Shrinking a photo on your iPhone is achievable, empowering you to optimize visuals, manage storage efficiently, and share memories seamlessly. At dfphoto.net, we are committed to helping you master this skill and improve your overall photographic journey. Ready to learn about image resizing and photo compression?
1. Why Should You Shrink Photos On Your iPhone?
Shrinking photos on your iPhone offers several compelling benefits, enhancing both your device’s performance and your ability to share memories effortlessly. Let’s explore these advantages in detail:
- Conserve Storage Space: High-resolution photos consume significant storage, which can quickly fill up your iPhone. Compressing these images reduces their file size, freeing up valuable space for more photos, apps, and other data.
- Faster Sharing: Smaller photo sizes make it quicker and easier to share images via email, messaging apps, and social media platforms. Large files can take a long time to upload and send, potentially causing frustration.
- Reduce Data Usage: When you share photos over a cellular network, smaller files consume less data. This is particularly beneficial if you have a limited data plan or are in an area with slow internet speeds.
- Optimize Website Performance: If you’re uploading photos to a website or blog directly from your iPhone, using smaller, optimized images ensures faster loading times and a better user experience.
- Fit Email Attachment Limits: Many email providers have limits on the size of attachments you can send. Resizing your photos ensures they fall within these limits, preventing your emails from being rejected.
2. What Are The Different Methods To Shrink A Photo On iPhone?
There are several methods to reduce photo file size on your iPhone, each offering unique advantages. Here’s a comprehensive overview of techniques:
2.1. Using The Built-In Mail App
The Mail app offers a straightforward way to reduce photo size when sending images via email.
- Open the Photos App: Launch the Photos app on your iPhone and select the photo you want to share.
- Share via Mail: Tap the share icon (the square with an arrow pointing upwards) and choose the Mail option.
- Select Image Size: The Mail app will prompt you to choose an image size: Small, Medium, Large, or Actual Size. Selecting Small or Medium will significantly reduce the file size.
- Compose and Send: Enter the recipient’s email address, add a subject, and compose your message. The resized photo will be attached.
2.2. Using The Built-In Messages App
The Messages app automatically compresses images when sending them via iMessage or SMS.
- Open the Messages App: Launch the Messages app and start a new message or open an existing conversation.
- Insert Photo: Tap the camera icon and select the photo you want to send.
- Send the Photo: The Messages app will compress the photo before sending it. The level of compression depends on the size of the original image and your device settings.
2.3. Using Third-Party Apps
Several third-party apps offer advanced photo resizing and compression features. These apps often provide more control over the final file size and quality.
- Adobe Photoshop Express: A free app with a range of editing tools, including resizing and compression options.
- Image Size: A dedicated app for resizing images with precise control over dimensions and file size.
- Resize Me!: An easy-to-use app that allows you to quickly resize single photos or batches of images.
2.4. Adjusting Camera Settings
You can reduce the default photo size by adjusting the camera settings on your iPhone.
- Open Settings: Go to the Settings app on your iPhone.
- Navigate to Camera: Scroll down and tap on Camera.
- Adjust Video Resolution: Tap on Record Video and choose a lower resolution (e.g., 720p HD instead of 4K). This will reduce the file size of videos you record.
- Adjust Photo Format: Tap on Formats and choose High Efficiency. This format uses HEIF/HEVC, which compresses photos and videos more efficiently than JPEG.
2.5. Using Online Photo Resizers
Several online tools allow you to resize photos directly in your web browser without installing any software.
- TinyPNG: Although primarily designed for PNG images, TinyPNG also supports JPEG compression.
- iLoveIMG: A comprehensive online tool with options for resizing, cropping, and converting images.
- ResizePixel: A user-friendly online resizer with options to specify the desired dimensions or file size.
3. How To Shrink Photos Using The Mail App?
Using the Mail app is a convenient method to resize photos directly from your iPhone when sharing them via email. Here’s a step-by-step guide:
3.1. Step-By-Step Guide
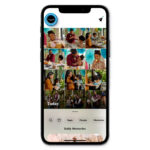
- Open the Photos App: Start by opening the Photos app on your iPhone. This is where all your photos are stored.
 Open Photos App on iPhone
- Select the Photo: Browse your photo library and tap on the photo you want to resize and send.
 Select Photo to Shrink on iPhone
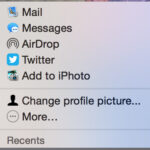
- Tap the Share Icon: Look for the share icon in the bottom-left corner of the screen. It’s a square with an arrow pointing upwards. Tap this icon to open the share sheet.
 Tap Share Icon on iPhone to Resize Photo
- Choose Mail: In the share sheet, scroll through the options and select Mail. This will open a new email window with the selected photo attached.
![]() Choose Mail Option to Resize Photo on iPhone
Choose Mail Option to Resize Photo on iPhone
- Select Image Size: The Mail app will prompt you to choose an image size. You’ll typically see options like Small, Medium, Large, and Actual Size.
 Select Image Size in Mail App on iPhone
- Choose Small or Medium: For the purpose of shrinking the photo, select either Small or Medium. These options significantly reduce the file size compared to the original.
- Compose and Send: Enter the recipient’s email address, add a subject, and compose your message. The resized photo will be attached to the email.
- Send the Email: Tap the send button (usually a paper airplane icon) in the top-right corner of the screen to send your email with the resized photo.
3.2. Benefits Of Using The Mail App
- Convenience: This method is quick and easy, as it doesn’t require any additional apps.
- No App Installation: You don’t need to download or install any third-party software, saving storage space.
- Integrated Workflow: The resizing process is integrated directly into the sharing workflow, making it seamless.
3.3. Limitations Of Using The Mail App
- Limited Control: You have limited control over the exact dimensions and file size of the resized photo. The Mail app provides only a few preset options.
- Email Requirement: This method only works when sharing via email, not for other purposes like saving a smaller version to your device.
- Quality Loss: Resizing the photo may result in some loss of quality, especially if you choose the Small option.
4. How To Shrink Photos Using The Messages App?
The Messages app on your iPhone is designed to automatically optimize images for quick and efficient sharing. Here’s how it works:
4.1. Automatic Compression
When you send a photo via iMessage or SMS, the Messages app automatically compresses the image to reduce its file size. This compression helps ensure that photos are sent quickly, even on slower networks. The level of compression varies depending on the size of the original image and your device settings.
4.2. Step-By-Step Guide
- Open the Messages App: Launch the Messages app on your iPhone. This is the app you use to send text messages and iMessages.
- Start a New Message or Open a Conversation: You can either start a new message by tapping the compose button (usually a pencil icon) or open an existing conversation.
- Tap the Camera Icon: In the message input field, tap the camera icon. This will open your photo library.
 Tap Camera Icon in Messages App on iPhone
- Select the Photo: Browse your photo library and tap on the photo you want to send.
- Add a Comment (Optional): You can add a comment or caption to the photo before sending it, if desired.
- Send the Photo: Tap the send button (usually an arrow icon) to send the photo. The Messages app will compress the photo before sending it.
4.3. Benefits Of Using The Messages App
- Automatic Compression: The Messages app automatically compresses images, saving you the hassle of manual resizing.
- Quick Sharing: Photos are sent quickly, even on slower networks, thanks to the automatic compression.
- Ease of Use: The process is straightforward and integrated directly into the messaging workflow.
4.4. Limitations Of Using The Messages App
- Limited Control: You have no control over the level of compression applied to the photo. The Messages app automatically determines the compression level based on the image size and network conditions.
- Quality Loss: The compression process may result in some loss of quality, especially for high-resolution images.
- Not Suitable for All Purposes: This method is only suitable for sharing photos via the Messages app. If you need to save a smaller version of the photo to your device or share it via other channels, you’ll need to use a different method.
5. How To Shrink Photos Using Third-Party Apps?
Third-party apps offer more advanced features and greater control over the resizing process compared to the built-in options on your iPhone. These apps often provide options to specify the exact dimensions, file size, and compression level of the resized photo. Here are some popular third-party apps for shrinking photos on your iPhone:
5.1. Adobe Photoshop Express
Adobe Photoshop Express is a free app that offers a range of photo editing tools, including resizing and compression options.
- Download and Install: Download Adobe Photoshop Express from the App Store and install it on your iPhone.
- Open the App: Launch Adobe Photoshop Express.
- Select the Photo: Tap the photo icon to select the photo you want to resize. You may need to grant the app access to your photo library.
 Select Photo in Adobe Photoshop Express on iPhone
- Resize: Look for the Resize option in the editing tools. It may be under the Adjustments or Tools menu.
- Specify Dimensions: Enter the desired width or height for the resized photo. The app will automatically adjust the other dimension to maintain the aspect ratio.
- Save the Resized Photo: Tap the Save icon to save the resized photo to your device. You can choose to save it as a new photo or replace the original.
5.2. Image Size
Image Size is a dedicated app for resizing images with precise control over dimensions and file size.
- Download and Install: Download Image Size from the App Store and install it on your iPhone.
- Open the App: Launch Image Size.
- Select the Photo: Tap the image icon to select the photo you want to resize.
- Specify Dimensions: Enter the desired width and height for the resized photo. You can choose to maintain the aspect ratio or specify independent dimensions.
 Specify Dimensions in Image Size App on iPhone
- Choose Units: You can specify the dimensions in pixels, inches, centimeters, or millimeters.
- Save the Resized Photo: Tap the Save icon to save the resized photo to your device.
5.3. Resize Me!
Resize Me! is an easy-to-use app that allows you to quickly resize single photos or batches of images.
- Download and Install: Download Resize Me! from the App Store and install it on your iPhone.
- Open the App: Launch Resize Me!
- Select the Photo: Tap the image icon to select the photo you want to resize.
- Choose a Preset Size or Specify Dimensions: You can choose from a list of preset sizes or specify the desired width and height.
- Save the Resized Photo: Tap the Save icon to save the resized photo to your device.
5.4. Benefits Of Using Third-Party Apps
- More Control: Third-party apps offer more control over the resizing process, allowing you to specify the exact dimensions, file size, and compression level of the resized photo.
- Advanced Features: Many third-party apps offer advanced features like batch resizing, watermarking, and image optimization.
- Flexibility: These apps provide more flexibility in terms of saving options, allowing you to save the resized photo to your device, share it via various channels, or upload it to cloud storage services.
5.5. Limitations Of Using Third-Party Apps
- App Installation: You need to download and install a third-party app, which may take up storage space on your device.
- Learning Curve: Some apps may have a learning curve, especially those with advanced features.
- Cost: While many third-party apps are free, some may require a subscription or in-app purchases to unlock certain features.
6. How To Adjust Camera Settings To Take Smaller Photos?
Adjusting your iPhone’s camera settings can help you capture smaller photos and videos right from the start, saving storage space and making it easier to share your memories. Here’s how to do it:
6.1. Adjusting Video Resolution
Lowering the video resolution reduces the file size of the videos you record.
- Open Settings: Go to the Settings app on your iPhone.
- Navigate to Camera: Scroll down and tap on Camera.
- Tap on Record Video: Select Record Video.
:max_bytes(150000):strip_icc()/how-to-change-video-resolution-iphone-4177920-10-5c797530c975774545cf32b3.jpg “Accessing the video recording settings on your iPhone allows you to adjust the resolution and frame rate, tailoring video quality to your specific needs and storage capacity. This customization ensures you can capture high-quality videos without consuming excessive storage space on your device.”)
- Choose a Lower Resolution: Select a lower resolution option. For example, choose 720p HD at 30 fps instead of 4K at 60 fps. Note that while 4K provides the highest quality, it also consumes the most storage space. Opting for a lower resolution like 1080p or 720p can significantly reduce file sizes without a drastic loss in visual quality, making it ideal for everyday recording and sharing.
- Test the New Settings: Record a short video to test the new settings and ensure the quality is acceptable for your needs.
6.2. Adjusting Photo Format
Changing the photo format can help you save storage space without sacrificing image quality.
- Open Settings: Go to the Settings app on your iPhone.
- Navigate to Camera: Scroll down and tap on Camera.
- Tap on Formats: Select Formats.
 Tap on Formats in iPhone Camera Settings
- Choose High Efficiency: Select High Efficiency. This format uses HEIF/HEVC, which compresses photos and videos more efficiently than JPEG.
- Compatibility Note: Keep in mind that HEIF/HEVC may not be compatible with all devices and platforms. If you need to share photos with someone who may not be able to view HEIF/HEVC files, you can choose Most Compatible, which uses JPEG.
6.3. Benefits Of Adjusting Camera Settings
- Save Storage Space: Capturing smaller photos and videos helps you save valuable storage space on your iPhone.
- Easier Sharing: Smaller files are easier to share via email, messaging apps, and social media.
- Improved Performance: Using smaller files can improve the performance of your iPhone, especially when editing or processing photos and videos.
6.4. Limitations Of Adjusting Camera Settings
- Reduced Quality: Lowering the video resolution or using a more efficient photo format may result in some loss of quality.
- Compatibility Issues: HEIF/HEVC may not be compatible with all devices and platforms.
- Permanent Change: Adjusting the camera settings will affect all future photos and videos you capture. If you want to capture high-resolution photos and videos occasionally, you’ll need to change the settings back.
7. How To Shrink Photos Using Online Photo Resizers?
Online photo resizers are convenient tools for quickly reducing the size of your images without needing to install any software. These web-based services allow you to upload your photo, specify the desired dimensions or file size, and download the resized version. Here are some popular online photo resizers:
7.1. TinyPNG
TinyPNG is primarily designed for compressing PNG images, but it also supports JPEG compression.
- Go to TinyPNG Website: Open your web browser and go to the TinyPNG website (https://tinypng.com).
- Upload Your Photo: Drag and drop your JPEG or PNG photo onto the webpage, or click the upload area to select a file from your device.
 Upload Photo to TinyPNG Website for Resizing
- Wait for Compression: TinyPNG will automatically compress your photo. The compression process may take a few seconds, depending on the size of the image.
- Download the Resized Photo: Once the compression is complete, click the Download button to save the resized photo to your device.
7.2. iLoveIMG
iLoveIMG is a comprehensive online tool with options for resizing, cropping, and converting images.
- Go to iLoveIMG Website: Open your web browser and go to the iLoveIMG website (https://www.iloveimg.com).
- Select Resize Image Tool: Click on the Resize IMAGE option.
 Select Resize Image Tool on iLoveIMG Website
- Upload Your Photo: Click the Select images button to upload your photo from your device.
- Specify Dimensions: Choose to resize by percentage or by specifying the desired width and height.
- Resize Image: Click the Resize IMAGE button to start the resizing process.
- Download the Resized Photo: Once the resizing is complete, click the Download resized images button to save the resized photo to your device.
7.3. ResizePixel
ResizePixel is a user-friendly online resizer with options to specify the desired dimensions or file size.
- Go to ResizePixel Website: Open your web browser and go to the ResizePixel website (https://www.resizepixel.com).
- Upload Your Photo: Click the Upload Image button to upload your photo from your device.
- Specify Dimensions: Enter the desired width and height for the resized photo. You can also choose to resize by percentage or by specifying the maximum file size.
- Resize Image: Click the Resize button to start the resizing process.
- Download the Resized Photo: Once the resizing is complete, click the Download button to save the resized photo to your device.
7.4. Benefits Of Using Online Photo Resizers
- No Software Installation: You don’t need to download or install any software, saving storage space on your device.
- Convenience: Online resizers are quick and easy to use, with a simple and intuitive interface.
- Accessibility: You can access online resizers from any device with a web browser and an internet connection.
7.5. Limitations Of Using Online Photo Resizers
- Internet Connection Required: You need an internet connection to use online photo resizers.
- Upload Time: Uploading and downloading large photos can take time, especially with a slow internet connection.
- Security Concerns: Uploading photos to an online service may raise security concerns, especially if you’re dealing with sensitive or private images. Always use reputable and trustworthy online resizers.
8. What Are The Photo Editing Tips To Optimize Images For Mobile?
Optimizing images for mobile devices involves more than just reducing file size. Here are some photo editing tips to ensure your photos look their best on mobile screens:
8.1. Crop for Mobile Screens
Mobile screens are smaller and have different aspect ratios than desktop screens. Crop your photos to fit mobile screens and highlight the most important elements of the image.
8.2. Adjust Brightness and Contrast
Mobile screens can be difficult to see in bright sunlight. Adjust the brightness and contrast of your photos to make them more visible on mobile devices.
8.3. Sharpen Images
Sharpening your photos can help them look more detailed and crisp on mobile screens. However, be careful not to over-sharpen, as this can create unwanted artifacts.
8.4. Use Compression Wisely
When compressing your photos, find a balance between file size and image quality. Experiment with different compression levels to find the optimal setting for your images.
8.5. Optimize File Format
Use JPEG for photos with lots of color and detail, and PNG for images with transparency or text. JPEG is generally more efficient for photos, while PNG is better for graphics and logos.
8.6. Test on Multiple Devices
Test your optimized photos on different mobile devices to ensure they look good on a variety of screens.
9. What Are The Best Practices For Managing Photo Storage On Your iPhone?
Managing photo storage on your iPhone is crucial for maintaining device performance and ensuring you have enough space for new memories. Here are some best practices:
9.1. Regularly Back Up Your Photos
Back up your photos to a cloud storage service like iCloud, Google Photos, or Dropbox. This ensures you won’t lose your photos if your iPhone is lost, stolen, or damaged.
9.2. Delete Unnecessary Photos and Videos
Regularly review your photo library and delete any unnecessary photos and videos, such as duplicates, blurry shots, or unwanted screenshots.
9.3. Use iCloud Photo Library
iCloud Photo Library automatically uploads your photos and videos to iCloud and keeps them in sync across all your devices. You can choose to optimize storage on your iPhone, which stores smaller, optimized versions of your photos on your device while keeping the original, high-resolution versions in iCloud.
9.4. Transfer Photos to Your Computer
Periodically transfer your photos to your computer to free up space on your iPhone. You can use iTunes or AirDrop to transfer photos to your computer.
9.5. Use External Storage Devices
Consider using an external storage device like a USB drive or a portable hard drive to store your photos. This is a good option if you have a large photo library and don’t want to rely on cloud storage.
9.6. Compress Photos Before Storing
Compress your photos before storing them on your iPhone or transferring them to another device. This will help you save storage space without sacrificing image quality.
10. What Are The Common Mistakes To Avoid When Resizing Photos?
Resizing photos can be tricky, and it’s easy to make mistakes that can negatively impact the quality of your images. Here are some common mistakes to avoid:
10.1. Stretching or Distorting Images
When resizing photos, always maintain the aspect ratio to avoid stretching or distorting the image. Most photo editing tools have an option to maintain aspect ratio automatically.
10.2. Over-Compressing Images
Compressing photos too much can result in significant loss of quality. Find a balance between file size and image quality by experimenting with different compression levels.
10.3. Resizing Too Small
Resizing photos too small can make them look blurry and pixelated, especially when viewed on larger screens. Avoid resizing photos to dimensions that are smaller than necessary.
10.4. Not Sharpening After Resizing
Resizing photos can soften the image, so it’s often necessary to sharpen the image after resizing to restore detail and crispness.
10.5. Ignoring File Format
Choosing the wrong file format can negatively impact the quality and file size of your images. Use JPEG for photos with lots of color and detail, and PNG for images with transparency or text.
10.6. Not Testing on Multiple Devices
Always test your resized photos on different devices to ensure they look good on a variety of screens.
FAQ: Shrinking Photos On iPhone
1. Will Shrinking A Photo Reduce Its Quality?
Yes, shrinking a photo can reduce its quality, especially if you compress it too much. However, by using the right methods and settings, you can minimize the loss of quality.
2. How Can I Shrink Multiple Photos At Once On My iPhone?
You can use third-party apps like Image Size or Resize Me! to batch resize multiple photos at once on your iPhone.
3. Is It Better To Resize Photos On My iPhone Or On A Computer?
It depends on your needs and preferences. Resizing photos on your iPhone is convenient for quick sharing, while resizing on a computer offers more control and advanced features.
4. What Is The Best File Format To Use When Shrinking Photos?
JPEG is generally the best file format to use when shrinking photos, as it offers a good balance between file size and image quality.
5. How Do I Maintain The Aspect Ratio When Resizing Photos?
Most photo editing tools have an option to maintain aspect ratio automatically. Make sure this option is enabled when resizing photos to avoid stretching or distorting the image.
6. Can I Recover The Original Size Of A Photo After Shrinking It?
No, you cannot recover the original size of a photo after shrinking it, unless you have a backup of the original file.
7. Does Sending Photos Via Text Message Reduce Their Size?
Yes, sending photos via text message (SMS/MMS) typically reduces their size to make them easier to send over cellular networks.
8. How Do I Stop My iPhone From Compressing Photos?
You cannot completely stop your iPhone from compressing photos when sharing them via certain methods like text message or email. However, you can minimize compression by using alternative sharing methods like AirDrop or cloud storage services.
9. Is There A Way To Shrink Photos Without Losing Quality?
While some quality loss is inevitable when shrinking photos, you can minimize it by using the right methods and settings. Avoid over-compressing the image and choose a file format that balances file size and image quality.
10. What Are The Best Apps For Resizing Photos On iPhone?
Some of the best apps for resizing photos on iPhone include Adobe Photoshop Express, Image Size, and Resize Me.
At dfphoto.net, we are dedicated to providing you with the knowledge and tools you need to excel in photography. Whether you’re looking to enhance your technical skills, discover new creative inspiration, or connect with a community of fellow photographers, we have something for everyone.
Final Thought
Mastering the art of shrinking photos on your iPhone is essential for efficient storage management and seamless sharing. Whether you opt for built-in tools, third-party apps, or online resizers, understanding the nuances of each method empowers you to optimize your visual content effortlessly. As you continue your photographic journey, remember that dfphoto.net is here to support you with expert guidance, inspiring content, and a vibrant community.
Ready to take your photography skills to the next level? Visit dfphoto.net today to explore our extensive collection of tutorials, articles, and resources. Connect with photographers from around the USA, share your work, and discover new perspectives. Whether you’re a beginner or a seasoned pro, dfphoto.net is your ultimate destination for all things photography.
Address: 1600 St Michael’s Dr, Santa Fe, NM 87505, United States
Phone: +1 (505) 471-6001
Website: dfphoto.net