iCloud Shared Photo Library provides a fantastic way for you and up to five other people to collaboratively build a shared collection of photos and videos. This feature ensures everyone involved can access and contribute to a unified pool of memories. This guide will walk you through setting up and effectively using an iCloud Shared Library to enhance your photo sharing experience.
Understanding How iCloud Shared Photo Library Works
When you contribute photos and videos to an iCloud Shared Photo Library, these items are moved from your Personal Library into the Shared Library. You can participate in only one Shared Library at a time. You have the flexibility to choose specific photos and videos to share or to set up automatic sharing directly from your device’s camera.
All members of a Shared Library have equal privileges to add, edit, and even delete content within the library. Importantly, the person who initially sets up the Shared Library, known as the library creator, is responsible for the iCloud storage used by all the content. Other participants gain access to the Shared Library without it impacting their personal iCloud storage quotas.
Creating Your Own Shared Library
To create a Shared Library, you’ll need a device running iOS 16.1, iPadOS 16.1, or macOS Ventura or later with iCloud Photos enabled. If you are under 13 years of age, you can only create or join a Shared Library with members of your Family Sharing group.*
Setting Up on Your iPhone or iPad
- Open the Settings app, navigate to Photos, and then select Shared Library. In earlier iOS versions like iOS 17 or older, the path might be directly Settings > Photos > Shared Library.
- Choose up to five individuals to invite to your library. You can also skip this step and invite participants later if you prefer.
- Decide whether to immediately move existing photos and videos to your Shared Library or to add content at a later time.
- Follow the on-screen prompts to preview your Shared Library setup, confirm your sharing preferences, and send invitations to your chosen participants.
 You can preview your Shared Library during setup.
Setting Up on Your Mac
- Launch the Photos app, then navigate to Photos in the menu bar, and select Settings. Click on the iCloud tab.
- Ensure iCloud Photos is turned on. If it’s not, check the box to enable it.
- Click on Shared Library, and then click Get Started to begin the setup process.
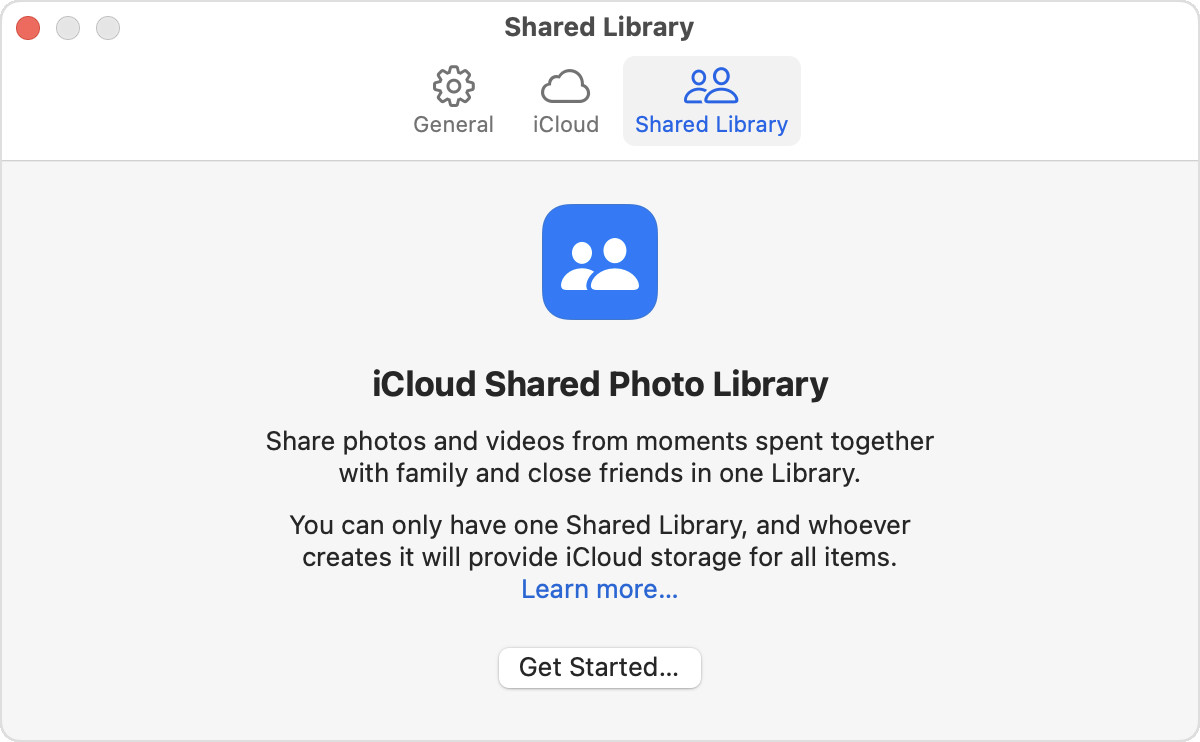 The Shared Library tab is next to the iCloud tab.4. Follow the on-screen instructions to invite participants and select the photos and videos you wish to add to your Shared Library.
Joining an Existing Shared Library
To join an iCloud Shared Library, ensure your device is updated to iOS 16.1, iPadOS 16.1, or macOS Ventura or later, with iCloud Photos enabled. For users under 13, joining a Shared Library is restricted to members within their Family Sharing group.*
Joining on Your iPhone or iPad
- Access the invitation directly from the library creator, or go to Settings > Photos. In iOS 17 or earlier, simply go to Settings > Photos.
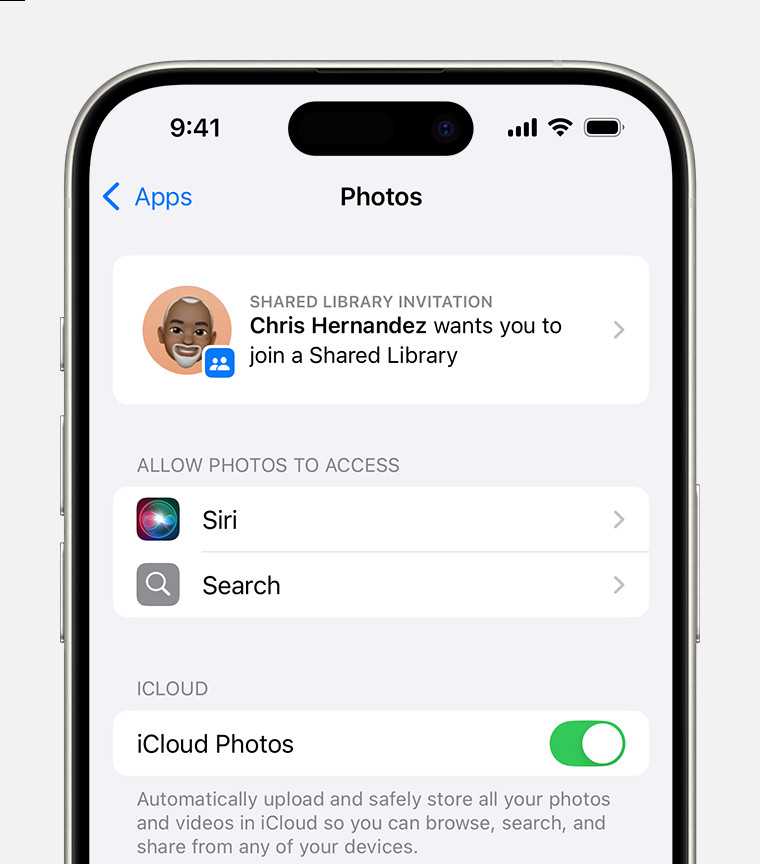 If you have a Shared Library invitation, you can find it in the Photos section of your device Settings.2. Tap Accept & Continue.
3. Choose if you want to immediately move photos and videos to the Shared Library or prefer to do it later.
4. Preview the Shared Library content as prompted and confirm the content you intend to share.
Joining on Your Mac
- Open the invitation from the library creator or go to Photos > Settings, and select View Invitation.
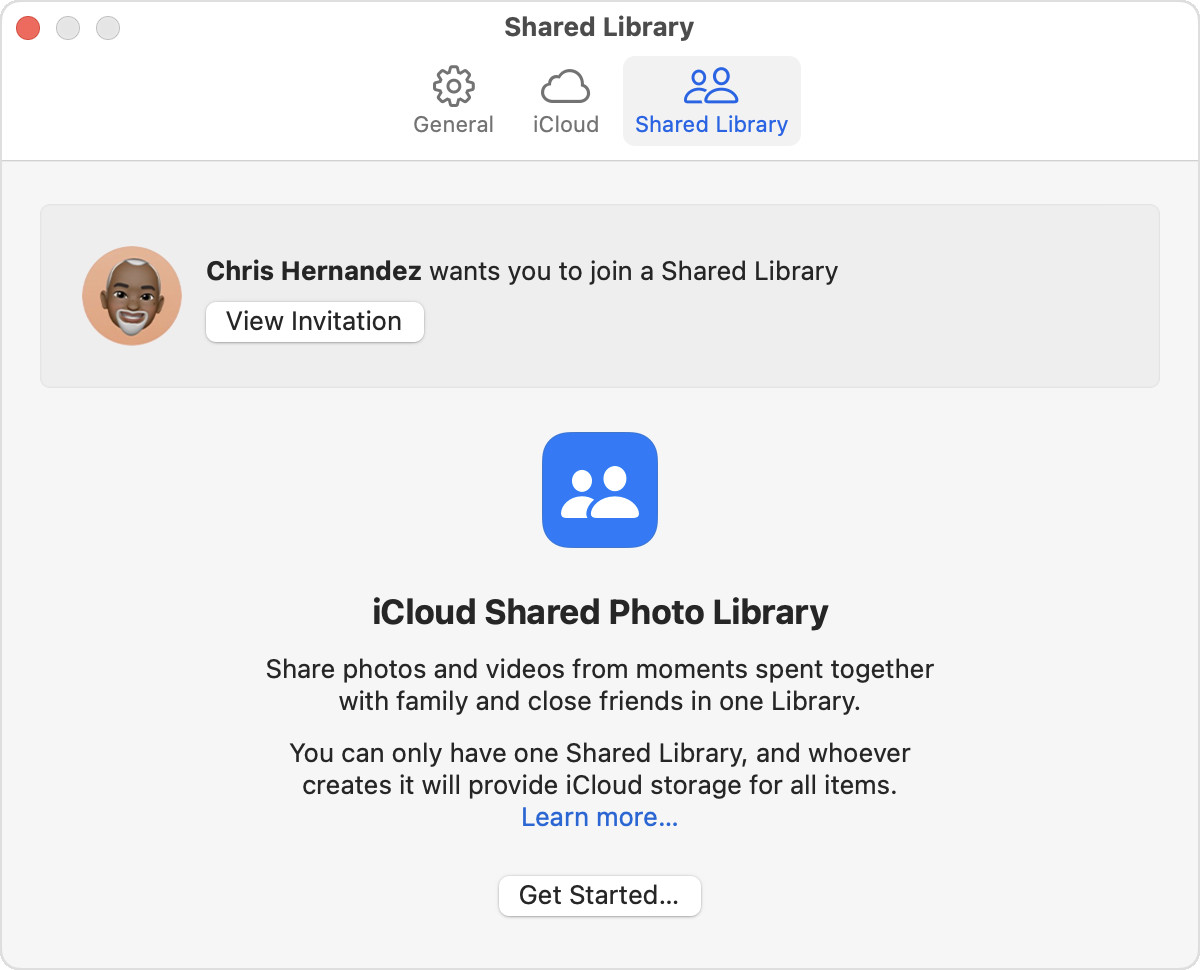 If you have a Shared Library invitation, you can find it in Settings in the Photos app.2. Click Get Started, then follow the on-screen steps to choose photos and videos you want to contribute to the Shared Library, or opt to add them later.
3. Preview the Shared Library content and confirm your sharing selections.
Effectively Using Your Shared Library
Once your Shared Library is set up, you can explore various ways to use it, such as sharing photos directly from your camera and switching between different library views.
Direct Sharing from Camera on iPhone or iPad
- Go to Settings > Photos, then tap Shared Library. In iOS 17 or earlier, navigate to Settings > Photos > Shared Library.
- Tap Sharing from Camera and ensure it is turned on.
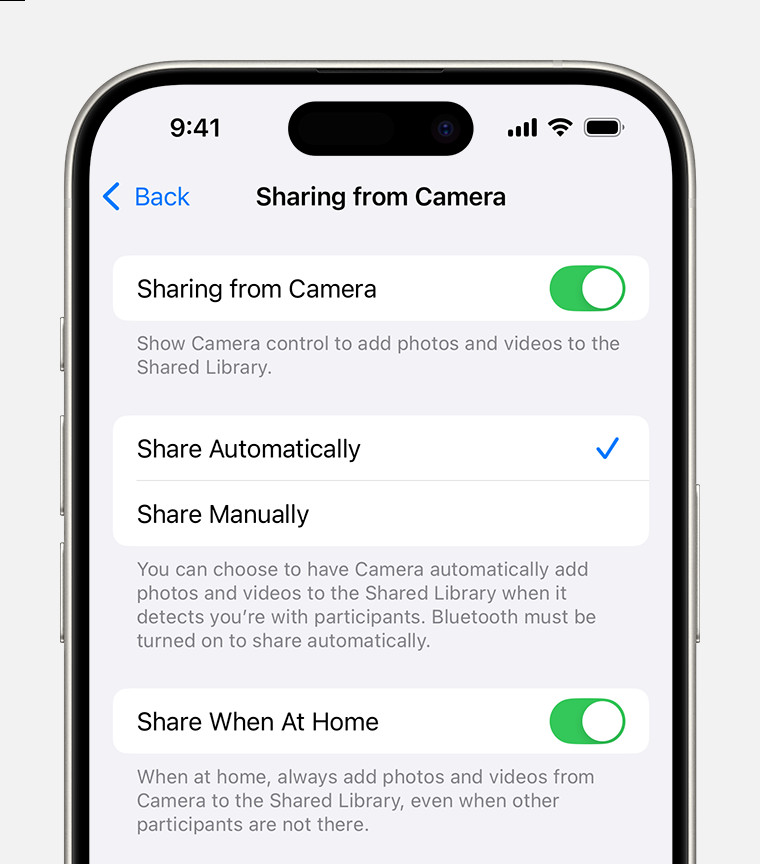 To add a button in the Camera app to share photos and videos to your Shared Library, turn on Sharing from Camera.
- For automatic sharing when near participants, select Share Automatically.
- To manually choose when to share via the Camera app, choose Share Manually.
- To automatically share photos taken at home, select Share When At Home.
- In the Camera app, ensure the Shared Library button is enabled to directly send photos and videos to the Shared Library. Tap to disable it if you want to save content to your Personal Library instead.
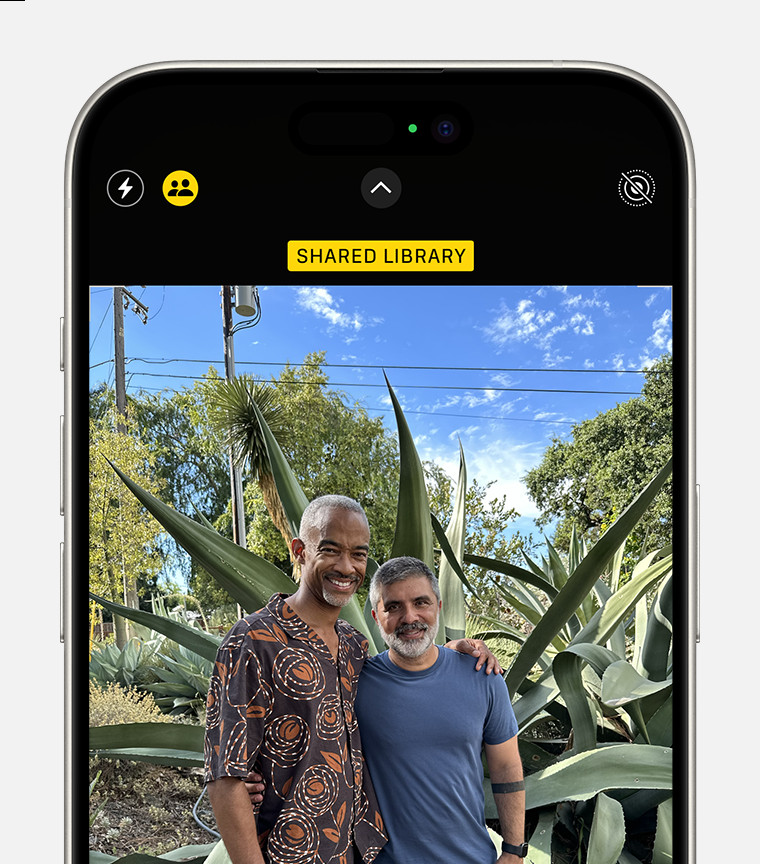 The Shared Library button is at the top of the screen.
Switching Between Personal and Shared Libraries on iPhone or iPad
- Open the Photos app.
- Tap the profile icon at the top and scroll to Library View Options. In iOS 17 or earlier, tap the button next to Select at the top of the Albums or Library tabs.
- Choose between Personal Library, Shared Library, or Both Libraries to customize your view.
 An iPhone screen showing Both Libraries, Personal Library, and Shared Library under Library View Options.
When viewing Both Libraries or just the Shared Library, photos from the Shared Library are marked with an icon. You can disable this indicator by tapping Shared Library Indicator.
Switching Between Libraries on Mac
- Open the Photos app.
- At the top of the window, select Personal Library, Shared Library, or Both Libraries to switch views.
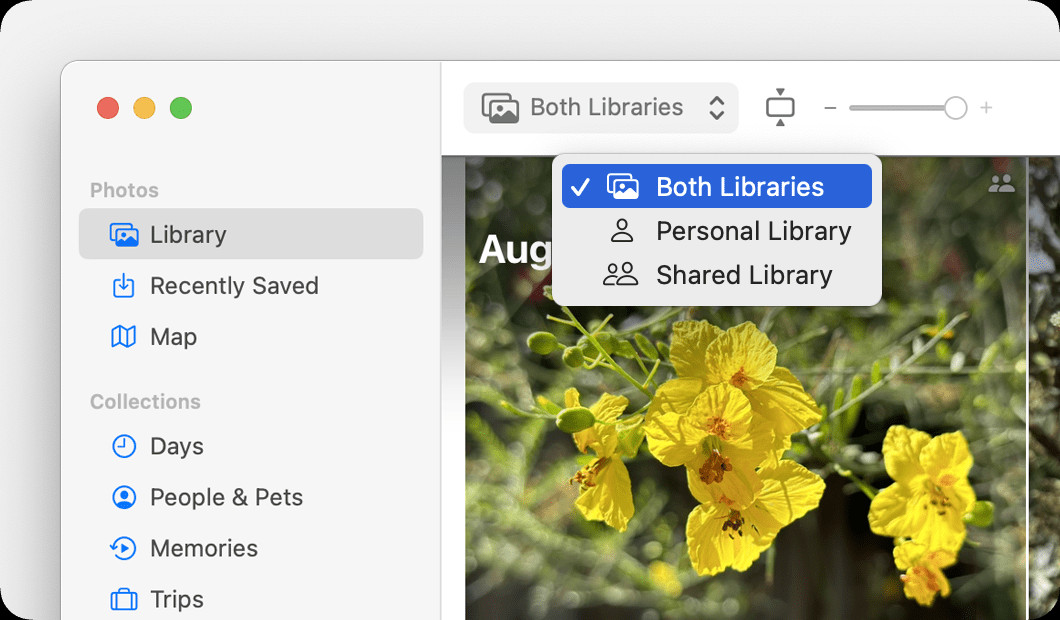 A Mac screen showing that you can toggle between Both Libraries, Personal Library, and Shared Library.
Similar to iOS, photos in the Shared Library are badged with an icon in Both Libraries or Shared Library view. You can hide these badges by going to View > Metadata > In Shared Library.
Leaving a Shared Library
If you are the creator of an iCloud Shared Photo Library, you have the ability to remove participants or delete the entire Shared Library whenever necessary. Deleting the Shared Library will notify all participants. Participants who have been in the library for more than seven days will automatically receive all content from the Shared Library in their Personal Library. Those who have been participants for less than seven days will only receive the photos and videos they personally contributed.
As a participant, you can choose to leave a Shared Library at any time. When leaving, you can opt to receive a copy of everything in the Shared Library or only the content you added.
Learn how to leave a Shared Library for detailed instructions.
Getting Help with Shared Library
*Age restrictions apply and vary by country or region, as detailed here.