Sharing photos on Facebook is a common practice, but are you doing it right? This guide from dfphoto.net will show you how to share photos on Facebook effectively. We will cover everything from uploading high-quality images to creating shared albums and sending large files, ensuring your memories are showcased in the best possible light. Learn about photo sharing, social media engagement, and image optimization.
1. Why is Sharing Photos on Facebook Important?
Sharing photos on Facebook is important for several reasons. First, it allows you to connect with friends and family by sharing your life experiences visually. Second, it can help you build your personal brand or promote your business by showcasing your work or products. Finally, it can be a great way to preserve memories and look back on them in the future.
- Connecting with Loved Ones: Sharing photos bridges geographical gaps, allowing family and friends to witness your life’s milestones and everyday moments, fostering stronger bonds.
- Building a Personal Brand: For photographers and creatives, Facebook serves as a portfolio, displaying skills and attracting potential clients or collaborators.
- Preserving Memories: Digital photo albums on Facebook act as time capsules, enabling you to revisit cherished memories and share them with future generations.
2. What Are the Different Ways to Share Photos on Facebook?
There are several ways to share photos on Facebook. You can upload them directly to your profile, share them in a post, create an album, share them in a group, or send them in a private message. Each method has its own advantages and is suitable for different situations.
- Direct Upload to Profile: Ideal for profile pictures or cover photos, instantly updating your visual identity.
- Sharing in a Post: Perfect for sharing individual photos or small collections with a caption to tell a story or express your thoughts.
- Creating an Album: Best for organizing photos from a specific event or trip, allowing viewers to browse chronologically or thematically.
- Sharing in a Group: Great for sharing photos with a specific community, such as a photography club or travel group, fostering engagement and discussion.
- Sending in a Private Message: Suitable for sharing photos with specific individuals, ensuring privacy and personalized sharing.
3. How Do You Upload High-Quality Photos to Facebook?
To upload high-quality photos to Facebook, ensure your images are high resolution and properly sized before uploading. Enable the “High Quality” upload option in your Facebook settings. Avoid compressing the images too much, as this can reduce their quality.
- Resolution: Start with the highest resolution possible from your camera or smartphone.
- Sizing: Resize images to Facebook’s recommended dimensions (e.g., 2048 pixels wide for timeline photos) to prevent automatic compression.
- Settings: Enable “High Quality” uploads in Facebook’s settings to minimize compression artifacts.
- Compression: Use image editing software to optimize the file size without sacrificing too much quality. Aim for file sizes under 1MB.
4. What Are Facebook’s Image Size Recommendations for 2024?
Facebook’s image size recommendations for 2024 are as follows:
| Image Type | Recommended Size |
|---|---|
| Profile Picture | 170 x 170 pixels (displays at 170×170 on desktops, 128×128 on smartphones) |
| Cover Photo | 851 x 315 pixels (displays at 820×312 on desktops, 640×360 on smartphones) |
| Timeline Photo | 2048 pixels wide |
| Shared Image | 1200 x 630 pixels |
| Story Image/Video | 1080 x 1920 pixels |
| Event Cover Photo | 1200 x 628 pixels |
| Ad Image | 1200 x 628 pixels |
| Carousel Ad Image | 1080 x 1080 pixels |
| Instant Article Image | 1200 x 675 pixels |
Using these dimensions ensures your photos look their best on Facebook, regardless of the device used to view them.
5. How Do You Create a Photo Album on Facebook?
To create a photo album on Facebook:
- Go to your profile.
- Click on the “Photos” tab.
- Click “+ Create Album.”
- Add a title and description.
- Upload your photos.
- Set the privacy settings.
- Click “Post.”
Creating albums helps organize your photos and makes them easier for your friends to view.
- Step 1: Navigate to your Facebook profile.
- Step 2: Click on the “Photos” tab, usually found under your cover photo.
- Step 3: Click the “+ Create Album” button to start a new album.
- Step 4: Add a descriptive title and a brief description to provide context for the album’s content.
- Step 5: Upload photos from your computer or mobile device, selecting the images you want to include in the album.
- Step 6: Adjust the privacy settings to control who can view the album (e.g., public, friends, specific friends).
- Step 7: Click “Post” to publish the album to your profile, making it visible to your selected audience.
6. How Do You Share Photos in a Facebook Group?
To share photos in a Facebook group:
- Go to the group.
- Click “Write something…”
- Click the photo/video icon.
- Select the photos you want to share.
- Add a caption.
- Click “Post.”
Sharing photos in groups is a great way to engage with specific communities and share content relevant to their interests.
- Step 1: Navigate to the Facebook group where you want to share photos.
- Step 2: Click the “Write something…” box at the top of the group’s page.
- Step 3: Click the photo/video icon to upload media.
- Step 4: Select the photos you want to share from your device.
- Step 5: Add a caption to provide context or start a discussion.
- Step 6: Click “Post” to share the photos with the group members.
7. How Can You Send Photos Privately on Facebook Messenger?
To send photos privately on Facebook Messenger:
- Open a chat with the person you want to send the photo to.
- Click the photo icon.
- Select the photo you want to send.
- Click “Send.”
This method ensures that only the recipient can view the photos.
- Step 1: Open a conversation with the individual you want to send the photo to in Facebook Messenger.
- Step 2: Click the photo icon, typically located near the bottom of the chat window.
- Step 3: Select the photo you want to send from your device’s gallery or camera roll.
- Step 4: Click “Send” to deliver the photo directly to the recipient’s chat.
8. What is the New HD Photo Feature on Facebook Messenger?
Facebook Messenger now allows you to send photos in high definition. To use this feature, select an image from your chat composer, turn the HD toggle on, and tap Send. This ensures the recipient receives the photo in its original quality.
- Step 1: Open a chat in Messenger.
- Step 2: Select an image from your chat composer.
- Step 3: Turn the HD toggle on.
- Step 4: Tap Send.
9. How Do You Create Shared Albums on Facebook Messenger?
You can create shared albums with friends on Facebook Messenger. To do this, select multiple photos from your chat composer, tap “Create album,” and name the album. Everyone in the chat can view, add, delete, and download pictures and videos from the album.
 Two phone screens showing a Messenger account and how they can use a QR code to connect.
- Step 1: Select multiple photos from your chat composer.
- Step 2: Tap “Create album.”
- Step 3: Name the album.
- Step 4: Everyone in the chat can view, add, delete, and download pictures and videos from the album.
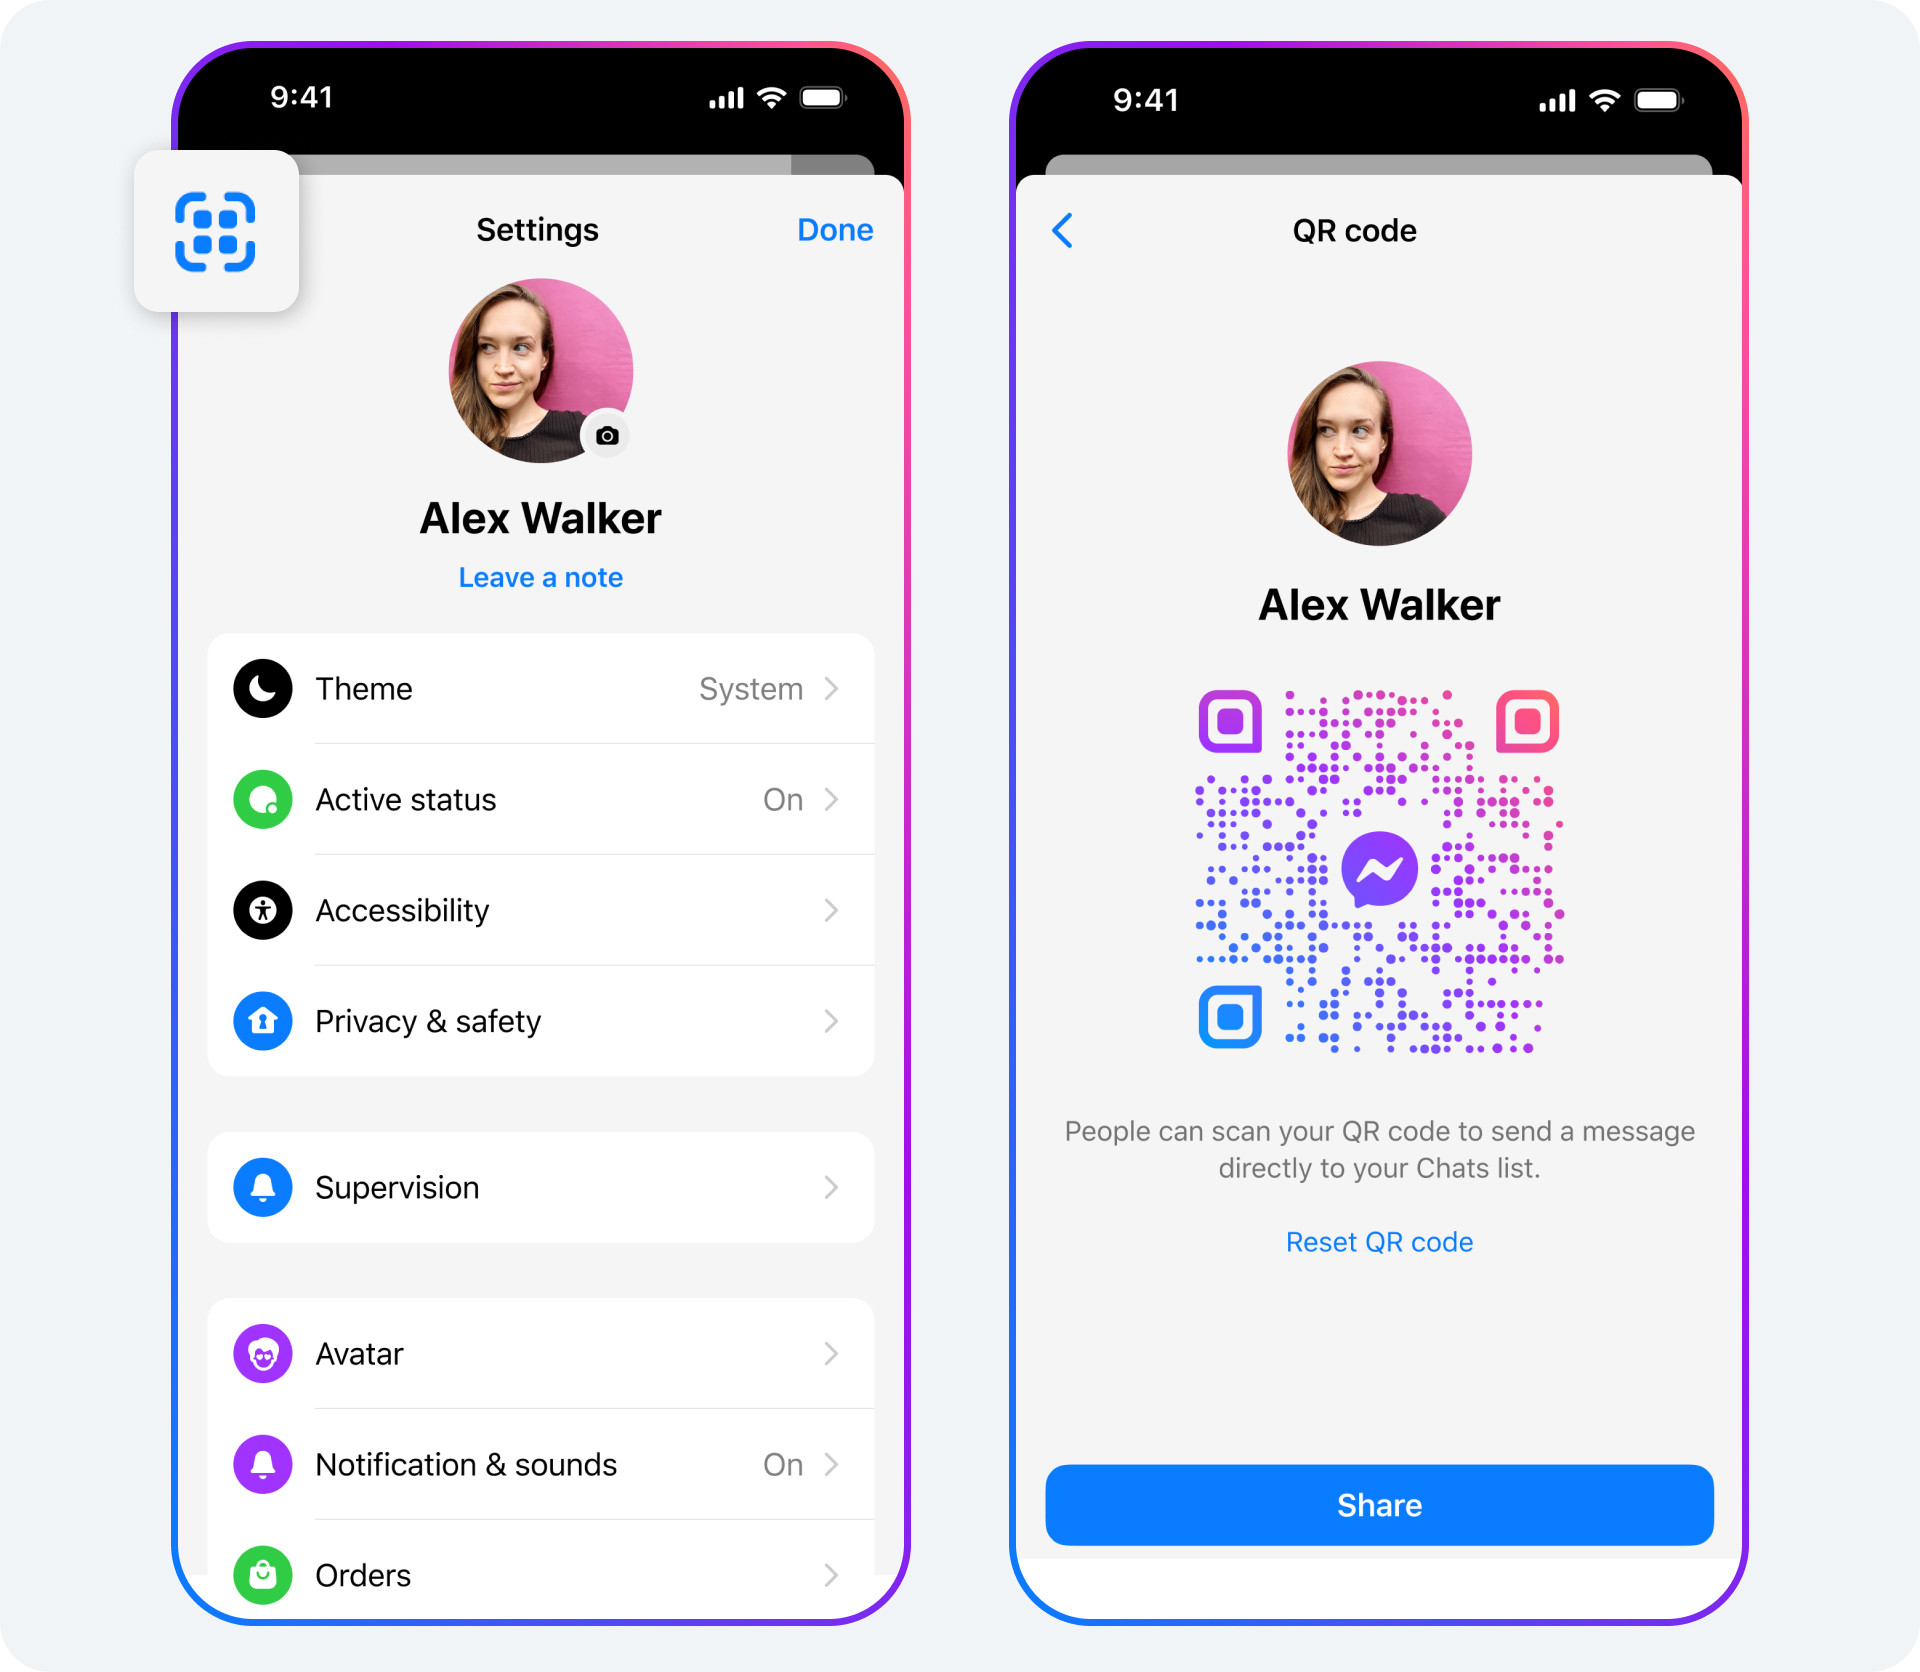
10. How Do QR Codes Help in Sharing Photos on Facebook?
QR codes make it easier to add new connections on Messenger. Instead of typing someone’s name or number, you can scan their Messenger QR code or share yours via a link. This simplifies the process of connecting and sharing photos.
- Step 1: Go to your Messenger Settings.
- Step 2: Tap the QR code icon at the top.
- Step 3: Have the other person scan your code, or share a link.
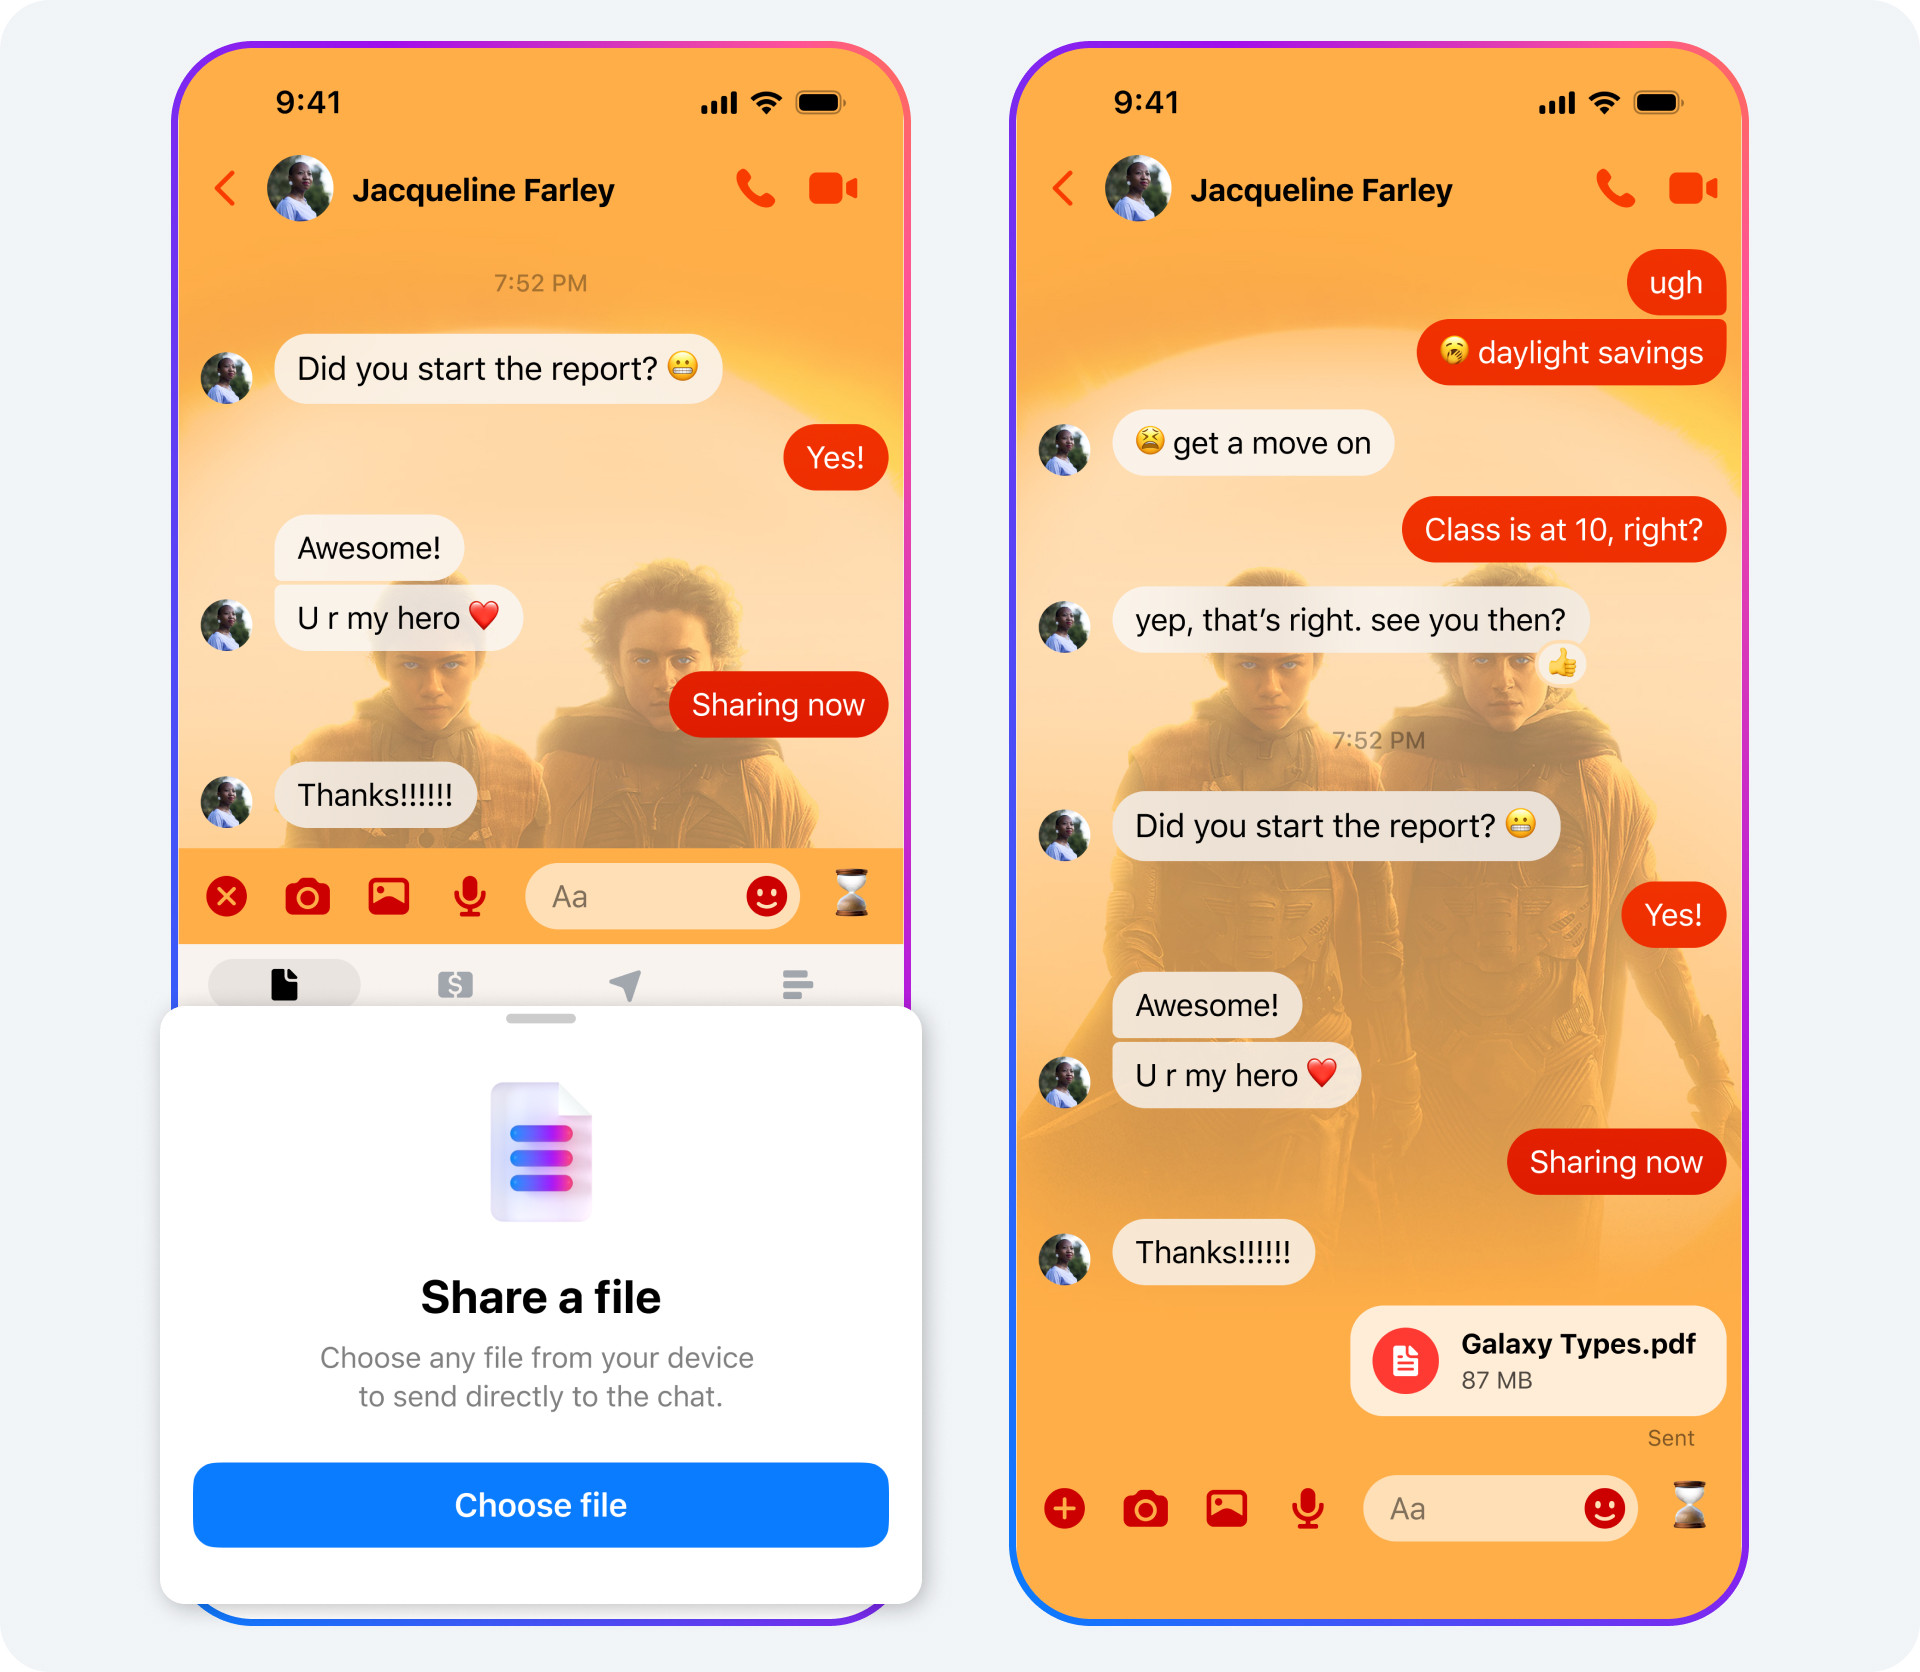
11. Can You Send Large Files, Including Photos, on Facebook Messenger?
Yes, you can now send files up to 100MB on Facebook Messenger. This includes photos, documents, and other file types. To do this, tap the + button in a Messenger chat and select a file.
 Two phone screens showing how to share a file in Messenger.
- Step 1: Tap the + button in a Messenger chat.
- Step 2: Select a file up to 100MB.
- Step 3: Send the file.
12. What Are the Best Practices for Tagging People in Facebook Photos?
Tagging people in Facebook photos is a great way to share the photos with them and their friends. However, it’s important to follow some best practices:
- Ask for Permission: Before tagging someone, especially in a potentially unflattering photo, ask if they’re okay with it.
- Be Accurate: Make sure you’re tagging the right person. Misidentifying someone can be embarrassing.
- Don’t Over-Tag: Avoid tagging too many people in one photo, as it can become annoying for those tagged and their friends.
- Respect Privacy: Be mindful of the privacy settings of the people you’re tagging. If someone has their profile set to private, tagging them in a public photo might not be appropriate.
- Tag Relevant People: Only tag people who are actually in the photo or have a significant connection to it.
- Use Tag Review: Encourage your friends to use the tag review feature, which allows them to approve or reject tags before they appear on their profile.
- Consider the Context: Think about the context of the photo and whether tagging is appropriate. For example, tagging someone in a photo from a private event might not be a good idea if they don’t want that information shared publicly.
- Avoid Tagging for Attention: Don’t tag people solely to get more likes or comments on your photos.
- Untag If Requested: If someone asks you to remove a tag, do so promptly and without argument.
- Be Mindful of Facial Recognition: Facebook uses facial recognition technology, so be aware that even if you don’t tag someone, they might be identified by the platform.
Following these best practices helps ensure that tagging is a positive experience for everyone involved.
13. How Do You Control Who Can See Your Photos on Facebook?
You can control who can see your photos on Facebook by adjusting the privacy settings for each photo or album. You can choose to share your photos with the public, friends, specific friends, or only yourself.
- Individual Photo Privacy: When posting a photo, use the audience selector (the dropdown menu next to the “Post” button) to choose who can see it.
- Album Privacy: When creating or editing an album, you can set the privacy for the entire album. This will apply to all photos within the album.
- Custom Audiences: Create custom audiences to share photos with specific groups of friends or exclude certain people from seeing your photos.
- Limit Past Posts: Use the “Limit Past Posts” feature to change the audience of all your past public posts to “Friends.”
- Profile Review: Enable profile review to approve or reject tags and posts that others add to your timeline.
- Block Users: If you want to prevent someone from seeing your photos altogether, you can block them.
14. What Are Some Creative Ideas for Sharing Photos on Facebook?
Here are some creative ideas for sharing photos on Facebook:
- Themed Albums: Create albums based on themes, such as “Travel Adventures,” “Family Celebrations,” or “Pet Portraits.”
- Before-and-After Photos: Share before-and-after photos of home renovations, fitness journeys, or creative projects.
- Photo Challenges: Participate in or create your own photo challenges with daily or weekly themes.
- Storytelling with Photos: Use a series of photos to tell a story, adding captions that provide context and emotion.
- Throwback Thursdays: Share old photos every Thursday, reminiscing about past memories and experiences.
- Behind-the-Scenes: Give your friends a glimpse into your life by sharing behind-the-scenes photos of your work, hobbies, or daily routines.
- Collaborative Albums: Create shared albums with friends or family members, allowing everyone to contribute their photos from a specific event or trip.
- Interactive Posts: Ask questions or create polls related to your photos to encourage engagement and interaction.
- 360° Photos: Share 360° photos that allow your friends to explore your surroundings in an immersive way.
- Animated GIFs: Turn a series of photos into an animated GIF to add a touch of humor or creativity to your posts.
15. How Can You Use Facebook to Promote Your Photography Business?
If you’re a professional photographer, Facebook can be a powerful tool for promoting your business. Here’s how:
- Create a Professional Page: Set up a Facebook Page specifically for your photography business, separate from your personal profile.
- Showcase Your Best Work: Regularly share your best photos on your Page, highlighting your unique style and expertise.
- Engage with Your Audience: Respond to comments and messages promptly, and ask questions to encourage interaction.
- Run Targeted Ads: Use Facebook’s advertising platform to reach potential clients in your target market.
- Offer Promotions and Discounts: Attract new clients by offering special deals and discounts on your photography services.
- Share Behind-the-Scenes Content: Give your followers a glimpse into your process by sharing behind-the-scenes photos and videos.
- Collaborate with Other Businesses: Partner with complementary businesses, such as event planners or florists, to reach a wider audience.
- Host Contests and Giveaways: Generate excitement and engagement by hosting photo contests and giveaways.
- Use Facebook Live: Broadcast live videos to showcase your work, answer questions, or provide tips and tutorials.
- Optimize Your Page for Search: Use relevant keywords in your Page name, description, and posts to improve your search engine ranking.
By using these strategies, you can effectively use Facebook to promote your photography business and attract new clients.
16. What Are the Legal Considerations When Sharing Photos on Facebook?
When sharing photos on Facebook, it’s important to be aware of the legal considerations:
- Copyright: Make sure you have the right to share the photos. If you didn’t take the photos yourself, you need permission from the copyright holder.
- Privacy: Respect the privacy of the people in your photos. Get their consent before sharing photos of them, especially if the photos are sensitive or potentially embarrassing.
- Model Releases: If you’re using photos of people for commercial purposes, you may need to obtain model releases, which give you permission to use their likeness in your advertising or marketing materials.
- Defamation: Be careful not to share photos that could be considered defamatory, meaning they could harm someone’s reputation.
- Terms of Service: Familiarize yourself with Facebook’s terms of service, which outline the rules and guidelines for using the platform.
- Data Protection Laws: Be aware of data protection laws, such as the General Data Protection Regulation (GDPR) in Europe, which regulate the collection and use of personal data.
- Child Protection Laws: If you’re sharing photos of children, be aware of child protection laws and take extra care to protect their privacy and safety.
- Intellectual Property: Don’t share photos that infringe on someone else’s intellectual property rights, such as trademarks or patents.
- Commercial Use Restrictions: Be aware of any restrictions on using photos for commercial purposes, such as photos licensed under a Creative Commons license.
- Fair Use: Understand the concept of fair use, which allows you to use copyrighted material in certain circumstances, such as for criticism, commentary, or education.
By being mindful of these legal considerations, you can avoid potential legal issues and ensure that you’re sharing photos responsibly.
17. How Do You Download Photos from Facebook?
Downloading photos from Facebook is straightforward. You can download individual photos or entire albums.
- Download Individual Photos:
- Open the photo you want to download.
- Click the three dots in the top right corner.
- Select “Download.”
- Download Albums:
- Go to the album you want to download.
- Click the three dots in the top right corner.
- Select “Download Album.”
18. What Tools Can Help You Manage Your Facebook Photos?
Several tools can help you manage your Facebook photos:
- Facebook’s Built-in Tools: Facebook offers basic tools for organizing, tagging, and editing your photos.
- Adobe Lightroom: A professional photo editing and management software that allows you to organize, edit, and export your photos for Facebook.
- Adobe Photoshop: A powerful image editing software that gives you precise control over your photos.
- Canva: A user-friendly graphic design tool that you can use to create eye-catching visuals for Facebook.
- Google Photos: A cloud-based photo storage and sharing service that integrates with Facebook.
- IFTTT (If This Then That): A automation tool that allows you to automatically share your photos from other platforms to Facebook.
- Buffer: A social media management tool that helps you schedule and analyze your Facebook posts.
- Hootsuite: Another social media management tool that offers similar features to Buffer.
- Tailwind: A social media scheduling tool that focuses on visual content.
- PicMonkey: An online photo editor that offers a range of editing tools and templates.
19. How Does Facebook’s Algorithm Affect Photo Sharing?
Facebook’s algorithm plays a significant role in determining which photos are seen by users. Here’s how it works:
- Relevance: Facebook prioritizes content that it believes is relevant to each user, based on their past interactions and interests.
- Engagement: Photos that receive more likes, comments, and shares are more likely to be shown to a wider audience.
- Relationships: Facebook prioritizes content from friends and family members, as well as Pages and Groups that users frequently interact with.
- Timeliness: Newer photos are generally given more weight than older photos.
- Content Type: Facebook may prioritize certain types of content, such as photos or videos, depending on user preferences and current trends.
- Completeness: Facebook prefers content that is complete and informative, with captions, tags, and other relevant information.
- Authenticity: Facebook penalizes content that is deemed to be inauthentic, such as spam or clickbait.
- Predictive Ranking: Facebook uses machine learning to predict which photos are most likely to be of interest to each user.
- User Feedback: Facebook takes user feedback into account when determining which photos to show, such as when users hide or report content.
- Ad Relevance: Facebook prioritizes ads that are relevant to each user’s interests and demographics.
To increase the visibility of your photos on Facebook, focus on creating high-quality, engaging content that resonates with your audience.
20. How Can dfphoto.net Help You Improve Your Photo Sharing on Facebook?
dfphoto.net provides a wealth of resources to help you improve your photo sharing on Facebook. Whether you are an amateur or professional, dfphoto.net offers:
- Photography Tutorials: Learn essential photography techniques.
- Equipment Reviews: Get advice on cameras, lenses, and accessories.
- Inspiration: Discover stunning photographs and profiles of famous photographers.
- Editing Tips: Master software like Adobe Photoshop and Lightroom.
- Community: Connect with like-minded photographers.
- Portfolio Building: Learn how to create a great photography portfolio.
Visit dfphoto.net today to improve your photography skills and make the most of sharing your photos on Facebook. Our address is 1600 St Michael’s Dr, Santa Fe, NM 87505, United States. You can also call us at +1 (505) 471-6001.
FAQ: Sharing Photos on Facebook
Here are 10 frequently asked questions about sharing photos on Facebook:
- What is the best image size for Facebook photos in 2024? The best image size for Facebook photos is 2048 pixels wide for timeline photos and 1200 x 630 pixels for shared images, ensuring optimal display quality.
- How do I upload high-quality photos to Facebook? Enable “High Quality” uploads in Facebook settings and ensure your photos are high resolution and properly sized before uploading to maintain quality.
- Can I create shared albums on Facebook Messenger? Yes, you can create shared albums on Facebook Messenger by selecting multiple photos from your chat, tapping “Create album,” and naming it for collaborative viewing.
- How do QR codes simplify sharing photos on Facebook? QR codes allow you to quickly connect with new friends on Messenger by scanning their code or sharing yours, streamlining photo sharing.
- What file size limit applies to sending photos on Facebook Messenger? You can send files up to 100MB on Facebook Messenger, including photos and documents.
- How can I control who sees my photos on Facebook? Adjust the privacy settings for each photo or album, choosing to share with the public, friends, specific friends, or only yourself.
- What are some creative ideas for sharing photos on Facebook? Consider themed albums, before-and-after photos, photo challenges, storytelling with photos, and collaborative albums.
- How can I use Facebook to promote my photography business? Create a professional page, showcase your best work, engage with your audience, run targeted ads, and offer promotions.
- What legal considerations should I keep in mind when sharing photos on Facebook? Ensure you have the right to share photos, respect privacy, obtain model releases if necessary, and adhere to Facebook’s terms of service.
- Where can I find the newest photography tips for sharing on Facebook? You can find the newest photography tips on dfphoto.net.
By following these tips and best practices, you can effectively share your photos on Facebook and engage with your friends, family, and audience.