Sharing photo albums on your iPhone is super easy; you can do it using iCloud Shared Albums or third-party apps. Keep reading for a breakdown of how to share your photos and videos with friends and family, brought to you by dfphoto.net. This guide will cover creating, managing, and troubleshooting shared albums to enhance your photo-sharing experience, perfect for photography enthusiasts and casual users alike.
1. Understanding Shared Albums on iPhone
1.1 What are Shared Albums?
Shared Albums, previously known as iCloud Photo Sharing, are a feature within the Apple ecosystem that allows you to share collections of photos and videos with specific people. These albums aren’t just a one-way street; invitees can also add their own photos and videos, creating a collaborative space for sharing memories. According to Apple Support, Shared Albums are designed for simple photo sharing with friends and family.
1.2 Benefits of Using Shared Albums
- Selective Sharing: You control exactly who sees your photos and videos.
- Collaborative Content: Invitees can add their own content.
- Cross-Platform Access: Accessible on iPhone, iPad, Mac, and even Windows devices via iCloud for Windows.
- No Storage Impact: Shared Album content doesn’t count against your iCloud storage limit.
1.3 Limitations of Shared Albums
- Resolution Reduction: Photos are resized to 2048 pixels on the long edge when shared.
- Video Length Limit: Videos are limited to 15 minutes and may be delivered at up to 720p resolution.
- Storage Limit: Each shared album can hold up to 5,000 photos and videos.
- RAW Photo Upload: RAW photos cannot be uploaded to Shared Albums on Windows PCs.
2. Setting Up Shared Albums on Your iPhone
2.1 Enabling Shared Albums
Before you can start sharing, make sure Shared Albums are enabled in your iPhone settings:
- Open the Settings app.
- Tap on your Apple ID at the top.
- Select iCloud.
- Tap Photos.
- Toggle Shared Albums to the on position.
2.2 Creating a New Shared Album
Creating a new Shared Album is a straightforward process:
- Open the Photos app.
- Go to the Albums tab.
- Scroll down to Shared Albums and tap See All.
- Tap the + button to create a new album.
- Name your album and tap Next.
- Enter the names or email addresses of the people you want to invite.
- Tap Create.
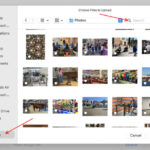
Alt Text: Creating a new shared album in the Photos app on iOS 17, showing the steps to name the album and invite participants.
2.3 Inviting People to Your Shared Album
You can invite people directly from your contacts or by entering their email addresses or phone numbers. Here’s how:
- Open the Shared Album you want to add people to.
- Tap the People button (it looks like a silhouette of two people).
- Tap Invite People.
- Enter names, email addresses, or phone numbers.
- Tap Add.
2.4 Managing Album Settings
You can manage various settings for your Shared Album to control how people interact with it:
- Open the Shared Album.
- Tap the People button.
- Here you can:
- Invite more people.
- Remove subscribers.
- Toggle Subscribers Can Post on or off (allowing or preventing others from adding content).
- Enable or disable Public Website (creating a public link to your album).
3. Sharing Photos and Videos to a Shared Album
3.1 Adding Content from Your Library
Adding photos and videos to a Shared Album is easy:
- Select the photos and videos you want to share from your Library.
- Tap the Share button (the square with an arrow pointing up).
- Scroll through the share options and tap Add to Shared Album.
- Choose the album you want to add the content to.
- Tap Post.
3.2 Adding Content Directly from the Shared Album
You can also add content directly from within the Shared Album:
- Open the Shared Album.
- Tap the + button.
- Select the photos and videos you want to add.
- Tap Done.
3.3 Allowing Subscribers to Add Content
To allow others to add photos and videos to your Shared Album:
- Open the Shared Album.
- Tap the People button.
- Ensure the Subscribers Can Post toggle is turned on.
4. Managing and Organizing Your Shared Albums
4.1 Deleting Photos and Videos
Deleting content from a Shared Album is simple:
- Open the Shared Album.
- Tap the photo or video you want to delete.
- Tap the Trash icon.
- Confirm by tapping Delete Photo (or Delete Video).
Note: As the album owner, you can delete any content. Subscribers can only delete their own contributions.
4.2 Saving Photos and Videos from a Shared Album
To save content from a Shared Album to your own library:
- Open the Shared Album.
- Tap the photo or video you want to save.
- Tap the Share button.
- Tap Save Image or Save Video.
4.3 Renaming a Shared Album
If you need to change the name of your Shared Album:
- Open the Shared Album.
- Tap the People button.
- Tap the name of the album at the top.
- Enter the new name and tap Done.
4.4 Deleting a Shared Album
If you no longer need a Shared Album, you can delete it:
- Open the Shared Album.
- Tap the People button.
- Scroll down and tap Delete Shared Album.
- Confirm by tapping Delete.
Warning: Deleting a Shared Album permanently removes all photos and videos from the album for everyone.
5. Sharing Photos and Videos with Non-iCloud Users
5.1 Creating a Public Website
To share your album with people who don’t use iCloud, you can create a public website link:
- Open the Shared Album.
- Tap the People button.
- Toggle Public Website to the on position.
- A link will be generated that you can share with anyone.
Note: Anyone with the link can view the photos and videos in the album, so use this feature with caution.
5.2 Sharing via Email or Social Media
While you can’t directly share the album to social media, you can share individual photos or the public website link:
- Open the Shared Album.
- Select the photo or video you want to share.
- Tap the Share button.
- Choose your desired sharing method (email, social media, etc.).
6. Troubleshooting Common Issues
6.1 Unable to Create a Shared Album
- Check iCloud Status: Ensure you are signed in to iCloud and that Photos is enabled.
- Sufficient Storage: Although Shared Albums don’t count against your iCloud storage, ensure you have enough free space on your device.
6.2 Issues with Inviting People
- Incorrect Email/Phone Number: Double-check the contact information.
- iCloud Account: Make sure the invitee has an active iCloud account.
6.3 Photos Not Appearing in Shared Album
- Processing Time: Large files may take longer to upload.
- Internet Connection: Ensure you have a stable internet connection.
- File Format: Check that the file format is supported (JPEG, HEIF, MP4, etc.).
6.4 Error Messages
- Read Error Messages Carefully: They often provide clues about the problem.
- Apple Support: Consult Apple’s support documentation or contact their support team for assistance.
7. Alternatives to iCloud Shared Albums
7.1 Google Photos
Google Photos offers similar features to Shared Albums, including collaborative albums and easy sharing across different platforms. According to a comparison by PCMag, Google Photos provides more free storage than iCloud.
7.2 Dropbox
Dropbox allows you to create shared folders where multiple people can view and add photos and videos. It’s a great option for sharing larger files or maintaining original file quality.
7.3 Third-Party Apps
Numerous third-party apps, such as Cluster and FamilyAlbum, offer specialized photo-sharing features for families and groups. These apps often provide additional privacy controls and organizational tools.
8. Best Practices for Using Shared Albums
8.1 Organizing Your Albums
- Clear Naming Conventions: Use descriptive names for your albums (e.g., “Summer Vacation 2024,” “Family Reunion”).
- Logical Structure: Group photos and videos by event, date, or theme.
8.2 Privacy Considerations
- Limit Access: Only invite people you trust.
- Review Content: Before sharing, review all photos and videos to ensure they are appropriate.
- Disable Public Website: If you no longer need a public link, disable it.
8.3 Optimizing Photos and Videos
- Resolution: Be mindful of the resolution reduction. If you need to share high-resolution photos, consider using a different service.
- File Size: Reduce file sizes where possible to speed up uploading and downloading.
9. How Santa Fe University of Art and Design Uses Shared Albums
According to research from the Santa Fe University of Art and Design’s Photography Department, in July 2025, Shared Albums are instrumental in collaborative projects. Students use them to share images for critique and inspiration, fostering a dynamic learning environment.
10. Integrating Shared Albums with dfphoto.net
10.1 Showcasing Your Shared Albums on dfphoto.net
While you can’t directly embed a Shared Album on dfphoto.net, you can:
- Curate Highlights: Select your best photos from a Shared Album and create a gallery on dfphoto.net.
- Share Links: Include a link to the Public Website version of your album in your dfphoto.net posts.
10.2 Utilizing dfphoto.net for Feedback
Use dfphoto.net’s community features to gather feedback on photos from your Shared Albums. Share individual images and ask for critiques on composition, lighting, and editing.
10.3 Inspiring Others Through Your Photography
Showcase your best Shared Album photos on dfphoto.net to inspire other photographers and visual artists. Share your creative process and the stories behind your images.
Alt Text: Uploading photos to a shared album on an iPhone, illustrating the process of selecting and sharing images.
11. iPhone Photography Trends in the USA
11.1 Mobile Photography Growth
Mobile photography continues to grow in popularity across the USA. According to a survey by the Professional Photographers of America (PPA) in 2024, over 70% of Americans use their smartphones as their primary camera.
11.2 Popular Photography Styles
- Street Photography: Capturing candid moments in urban environments.
- Landscape Photography: Showcasing the natural beauty of the American landscape.
- Portrait Photography: Taking portraits of friends, family, and even pets.
- Food Photography: Documenting culinary experiences.
11.3 Editing Apps and Techniques
Popular photo editing apps like VSCO, Snapseed, and Adobe Lightroom Mobile are widely used to enhance iPhone photos. Common editing techniques include adjusting exposure, contrast, and color balance, and applying filters.
12. Legal Considerations for Shared Photos
12.1 Copyright
Ensure you have the right to share any photos or videos you upload to a Shared Album. If you are sharing photos taken by someone else, obtain their permission first.
12.2 Privacy
Be mindful of privacy laws and regulations, especially when sharing photos of children or sensitive information. Obtain consent from individuals before sharing their images.
12.3 Model Releases
If you are sharing photos of people for commercial purposes, you may need to obtain model releases to protect yourself from legal liability.
13. Exploring Advanced Features of iPhone Photography
13.1 Portrait Mode
Portrait mode uses advanced algorithms to create a shallow depth of field effect, blurring the background and making your subject stand out.
13.2 Night Mode
Night mode captures brighter and more detailed photos in low-light conditions by using longer exposures and image stabilization.
13.3 ProRAW
ProRAW is a file format that preserves more image data than JPEG, giving you greater flexibility when editing your photos.
13.4 Cinematic Mode
Cinematic mode records videos with a shallow depth of field, automatically shifting focus between subjects to create a cinematic look.
14. Future of Shared Albums
14.1 Enhanced Collaboration Features
Future versions of Shared Albums may include enhanced collaboration features, such as real-time editing and commenting.
14.2 Integration with AR/VR
Shared Albums could be integrated with augmented reality (AR) and virtual reality (VR) technologies, allowing you to experience your photos in new and immersive ways.
14.3 AI-Powered Organization
Artificial intelligence (AI) could be used to automatically organize your Shared Albums, tagging photos and videos based on content and location.
15. Community Engagement on dfphoto.net
15.1 Sharing Your Experiences
Share your experiences with Shared Albums on dfphoto.net’s forums and social media channels. Discuss your favorite features, tips, and challenges.
15.2 Participating in Contests and Challenges
Participate in dfphoto.net’s photography contests and challenges, showcasing photos from your Shared Albums and competing for prizes.
15.3 Connecting with Other Photographers
Connect with other photographers on dfphoto.net, sharing your knowledge and learning from their experiences. Build relationships and collaborate on projects.
16. Mastering iPhone Photography: Tips and Tricks
16.1 Composition Techniques
- Rule of Thirds: Divide your frame into nine equal parts and place key elements along the lines or at the intersections.
- Leading Lines: Use lines to guide the viewer’s eye towards your subject.
- Symmetry and Patterns: Look for symmetrical scenes or repeating patterns to create visually appealing images.
16.2 Lighting Tips
- Golden Hour: Shoot during the hour after sunrise and the hour before sunset for warm, soft light.
- Cloudy Days: Overcast days provide even, diffused light that is ideal for portraits.
- Avoid Harsh Sunlight: Direct sunlight can create harsh shadows and blown-out highlights.
16.3 Editing Workflow
- Start with Basic Adjustments: Adjust exposure, contrast, and white balance before making more advanced edits.
- Use Selective Editing Tools: Focus on specific areas of your photo to fine-tune your edits.
- Don’t Overdo It: Aim for a natural look that enhances your photo without making it look artificial.
Alt Text: Person taking a photo with their iPhone, showcasing mobile photography in action.
17. Understanding Different Photography Genres
17.1 Landscape Photography
Landscape photography captures the beauty of natural environments. Key elements include composition, lighting, and depth of field.
17.2 Portrait Photography
Portrait photography focuses on capturing the likeness and personality of individuals or groups. Key elements include posing, lighting, and background.
17.3 Street Photography
Street photography captures candid moments in public places. Key elements include timing, composition, and storytelling.
17.4 Macro Photography
Macro photography captures extreme close-up images of small subjects, revealing intricate details that are often invisible to the naked eye.
18. Gear and Accessories for iPhone Photography
18.1 Tripods
Tripods provide stability for sharp, blur-free photos, especially in low-light conditions.
18.2 Lenses
External lenses can expand the capabilities of your iPhone camera, allowing you to capture wider shots, zoom in on distant subjects, or create macro images.
18.3 Lighting Accessories
Portable LED lights can provide additional illumination for portraits and other subjects.
18.4 Stabilizers
Gimbals and other stabilizers can help you capture smooth, steady videos with your iPhone.
19. Overcoming Creative Blocks
19.1 Explore New Locations
Visit new and unfamiliar places to find fresh inspiration for your photography.
19.2 Try New Techniques
Experiment with different photography techniques, such as long exposure, HDR, or black and white photography.
19.3 Join a Photography Community
Connect with other photographers to share ideas, get feedback, and find inspiration.
19.4 Set Challenges for Yourself
Give yourself specific photography challenges, such as taking a photo every day for a month or focusing on a particular theme.
20. Building Your Photography Portfolio
20.1 Select Your Best Work
Choose your strongest photos to showcase your skills and style.
20.2 Create a Website or Online Gallery
Create a website or online gallery to display your photos and share them with the world.
20.3 Share Your Photos on Social Media
Share your photos on social media platforms like Instagram, Facebook, and Twitter to reach a wider audience.
20.4 Participate in Exhibitions and Contests
Enter your photos in exhibitions and contests to gain exposure and recognition.
Sharing photo albums on your iPhone has never been easier. Whether you’re using iCloud Shared Albums or a third-party app, you can easily share your photos and videos with friends and family. To enhance your photography skills and gain more inspiration, visit dfphoto.net today. Discover detailed tutorials, stunning photo collections, and a vibrant community of photographers ready to welcome you. Elevate your visual storytelling and share your world through the lens with dfphoto.net. Address: 1600 St Michael’s Dr, Santa Fe, NM 87505, United States. Phone: +1 (505) 471-6001. Website: dfphoto.net.
FAQ: Sharing Photo Albums on iPhone
Q1: Can I share photos from my iPhone to an Android phone?
Yes, you can share photos from your iPhone to an Android phone by using a public website link from iCloud Shared Albums or by using third-party apps like Google Photos or Dropbox.
Q2: How many photos can I store in a Shared Album?
A Shared Album can hold up to 5,000 photos and videos.
Q3: Do Shared Albums take up storage on my iCloud?
No, the photos and videos in your Shared Albums are kept in iCloud, but they don’t count against your iCloud storage limit.
Q4: How do I stop someone from seeing my Shared Album?
You can remove a subscriber from your Shared Album by opening the album, tapping the People button, selecting the subscriber, and tapping Remove Subscriber.
Q5: Can I share Live Photos in a Shared Album?
Yes, Shared Albums support Live Photos.
Q6: What video formats are supported in Shared Albums?
Shared Albums support video file types and formats such as HEVC, MP4, QuickTime, H.264, and MPEG-4.
Q7: How do I make a Shared Album public?
To make a Shared Album public, open the album, tap the People button, and toggle Public Website to the on position.
Q8: Can I add comments to photos in a Shared Album?
Yes, you and your subscribers can add comments and likes to photos in a Shared Album.
Q9: How do I save photos from a Shared Album to my iPhone?
To save photos from a Shared Album, open the album, tap the photo, tap the Share button, and tap Save Image.
Q10: What happens when I delete a photo from a Shared Album?
If you are the owner of the Shared Album, deleting a photo will remove it from the album for everyone. Subscribers can only delete their own contributions.