Sending photos is a common task, but sometimes you need to ensure your pictures arrive as attachments, not embedded images within the email body. This is crucial when the recipient needs to download and save the photo directly, especially for professional or archiving purposes. If you’ve ever wondered, “How Do You Send A Photo as an attachment?”, you’re not alone. Many users encounter this issue across various devices. This guide will walk you through straightforward methods to send photos as attachments on different platforms, ensuring your images are delivered exactly as you intend.
One common problem users face is that email clients sometimes display images directly in the email body instead of as separate attachments. While convenient for quick viewing, this isn’t ideal when the recipient needs to save the photo file itself. For instance, you might want to send photos to a colleague for a project, and they need to download and work with those image files. In such cases, sending photos as attachments is essential.
Let’s explore how to achieve this on your devices.
Sending Photos as Attachments on iPhone
iPhones offer several ways to share photos, and knowing the right methods is key to sending them as attachments.
One straightforward method is using the Mail app directly. When composing a new email in the Mail app, you can easily add a photo as an attachment. Tap within the body of your email, and you should see an option to insert a photo or attachment. Selecting this will allow you to browse your photo library and choose the image you want to send. This method generally ensures that the photo is sent as a traditional attachment.
Another effective approach is to start from the Photos app itself. Open the Photos app, select the photo you wish to send, and tap the share icon (usually a square with an arrow pointing upwards). From the share sheet, choose the “Mail” option. This will open a new email draft with your selected photo attached. This is often the most direct way to send a photo as an attachment from your iPhone.
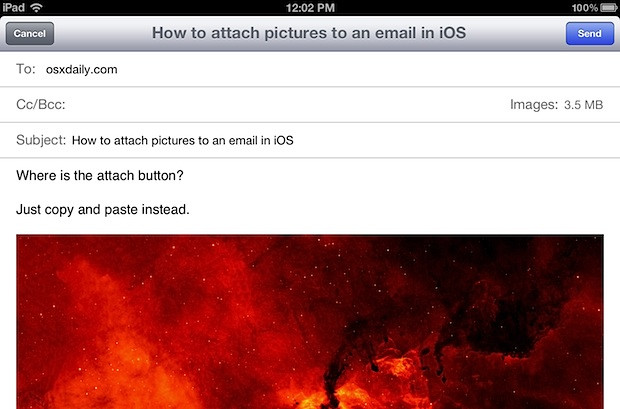 Example of an embedded image in email body as unwanted outcome
Undesired outcome: Image embedded in the email body, not as a downloadable attachment.
It’s worth noting that sometimes, email signatures can influence how photos are sent. In some cases, lengthy or complex email signatures might inadvertently cause images to embed rather than attach. If you’re consistently facing issues, try simplifying your email signature to just a few lines of plain text and see if that resolves the problem.
Sending Photos as Attachments on Android
Android devices also provide multiple ways to send photos as attachments. Similar to iPhones, you can use your default email app or start from the Photos app.
If you’re using Gmail or another email app on your Android phone, the process is quite similar to iPhone’s Mail app. When composing an email, look for an “attach” icon, often represented by a paperclip. Tapping this icon will give you options to attach files, including photos from your gallery. Select the photo, and it will be added as an attachment to your email.
Alternatively, you can go to your Gallery or Photos app, select the photo, and tap the share icon. Choose your email app from the sharing options. This will also create a new email with the selected photo attached, ready for you to send.
General Tips for Ensuring Photos are Sent as Attachments
Regardless of your device, here are some general tips to maximize the chances of your photos being sent as attachments:
- Avoid Dragging and Dropping Images: Directly dragging and dropping images into the email body might lead to embedding them. Use the “attach” function within your email app instead.
- Check Email Client Settings: Some email clients might have settings related to image handling. While less common, exploring your email client’s settings for attachment preferences could be helpful if you consistently encounter issues.
- Consider Zipping Large Files: For sending multiple high-resolution photos, compressing them into a ZIP file before attaching can be beneficial. This not only ensures they are sent as a single attachment but can also reduce the overall file size, making sending and downloading faster.
 Example of a desired image attachment in email for easy saving
Desired outcome: Image sent as a distinct attachment, easily downloadable and savable by the recipient.
Conclusion
Sending photos as attachments is usually a straightforward process, but understanding the nuances across different devices and email clients can prevent unwanted embedding. By using the “attach” function in your email app or sharing directly from your photo gallery and considering factors like email signatures and file sizes, you can confidently send photos as attachments, ensuring recipients can easily save and use the images as intended. Whether you’re using an iPhone or Android device, these methods will help you effectively manage how your photos are delivered via email.

