MacBooks are known for their user-friendly interface, and saving photos is no exception. Whether you’re archiving precious memories, grabbing images for a presentation, or collecting inspiration from the web, knowing how to save photos on your MacBook is a fundamental skill. This guide will walk you through three straightforward methods to save any image you encounter on your Mac, ensuring you never miss out on capturing what you need.
Method 1: The Classic Right-Click to Save
The right-click method is perhaps the most versatile and widely used way to save images on a MacBook. It offers you the most control over the saving process, allowing you to rename files and choose specific save locations. Remember, on a MacBook trackpad, a two-finger tap acts as a right-click. If you’re using a mouse without a dedicated right-click button, simply hold down the “Control” key while clicking.
Step-by-step guide:
- Position your cursor over the image you want to save.
- Right-click (two-finger tap on trackpad or Control-click) on the image. This will open a context menu with various options.
- From the dropdown menu, select “Save Image As…”. This option is usually clearly visible and directly related to saving the image.
 Selecting "Save Image As…" from the right-click menu on a MacBook, illustrating the first step in saving an image via right-click.
- A dialog box will appear, prompting you to name your file and choose a save location. In the “Save As” field, type in your desired file name. This is a great opportunity to give your image a descriptive and easily searchable name.
- Use the dropdown menus or the Finder window in the dialog box to navigate to the folder where you want to save the image. You can choose your Desktop, Downloads folder, Pictures library, or any other folder on your MacBook.
- Once you’ve named your file and selected your save location, click the blue “Save” button in the bottom right corner of the dialog box.
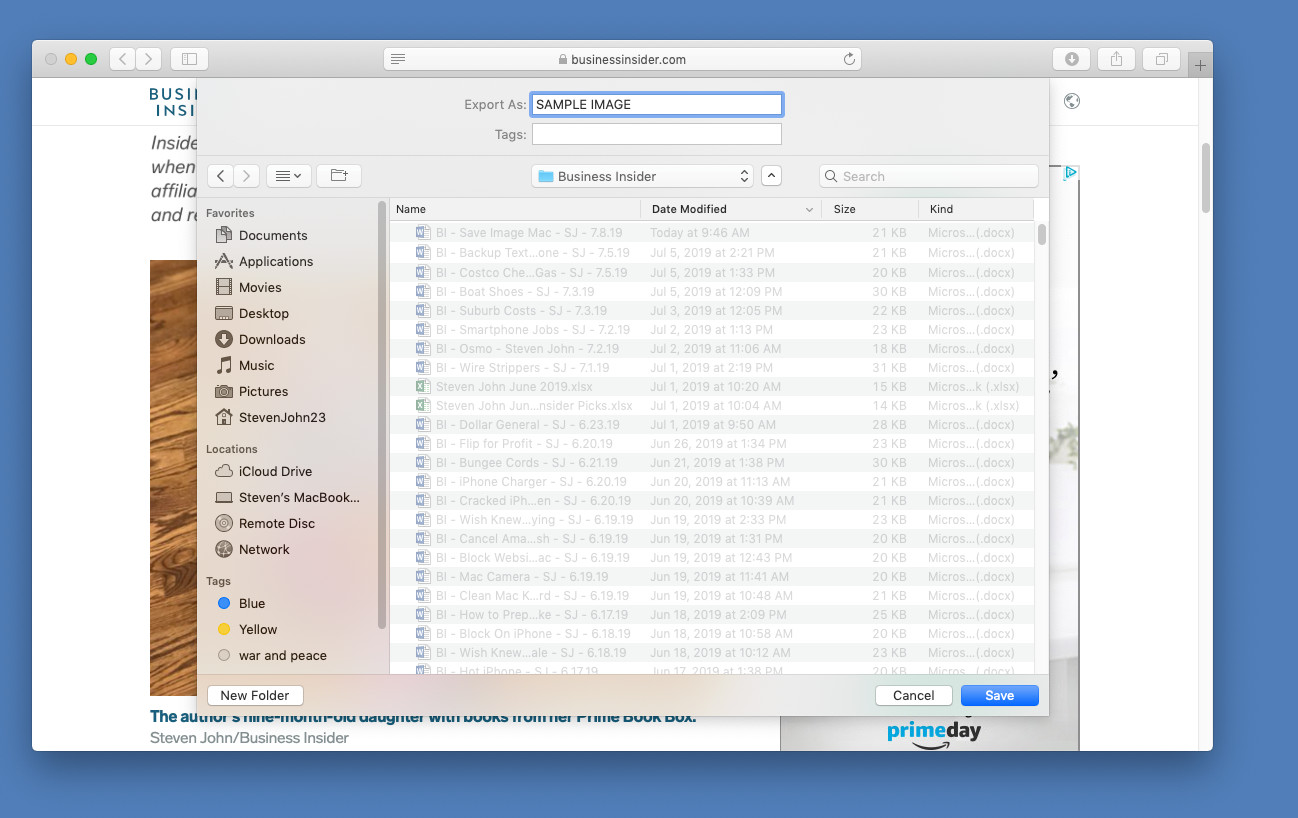 Renaming a file in the "Save As" dialog box on a MacBook before saving, demonstrating how to customize the file name and save location.
This method is ideal when you need to organize your saved photos immediately or want to ensure they are named according to your system.
Method 2: The Speedy Drag-and-Drop Technique
For a truly rapid way to save images, especially when organization isn’t your immediate priority, the drag-and-drop method is incredibly efficient. It’s the quickest of the three, though it sacrifices the file renaming step of the right-click method.
Quick steps to drag and drop:
- Click and hold your left mouse button or trackpad on the image you intend to save.
- While holding down the click, drag the image directly to your desired destination. This could be your MacBook desktop, an open folder window, a folder in your Dock, or even directly into applications like Word or Pages documents.
- Look for a green circle with a “+” symbol appearing next to your cursor as you drag. This icon indicates that you are about to copy the image to the new location.
- Release the mouse button or trackpad to drop the image into its new location. The image will be saved with its original file name in the destination you chose.
This method is perfect for quickly grabbing images and placing them on your desktop for immediate use or dropping them directly into documents you’re working on.
Method 3: Capture It All with Screenshots
When direct saving isn’t an option, such as with images embedded in locked PDFs or displayed on platforms like Instagram that restrict right-clicking, screenshots come to the rescue. MacBook’s built-in screenshot tools are powerful and easy to use, letting you capture any image visible on your screen.
Screenshot Options:
- Capture a specific area: Press and hold the “Command” + “Shift” + “4” keys simultaneously. Your cursor will transform into crosshairs. Click and drag to select the specific portion of the screen you want to capture. Release the mouse button or trackpad to take the screenshot.
- Capture the entire screen: Press and hold the “Command” + “Shift” + “3” keys together. This will instantly capture a screenshot of your entire display.
After taking a screenshot using either method, the image file will automatically be saved to your MacBook’s desktop as a PNG file, usually named with a date and timestamp. You can then move and rename the screenshot file as needed.
Screenshots are invaluable for capturing images from sources that don’t allow direct saving, ensuring you can save any visual content you need on your MacBook.
By mastering these three methods, you’ll be well-equipped to save any photo you encounter while using your MacBook, whether for work, school, or personal enjoyment. Each method offers a different balance of speed, control, and versatility, allowing you to choose the best approach for every situation.
