Resizing photos on a Mac is a common task, whether you’re preparing images for social media, email, or printing. Fortunately, macOS offers several built-in methods and third-party apps to make this process simple and efficient. This article will guide you through different options for resizing your images on a Mac.
Using Preview for Quick Resizing
Preview, a pre-installed application on macOS, provides a straightforward way to resize single or multiple images.
To resize photos in Preview:
-
Open Images: Select the images you want to resize in Finder. Right-click and choose “Open With” > “Preview.”
-
Select All: In the left sidebar of Preview, ensure all images are selected. If not, click “Edit” > “Select All.”
 Preview Sidebar with Multiple Images Selected
 -
Adjust Size: Go to “Tools” > “Adjust Size.” A window will appear with options to change the width, height, and resolution. You can lock the aspect ratio to maintain proportions.
-
Save Changes: After adjusting the dimensions, click “OK.” Then, go to “File” > “Export Selected Images” to save the resized photos.
Tip: You can change Preview’s preferences to open all selected images in a single window for easier batch processing.
Batch Resizing with Preview: A Deeper Dive
While Preview allows individual image resizing, it also offers a powerful way to resize multiple photos simultaneously.
-
Open with Preview: Select all the images you want to resize. Right click and choose “Open With” > “Preview”. This will open all images within a single Preview window, displayed in the left-hand sidebar.
-
Select All in Sidebar: Click on one image in the sidebar, then press Command + A to select all images.
-
Tools > Adjust Size: Navigate to the “Tools” menu and select “Adjust Size.” This will present you with options for adjusting width, height, and resolution. Ensure the “Scale proportionally” box is checked to avoid distorting your images.
-
File > Export Selected Images: Once you’ve chosen your desired dimensions, click “OK.” Then, use “File” > “Export Selected Images” to save the resized versions. Choose a destination folder and preferred file format.
Leveraging Third-Party Apps: Resize Master
For more advanced resizing options, consider third-party apps like Resize Master. This App Store application provides a user-friendly interface with various resizing features.
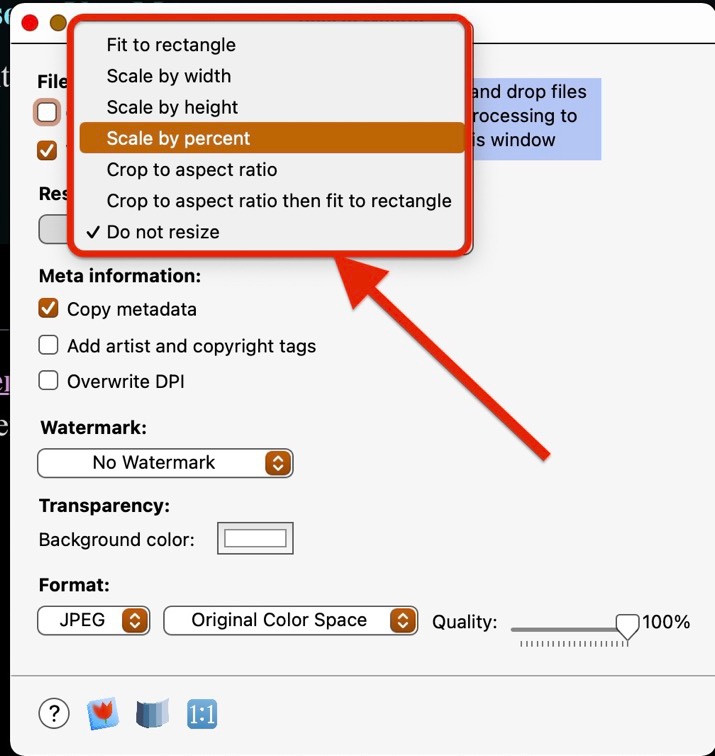 Resize Master Interface
Resize Master allows you to:
- Batch resize: Process entire folders of images at once.
- Preset dimensions: Choose from predefined sizes or customize your own.
- File format options: Save resized images in various formats.
Exporting from Photos with Resizing Options
The Photos app also offers built-in resizing capabilities during export:
-
Select Images: In Photos, select the images you wish to resize.
-
File > Export: Go to “File” > “Export” in the menu bar.
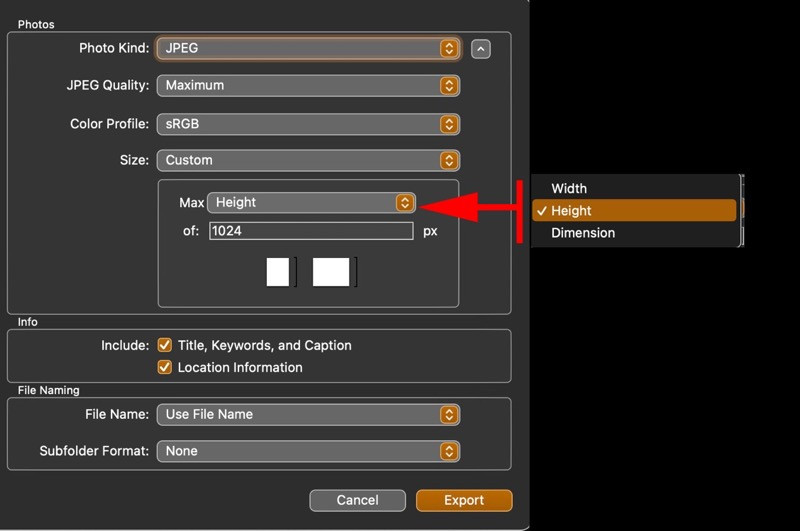 Photos Export Options
 -
Choose Size: In the export window, you can choose from several preset sizes (Small, Medium, Large, or Actual Size) or specify custom dimensions.
Conclusion
Resizing photos on your Mac is easily achievable using built-in tools like Preview and Photos, or with third-party applications like Resize Master. Choosing the best method depends on your specific needs and the number of images you need to process. Whether you need a quick resize for a single image or batch processing for a large collection, macOS provides the tools you need.