Resizing photos is a fundamental skill for anyone working with digital images. Whether you’re preparing photos for the web, email, printing, or simply to save storage space, understanding how to resize your images effectively is crucial. This guide will walk you through the essential methods for resizing your photos, ensuring you maintain image quality while achieving your desired size.
Understanding Photo Resizing: Dimensions and File Size
Before diving into the “how,” it’s important to understand the “what” of photo resizing. When we talk about resizing photos, we’re generally referring to two key aspects: image dimensions and file size.
- Image Dimensions: Measured in pixels, dimensions represent the width and height of your photo. For example, a photo with dimensions of 2000×3000 pixels is 2000 pixels wide and 3000 pixels tall. Reducing dimensions means making the image smaller visually.
- File Size: Measured in kilobytes (KB) or megabytes (MB), file size indicates the amount of digital storage space a photo occupies. File size is influenced by dimensions, file format (like JPEG, PNG), and compression. Resizing dimensions often reduces file size, but not always proportionally.
It’s crucial to differentiate resizing from cropping. Cropping changes the composition of your photo by removing parts of the image, while resizing changes the overall dimensions of the entire image. You can crop a photo without resizing its dimensions, and vice versa.
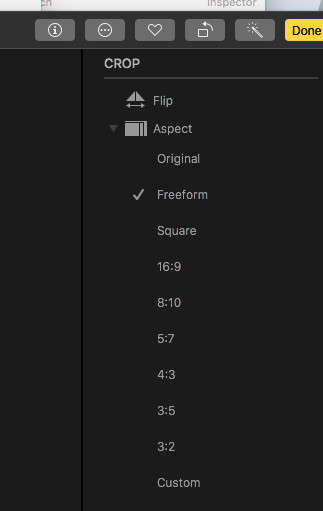 Apple Photos Crop Tool Interface Showing Aspect Ratio Options for Photo Resizing
Resizing Photos When Exporting
One of the most common ways to resize photos is during the export process. Most photo editing software, including built-in tools on your computer and mobile devices, offer resizing options when you save or export your edited images.
Here’s a general approach, applicable to many photo applications:
- Edit Your Photo (Optional): Make any desired adjustments to your photo, such as color correction or cropping, before resizing.
- Initiate Export/Save As: Look for options like “Export,” “Save As,” or “Share.”
- Find Resizing Options: In the export settings, you should find options to control image size. These might be presented as:
- Presets: Options like “Small,” “Medium,” “Large,” “Web,” or “Email” which automatically apply predetermined dimensions or file sizes.
- Custom Dimensions: Fields where you can manually enter the desired width and height in pixels. Some tools allow you to maintain aspect ratio to avoid distortion.
- File Size Limit: Some advanced tools allow you to specify a maximum file size (e.g., in KB) and the software will adjust dimensions and compression accordingly.
- Quality Settings: Often linked to resizing, adjusting JPEG quality can significantly impact file size. Lower quality means smaller file size but potentially more compression artifacts.
Example: Resizing during Export in Apple Photos (macOS)
While Apple Photos doesn’t offer direct in-app resizing, it provides resizing options during export:
-
Select the photo(s) you want to resize.
-
Go to
File>Export>Export [Number] Photos... -
In the Export dialog:
- Photo Kind: Choose
JPEG(most common for web and general use) orPNG(for images with transparency, but larger file sizes). - Quality: Adjust the slider to control JPEG quality and file size. “High” quality will result in larger files, while “Low” will reduce file size but may introduce noticeable compression.
- Size: This is where you resize! Choose from:
Actual Size: Exports the photo at its original dimensions (no resizing).Small,Medium,Large: Presets that reduce dimensions to smaller sizes.Custom: Allows you to specify the maximum dimensions (either width or height). Photos will be scaled down to fit within these limits while maintaining aspect ratio.
- Photo Kind: Choose
-
Click
Exportand choose where to save the resized photo(s).
Resizing Photos Using Third-Party Tools
For more advanced resizing options or batch resizing (resizing multiple photos at once), you might consider using dedicated photo editing software or online resizing tools.
- Photo Editing Software (e.g., Adobe Photoshop, GIMP): These programs offer precise control over resizing, allowing you to specify exact dimensions, resampling methods (algorithms for resizing that affect image quality), and more. They are ideal for professional use or when you need very specific resizing outcomes.
- Online Photo Resizers (e.g., ResizePixel, iLoveIMG): Numerous websites offer free online photo resizing tools. These are convenient for quick resizing without needing to install software. Simply upload your photo, choose your desired size, and download the resized image. Be mindful of privacy when using online tools and avoid uploading sensitive photos.
- Mobile Apps (e.g., Adobe Lightroom Mobile, Photo Compress & Resize): Mobile apps are available for resizing photos directly on your smartphone or tablet, which is useful for preparing photos for social media or messaging.
Choosing the Right Size
The ideal photo size depends entirely on its intended use.
- Web Use: For websites and blogs, aim for optimized sizes that balance visual quality with page loading speed. Common web sizes range from 800 to 2000 pixels on the longest edge, depending on where the image is displayed. File sizes should ideally be under 500KB, and preferably smaller for faster loading.
- Email: For emailing photos, smaller sizes are better to avoid large attachments. Resizing to around 600-800 pixels on the longest edge and reducing file size to under 100-200KB is generally recommended.
- Printing: Print size depends on desired print dimensions and print resolution (DPI – dots per inch). For good quality prints, you’ll need higher resolution images. For example, a 4×6 inch print at 300 DPI requires an image of approximately 1200×1800 pixels.
- Storage Space: If you’re resizing to save storage space, consider reducing dimensions to a size that’s still suitable for your viewing needs. For archiving or backup, it’s generally recommended to keep original, full-resolution photos and create resized copies as needed.
Conclusion
Knowing how to resize photos is an essential skill in today’s digital world. By understanding the concepts of image dimensions and file size, and by utilizing export options or dedicated resizing tools, you can effectively prepare your photos for various purposes, from sharing online to printing and archiving. Remember to always consider the intended use of your photos when choosing the right resized dimensions and file size.

