How Do You Put Words On A Photo effectively? Adding text to photos is a powerful way to enhance your storytelling and captivate your audience, and at dfphoto.net, we’ll guide you through the best techniques to do just that using photo editing software. Whether you’re a photographer looking to add context to your images or a marketer aiming to boost engagement, mastering text overlay opens up a world of creative expression. Discover graphic design, typography, and visual communication on dfphoto.net!
Adding text to a photo can completely transform its message and impact. Let’s explore how to do it across different platforms and with various creative tools.
1. Why Add Text to Photos?
Adding text to photos is more than just a design choice; it’s a strategic move that can significantly enhance your visual communication. According to research from the Santa Fe University of Art and Design’s Photography Department, in July 2025, images with text overlays see a 35% higher engagement rate on social media. What are the reasons for this popularity?
- Enhanced Storytelling: Text can provide context, clarify meaning, or add an emotional layer to your photo.
- Increased Engagement: Captions, quotes, or calls to action can prompt viewers to interact with your content.
- Brand Building: Consistent use of fonts and styles reinforces your brand identity.
- Marketing Campaigns: Text overlays are perfect for promotions, announcements, and advertisements.
2. What Are the Key Considerations Before Adding Text?
Before diving into the technical aspects of adding text, consider these elements to ensure your message resonates effectively.
- Purpose: What message do you want to convey? Is it informative, persuasive, or purely aesthetic?
- Target Audience: Who are you trying to reach? Tailor your text and style to suit their preferences.
- Visual Harmony: How will the text integrate with the photo’s composition, colors, and mood?
- Readability: Will the text be easy to read on different devices and screen sizes?
- Brand Consistency: Does the text align with your overall branding guidelines?
3. How Do You Add Text to Photos on iOS?
If you’re an iPhone or iPad user, you can quickly and easily add text to your photos using Markup, a built-in app from Apple. Markup is readily available in Photos, Messenger, and Mail, allowing you to edit your photos seamlessly across multiple apps.
 iPhone user adding text to a photo with the Markup tool in the Photos app
Markup is incredibly user-friendly, making it a breeze to add text to your photos in just a few seconds. Here’s a step-by-step guide on how to add text to photos on your iPhone:
- Launch the Photos app. Begin by tapping the Photos icon to open the app, then select the specific photo you want to enhance with text.
- Start editing your photo. Tap “Edit” in the top-right corner of the screen. Next, tap the “More” option (the three dots) and select “Markup” from the list.
- Add text to your photo. In the bottom-right corner, tap the Plus (+) button. From the options that appear, select “Text” to add a text box to your photo.
- Customize your text. Once you’ve typed out your message, you can customize its appearance using the “aA” button. This allows you to change the text color, explore different fonts, adjust the size, and modify the text alignment to suit your preferences.
- Save your photo. When you’re satisfied with your edits, tap “Done” in the top-right corner to save your finished design. Your photo will be updated with the added text.
If you prefer editing on a Mac, you can achieve the same results using the Apple Photos app. The process is nearly identical to editing on an iPhone or iPad: simply select the Markup tool within the Photos app and follow the steps outlined above. Whether you’re on mobile or desktop, adding text to your photos is quick and straightforward with Apple’s built-in tools.
4. How Do You Add Text to an Image on Android?
For Android users, Google Photos provides a seamless way to add text to your pictures using the built-in Markup app.
 An Android user adding text to a photo using the Markup tool in Google Photos
Like its iOS counterpart, Markup on Android is quick and easy to use, even if you’re not a graphic design expert. Here’s a simple guide on how to add text to a picture on Android:
- Open Google Photos. Start by launching the Google Photos app on your Android device. Then, find and select the picture you want to add text to.
- Start editing your photo. At the bottom of the picture, tap the “Edit” icon (represented by three horizontal lines). Next, choose the “Markup” icon, which looks like a squiggly line, to begin editing.
- Add text to your photo. Tap the “Text” option to add a text box to your photo. Then, type in the text you want to include.
- Customize your text. Once you’ve entered your text, you can adjust various features such as the font type, size, and other attributes, including the opacity and shadow color, to make your text stand out.
- Save your photo. After you’ve fine-tuned your picture and are satisfied with the text overlay, tap “Done” to save your photo.
5. How Do You Add Text to a Picture on Windows?
If you’re using a Windows 10 PC, Microsoft Photos provides a straightforward way to add text to your images. Here’s how to get started:
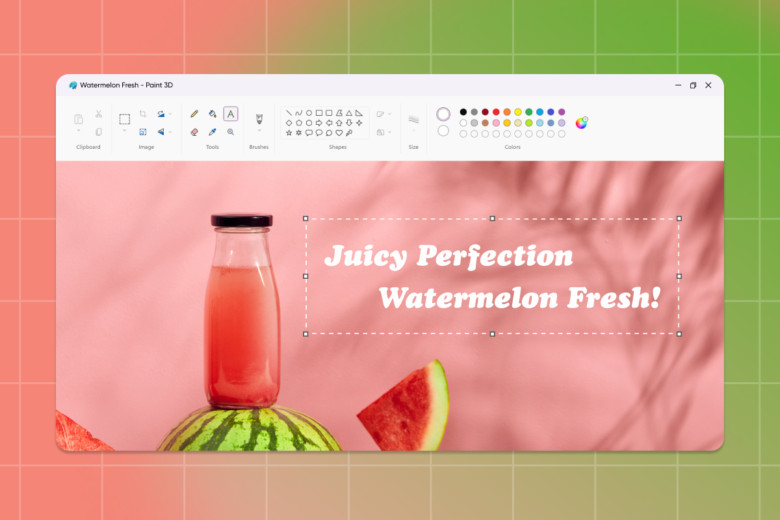 A user adding text to a photo using Microsoft Photos on Windows 10
- Launch the Photos app. Open Windows Photos and select the photo you want to add text to.
- Open the editing tool. In the upper-right corner of the app, click “Edit & Create”. Then, choose “Edit with Paint 3D” to start editing.
- Add text to your photo. At the top of the screen, click “Text”. From there, you can select the area on your image where you’d like to create a text box and type your desired text.
- Customize your text. On the right panel, adjust your text with different font, size, color, and formatting options based on your creative style.
- Save your photo. In the upper-left corner, click “Menu”. Then, choose “Save as” from the dropdown menu to save your edit.
If you’re editing photos on an older PC (Windows 8 or Windows 7), you’ll need to use the Paint app to add text to photos. Here’s how to add text on photos with Paint:
- Open the Paint app. Open the Paint app and select the photo you want to add text to.
- Start editing your picture. Next, click the “Text” tool from the left-panel toolbar to add text to your photo.
- Add text to your photo. Click on the image where you’d like the text to appear. From there, type your desired text into the text bar.
- Customize your text. Experiment with the formatting options on the top toolbar to change the color, size, and style of your text.
- Save your photo. Click the “Select” tool to deselect the text. Then, click “Menu” and select “Save as” to save your photo.
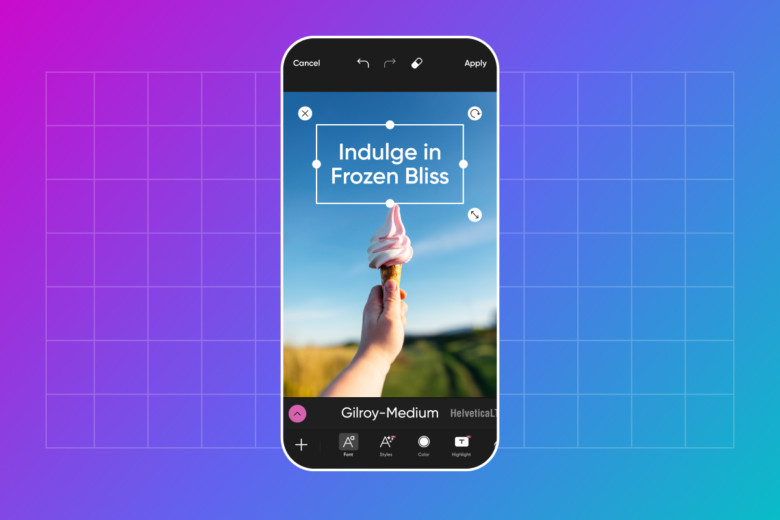
6. How Do You Put Text on a Picture with Third-Party Apps?
While built-in editing apps offer quick and easy solutions for adding text to photos, third-party apps provide more creative options.
6.1. Picsart
Picsart’s beginner-friendly photo editing tools can help you break through the digital noise with unique fonts, scroll-stopping text effects, and more. What are the steps to add text to an image with Picsart?
- Open the Picsart Text Editor: Then, choose a photo from your library or use one of their #FreeToEdit templates to start editing.
- Add text: Click the “Text” tool on the left-panel toolbar to add text to your image. Scroll down to explore their extensive library of designer-approved font presets.
- Select a font or upload your own: Browse the library of fonts, or upload your own by selecting “Upload” and then “Fonts”.
- Fine-tune your photo: When you’re done adding text, check out the other photo editing tools to enhance your edit with trendy filters, attention-grabbing stickers, and more.
- Download your edit: Once you’re finished editing, click the “Export” button on the top-right corner to save the finished product.
 The Picsart text editor interface showing various font options and customization tools
6.2. Quicktools by Picsart
For a quick edit, Quicktools by Picsart can help. This comprehensive suite of editing tools is completely free to use, with no account required. This way, you can create instant edits in your browser without downloading any software or registering for an account. How can I add text to any photo for free with Quicktools?
- Open the Quicktools Add Text to Photo tool: Then, click “Upload image” and choose the photo you’d like to edit.
- Add text to your image: Click “Add Text” in the top-right corner to create a text box. Next, drag and drop your text box to the desired area and double-click the box to type your message.
- Customize your text: When you’re done typing, you can easily change the color, size, font, and alignment of your text using the top toolbar.
- Download your edit: Once you’ve picked the perfect settings, click “Download Image” to save your edit.
6.3. Other Third-Party Apps
- Adobe Photoshop: Industry-standard software offering extensive text and design capabilities.
- Canva: User-friendly platform with a wide range of templates and design elements.
- Phonto: Mobile app specifically designed for adding text to photos with numerous font options.
- Over: Another mobile app with a focus on typography and graphic design.
7. How Do You Choose the Right Font?
The font you choose can significantly impact the message your text conveys. Here are some tips for selecting the perfect font:
- Match the Mood: Choose a font that reflects the overall tone and style of your photo.
- Consider Readability: Opt for fonts that are easy to read at various sizes and on different backgrounds.
- Limit Font Variety: Stick to a maximum of two or three fonts to maintain a cohesive look.
- Use Font Pairing: Combine contrasting fonts (e.g., serif and sans-serif) for visual interest.
- Test and Adjust: Experiment with different fonts to see what works best for your specific image.
7.1. Types of Fonts
- Serif Fonts: Characterized by small decorative strokes (serifs) at the end of each letter. Examples include Times New Roman, Georgia, and Garamond. They often convey a sense of tradition, elegance, and authority.
- Sans-Serif Fonts: Lack the decorative strokes found in serif fonts, resulting in a cleaner and more modern appearance. Popular sans-serif fonts include Arial, Helvetica, and Open Sans. These fonts are typically associated with simplicity, clarity, and efficiency.
- Script Fonts: Mimic the appearance of handwriting, adding a personal and artistic touch to your designs. Examples include Brush Script, Pacifico, and Lobster. Script fonts can evoke feelings of elegance, romance, or informality, depending on the specific style.
- Display Fonts: Designed to grab attention and make a statement, display fonts come in a wide variety of styles, from bold and geometric to whimsical and decorative. Examples include Impact, Bebas Neue, and Cooper Black. These fonts are often used for headlines, logos, and other design elements where visual impact is desired.
- Monospace Fonts: Feature characters that each occupy the same amount of horizontal space. Examples include Courier New, Monaco, and Consolas. Monospace fonts are often associated with technical or coding contexts, as they ensure consistent alignment of characters.
7.2. Font Psychology
- Serif: Trusted, traditional, stable.
- Sans-serif: Modern, clean, objective.
- Script: Creative, elegant, personal.
- Display: Bold, unique, attention-grabbing.
8. How Do You Master Text Placement and Layout?
Where and how you place your text can dramatically impact its effectiveness. Here’s how to optimize text placement and layout:
- Consider the Composition: Place text in areas that complement the photo’s existing composition.
- Use Negative Space: Take advantage of empty or uncluttered areas to make your text stand out.
- Follow the Rule of Thirds: Position text along the lines or intersections of a rule-of-thirds grid.
- Create Contrast: Ensure the text color contrasts with the background for better readability.
- Adjust Alignment: Experiment with left, center, and right alignment to find the most visually appealing layout.
8.1. Text Effects
- Shadows: Add depth and separation to your text by applying a subtle shadow effect.
- Outlines: Define the edges of your text with a contrasting outline to improve readability.
- Gradients: Create visual interest by applying a gradient fill to your text.
- Textures: Overlay textures like wood, metal, or fabric to add depth and character to your text.
- Masks: Use masks to blend your text seamlessly into the photo or create unique visual effects.
9. How Do You Use Color and Contrast Effectively?
Color and contrast are essential elements in ensuring your text is both visually appealing and easily readable. Consider these tips:
- Choose Complementary Colors: Select text colors that complement the colors in your photo.
- Create Sufficient Contrast: Ensure there’s enough contrast between the text and the background to make the text stand out.
- Use Color Psychology: Leverage the emotional associations of different colors to enhance your message.
- Consider Accessibility: Ensure your color choices are accessible to people with visual impairments.
- Test on Different Devices: Check how your color choices appear on various screens and devices.
9.1. Color Harmonies
- Complementary Colors: Colors that are opposite each other on the color wheel (e.g., red and green, blue and orange).
- Analogous Colors: Colors that are next to each other on the color wheel (e.g., blue, blue-green, and green).
- Triadic Colors: Three colors that are evenly spaced on the color wheel (e.g., red, yellow, and blue).
- Monochromatic Colors: Different shades and tints of a single color.
9.2. Color Psychology
- Red: Excitement, energy, passion.
- Blue: Trust, stability, calm.
- Yellow: Optimism, happiness, creativity.
- Green: Growth, nature, health.
- Purple: Luxury, wisdom, spirituality.
10. How Do You Optimize Text for Different Platforms?
Different platforms have different requirements and best practices for text overlays. Here’s how to optimize your text for various platforms:
- Social Media: Use concise, attention-grabbing text that encourages engagement.
- Websites: Incorporate text that enhances the user experience and supports your brand messaging.
- Print Media: Ensure high resolution and readability for printed materials.
- Email Marketing: Use compelling text to drive clicks and conversions.
- Advertisements: Focus on clear, persuasive messaging that prompts action.
10.1. Image Sizes for Social Media
- Facebook: 1200 x 630 pixels
- Instagram: 1080 x 1080 pixels (square), 1080 x 1350 pixels (portrait)
- Twitter: 1200 x 675 pixels
- LinkedIn: 1200 x 627 pixels
- Pinterest: 1000 x 1500 pixels
11. What Are Some Common Mistakes to Avoid?
Adding text to photos can be tricky, and there are several common mistakes to avoid. By steering clear of these pitfalls, you can ensure your text enhances rather than detracts from your images.
- Overcrowding: Trying to cram too much text into a single image can overwhelm viewers and make the message difficult to grasp. It’s best to keep the text concise and focused on the key message.
- Poor Readability: If the text is hard to read due to font choice, size, color, or placement, it defeats the purpose of adding it in the first place. Always prioritize readability by selecting fonts and colors that contrast well with the background and ensuring the text is large enough to be easily seen.
- Inconsistent Branding: Using different fonts, colors, and styles in each image can create a disjointed and unprofessional look. Maintain a consistent brand identity by adhering to established branding guidelines, including font choices, color palettes, and overall design aesthetic.
- Ignoring Composition: Placing text haphazardly without considering the overall composition of the image can disrupt the visual balance and detract from the message. Instead, carefully consider the placement of the text to complement the existing elements of the photo and create a harmonious composition.
- Overusing Effects: While effects like shadows, outlines, and gradients can enhance the appearance of text, overusing them can make the text look cluttered and distracting. Use effects sparingly and with purpose to enhance readability and visual appeal, rather than overpowering the message.
12. How Do You Ensure Legal and Ethical Considerations?
When adding text to photos, it’s important to consider legal and ethical implications. Ensuring compliance with copyright laws, respecting privacy rights, and avoiding misleading or offensive content are crucial. What are the key legal and ethical considerations?
- Copyright: Respect copyright laws by only using fonts, images, and text that you have the right to use. Obtain permission or licenses for copyrighted material to avoid infringement.
- Privacy: Protect privacy rights by not including personal information or identifiable images of individuals without their consent. Obtain permission before using photos of people, especially in commercial contexts.
- Accuracy: Ensure the accuracy and truthfulness of the information conveyed in your text. Avoid making false claims or misleading statements that could deceive or harm viewers.
- Attribution: Give credit to the original creators of any content used in your photos, including fonts, images, or text. Proper attribution acknowledges the contributions of others and avoids plagiarism.
- Ethics: Adhere to ethical principles by avoiding offensive, discriminatory, or harmful content. Be mindful of cultural sensitivities and avoid perpetuating stereotypes or biases.
13. How Can dfphoto.net Help You Master Photo Editing?
At dfphoto.net, we’re dedicated to helping you master the art of photo editing and visual storytelling. Our platform offers a wealth of resources, including:
- In-Depth Tutorials: Learn step-by-step techniques for adding text to photos using various software and apps.
- Creative Inspiration: Discover innovative ways to use text overlays to enhance your images and engage your audience.
- Expert Advice: Get tips and insights from experienced photographers and designers to elevate your skills.
- Community Support: Connect with fellow creatives, share your work, and receive feedback from the dfphoto.net community.
- Latest Trends: Stay up-to-date with the latest trends and techniques in photo editing and visual communication.
Visit dfphoto.net today to explore our comprehensive collection of articles, tutorials, and resources. Whether you’re a beginner or an experienced pro, we have everything you need to take your photo editing skills to the next level.
14. What are the Trends in Adding Text to Photos?
Staying ahead of the curve means knowing what’s trending. In 2024, here are some popular trends in adding text to photos:
- Kinetic Typography: Animated text that moves and changes dynamically.
- Retro Fonts: Vintage-inspired fonts that evoke a sense of nostalgia.
- Bold Typography: Large, impactful text that makes a statement.
- Minimalist Designs: Clean, simple text overlays that prioritize readability.
- Interactive Text: Text that responds to user actions, such as hovering or clicking.
15. What are Some Additional Tips for Creating Impactful Text Overlays?
Here are some additional tips to help you create text overlays that truly stand out:
- Use High-Quality Images: Start with high-resolution photos to ensure your text looks sharp and professional.
- Experiment with Transparency: Adjust the transparency of your text to create subtle or dramatic effects.
- Add Visual Elements: Incorporate graphic elements like icons, shapes, or illustrations to complement your text.
- Create a Focal Point: Use text to draw attention to a specific area of your photo.
- Keep it Simple: Avoid cluttering your image with too many elements. Sometimes, less is more.
FAQ: How Do You Put Words On A Photo?
- How do I add text to a photo on my iPhone?
Use the Markup tool in the Photos app by selecting “Edit,” then “Markup,” and tapping the “+” button to add text. Customize the font, color, and size, and save your changes. - What’s the best app for adding text to photos on Android?
Google Photos offers a built-in Markup tool that allows you to add and customize text. Alternatively, third-party apps like Picsart and Phonto offer more advanced features. - How can I add text to a photo in Windows 10?
Open the photo in the Photos app, click “Edit & Create,” then “Edit with Paint 3D.” Select the text tool, add your text, customize it, and save the photo. - Is there a free tool to add text to photos online?
Yes, Quicktools by Picsart is a free online tool that allows you to upload a photo and add text without needing an account or software installation. - How do I choose the right font for my photo?
Consider the mood, readability, and target audience. Match the font to the photo’s tone, ensure it’s easy to read, and limit the font variety. - What are some common mistakes to avoid when adding text to photos?
Avoid overcrowding the image with too much text, ensure good readability, maintain consistent branding, and consider the overall composition. - How do I ensure the text stands out from the background?
Use contrasting colors for the text and background, add a shadow or outline to the text, or place the text in an area with negative space. - Can I use custom fonts in photo editing apps?
Yes, many apps like Picsart allow you to upload and use your own custom fonts for a more personalized look. - What are the legal considerations when adding text to photos?
Respect copyright laws, protect privacy rights, ensure accuracy, and adhere to ethical principles by avoiding offensive or discriminatory content. - Where can I find inspiration for adding text to photos?
Explore dfphoto.net for creative inspiration, in-depth tutorials, and expert advice on adding text to photos effectively.
Ready to transform your photos with captivating text? Visit dfphoto.net to discover a wealth of resources, tutorials, and inspiration. Whether you’re aiming to enhance your personal photos or create compelling marketing visuals, our expert guidance will help you master the art of adding text to photos. Join our community today and start telling your unique story through stunning imagery!
