Printing photos onto fabric opens a world of creative possibilities, from personalized gifts to unique home decor. At dfphoto.net, we are excited to show you how you can transfer your cherished photos onto fabric. We will cover everything from selecting the right materials to mastering the printing process, ensuring vibrant and lasting results. Discover how to infuse your personal style into every project with our expert guidance. Learn about the various methods, including heat transfer, direct-to-garment (DTG) printing, and traditional techniques, along with tips for achieving professional-quality prints.
1. Understanding the Basics of Printing Photos on Fabric
Printing photos onto fabric is a fantastic way to personalize items, create unique art, or even produce custom textiles. Let’s dive into the fundamental aspects to ensure your projects turn out great.
1.1. What Are the Different Methods Available for Fabric Photo Printing?
Several methods can transfer images to fabric, each with its own advantages and ideal uses. Here’s a breakdown:
- Heat Transfer: This involves printing an image onto special transfer paper and then using heat to transfer it onto the fabric. It’s great for small projects and personalized gifts.
- Direct-to-Garment (DTG) Printing: DTG printers apply ink directly to the fabric. This is ideal for complex designs and small production runs, offering excellent detail and color accuracy.
- Sublimation: This method uses heat to turn the ink into a gas that bonds with the fabric fibers. It works best on polyester or polyester-blend fabrics and produces vibrant, durable prints.
- Screen Printing: A stencil is used to apply ink onto the fabric. This is a cost-effective option for large quantities and simple designs.
- Inkjet Printing on Fabric: Special fabric sheets are run through an inkjet printer. This is suitable for small, detailed projects but may require fabric treatments for durability.
1.2. What Types of Fabric Work Best for Photo Printing?
The type of fabric you choose significantly impacts the final print quality.
| Fabric Type | Best For | Considerations |
|---|---|---|
| Polyester | Sublimation, DTG printing | Known for vibrant colors and durability. |
| Cotton | Heat transfer, DTG printing, inkjet printing | Soft and comfortable, but may require pretreatment for better ink adhesion. |
| Linen | DTG printing, inkjet printing | Offers a natural look, but may not produce the sharpest details. |
| Silk | Digital silk printing | Luxurious feel, best suited for delicate designs. |
| Polyester Blends | Heat transfer, DTG printing | Offers a balance of durability and comfort, good for a range of printing techniques. |
1.3. What Supplies Do You Need to Get Started?
Gathering the right supplies is crucial for a smooth printing process. Here’s a comprehensive list:
- Printer: Inkjet or laser printer, depending on your chosen method.
- Ink: Sublimation ink, pigment ink, or dye ink, depending on the printer and fabric.
- Transfer Paper: Heat transfer paper for heat transfer, or printable fabric sheets for inkjet printing.
- Fabric: Choose the appropriate fabric type for your project.
- Heat Press or Iron: For heat transfer applications.
- Cutting Tools: Scissors or a rotary cutter for trimming fabric and transfer paper.
- Software: Photo editing software to adjust and prepare your images.
- Protective Paper: Parchment paper or Teflon sheet to protect the fabric and heat press.
- Optional:
- Spray adhesive to temporarily hold the transfer paper in place.
- Fabric stabilizer to prevent stretching during printing.
- Cleaning supplies to remove any residue from the fabric.
1.4. What Image Resolution Is Needed for Optimal Results?
Image resolution is crucial for a crisp, clear print. Aim for at least 300 DPI (dots per inch) for the best results. Lower resolutions may result in blurry or pixelated images. Ensure your image is sized correctly before printing to avoid distortion.
1.5. Where Can I Find High-Quality Images for Printing?
Finding the right images is as important as the printing process itself.
- Personal Photos: Use your own high-resolution photos for a personal touch.
- Stock Photo Websites: Sites like Unsplash, Pexels, and Shutterstock offer a wide variety of high-quality images.
- Graphics Fairy: A great source for vintage images.
- Creative Commons: Search for images with Creative Commons licenses to use them freely with attribution.
2. Step-by-Step Guide to Printing Photos on Fabric Using Heat Transfer
Heat transfer is a popular and accessible method for printing photos onto fabric. Here’s a detailed guide to help you achieve excellent results.
2.1. How to Prepare Your Image for Heat Transfer Printing?
Preparing your image correctly is essential for a successful heat transfer.
- Choose a High-Resolution Image: Select an image with at least 300 DPI for the best print quality.
- Mirror the Image: Flip the image horizontally using photo editing software. This ensures the image appears correctly when transferred to the fabric.
- Adjust Colors: Enhance the colors slightly to compensate for any loss during the transfer process.
- Crop and Resize: Crop the image to the desired size and ensure it fits within the dimensions of your transfer paper.
2.2. What Type of Transfer Paper Should You Use?
Choosing the right transfer paper is crucial for achieving the best results.
- Light Fabric Transfer Paper: Designed for use on white or light-colored fabrics. It typically leaves a transparent background around the image.
- Dark Fabric Transfer Paper: Suitable for dark-colored fabrics. It usually has an opaque background that ensures the image stands out.
- Inkjet Transfer Paper: Specifically designed for use with inkjet printers.
- Laser Transfer Paper: Designed for use with laser printers.
2.3. How to Print Your Image onto the Transfer Paper?
Follow these steps to print your image onto the transfer paper:
- Load the Transfer Paper: Place the transfer paper into your printer, ensuring the printable side is facing the correct direction.
- Adjust Printer Settings: Set your printer to the highest quality print setting. Select the appropriate paper type (e.g., glossy photo paper or transfer paper).
- Print the Image: Print the mirrored image onto the transfer paper.
- Let It Dry: Allow the ink to dry completely before proceeding to the next step.
2.4. What Are the Correct Settings for Your Heat Press or Iron?
Using the correct settings for your heat press or iron is essential to ensure the image transfers properly.
- Heat Press:
- Temperature: Typically between 350°F and 375°F (175°C and 190°C). Check the transfer paper instructions for the specific temperature.
- Pressure: Medium to firm pressure.
- Time: Usually 20-30 seconds.
- Iron:
- Setting: Use the highest heat setting (usually cotton or linen).
- Steam: Turn off the steam function.
- Pressure: Apply firm, even pressure.
- Time: Iron over the image for 2-3 minutes, moving slowly and evenly.
2.5. How to Transfer the Image onto the Fabric?
Follow these steps to transfer the image onto the fabric:
- Prepare the Fabric: Iron the fabric to remove any wrinkles.
- Position the Transfer: Place the transfer paper face down onto the fabric in the desired location.
- Apply Heat:
- Heat Press: Place a protective sheet (parchment paper or Teflon sheet) over the transfer paper. Press down with the heat press for the recommended time and pressure.
- Iron: Place a protective sheet over the transfer paper. Iron over the image with firm, even pressure for the recommended time.
- Cool Down: Allow the transfer to cool completely before peeling off the transfer paper.
- Peel the Paper: Gently peel off the transfer paper, starting from one corner. If the image is not fully transferred, reapply heat and pressure.
2.6. What Are the Best Practices for Washing and Caring for Your Printed Fabric?
Proper care will help prolong the life of your printed fabric.
- Wait Before Washing: Allow at least 24 hours before washing the fabric.
- Turn Inside Out: Wash the fabric inside out to protect the image.
- Use Cold Water: Wash in cold water to prevent fading.
- Mild Detergent: Use a mild, gentle detergent.
- Avoid Bleach: Do not use bleach or harsh chemicals.
- Tumble Dry Low: Tumble dry on a low setting or hang to dry.
- Iron Inside Out: If ironing is necessary, iron the fabric inside out on a low heat setting.
3. Direct-to-Garment (DTG) Printing: A Comprehensive Guide
Direct-to-Garment (DTG) printing is an advanced method that offers high-quality, detailed prints directly onto fabric.
3.1. What Is DTG Printing and How Does It Work?
DTG printing is a process where a specialized inkjet printer applies ink directly onto the fabric. The printer uses water-based inks that are absorbed into the fabric fibers, resulting in a soft, durable print.
3.2. What Are the Advantages of DTG Printing?
- High Detail: DTG printing can reproduce intricate designs with excellent detail and color accuracy.
- Small Runs: Ideal for small production runs and custom orders.
- No Minimums: No minimum order quantities, making it perfect for individual projects.
- Soft Feel: The water-based inks result in a soft, comfortable print.
- Versatility: Can print on a variety of fabrics, including cotton, linen, and some polyester blends.
3.3. What Types of Printers Are Suitable for DTG Printing?
Choosing the right DTG printer is crucial for achieving high-quality results.
- Entry-Level DTG Printers: Suitable for small businesses and hobbyists. Examples include the Epson F2100 and Brother GT-3 Series.
- Mid-Range DTG Printers: Offer faster printing speeds and higher production capacity. Examples include the Kornit Breeze and Ricoh Ri 1000.
- Industrial DTG Printers: Designed for high-volume production. Examples include the Kornit Avalanche and Aeoon Technologies printers.
3.4. How to Prepare Fabric for DTG Printing?
Proper fabric preparation is essential for optimal DTG printing results.
- Pretreatment: Apply a pretreatment solution to the fabric to improve ink adhesion and color vibrancy. This is especially important for dark-colored fabrics.
- Heat Press: Use a heat press to cure the pretreatment solution, ensuring it bonds properly with the fabric.
- Smooth Surface: Ensure the fabric is smooth and free of wrinkles before printing.
3.5. What Inks Are Used in DTG Printing?
DTG printing uses specialized water-based inks designed to bond with fabric fibers.
- CMYK Inks: Cyan, magenta, yellow, and black inks are used to create a wide range of colors.
- White Ink: Used as a base layer for printing on dark-colored fabrics to ensure the colors stand out.
3.6. What Are the Maintenance Requirements for DTG Printers?
Regular maintenance is crucial for keeping your DTG printer in top condition.
- Cleaning: Regularly clean the print heads, nozzles, and other components to prevent clogging.
- Ink Levels: Monitor ink levels and replace cartridges as needed.
- Calibration: Calibrate the printer regularly to ensure accurate color reproduction.
- Software Updates: Keep the printer software up to date for optimal performance.
3.7. What Are Some Tips for Achieving the Best DTG Print Quality?
- High-Resolution Images: Use high-resolution images (300 DPI or higher) for the best print quality.
- Proper Pretreatment: Apply the correct amount of pretreatment solution and cure it properly.
- Smooth Fabric: Ensure the fabric is smooth and free of wrinkles.
- Optimal Printer Settings: Use the recommended printer settings for the fabric type and ink.
- Regular Maintenance: Perform regular maintenance to keep the printer in top condition.
4. Sublimation Printing: A Detailed Exploration
Sublimation printing is a unique method that offers vibrant, durable prints on polyester fabrics.
4.1. What Is Sublimation Printing and How Does It Work?
Sublimation printing is a process where special sublimation inks are printed onto transfer paper. The paper is then placed on the fabric, and heat and pressure are applied. The heat causes the ink to turn into a gas, which penetrates the fabric fibers and bonds permanently.
4.2. What Are the Advantages of Sublimation Printing?
- Vibrant Colors: Sublimation printing produces exceptionally vibrant and long-lasting colors.
- Durability: The ink bonds directly with the fabric fibers, resulting in a durable print that won’t fade or crack.
- Soft Feel: The print has a soft, natural feel because the ink becomes part of the fabric.
- All-Over Prints: Ideal for creating all-over prints and seamless designs.
4.3. What Types of Fabrics Are Suitable for Sublimation Printing?
Sublimation printing works best on polyester or polyester-blend fabrics. High polyester content (at least 65%) is recommended for the best results.
4.4. What Equipment Do You Need for Sublimation Printing?
- Sublimation Printer: A specialized printer that uses sublimation inks.
- Sublimation Inks: Special inks that turn into a gas when heated.
- Sublimation Paper: Transfer paper designed for sublimation printing.
- Heat Press: A heat press to apply heat and pressure to the fabric and transfer paper.
- Protective Paper: Parchment paper or Teflon sheet to protect the fabric and heat press.
4.5. How to Prepare Your Image for Sublimation Printing?
- High-Resolution Image: Use a high-resolution image (300 DPI or higher) for the best print quality.
- Color Correction: Adjust the colors to account for any shifts during the sublimation process.
- Mirror the Image: Flip the image horizontally to ensure it appears correctly on the fabric.
4.6. How to Sublimate the Image onto the Fabric?
- Print the Image: Print the mirrored image onto the sublimation paper using sublimation inks.
- Position the Transfer: Place the sublimation paper face down onto the fabric in the desired location.
- Apply Heat: Place a protective sheet over the transfer paper. Press down with the heat press for the recommended time, temperature, and pressure (typically around 400°F or 200°C for 60 seconds).
- Cool Down: Allow the fabric to cool completely before removing the transfer paper.
- Peel the Paper: Gently peel off the sublimation paper to reveal the vibrant, durable print.
4.7. What Are Some Tips for Achieving the Best Sublimation Print Quality?
- Use High-Quality Materials: Use high-quality sublimation inks and paper for the best results.
- Proper Heat and Pressure: Apply the correct heat and pressure according to the fabric and transfer paper instructions.
- Smooth Fabric: Ensure the fabric is smooth and free of wrinkles.
- Consistent Temperature: Maintain a consistent temperature throughout the sublimation process.
5. Screen Printing: A Traditional Approach
Screen printing is a versatile and cost-effective method for printing designs onto fabric, especially for large quantities.
5.1. What Is Screen Printing and How Does It Work?
Screen printing involves creating a stencil on a fine mesh screen. Ink is then forced through the open areas of the stencil onto the fabric below.
5.2. What Are the Advantages of Screen Printing?
- Cost-Effective for Large Quantities: Screen printing is economical for large production runs.
- Durability: Screen-printed designs are highly durable and long-lasting.
- Versatility: Can print on a wide range of fabrics, including cotton, polyester, and blends.
- Vibrant Colors: Produces vibrant, opaque colors that stand out on any fabric.
5.3. What Equipment Do You Need for Screen Printing?
- Screens: Mesh screens stretched over a frame.
- Squeegee: A tool used to force ink through the screen.
- Inks: Screen printing inks designed for fabric.
- Emulsion: A light-sensitive liquid used to create the stencil.
- Exposure Unit: A light source used to harden the emulsion and create the stencil.
- Washout Booth: A space for washing out the unexposed emulsion.
- Drying Rack: A rack for drying the printed fabric.
5.4. How to Create a Screen Printing Stencil?
- Coat the Screen: Apply a thin, even layer of emulsion to the screen.
- Dry the Screen: Allow the emulsion to dry completely in a dark room.
- Expose the Screen: Place a transparency of your design on the screen and expose it to light using an exposure unit.
- Washout the Screen: Wash out the unexposed emulsion with water to reveal the stencil.
- Dry the Screen: Allow the screen to dry completely before printing.
5.5. How to Print Your Design onto Fabric?
- Position the Screen: Place the screen on top of the fabric in the desired location.
- Apply Ink: Pour a line of ink across the top of the screen.
- Squeegee the Ink: Use the squeegee to pull the ink down the screen with firm, even pressure.
- Lift the Screen: Carefully lift the screen to reveal the printed design.
- Dry the Fabric: Allow the ink to dry completely before wearing or washing the fabric.
5.6. What Types of Inks Are Used in Screen Printing?
- Plastisol Inks: Durable and opaque, ideal for printing on dark fabrics.
- Water-Based Inks: Soft and eco-friendly, great for printing on light fabrics.
- Discharge Inks: Remove the dye from the fabric, leaving a soft, natural print.
5.7. What Are Some Tips for Achieving the Best Screen Print Quality?
- Proper Screen Tension: Ensure the screen is properly tensioned for a clean, crisp print.
- Even Ink Distribution: Apply the ink evenly across the screen.
- Consistent Squeegee Pressure: Use consistent pressure when squeegeeing the ink.
- Clean Screens: Keep the screens clean to prevent clogs and imperfections.
6. Inkjet Printing on Fabric: A Simple Method
Inkjet printing on fabric is a simple and accessible method for creating custom fabric prints at home.
6.1. What Is Inkjet Printing on Fabric and How Does It Work?
Inkjet printing on fabric involves using a standard inkjet printer with special fabric sheets. These sheets are treated with a coating that allows the ink to adhere to the fabric.
6.2. What Are the Advantages of Inkjet Printing on Fabric?
- Simple and Accessible: Can be done at home with a standard inkjet printer.
- Detailed Designs: Suitable for printing detailed designs and photos.
- Small Projects: Ideal for small, personalized projects.
6.3. What Materials Do You Need for Inkjet Printing on Fabric?
- Inkjet Printer: A standard inkjet printer.
- Fabric Sheets: Special fabric sheets treated for inkjet printing.
- Ink: Standard inkjet inks.
- Scissors or Rotary Cutter: For trimming the fabric sheets.
- Iron: For pressing the fabric after printing.
6.4. How to Prepare Your Fabric for Inkjet Printing?
- Choose Fabric Sheets: Select fabric sheets that are compatible with your inkjet printer.
- Iron the Fabric: Iron the fabric sheets to remove any wrinkles.
- Load the Fabric: Load the fabric sheet into your printer, following the manufacturer’s instructions.
6.5. How to Print Your Image onto the Fabric?
- Adjust Printer Settings: Set your printer to the highest quality print setting. Select the appropriate paper type (e.g., glossy photo paper or fabric).
- Print the Image: Print the image onto the fabric sheet.
- Let It Dry: Allow the ink to dry completely before proceeding to the next step.
6.6. How to Set the Ink on the Fabric?
- Iron the Fabric: Place a clean cloth over the printed fabric and iron it on a medium heat setting to set the ink.
- Follow Instructions: Follow the manufacturer’s instructions for setting the ink and caring for the printed fabric.
6.7. What Are Some Tips for Achieving the Best Inkjet Print Quality?
- Use High-Quality Fabric Sheets: Use high-quality fabric sheets for the best results.
- Print at Highest Quality: Print at the highest quality setting on your printer.
- Allow Ink to Dry: Allow the ink to dry completely before setting it with an iron.
- Follow Instructions: Follow the manufacturer’s instructions for printing and caring for the fabric.
7. Advanced Techniques and Tips for Fabric Photo Printing
Elevate your fabric photo printing skills with these advanced techniques and tips.
7.1. How to Create a Quilted Photo Collage?
Creating a quilted photo collage involves printing multiple photos onto fabric and then sewing them together to create a unique quilt.
- Print Your Photos: Print your photos onto fabric using your preferred method (heat transfer, DTG, sublimation, or inkjet).
- Cut the Fabric: Cut the printed fabric into squares or rectangles.
- Arrange the Squares: Arrange the squares in a pleasing design.
- Sew the Squares: Sew the squares together to create the quilt top.
- Add Batting and Backing: Add batting and backing to the quilt and quilt as desired.
7.2. How to Make Personalized Photo Pillows?
Making personalized photo pillows is a great way to display your favorite memories.
- Print Your Photo: Print your photo onto fabric using your preferred method.
- Cut the Fabric: Cut the printed fabric to the desired size for your pillow.
- Sew the Pillow: Sew the fabric together, leaving an opening for stuffing.
- Stuff the Pillow: Stuff the pillow with fiberfill or other stuffing material.
- Close the Opening: Sew the opening closed to complete the pillow.
7.3. How to Design Custom Fabric Labels?
Designing custom fabric labels is a great way to add a personal touch to your sewing projects.
- Design Your Label: Design your label using graphic design software.
- Print Your Label: Print your label onto fabric using your preferred method.
- Cut the Label: Cut the label to the desired size.
- Attach the Label: Attach the label to your project using sewing or adhesive.
7.4. How to Add Text and Graphics to Your Printed Photos?
Adding text and graphics to your printed photos can enhance your designs and make them more personalized.
- Use Photo Editing Software: Use photo editing software to add text, graphics, and other embellishments to your photos.
- Print Your Design: Print your design onto fabric using your preferred method.
7.5. How to Protect Your Printed Fabric from Fading?
Protecting your printed fabric from fading is essential for ensuring your designs last.
- Use UV-Resistant Inks: Use UV-resistant inks to prevent fading.
- Apply a UV Protectant Spray: Apply a UV protectant spray to the fabric to protect it from the sun.
- Wash in Cold Water: Wash the fabric in cold water to prevent fading.
- Avoid Direct Sunlight: Avoid exposing the fabric to direct sunlight for extended periods.
7.6. How to Troubleshoot Common Printing Problems?
- Blurry Prints: Ensure your image resolution is high enough (300 DPI or higher).
- Faded Colors: Adjust the colors in your image and use high-quality inks.
- Uneven Prints: Ensure the fabric is smooth and free of wrinkles.
- Ink Bleeding: Use the appropriate inks for your fabric and printing method.
8. Inspiring Ideas for Projects Using Printed Photos on Fabric
Let your creativity flow with these inspiring project ideas that utilize printed photos on fabric.
8.1. Personalized T-Shirts and Apparel
Create custom t-shirts, hoodies, and other apparel items with your favorite photos, designs, and quotes.
8.2. Custom Home Decor Items
Design unique home decor items such as throw pillows, curtains, wall hangings, and tablecloths with personalized photo prints.
8.3. Unique Gifts for Family and Friends
Craft personalized gifts for your loved ones, including photo blankets, tote bags, aprons, and more.
8.4. Memory Quilts and Photo Albums
Create memory quilts and photo albums using fabric prints to preserve cherished memories in a tangible and artistic way.
8.5. Custom Fabric Labels for Handmade Items
Design and print custom fabric labels to add a professional and personalized touch to your handmade clothing, crafts, and accessories.
8.6. Art Quilts and Fabric Collages
Experiment with art quilts and fabric collages by combining printed photos with various fabrics, textures, and embellishments to create unique and expressive artworks.
9. Essential Tips for Long-Lasting Fabric Photo Prints
Maximize the lifespan of your fabric photo prints with these essential tips.
9.1. Choosing the Right Inks and Materials
Select high-quality inks and materials specifically designed for fabric printing to ensure vibrant and durable prints.
9.2. Preparing Your Fabric Properly
Pre-wash and iron your fabric before printing to remove any sizing, wrinkles, or impurities that may affect the print quality.
9.3. Applying a Protective Coating
Consider applying a protective coating or sealant to your printed fabric to guard against fading, staining, and wear.
9.4. Washing and Drying Your Printed Fabrics
Follow these guidelines when washing and drying your printed fabrics:
- Turn the fabric inside out before washing.
- Use a gentle, color-safe detergent.
- Wash in cold water on a delicate cycle.
- Avoid using bleach or fabric softeners.
- Tumble dry on low heat or hang to dry.
9.5. Storing Your Printed Fabrics
Store your printed fabrics in a cool, dry place away from direct sunlight to prevent fading and deterioration.
10. The Future of Fabric Photo Printing: Trends and Innovations
Stay ahead of the curve with insights into the latest trends and innovations in fabric photo printing.
10.1. Sustainable and Eco-Friendly Printing Options
Explore sustainable and eco-friendly fabric printing options, such as using organic fabrics, water-based inks, and energy-efficient printing equipment.
10.2. Advancements in DTG Technology
Keep an eye on advancements in Direct-to-Garment (DTG) printing technology, including faster printing speeds, higher resolution, and improved color accuracy.
10.3. Integration of Digital Design Tools
Discover how the integration of digital design tools and software is simplifying the fabric photo printing process, allowing for more creative and complex designs.
10.4. Personalized and On-Demand Printing Services
Take advantage of personalized and on-demand fabric printing services, which allow you to create custom designs and order small quantities with ease.
10.5. The Rise of DIY and Maker Communities
Join the growing DIY and maker communities to share your fabric photo printing projects, learn new techniques, and find inspiration from fellow creatives.
At dfphoto.net, we encourage you to explore the endless possibilities of fabric photo printing. Whether you’re a seasoned pro or just starting out, there’s always something new to discover and create.
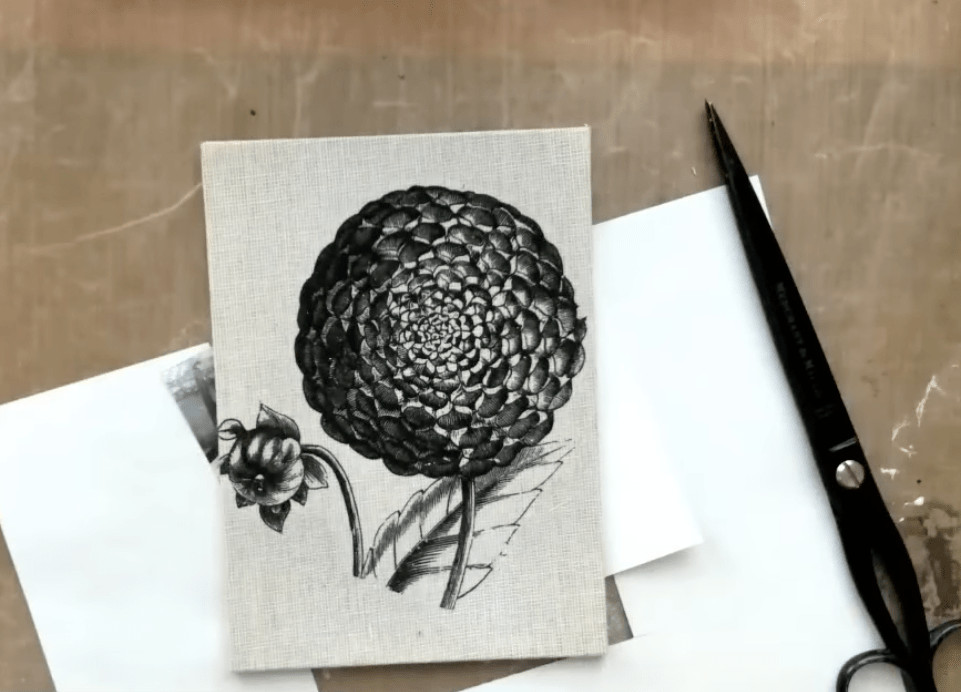 Transferring a vintage castle image onto fabric
FAQ: Frequently Asked Questions About Printing Photos on Fabric
1. Can you print photos on any type of fabric?
Not all fabrics are suitable for printing photos. Natural fabrics like cotton, linen, and silk, as well as synthetic fabrics like polyester and rayon, can be used. The best fabric for printing photos depends on the printing method and desired outcome. For example, sublimation printing works best on polyester fabrics, while DTG printing is well-suited for cotton.
2. What is the best method for printing photos on fabric at home?
The best method for printing photos on fabric at home is heat transfer. This method is relatively simple and affordable, and it can be used with a standard inkjet printer and a heat press or iron. However, the results may not be as durable or vibrant as with professional printing methods like DTG or sublimation.
3. How do I prepare my photo for printing on fabric?
To prepare your photo for printing on fabric, you should first ensure that it is high-resolution (300 DPI or higher) to avoid pixelation or blurring. Next, mirror the image horizontally if you are using heat transfer paper, as the image will be reversed when transferred to the fabric. Finally, adjust the colors and brightness of the photo to ensure that it looks its best when printed on fabric.
4. What type of ink should I use for printing photos on fabric?
The type of ink you should use for printing photos on fabric depends on the printing method you are using. For inkjet printing, use pigment-based inks, as they are more durable and water-resistant than dye-based inks. For sublimation printing, use sublimation inks, which are specially designed to bond with polyester fabrics. For screen printing, use fabric inks that are designed to adhere to the specific type of fabric you are using.
5. How do I make my printed photos on fabric last longer?
To make your printed photos on fabric last longer, you should follow these tips:
- Use high-quality inks and fabrics.
- Prepare the fabric properly before printing.
- Set the ink properly after printing.
- Wash the fabric inside out in cold water.
- Use a mild detergent.
- Avoid using bleach or fabric softeners.
- Tumble dry on low heat or hang to dry.
- Avoid exposing the fabric to direct sunlight for extended periods.
6. Can I wash fabric with printed photos?
Yes, you can wash fabric with printed photos, but you should take certain precautions to protect the print. Wash the fabric inside out in cold water using a mild detergent. Avoid using bleach or fabric softeners, and tumble dry on low heat or hang to dry.
7. What is DTG printing, and how does it differ from other methods?
DTG (Direct-to-Garment) printing is a digital printing method that sprays ink directly onto the fabric. It differs from other methods like heat transfer or sublimation in that it does not require a transfer paper or heat to bond the ink to the fabric. DTG printing is best suited for complex designs and small production runs, as it offers excellent detail and color accuracy.
8. Is sublimation printing only for polyester fabrics?
Yes, sublimation printing is primarily for polyester fabrics or polyester-blend fabrics. The sublimation process requires the ink to bond with the polymer fibers in the fabric, which is why it works best with polyester.
9. How much does it cost to print photos on fabric?
The cost of printing photos on fabric varies depending on the printing method, fabric type, and print size. Heat transfer is the most affordable method, while DTG and sublimation printing are more expensive.
10. Where can I find inspiration for fabric photo printing projects?
You can find inspiration for fabric photo printing projects on websites like Pinterest, Etsy, and Instagram, as well as in crafting and sewing magazines. You can also join online communities and forums dedicated to fabric printing and crafting.
We hope this comprehensive guide has provided you with valuable insights and practical tips for printing photos on fabric. Remember to visit dfphoto.net for more inspiration, tutorials, and resources to fuel your passion for photography and creative arts. Let your imagination soar and bring your cherished memories to life on fabric!
Ready to turn your photos into stunning fabric art? Visit dfphoto.net today for more tips, tutorials, and inspiration. Join our vibrant community of photographers and artists and start creating!
Address: 1600 St Michael’s Dr, Santa Fe, NM 87505, United States
Phone: +1 (505) 471-6001
Website: dfphoto.net
Let’s connect and create something amazing together!