Instagram, boasting over a billion active users, stands as a powerhouse social media platform for individuals and businesses alike. Whether you’re aiming to showcase your photography, promote your brand, or simply connect with a global audience, mastering Instagram posting is crucial. If you’re new to this visually-driven platform, or seeking to refine your posting process, this comprehensive guide will walk you through each step of sharing your photos on Instagram effectively.
Posting consistently and strategically on Instagram is key to building an engaged audience and achieving your goals, be it increased brand visibility or personal connection. Let’s dive into the essential steps to get your photos onto Instagram and start making an impact.
Posting Photos to Instagram: Your Quick Guide
Here’s a straightforward breakdown of the process to post your photos on Instagram:
- Tap the Plus (+) Icon: Initiate a new post.
- Select Media: Choose photos or videos from your device’s library, or capture new content directly within the app.
- Create a Carousel (Optional): Post multiple images in a single post.
- Crop and Adjust: Ensure your image dimensions are perfect for Instagram’s format.
- Apply Filters: Enhance your photo’s look with Instagram’s built-in filters.
- Edit for Perfection: Fine-tune brightness, contrast, and other aspects of your image.
- Craft a Compelling Caption: Write engaging text to accompany your photo.
- Hashtag Strategically: Increase discoverability with relevant hashtags.
- Tag People: Credit or connect with individuals featured in your photo.
- Add Location: Let your audience know where the photo was taken.
- Use Emojis: Add visual flair and emotion to your captions.
- Share Across Platforms: Extend your reach by sharing your post on other social media.
- Edit After Posting: Correct any errors or make updates even after your post is live.
Let’s explore each step in detail to ensure you can post on Instagram like a pro.
.png)
Step 1: Tap the + Icon to Start a New Post
Look for the plus sign [+], typically located at the top center or top right of your Instagram screen, depending on your device and app version. Tapping this icon is your first step to sharing content. This action will take you to the media selection screen, where you can choose what you want to post.
Step 2: Choose Photos or Videos from Your Library or Capture New Content
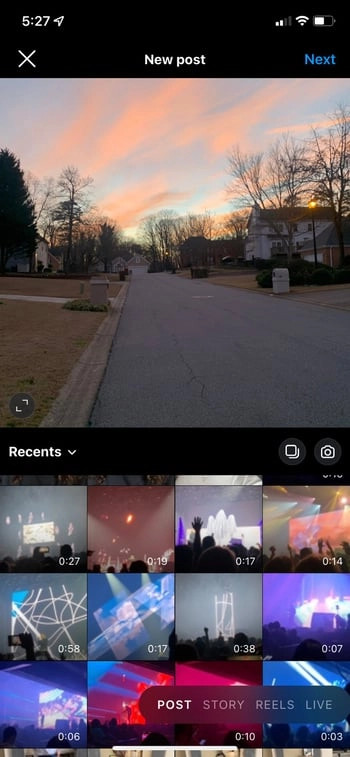 Selecting photos and videos from phone library to post on Instagram
Once you’ve tapped the plus icon, Instagram will access your device’s photo and video library. You can scroll through your recent media and select the photo or video you wish to post. Alternatively, you’ll see options to take a new photo or video directly within the Instagram app at the bottom of the screen. This is useful if you want to capture something in real-time and post it immediately.
After selecting your media, tap ‘Next’ in the top right corner to proceed to editing and finalizing your post.
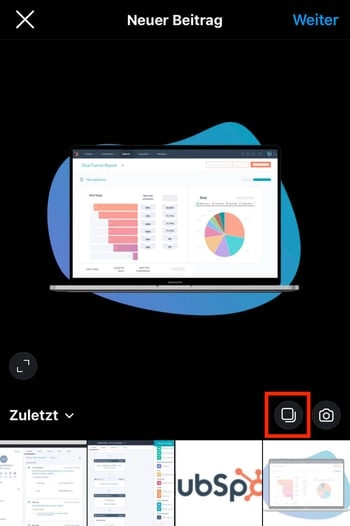
Step 3: Utilize the Carousel Feature to Post Multiple Images
 Selecting multiple photos for an Instagram carousel post
Instagram’s carousel feature is perfect for storytelling or showcasing a series of related images or videos. To use this, when you are in your library selecting your media, look for the ‘Select multiple’ icon – it usually appears as stacked squares just above your photo grid. Tap this icon before choosing your first image.
Once activated, you can select up to 10 photos and videos to include in your carousel. The order you tap them in will determine their sequence in the post. Viewers can then swipe left on your post to see all the images in the carousel. This is a great way to share different perspectives of a photoshoot, a step-by-step process, or a collection of related products.
Step 4: Crop and Adjust Your Image for the Ideal Fit
While Instagram started with a square format, it now supports various aspect ratios including landscape and portrait. When you select an image, Instagram will initially display it in a square crop. However, you can easily adjust this to fit the original aspect ratio of your photo.
To show the full image (whether horizontal or vertical), use a pinch-to-zoom gesture on the image preview screen. Pinching inwards will zoom out and fit the entire image within the frame, adding white bars if necessary to maintain the aspect ratio within Instagram’s bounds. Keep in mind Instagram has specific dimension requirements for optimal display, so minor cropping might still be needed to ensure your photo looks its best.
Step 5: Enhance Your Photos with Filters
Instagram filters are a quick and easy way to alter the mood and style of your photos. After cropping, you’ll arrive at the filter screen. Swipe left across the filter options displayed at the bottom to preview them on your image in real-time.
To adjust the intensity of a filter, tap the filter icon again after applying it. A slider will appear, allowing you to decrease or increase the filter strength. Experiment with different filters to find one that complements your photo and aligns with your desired aesthetic. For a more subtle look, consider reducing the filter intensity.
Step 6: Fine-Tune Your Image with Editing Tools
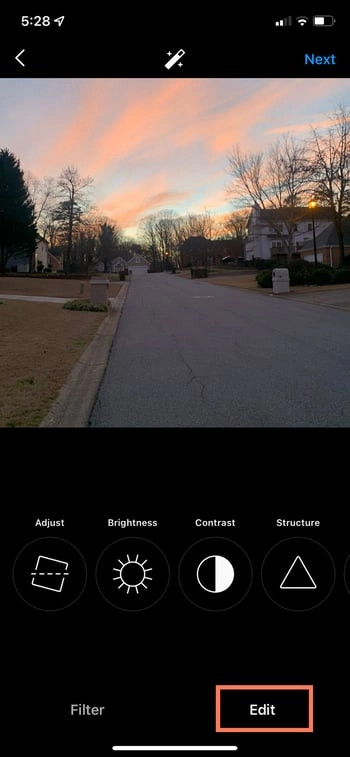 Editing options within Instagram for adjusting photos
Beyond filters, Instagram offers a suite of editing tools to further refine your images. Tap ‘Edit’ at the bottom right of the filter screen to access these options. Here’s a breakdown of the available adjustments:
- Adjust: Straighten or rotate your image subtly.
- Brightness: Lighten or darken the overall image.
- Contrast: Enhance or reduce the difference between light and dark areas.
- Structure: Add definition and detail to your photo, making textures pop.
- Warmth: Adjust the color temperature, making the image cooler or warmer.
- Saturation: Control the intensity of colors, from vibrant to muted or monochrome.
- Color: Overlay color tints for creative effects.
- Fade: Give your photo a vintage look by softening blacks.
- Highlights: Adjust the brightness of the lightest parts of the image.
- Shadows: Adjust the brightness of the darkest parts of the image.
- Vignette: Darken the edges of the photo, drawing focus to the center.
- Tilt Shift: Create a blurred effect, mimicking shallow depth of field.
- Sharpen: Enhance the clarity and detail of the image.
Experiment with these tools to achieve the perfect look for your photo. Subtle adjustments can often make a significant difference in the final impact of your post.
.png)
Step 7: Write an Engaging Caption to Tell Your Story
A well-crafted caption adds context and personality to your photo, encouraging interaction and deeper engagement. Tap ‘Next’ after editing to reach the caption screen. Here, you can type your message. Consider your caption as an opportunity to connect with your audience, share insights, ask questions, or simply add humor.
Keep your target audience in mind when writing. A personal account might use a casual, conversational tone, while a business account might adopt a more professional or informative style. Make sure your caption complements your visual and enhances the overall message of your post.
Step 8: Boost Discoverability with Strategic Hashtags
Hashtags categorize your content and make it discoverable to users interested in those topics, even if they don’t follow you. Integrate relevant hashtags into your caption. Research popular and niche hashtags related to your photo’s content.
Mix broad hashtags (like #photography) with more specific ones (like #landscapephotography or #sunsetphotography) to reach a wider yet targeted audience. Instagram allows up to 30 hashtags per post, but aim for quality over quantity. A good strategy is to use a combination of 5-10 highly relevant hashtags.
 Adding hashtags to an Instagram post for increased visibility
Step 9: Tag Relevant People in Your Photo
If your photo includes other Instagram users, tagging them is a great way to give credit and increase visibility among their followers. Before sharing, tap ‘Tag People’ on the post screen. Then, tap on the image to place a tag and search for the person’s username. You can tag multiple people in a photo.
Alternatively, you can also tag people directly within your caption by using the ‘@’ symbol followed by their username. Tagging people notifies them of the post and can encourage them and their followers to engage with your content.
Step 10: Add Your Location to Connect Locally
Adding a location to your Instagram post can help you connect with local audiences and increase discoverability within a specific geographic area. On the post screen, tap ‘Add Location’ and search for the place where the photo was taken.
When you add a location, your post can appear in location-based searches and on location pages, making it easier for people in that area to find your content. This is particularly useful for businesses trying to attract local customers or for sharing travel and event photos.
Step 11: Enhance Your Caption with Emojis
Emojis can add emotion, visual interest, and playfulness to your captions. Use relevant emojis to emphasize points, replace words, or simply add a bit of personality. Instagram provides a built-in emoji keyboard accessible from your device’s keyboard.
Use emojis sparingly and thoughtfully to complement your message, not to overwhelm it. Choose emojis that are relevant to your photo and caption content to enhance understanding and engagement. For example, using a 🌴 emoji with a beach photo or a ☕ emoji when posting about coffee.
Step 12: Share Your Post to Other Social Media Platforms for Wider Reach
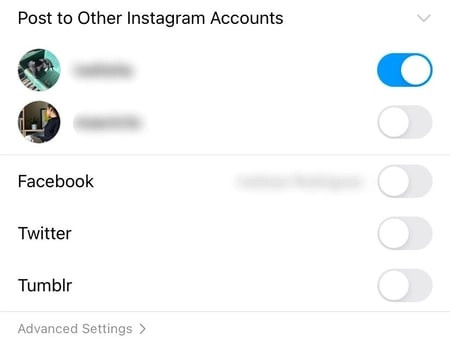 Sharing Instagram post to connected social media accounts
To maximize your content’s reach, Instagram allows you to simultaneously share your posts to other connected social media platforms like Facebook, Twitter, and more. On the ‘New Post’ screen, below the ‘Add Location’ option, you’ll see toggles for connected accounts. Simply toggle these to the right to automatically share your Instagram post on those platforms when you hit ‘Share’.
This cross-posting feature saves time and ensures your content is seen by your audience across different networks, although it’s wise to tailor your content slightly for each platform for best engagement.
Step 13: Edit Your Post After Publishing for Corrections or Updates
 Accessing post settings to edit an Instagram post
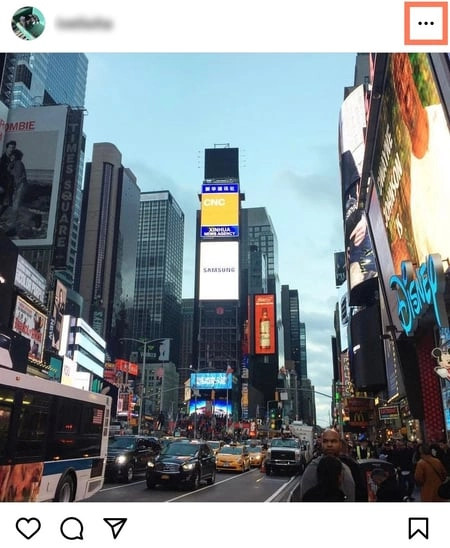
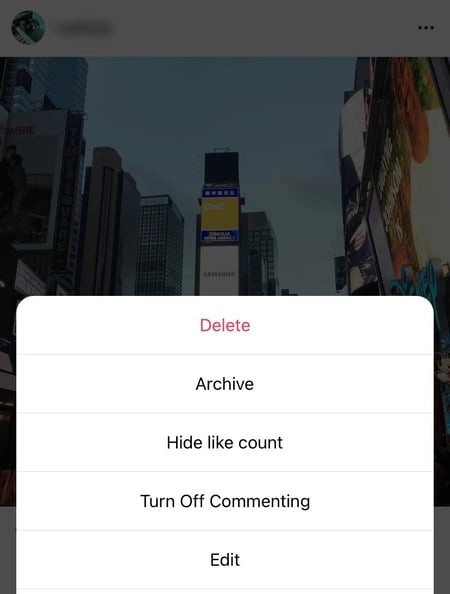
Even after your post is live, you can still make edits. To edit an Instagram post, go to your post and tap the three dots ‘…’ located at the top right corner. From the menu that appears, select ‘Edit’.
 Selecting edit option from Instagram post settings menu
This allows you to change your caption, add or remove tags, adjust location, and more. Use the edit feature to correct typos, add more information, or update your caption as needed. Editing is a useful feature for maintaining accuracy and keeping your content relevant.
Pro Tip: Consider the best times to post on Instagram to maximize visibility and engagement. Researching when your audience is most active can significantly improve the performance of your posts.
Grow Your Instagram Presence Through Effective Posting
Mastering how to post photos on Instagram is just the beginning. Consistent, strategic posting is essential for growing your audience, building engagement, and achieving your Instagram goals. Whether you’re sharing personal moments or marketing your business, these steps provide a solid foundation for Instagram success.
Editor’s note: This post was originally published in November 2019 and has been updated for comprehensiveness and accuracy.