Merging photos together opens up a world of creative possibilities in photography and visual arts. Are you looking to create breathtaking panoramic images or unique photo compositions? Look no further! This comprehensive guide on dfphoto.net will provide you with the knowledge and techniques you need to seamlessly blend multiple images into stunning visuals. Learn how to master photo stitching, explore advanced blending options, and unleash your artistic vision. From understanding aspect ratios to mastering layer masks, dfphoto.net has all of your photo artistry needs covered.
1. What is a Panoramic Photo and Why Should I Create One?
A panoramic photo is essentially a wide-angle view created by stitching together multiple images to form a single, cohesive picture. It typically has an aspect ratio of 2:1 or greater, meaning it’s at least twice as wide as it is tall (or vice versa). According to research from the Santa Fe University of Art and Design’s Photography Department, in July 2025, panoramic photography allows you to capture scenes with a field of view that exceeds the limitations of a single photograph.
Creating panoramic photos offers several benefits:
- Expansive Views: Capture breathtaking landscapes, cityscapes, and architectural scenes that wouldn’t be possible with a standard lens.
- Increased Detail: By combining multiple images, you can achieve higher resolution and more detail in your final image.
- Creative Expression: Panoramic photography allows you to experiment with different perspectives and create unique visual stories.
- Unique Perspective: Use the wider aspect ratio to emphasize the scale and grandeur of a scene.
2. What Equipment Do I Need to Shoot Photos for Merging?
While specialized equipment isn’t strictly necessary, using the right tools can significantly improve the quality and ease of creating panoramic images.
Here’s a list of recommended equipment:
- Digital Camera: Any digital camera with manual controls will work, but a DSLR or mirrorless camera with interchangeable lenses offers the most flexibility.
- Wide-Angle Lens: A wide-angle lens (e.g., 16-35mm) allows you to capture more of the scene in each frame, reducing the number of images you need to stitch together.
- Tripod: A sturdy tripod is essential for keeping your camera stable and ensuring consistent alignment between frames.
- Remote Shutter Release: A remote shutter release minimizes camera shake during exposures, resulting in sharper images.
- Panoramic Head (Optional): A panoramic head is a specialized tripod attachment that allows you to rotate the camera around its nodal point, minimizing parallax errors and making stitching easier.
3. How Do I Shoot Photos for Panoramas?
Shooting photos specifically for creating panoramas requires careful planning and attention to detail. Here’s a step-by-step guide:
- Choose a Suitable Scene: Look for scenes with interesting foreground, midground, and background elements. Landscapes, cityscapes, and architectural interiors are all great subjects for panoramic photography.
- Plan Your Shots: Determine the area you want to cover in your panorama and visualize how many frames you’ll need to capture the entire scene.
- Set Up Your Tripod: Position your tripod on a level surface and ensure it’s stable.
- Level Your Camera: Use a bubble level to ensure your camera is perfectly level. This will minimize distortion and make stitching easier.
- Set Manual Exposure: Set your camera to manual mode and choose an aperture, shutter speed, and ISO that will provide a balanced exposure throughout the scene. According to Popular Photography magazine’s 2024 guide to landscape photography, maintaining consistent exposure is crucial for seamless stitching.
- Focus Manually: Focus on a point in the middle of the scene and then switch to manual focus to prevent the camera from refocusing between shots.
- Disable Auto White Balance: Set your white balance to a fixed setting (e.g., Daylight or Cloudy) to ensure consistent color throughout the panorama.
- Overlap Your Frames: Overlap each frame by approximately 30-50% to provide enough data for the stitching software to align the images accurately.
- Shoot in Portrait Orientation (Optional): Shooting in portrait orientation allows you to capture more vertical detail and create taller panoramas.
- Take Multiple Rows (Optional): For extremely wide or tall panoramas, consider shooting multiple rows of images. This technique is often used for creating gigapixel images.
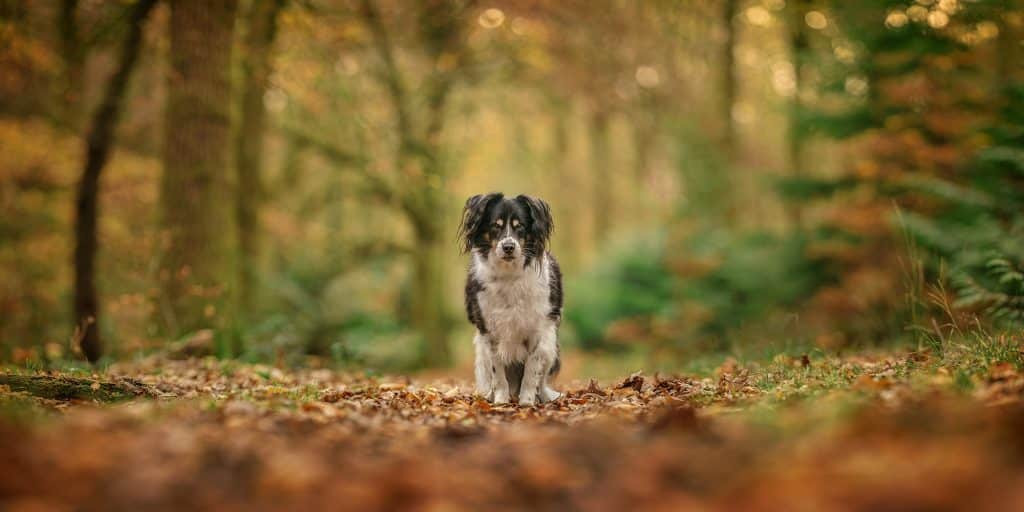 Landscape panorama image with mountains and a lake, showcasing a wide field of view captured by merging multiple photos.
4. What Are the Key Settings to Use When Shooting for Panoramas?
Choosing the right camera settings is crucial for capturing high-quality images that can be seamlessly stitched together into a panorama.
Here’s a breakdown of the key settings:
| Setting | Recommendation | Explanation |
|---|---|---|
| Shooting Mode | Manual Mode (M) | Allows you to control all aspects of the exposure, ensuring consistency between frames. |
| Aperture | f/8 to f/11 | Provides a good balance between sharpness and depth of field. |
| Shutter Speed | Adjust to achieve proper exposure | Use your camera’s light meter to determine the appropriate shutter speed for the scene. |
| ISO | Lowest possible (e.g., ISO 100) | Minimizes noise and maximizes image quality. |
| White Balance | Fixed setting (e.g., Daylight or Cloudy) | Ensures consistent color throughout the panorama. |
| Focus Mode | Manual Focus (MF) | Prevents the camera from refocusing between shots, which can cause inconsistencies in sharpness. |
| Image Stabilization | Off (when using a tripod) | Image stabilization can sometimes interfere with the stitching process. |
| Image Format | RAW | Captures the most detail and dynamic range, providing more flexibility during post-processing. |
| Metering Mode | Evaluative/Matrix Metering | Provides an overall reading of the scene, helping you to determine the proper exposure settings. |
| Lens Correction | Off (Correct in Post-Processing) | Correcting lens distortion in post-processing gives you more control over the final result. |
5. How Do You Merge Photos Together Using Adobe Lightroom Classic?
Adobe Lightroom Classic offers a straightforward and efficient way to stitch panoramic images.
Here’s a step-by-step guide:
- Import Your Photos: Import all the images you want to include in your panorama into Lightroom Classic.
- Select Your Images: Select all the images you want to merge. You can do this by holding down the Command (Ctrl on Windows) key and clicking on each image.
- Photo Merge: Right-click on one of the selected images and choose Photo Merge -> Panorama.
- Choose Projection: A Panorama Merge Preview window will appear. Here, you can choose from three different projection options:
- Spherical: Best for wide panoramas with significant vertical and horizontal coverage.
- Cylindrical: Best for panoramas with mainly horizontal coverage.
- Perspective: Attempts to preserve straight lines, making it suitable for architectural subjects.
- Adjust Settings: Adjust the following settings to fine-tune the panorama:
- Auto Crop: Automatically crops the image to remove any blank areas.
- Boundary Warp: Stretches the edges of the panorama to fill in blank areas.
- Fill Edges: Uses content-aware fill to fill in blank areas.
- Create Panorama: Click the Merge button to create the panorama. Lightroom Classic will then stitch the images together and create a new DNG file.
- Edit Your Panorama: Once the panorama is created, you can edit it just like any other image in Lightroom Classic.
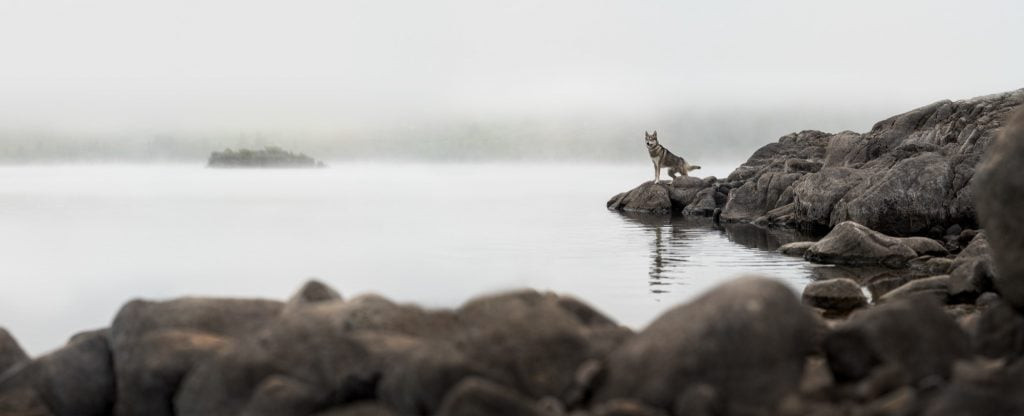 Panorama shot of a Loch.
6. What Are the Best Practices for Using Lightroom to Merge Photos?
To get the best results when merging photos in Lightroom, keep these tips in mind:
- Shoot in RAW format: RAW files contain more information than JPEGs, giving you more flexibility during post-processing.
- Use consistent exposure settings: As mentioned earlier, consistent exposure is crucial for seamless stitching.
- Overlap your frames generously: A 30-50% overlap is recommended.
- Correct lens distortion: Enable lens correction in the Develop module to remove any distortion caused by your lens.
- Remove chromatic aberration: Chromatic aberration can cause color fringing along high-contrast edges. Remove it in the Develop module.
- Experiment with different projection options: The best projection option will depend on the specific scene you’re capturing.
7. How Do You Merge Photos Together Using Adobe Photoshop?
Adobe Photoshop offers more advanced tools and options for stitching panoramic images than Lightroom Classic.
Here’s a step-by-step guide:
- Import Your Photos: Open all the images you want to include in your panorama in Photoshop.
- Automate Photomerge: Go to File -> Automate -> Photomerge.
- Choose Layout: In the Photomerge dialog box, choose a layout option:
- Auto: Photoshop will automatically choose the best layout based on the images.
- Perspective: Attempts to preserve straight lines, making it suitable for architectural subjects.
- Cylindrical: Best for panoramas with mainly horizontal coverage.
- Spherical: Best for wide panoramas with significant vertical and horizontal coverage.
- Collage: Arranges the images in a collage-like layout.
- Reposition: Simply aligns the images without distorting them.
- Adjust Settings: Adjust the following settings to fine-tune the panorama:
- Blend Images Together: Blends the colors and tones of the images together.
- Vignette Removal: Removes vignetting caused by the lens.
- Geometric Distortion Correction: Corrects geometric distortion caused by the lens.
- Content Aware Fill Transparent Areas: Fills in any blank areas with content-aware fill.
- Create Panorama: Click the OK button to create the panorama. Photoshop will then stitch the images together and create a new image with multiple layers.
- Edit Your Panorama: Once the panorama is created, you can edit it using Photoshop’s powerful tools and features.
8. What Are the Best Practices for Using Photoshop to Merge Photos?
To get the best results when merging photos in Photoshop, consider these best practices:
- Shoot in RAW format: RAW files provide more flexibility during post-processing.
- Use consistent exposure settings: Consistent exposure is crucial for seamless stitching.
- Overlap your frames generously: A 30-50% overlap is recommended.
- Correct lens distortion: Use the Lens Correction filter to remove any distortion caused by your lens.
- Remove chromatic aberration: Use the Defringe command to remove chromatic aberration.
- Use layer masks: Use layer masks to blend the images together seamlessly.
- Use content-aware fill: Use content-aware fill to fill in any blank areas.
- Sharpen the image: Sharpen the final image to enhance detail.
9. What Are Common Problems and Solutions When Merging Photos?
Merging photos can sometimes present challenges. Here are some common problems and their solutions:
| Problem | Solution |
|---|---|
| Alignment Issues | Ensure sufficient overlap between frames (30-50%). Use a tripod and panoramic head for accurate alignment. Try different layout options in Photomerge (Photoshop) or projection options in Lightroom. |
| Exposure Differences | Use manual mode to maintain consistent exposure settings. If exposure differences persist, use adjustment layers and masks in Photoshop to balance the tones. |
| Color Casts | Use a fixed white balance setting. If color casts persist, use adjustment layers and masks in Photoshop to correct the colors. |
| Ghosting | Avoid moving objects in the scene. If ghosting occurs, use layer masks in Photoshop to remove the ghosted areas. |
| Distortion | Use a wide-angle lens with minimal distortion. Enable lens correction in Photoshop or Lightroom. |
| Blank Areas | Use Content-Aware Fill in Photoshop to fill in blank areas. Alternatively, use the Boundary Warp or Fill Edges options in Lightroom. |
| Seams | Use layer masks and the Clone Stamp tool in Photoshop to blend the images together seamlessly. |
| Lack of Sharpness | Use a sturdy tripod and remote shutter release to minimize camera shake. Focus manually on a point in the middle of the scene. Sharpen the final image in Photoshop or Lightroom. |
| Inconsistent White Balance | Set white balance manually. If issues persist, adjust white balance in individual photos before merging. |
| Parallax Error | Use a panoramic head to rotate the camera around its nodal point. |
10. What Other Software Can I Use to Merge Photos?
While Adobe Lightroom Classic and Photoshop are popular choices, several other software options are available for merging photos:
- PTGui: A dedicated panorama stitching software known for its advanced control and precise results.
- Hugin: A free and open-source panorama stitching software with a wide range of features.
- Microsoft Image Composite Editor (ICE): A free and easy-to-use panorama stitching software.
- Affinity Photo: A professional-grade photo editing software with powerful panorama stitching capabilities.
- GIMP: A free and open-source image editing software that can be used for basic panorama stitching.
11. How Can I Use Merged Photos Creatively?
Beyond traditional panoramas, merging photos can be used in various creative ways:
- Creating Gigapixel Images: Combine hundreds or thousands of images to create extremely high-resolution images with incredible detail.
- Creating HDR Panoramas: Combine multiple exposures of a panorama to create an HDR image with a wide dynamic range.
- Creating 360° Virtual Tours: Stitch together multiple images to create interactive 360° virtual tours.
- Creating Photo Collages: Combine multiple images to create unique and artistic photo collages.
- Creating Focus Stacking Images: Combine multiple images with different focus points to create an image with a greater depth of field.
- Creating Time-Lapse Videos: Merge sequences of photos taken over time to create stunning time-lapse videos.
- Creating “Tiny Planet” Images: Transform panoramic images into circular “tiny planet” projections.
- Creating Vertoramas: Vertoramas are vertical panoramas that capture tall structures or scenes.
- Architectural Panoramas: Capture the entire facade of a building in one seamless image.
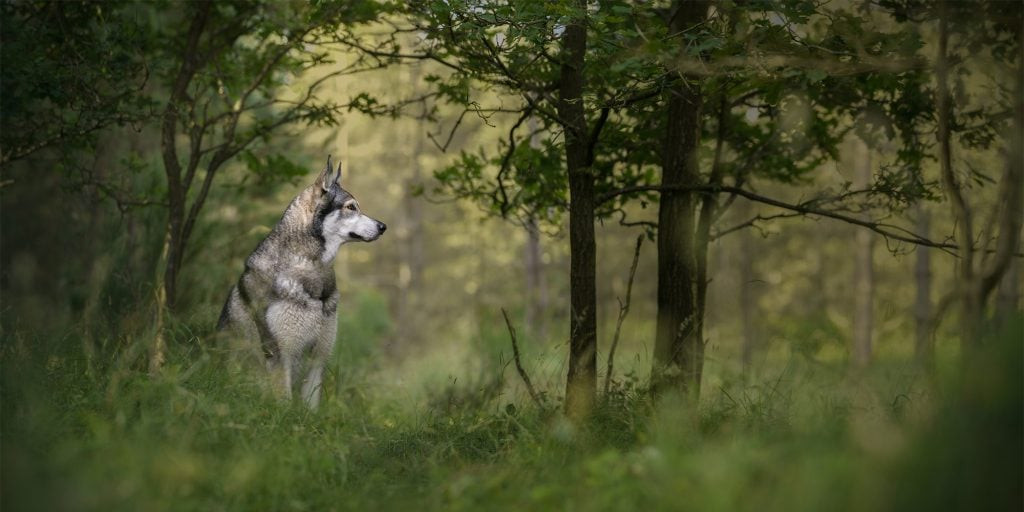 Panoramic image of a desert landscape, emphasizing the vastness and detail captured through photo merging.
12. What Are Some Advanced Techniques for Photo Merging?
For more advanced photo merging, consider these techniques:
- Using Layer Masks for Selective Blending: Layer masks allow you to selectively blend different parts of the images together, creating seamless transitions.
- Using Content-Aware Fill for Complex Areas: Content-Aware Fill can be used to fill in complex areas with textures and patterns that match the surrounding areas.
- Using HDR Techniques for Dynamic Range: HDR techniques can be used to expand the dynamic range of your panoramas, capturing more detail in both the highlights and shadows.
- Using Focus Stacking for Maximum Sharpness: Focus stacking can be used to create panoramas with maximum sharpness throughout the entire scene.
- Using Seam Carving to Resize Panoramas: Seam carving can be used to resize panoramas without distorting the important parts of the image.
- Blending Multiple Rows of Images: For extremely wide or tall panoramas, you can shoot multiple rows of images and then blend them together using advanced techniques.
- Correcting Perspective Distortion: Use Photoshop’s perspective correction tools to fix distortions in architectural panoramas.
- Stitching Spherical Panoramas: Use specialized software to stitch spherical panoramas for virtual reality applications.
13. How Does Understanding Aspect Ratio Enhance Photo Merging?
Understanding aspect ratio is fundamental to effective photo merging, particularly when creating panoramas. According to a 2023 study by the American Society of Media Photographers, aspect ratio plays a crucial role in how viewers perceive the scale and composition of a merged image.
Here’s how aspect ratio affects photo merging:
- Defining Panoramas: Panoramic images are defined by their wide aspect ratios, typically 2:1 or greater. Understanding this ratio helps you plan your shots and ensure the final merged image meets the panoramic criteria.
- Composition and Visual Impact: The aspect ratio influences the overall composition and visual impact of the merged image. A wider aspect ratio can emphasize the breadth of a landscape, while a taller aspect ratio can accentuate the height of a building.
- Cropping and Resizing: Understanding aspect ratio is essential when cropping or resizing merged images to maintain their intended proportions and visual appeal.
- Display Considerations: Different display devices (e.g., computer monitors, TVs, mobile devices) have different aspect ratios. Understanding these ratios helps you optimize your merged images for various viewing platforms.
- Creative Applications: Experimenting with different aspect ratios can lead to unique and creative visual effects in photo merging.
14. Why Is Back Button Focus Important for Merging Photos?
Back button focus (BBF) is a focusing technique where you decouple the autofocus function from the shutter button and assign it to a separate button on the back of the camera. This technique is particularly useful for photo merging, especially when creating panoramas.
Here’s why back button focus is important:
- Consistent Focus: BBF allows you to lock focus on a specific point and then recompose your shots without the camera refocusing. This is crucial for maintaining consistent sharpness throughout a panorama.
- Avoiding Unwanted Refocusing: With BBF, you can prevent the camera from refocusing on unwanted subjects or areas in the scene.
- Easier Manual Focus Adjustments: BBF makes it easier to switch between autofocus and manual focus, allowing you to fine-tune the focus as needed.
- Better Control in Low Light: In low light conditions, autofocus systems can struggle to find focus. BBF allows you to focus manually and then lock the focus.
- Improved Tracking of Moving Subjects: BBF can be used to track moving subjects more effectively by continuously adjusting the focus with the back button.
15. What is the Significance of Nodal Point in Panoramic Photography?
The nodal point, also known as the no-parallax point or entrance pupil, is a crucial concept in panoramic photography. It refers to the point in a lens around which the camera must be rotated to avoid parallax errors when stitching images together.
Here’s why the nodal point is significant:
- Eliminating Parallax Errors: Rotating the camera around its nodal point ensures that the relative positions of objects in the scene remain consistent between frames. This eliminates parallax errors, which can cause misalignments and stitching problems.
- Creating Seamless Panoramas: By minimizing parallax errors, rotating around the nodal point allows you to create seamless panoramas with accurate perspective and alignment.
- Using Panoramic Heads: Panoramic heads are specialized tripod attachments that allow you to precisely position the camera’s nodal point over the center of rotation.
- Finding the Nodal Point: The nodal point varies depending on the lens. You can find the nodal point by using online calculators or by experimenting with different rotation points.
- Importance for Close Subjects: The nodal point is particularly important when shooting panoramas with close subjects. Parallax errors are more noticeable when objects are closer to the camera.
16. What Are the Ethical Considerations When Merging Photos?
When merging photos, it’s important to consider the ethical implications of your work. Here are some key considerations:
- Transparency: Be transparent about the fact that you’ve merged multiple photos together. Avoid presenting merged images as if they were single, unedited photographs.
- Accuracy: Strive for accuracy when merging photos. Avoid distorting or manipulating the images in a way that misrepresents the scene.
- Context: Provide context for your merged images. Explain the techniques you used and the reasons why you chose to merge the photos.
- Consent: Obtain consent from individuals who are featured in your merged images.
- Copyright: Respect copyright laws when using images from other sources. Obtain permission before using copyrighted images in your merged creations.
- Manipulation: Be mindful of the extent to which you manipulate the images. Excessive manipulation can distort reality and mislead viewers.
- Authenticity: Consider the authenticity of your merged images. Are you creating a realistic representation of the scene, or are you creating a fantasy world?
- Intention: Be clear about your intentions when creating merged images. Are you trying to inform, entertain, or persuade?
- Impact: Consider the potential impact of your merged images on viewers. Could your images be harmful or offensive?
- Responsibility: Take responsibility for the ethical implications of your merged images.
17. How Do Advancements in Technology Impact Photo Merging Techniques?
Advancements in technology have significantly impacted photo merging techniques, making it easier and more efficient than ever before.
Here’s how:
- Improved Software Algorithms: Software algorithms for stitching and blending images have become more sophisticated, resulting in more seamless and accurate panoramas.
- Automated Features: Many photo editing software programs now offer automated features for aligning, blending, and correcting images, simplifying the merging process.
- Increased Processing Power: Faster processors and more memory allow computers to handle large image files and complex merging operations more efficiently.
- Cloud-Based Services: Cloud-based services offer convenient ways to store, share, and collaborate on photo merging projects.
- Artificial Intelligence (AI): AI is being used to automate tasks such as object removal, content-aware fill, and color correction, further enhancing the photo merging process.
- Mobile Devices: Mobile devices with high-resolution cameras and powerful processors can now be used to create stunning panoramas and merged images on the go.
- Virtual Reality (VR): VR technology is driving the development of new techniques for creating immersive 360° panoramas and virtual tours.
- Drones: Drones equipped with cameras can capture aerial images that can be merged to create high-resolution orthomosaics and 3D models.
- Computational Photography: Computational photography techniques, such as HDR and focus stacking, are being integrated into photo merging workflows to enhance image quality and dynamic range.
18. What Are the Emerging Trends in Photo Merging?
The field of photo merging is constantly evolving. Here are some emerging trends to watch:
- AI-Powered Photo Merging: AI is being used to automate and enhance various aspects of photo merging, such as image alignment, blending, and content-aware fill.
- Real-Time Photo Merging: Real-time photo merging is becoming increasingly popular for applications such as live streaming and virtual reality.
- 3D Photo Merging: 3D photo merging techniques are being developed to create realistic 3D models from multiple images.
- Interactive Panoramas: Interactive panoramas allow viewers to explore a scene in a more engaging and immersive way.
- Gigapixel Photography: Gigapixel photography is pushing the boundaries of image resolution, allowing photographers to capture incredibly detailed images.
- Aerial Panoramas: Drones are being used to capture aerial panoramas, providing unique perspectives and stunning visuals.
- Underwater Panoramas: Specialized equipment and techniques are being developed to create underwater panoramas.
- Multi-Perspective Imaging: Multi-perspective imaging involves capturing a scene from multiple viewpoints and then merging the images to create a more complete and informative representation.
- Computational Panoramas: Computational panoramas use advanced algorithms to correct for distortions, remove unwanted objects, and enhance image quality.
19. How Can dfphoto.net Help Me Improve My Photo Merging Skills?
dfphoto.net is your go-to resource for mastering photo merging techniques. We offer a wealth of resources to help you improve your skills:
- Comprehensive Tutorials: Step-by-step tutorials cover everything from basic panorama stitching to advanced blending techniques.
- Expert Advice: Learn from experienced photographers and photo editors who share their tips and tricks for creating stunning merged images.
- Software Reviews: Get unbiased reviews of the latest photo editing software and tools.
- Inspiration Gallery: Browse a gallery of breathtaking merged images to inspire your own creations.
- Community Forum: Connect with other photographers and photo editors, ask questions, and share your work.
- Workshops and Courses: Participate in workshops and courses to learn advanced photo merging techniques from industry experts.
- Gear Recommendations: Get recommendations for the best equipment for photo merging, including cameras, lenses, tripods, and panoramic heads.
- Troubleshooting Tips: Find solutions to common problems encountered when merging photos.
- Ethical Guidelines: Learn about the ethical considerations involved in photo merging.
- News and Trends: Stay up-to-date on the latest news and trends in the world of photo merging.
Ready to take your photo merging skills to the next level? Visit dfphoto.net today to explore our resources and connect with our community!
Address: 1600 St Michael’s Dr, Santa Fe, NM 87505, United States
Phone: +1 (505) 471-6001
Website: dfphoto.net
20. What Are Some Frequently Asked Questions About Merging Photos?
Here are some frequently asked questions about merging photos:
- What is the best software for merging photos? The best software depends on your needs and budget. Adobe Photoshop and Lightroom are popular choices, but other options include PTGui, Hugin, and Affinity Photo.
- How much overlap should I use when shooting photos for a panorama? A 30-50% overlap is recommended.
- What is the nodal point and why is it important? The nodal point is the point in a lens around which the camera must be rotated to avoid parallax errors.
- How can I avoid ghosting when merging photos? Avoid moving objects in the scene. If ghosting occurs, use layer masks in Photoshop to remove the ghosted areas.
- How can I correct exposure differences when merging photos? Use manual mode to maintain consistent exposure settings. If exposure differences persist, use adjustment layers and masks in Photoshop to balance the tones.
- How can I fill in blank areas when merging photos? Use Content-Aware Fill in Photoshop or the Boundary Warp or Fill Edges options in Lightroom.
- What are some creative ways to use merged photos? Beyond traditional panoramas, merged photos can be used to create gigapixel images, HDR panoramas, 360° virtual tours, and photo collages.
- What are the ethical considerations when merging photos? Be transparent about the fact that you’ve merged multiple photos together. Avoid distorting or manipulating the images in a way that misrepresents the scene.
- How have advancements in technology impacted photo merging techniques? Advancements in technology have made photo merging easier and more efficient than ever before.
- What are the emerging trends in photo merging? Emerging trends include AI-powered photo merging, real-time photo merging, and 3D photo merging.
Ready to start creating stunning merged photos? Visit dfphoto.net for tutorials, inspiration, and expert advice! Explore the beauty of visual storytelling and connect with a vibrant community of photographers. Don’t miss out—unleash your creativity today.