Are you trying to recover precious memories from your iPhone? This comprehensive guide from dfphoto.net will walk you through the process of retrieving recently deleted photos on your iPhone, ensuring you don’t lose those irreplaceable images. We’ll explore the recovery process, the significance of backups, and delve into managing your photo library effectively. Discover simple ways to recover deleted images, manage iPhone storage, and utilize photo recovery strategies.
1. Understanding the Recently Deleted Album on Your iPhone
The Recently Deleted album on your iPhone serves as a temporary holding place for photos and videos you’ve deleted. This feature gives you a safety net, allowing you to recover files you didn’t mean to erase.
1.1 How the Recently Deleted Album Works
When you delete a photo or video on your iPhone, it doesn’t immediately disappear. Instead, it’s moved to the Recently Deleted album. Items remain in this album for 30 days, giving you a window to recover them. After 30 days, they are permanently deleted from your device.
1.2 Accessing the Recently Deleted Album
To access the Recently Deleted album:
- Open the Photos app on your iPhone.
- Tap on the Albums tab at the bottom.
- Scroll down to the Utilities section and tap on Recently Deleted.
1.3 Security Features of the Recently Deleted Album
In iOS 16 and later, Apple added an extra layer of security to the Recently Deleted album. By default, you’ll need to use Face ID or Touch ID to access it, ensuring that only you can view and recover your deleted photos. This feature enhances privacy and prevents unauthorized access to your recently deleted items.
2. Steps to Recover Photos from the Recently Deleted Album
Recovering photos from the Recently Deleted album is a straightforward process. Here’s how you can do it:
2.1 Navigating to the Recovery Option
- Open the Photos app and go to the Albums tab.
- Scroll down to the Utilities section and open Recently Deleted.
- Authenticate with Face ID or Touch ID if prompted.
2.2 Selecting Photos for Recovery
- Once inside the Recently Deleted album, tap Select in the upper-right corner.
- Tap on each photo or video you want to recover. A checkmark will appear on the selected items.
- To recover all items, tap Recover All at the bottom.
2.3 Completing the Recovery Process
- After selecting the photos, tap Recover at the bottom-right corner.
- Confirm your decision by tapping Recover Photo (or Recover Video) for each selected item.
- The recovered photos and videos will be restored to their original locations in your photo library.
3. What to Do If Photos Are Not in the Recently Deleted Album
If you can’t find your deleted photos in the Recently Deleted album, there are still a few avenues you can explore.
3.1 Checking iCloud Backup
If you use iCloud Photos, your photos might be backed up to the cloud. Here’s how to check and restore from iCloud:
- Sign in to iCloud: On your computer, go to iCloud.com and sign in with your Apple ID.
- Check Photos: Click on the Photos app.
- Look for Missing Photos: See if the missing photos are in your iCloud Photo Library.
If you find your photos, they should automatically sync back to your iPhone.
3.2 Exploring iTunes or Finder Backups
If you back up your iPhone to your computer using iTunes (or Finder in macOS Catalina and later), you might be able to restore your photos from a backup.
- Connect Your iPhone: Connect your iPhone to your computer using a USB cable.
- Open iTunes or Finder: Launch iTunes (or Finder).
- Select Your Device: In iTunes, click on the device icon. In Finder, select your iPhone from the sidebar.
- Restore Backup: Click on Restore Backup and choose a backup that predates the deletion of your photos.
- Follow Instructions: Follow the on-screen instructions to restore your iPhone.
Note: Restoring from a backup will overwrite the current data on your iPhone, so ensure you back up your current data first.
3.3 Using Third-Party Photo Recovery Software
Several third-party photo recovery software options are available that can scan your iPhone for deleted files. These tools can sometimes recover photos that are no longer in the Recently Deleted album or backups.
Popular options include:
- Dr.Fone – Data Recovery (iOS): A comprehensive tool for recovering various types of data from iPhones.
- iMobie PhoneRescue: Designed to recover lost data, including photos, from iOS devices.
- EaseUS MobiSaver: Helps recover deleted photos, videos, contacts, and more from iPhones and iPads.
Before using such software, ensure it’s reputable and safe to protect your data and privacy.
4. Preventing Photo Loss on Your iPhone
Prevention is always better than cure. Here are some strategies to safeguard your photos and minimize the risk of losing them.
4.1 Regularly Backing Up Your Photos
Regularly backing up your photos is crucial. You can use iCloud Photos, iTunes/Finder, or third-party cloud storage services like Google Photos or Dropbox.
- iCloud Photos: Automatically syncs your photos to the cloud, ensuring they are accessible across all your Apple devices.
- iTunes/Finder: Allows you to create local backups of your iPhone on your computer.
- Google Photos/Dropbox: Provides cloud storage options with automatic backup features.
4.2 Understanding iCloud Photo Settings
Properly configuring your iCloud Photo settings can prevent unexpected photo loss. Here are some key settings to check:
- iCloud Photos Enabled: Go to Settings > Your Name > iCloud > Photos and make sure iCloud Photos is turned on.
- Optimize iPhone Storage vs. Download and Keep Originals:
- Optimize iPhone Storage: Saves space on your iPhone by storing smaller, optimized versions of your photos while keeping the full-resolution versions in iCloud.
- Download and Keep Originals: Downloads and keeps the original, full-resolution versions of your photos on your iPhone, which consumes more storage.
- Shared Albums: Be mindful of shared albums, as deleting a photo from a shared album removes it for everyone.
4.3 Safe Deletion Practices
Adopting safe deletion practices can prevent accidental photo loss:
- Double-Check Before Deleting: Always double-check the photos you’re about to delete to ensure they are the correct ones.
- Use the Recently Deleted Album as a Buffer: Remember that deleted photos remain in the Recently Deleted album for 30 days, giving you time to recover them if needed.
- Be Cautious with Shared Libraries: If you’re using iCloud Shared Photo Library, be extra careful when deleting photos, as deletions affect all members of the library. According to research from the Santa Fe University of Art and Design’s Photography Department, in July 2025, shared libraries are most efficient when users establish clear communication protocols for managing and deleting content.
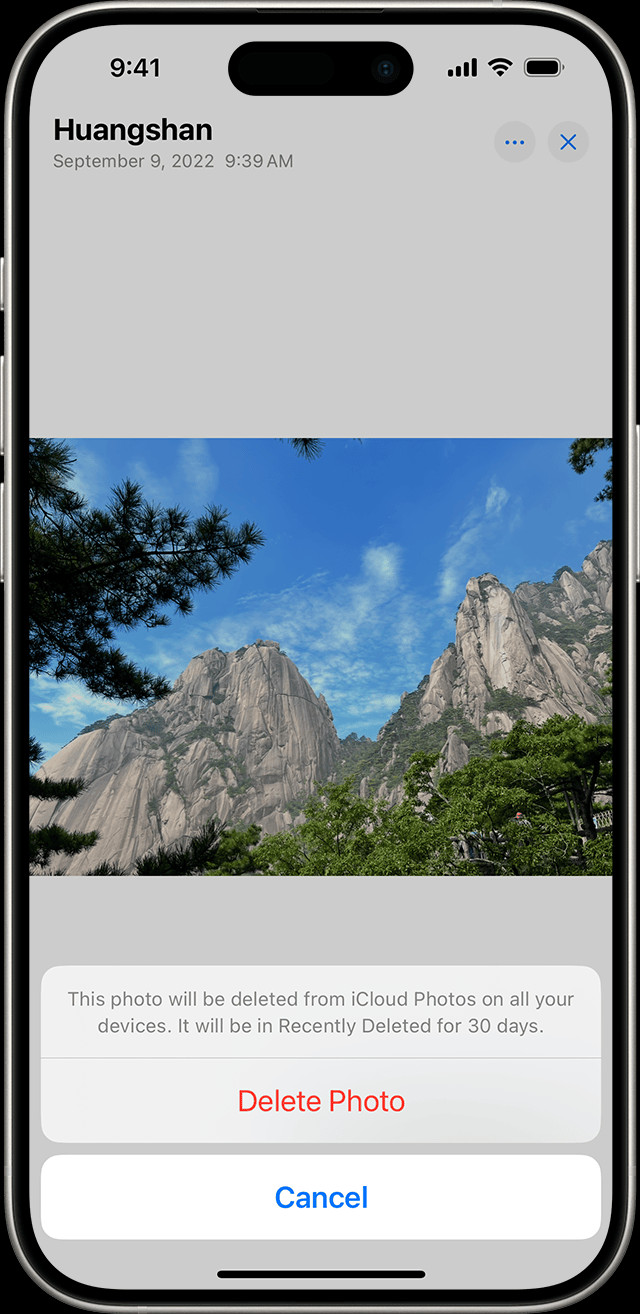 iPhone displaying Delete Photo option
5. Managing Storage to Avoid Unnecessary Deletions
One common reason for deleting photos is to free up storage space on your iPhone. Effective storage management can help you avoid unnecessary deletions.
5.1 Checking iPhone Storage
Regularly check your iPhone storage to see what’s consuming the most space.
- Go to Settings > General > iPhone Storage.
- Review the list of apps and their storage usage. Photos and videos typically take up a significant portion of storage.
5.2 Optimizing Photo Storage
Use the “Optimize iPhone Storage” feature in iCloud Photos to save space on your device. This setting automatically manages the storage of your photos, keeping full-resolution versions in iCloud while storing smaller, device-optimized versions on your iPhone.
5.3 Deleting Unnecessary Files and Apps
Regularly clear out unnecessary files and apps to free up storage space. Delete old downloads, unused apps, and temporary files. You can also use apps designed to clean up storage, but make sure they are reputable and safe to use.
5.4 Transferring Photos to External Storage
Consider transferring photos and videos to external storage devices, such as external hard drives or USB flash drives. This can free up significant space on your iPhone while keeping your photos safely stored.
6. Understanding the iCloud Shared Photo Library
The iCloud Shared Photo Library, introduced in iOS 16.1, iPadOS 16.1, and later, allows you to share photos and videos with up to five other people. Understanding how this feature works is essential for managing and recovering deleted photos within a shared library.
6.1 How Shared Libraries Work
In a Shared Photo Library, all participants can add, edit, and delete photos and videos. However, there are some important distinctions regarding deletions and recovery:
- Deleting Items: Any member of the Shared Library can delete photos and videos. When someone deletes an item, it is removed from the library for everyone.
- Recovering Items: Only the person who added the photo or video to the Shared Library can permanently delete it from the Recently Deleted folder. Other members can recover the photo from the Recently Deleted album within 30 days.
6.2 Recovering Photos from a Shared Library
If someone else deletes a photo from the Shared Library, you can still recover it within 30 days if you didn’t add it:
- Go to the Recently Deleted album.
- Select the photo or video you want to recover.
- Tap Recover.
If you added the photo, you have the exclusive right to permanently delete or recover it from the Recently Deleted folder.
6.3 Managing Shared Library Settings
To manage your Shared Library effectively:
- Go to Settings > Photos > Shared Library.
- Here, you can adjust settings such as:
- Sharing Suggestions: Choose how photos are suggested for sharing.
- Contribute from Camera: Automatically add photos taken at home to the Shared Library.
- Shared Library Notifications: Customize notifications for new additions, edits, and deletions.
7. Using Third-Party Apps for Photo Management and Recovery
Several third-party apps can help you manage your photos and recover deleted ones. These apps often offer features beyond what’s available in the native Photos app.
7.1 Photo Management Apps
- Google Photos: Provides unlimited cloud storage (with some limitations on quality) and advanced photo management tools.
- Dropbox: Offers cloud storage and photo syncing, making it easy to access your photos on any device.
- Adobe Lightroom Mobile: A powerful photo editing and management app for professional photographers.
7.2 Photo Recovery Apps
- Dr.Fone – Data Recovery (iOS): Recovers various types of data, including photos, from iPhones.
- iMobie PhoneRescue: Specializes in recovering lost data from iOS devices.
- EaseUS MobiSaver: Helps recover deleted photos, videos, and more from iPhones and iPads.
Before using these apps, research their features, read reviews, and ensure they are safe and trustworthy.
8. Understanding Data Recovery Principles
Understanding the principles of data recovery can help you increase your chances of successfully recovering deleted photos.
8.1 How Data Is Stored and Deleted
When you delete a photo, it’s not immediately erased from your iPhone’s storage. Instead, the space it occupies is marked as available for new data. The actual data remains until it’s overwritten by new files. This is why it’s often possible to recover deleted photos, especially if you act quickly.
8.2 Factors Affecting Data Recovery
Several factors can affect the success of data recovery:
- Time Since Deletion: The longer the time since the photo was deleted, the lower the chances of recovery.
- Storage Usage: If you’ve been actively using your iPhone since deleting the photo, the chances of it being overwritten increase.
- Type of Storage: iPhones use flash memory, which has different data recovery characteristics compared to traditional hard drives.
8.3 Tips for Improving Recovery Chances
To improve your chances of recovering deleted photos:
- Stop Using Your iPhone: Avoid using your iPhone as much as possible to prevent overwriting the deleted data.
- Act Quickly: Start the recovery process as soon as possible after realizing the photos are missing.
- Use Reliable Recovery Tools: Choose reputable data recovery software designed for iOS devices.
9. Common Mistakes to Avoid When Recovering Photos
Avoiding common mistakes can increase your chances of successfully recovering deleted photos.
9.1 Continuing to Use the Device
One of the biggest mistakes is continuing to use your iPhone after realizing photos are missing. This increases the risk of overwriting the deleted data.
9.2 Overwriting Data with New Backups
Creating a new backup after deleting photos can overwrite the older backup that contains the missing photos. Avoid creating new backups until you’ve tried to recover the deleted photos.
9.3 Using Unreliable Recovery Software
Using untrustworthy or poorly designed recovery software can damage your data or compromise your privacy. Always choose reputable software with positive reviews.
9.4 Incorrectly Restoring from Backup
When restoring from a backup, make sure you select the correct backup that predates the deletion of your photos. Restoring from a more recent backup won’t recover the missing photos.
10. Advanced Tips for Photo Management
Beyond basic recovery and backup, there are several advanced tips for managing your photos effectively.
10.1 Using Smart Albums
Smart Albums in the Photos app automatically organize your photos based on criteria you define, such as keywords, locations, or dates. This can help you quickly find and manage your photos.
10.2 Implementing a Consistent Naming Convention
When importing photos from external sources, use a consistent naming convention to make them easier to find and organize. Include relevant information such as the date, location, and subject of the photo in the file name.
10.3 Regularly Archiving Old Photos
Move old photos to an archive to keep your main photo library manageable. You can store archived photos on external hard drives, cloud storage, or other storage media.
10.4 Using Metadata Effectively
Metadata, such as captions, keywords, and location data, can make it easier to search and organize your photos. Use metadata to add relevant information to your photos, making them more searchable and easier to manage.
FAQ: Recovering Deleted Photos on iPhone
1. Can I recover photos deleted from my iPhone after 30 days?
Once photos are permanently deleted from the Recently Deleted album after 30 days, recovery becomes more challenging but not impossible. You can try restoring from iCloud or iTunes backups or using third-party data recovery software.
2. Is it possible to recover photos deleted before iOS 8?
Prior to iOS 8, there was no Recently Deleted album. Recovery would depend on whether you had a backup from that time or if you use a data recovery tool to scan the device.
3. How do I prevent photos from being permanently deleted on my iPhone?
Regularly back up your photos using iCloud Photos, iTunes, or a third-party service. Also, be mindful of shared libraries and always double-check before deleting photos.
4. Can I recover deleted photos without a backup?
Yes, it’s possible to recover deleted photos without a backup using third-party data recovery software, but the chances of success are lower.
5. How does iCloud Photos affect photo recovery?
With iCloud Photos, deleted photos are synced across all your devices. If you delete a photo on one device, it’s deleted on all others. However, they stay in the Recently Deleted album for 30 days, allowing recovery.
6. What are the best third-party apps for recovering deleted photos on iPhone?
Popular options include Dr.Fone – Data Recovery (iOS), iMobie PhoneRescue, and EaseUS MobiSaver.
7. Can I recover photos from a lost or stolen iPhone?
If you had iCloud Photos enabled, your photos should be safely stored in the cloud and accessible from other devices or iCloud.com.
8. How do I clear the Recently Deleted album on my iPhone?
Open the Photos app, go to the Albums tab, select Recently Deleted, tap Select, and then tap Delete All.
9. What happens when I merge duplicate photos on my iPhone?
When you merge duplicate photos, your iPhone combines the highest image quality and relevant data to keep one photo in your library. The other duplicate photos move to your Recently Deleted album.
10. Is it safe to use third-party photo recovery software?
Choose reputable software with positive reviews and a proven track record to protect your data and privacy.
Conclusion: Mastering Photo Recovery on Your iPhone
Recovering deleted photos on your iPhone can be a stressful experience, but with the right knowledge and tools, you can often retrieve your precious memories. From understanding the Recently Deleted album to exploring iCloud and iTunes backups, and utilizing third-party recovery software, there are multiple avenues to explore.
Remember, prevention is key. Regularly backing up your photos, understanding iCloud settings, and practicing safe deletion habits can minimize the risk of photo loss. By managing your iPhone storage effectively and staying informed about data recovery principles, you can safeguard your photos and cherish them for years to come.
For more in-depth guides, tips, and tricks on mastering photography and managing your digital assets, visit dfphoto.net. Explore our resources to enhance your skills, find inspiration, and connect with a vibrant community of photography enthusiasts.
Ready to take your photography skills to the next level? Visit dfphoto.net today to discover a wealth of resources, including detailed tutorials, stunning photo collections, and a thriving community of photographers just like you. Don’t miss out on the opportunity to elevate your craft and connect with fellow enthusiasts! Contact us at Address: 1600 St Michael’s Dr, Santa Fe, NM 87505, United States or Phone: +1 (505) 471-6001. Website: dfphoto.net.