Sending photos via email seems simple, but it can be tricky. How do you ensure your recipient receives the image as an attachment, not embedded in the email body? This guide provides clear, step-by-step instructions for emailing photos successfully, regardless of your email provider or operating system.
Method 1: Compressing the Photo
Compressing your photo into a ZIP file is a universally compatible method for emailing photos. This ensures the image arrives as a downloadable attachment, preventing potential display issues on the recipient’s end. Here’s how:
- Locate the Photo: Find the photo you want to email on your computer.
- Right-Click (or Control-Click on Mac): Select the photo and right-click (or Control-click on a Mac).
- Compress: Choose the option to compress or create a ZIP file. The wording might vary slightly depending on your operating system (e.g., “Compress,” “Send to,” “Compressed (zipped) folder”).
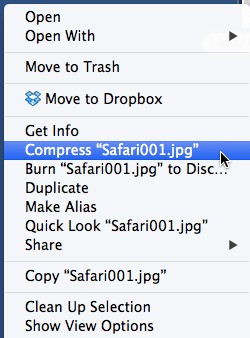 Compressing a photo on a desktop
- Attach to Email: Open your email client, create a new message, and attach the newly created ZIP file.
Method 2: Sending a Photo in a Folder
Placing your photo inside a folder before attaching it to your email can also help ensure it’s sent as a separate file. Some email clients automatically compress folders into ZIP files when attached.
- Create a Folder: Create a new folder on your desktop.
- Move Photo to Folder: Move the photo you want to send into the new folder.
- Attach Folder to Email: Open your email, create a new message, and attach the entire folder.
Method 3: “Show as Icon” (For Apple Mail Users)
While not a guarantee for all recipients, using the “Show as Icon” option in Apple Mail can improve the chances of sending a photo as an attachment.
- Attach Photo: Attach the photo to your email as usual.
- Right-Click (or Control-Click): Right-click (or Control-click) on the photo within the email draft.
- Select “Show as Icon”: This option changes the photo’s appearance in the email to a file icon, potentially signaling to the receiving email client to treat it as an attachment.
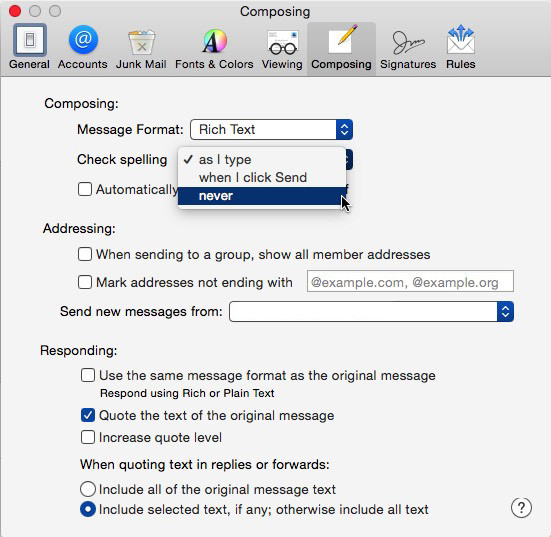 Changing email attachment settings
Ensuring Your Photo Arrives Successfully
Despite these methods, the recipient’s email client settings can still influence how the photo is displayed. For critical situations, consider these additional tips:
- Communicate with Recipient: Inform the recipient that you’re sending a photo attachment and ask them to check for a downloaded file if they don’t see it directly in the email.
- Use Small File Sizes: Large image files can sometimes cause problems. Resize or compress your photos before sending them to reduce their file size.
- Consider Cloud Storage: For very large files or when dealing with consistent attachment issues, consider uploading the photo to a cloud storage service (like Google Drive or Dropbox) and sharing a download link with the recipient.
These methods offer practical solutions for emailing photos effectively. By following these steps, you can ensure your images arrive as intended, making sharing photos a hassle-free experience.