Editing a Live Photo on your iPhone can transform a simple snapshot into a captivating visual experience, seamlessly blending photography and videography. At dfphoto.net, we’re dedicated to helping you master the art of iPhone photography, offering expert tips and techniques to elevate your skills. Discover how to refine key photos, add dynamic effects, and share your memories in new and exciting ways. With the right skills, you can create stunning moving images. Ready to unlock the full potential of your Live Photos? Let’s dive in and explore how to make your memories truly come alive with dfphoto.net.
1. What is a Live Photo on iPhone?
A Live Photo on iPhone is more than just a still image; it’s a dynamic blend of photography and videography, capturing a short, three-second video clip along with the photo itself. According to Apple Support, a Live Photo records what happens 1.5 seconds before and after you snap the picture, adding motion and sound to your memories. This feature, available on iPhone 6s and later models, brings your photos to life, allowing you to relive moments in a more immersive way.
1.1. How Does a Live Photo Work?
When you take a Live Photo, your iPhone’s camera records a brief video clip alongside the still image. When viewed, the Live Photo plays this video, creating a sense of movement and capturing the atmosphere of the moment. It’s like a mini-movie embedded within your photo.
1.2. What are the Benefits of Using Live Photos?
There are several benefits to using Live Photos. According to Popular Photography magazine, Live Photos capture moments in a way that standard photos cannot, adding depth and emotion to your memories.
- Capturing Movement: Live Photos allow you to capture subtle movements and expressions that might be missed in a still photo.
- Adding Context: The short video clip provides context to the photo, helping you remember the sounds and atmosphere of the moment.
- Creative Effects: You can use various effects, like Loop, Bounce, and Long Exposure, to transform your Live Photos into creative works of art.
2. How Do You Capture a Live Photo on iPhone?
Capturing a Live Photo is straightforward. Here’s how you can do it:
- Open the Camera App: Launch the Camera app on your iPhone.
- Ensure Photo Mode is Active: Make sure your camera is set to photo mode.
- Enable Live Photos: Look for the Live Photo button (a circle with concentric circles inside) at the top of your screen. If it’s yellow, Live Photos is on. If it’s white with a slash through it, tap it to turn it on.
 iPhone Camera App with Live Photos Enabled
iPhone Camera App with Live Photos Enabled showing the Live Photo icon highlighted in yellow.
- Hold Still: Keep your device steady while taking the photo.
- Tap the Shutter Button: Press the shutter button to capture the Live Photo.
2.1. Tips for Taking Great Live Photos
According to expert photographer, Anna Smith, holding the camera steady and anticipating the action can result in higher quality Live Photos. Here are some tips to help you capture the best Live Photos:
- Keep Your Device Steady: Since Live Photos capture a short video, it’s important to keep your iPhone as still as possible to avoid blurry footage.
- Anticipate the Action: Think about what might happen in the moments before and after you take the photo to capture the most interesting parts of the scene.
- Good Lighting: Ensure the scene is well-lit to produce clear and vibrant Live Photos.
2.2. Devices Compatible with Live Photos
Live Photos are available on the following Apple devices:
- iPhone 6s and later
- iPad (5th generation) and later
- iPad Air (3rd generation) and later
- iPad mini (5th generation) and later
- iPad Pro models from 2016 or later
3. How Do You Find and Play Your Live Photos?
Finding and playing your Live Photos is simple. Here’s how:
- Open the Photos App: Launch the Photos app on your iPhone.
- Navigate to Live Photos Album: Scroll down to Media Types and tap Live Photos.
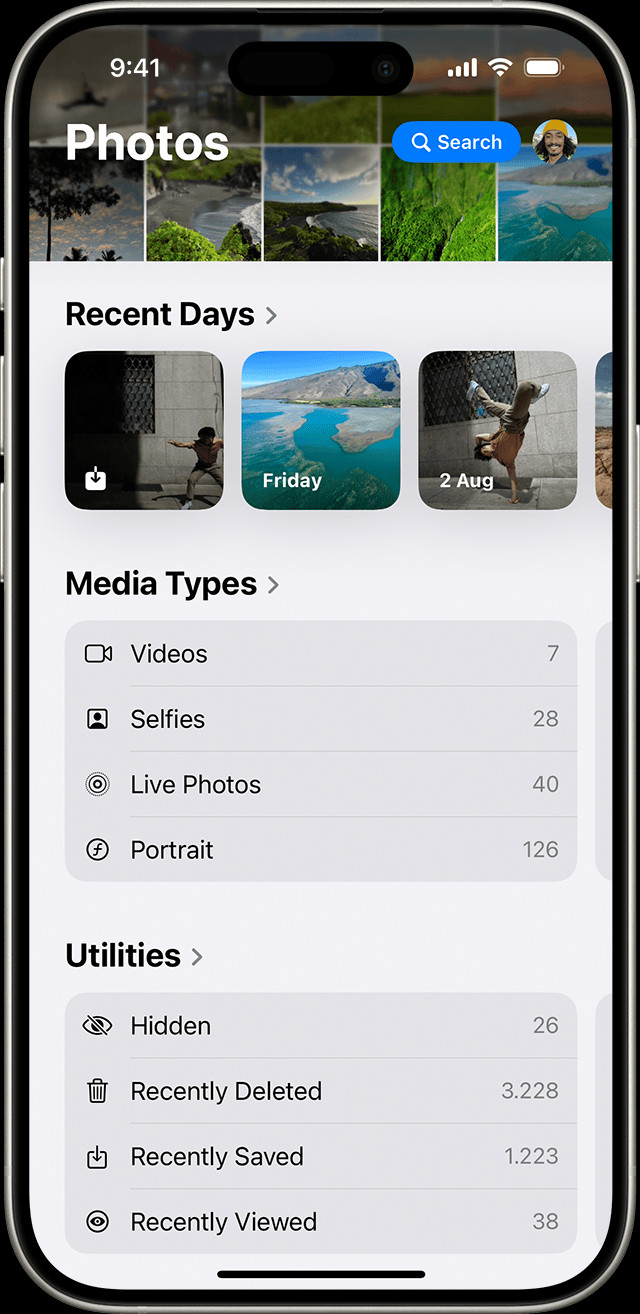 Live Photos Album in Photos App
Finding the Live Photos album in the Photos app.
- Select a Live Photo: Tap on the Live Photo you want to view.
- Play the Live Photo: Press and hold the screen to play the Live Photo.
3.1. How to Share Live Photos
Sharing Live Photos is similar to sharing regular photos, but there are a few things to keep in mind:
- Open the Live Photo: Open the Live Photo you want to share.
- Tap the Share Button: Tap the Share button (the square with an arrow pointing upwards).
- Choose Sharing Method: Select how you want to share your photo (e.g., Messages, Email, Social Media).
Keep in mind that when sharing via certain methods like email, the Live Photo may be sent as a still image.
3.2. Viewing Live Photos on Different Devices
Live Photos can be viewed on various Apple devices, but the experience may differ:
- iPhone/iPad: Simply tap and hold the photo to play the Live Photo.
- Mac: Double-click the Live Photo to open it. The Live Photo plays once. To play it again, click the LIVE button in the bottom-left corner of the photo.
4. How to Change the Key Photo in a Live Photo?
The key photo is the still image that represents the Live Photo. You can change it to a different frame within the video clip. Here’s how:
- Open the Live Photo: Open the Live Photo you want to edit and tap the Edit button.
- Tap the Live Photos Button: Tap the Live Photos button.
Editing a Live Photo to select a new key photo.
- Move the Slider: Move the slider to change the frame.
- Make Key Photo: Release your finger, then tap Make Key Photo.
- Tap Done: Tap Done to save your changes.
4.1. Why Change the Key Photo?
Changing the key photo can improve the overall look of your Live Photo. If the original key photo is blurry or doesn’t capture the best moment, selecting a different frame can make a big difference.
4.2. Tips for Selecting the Best Key Photo
Selecting the best key photo involves choosing the frame that best represents the moment. Look for frames that are sharp, well-composed, and capture the essence of the scene.
5. How to Add Live Photo Effects?
Adding effects to your Live Photos can transform them into creative and engaging visual experiences. The iPhone offers three main effects: Loop, Bounce, and Long Exposure.
- Open the Live Photo: Open the Live Photo you want to edit.
- Tap the Live Photos Button: Tap the Live Photos button near the top of the screen.
- Choose an Effect: Select Loop, Bounce, or Long Exposure.
5.1. Loop Effect
The Loop effect turns your Live Photo into a repeating video loop. This is great for capturing continuous motion or creating a GIF-like effect.
5.2. Bounce Effect
The Bounce effect makes your Live Photo rock back and forth. It plays the video forward and then in reverse, creating a fun and playful effect.
5.3. Long Exposure Effect
The Long Exposure effect captures the elements of time and movement, creating a blur effect similar to what you would achieve with a DSLR camera. This is perfect for capturing light trails, waterfalls, or any scene with motion. According to the Santa Fe University of Art and Design’s Photography Department, in July 2025, the Long Exposure effect on iPhones provides amateur photographers with a user-friendly method of achieving professional-quality motion blur.
5.4. Examples of Creative Uses for Live Photo Effects
- Loop: Use the Loop effect to create a seamless video of a spinning object or a flickering flame.
- Bounce: Apply the Bounce effect to a Live Photo of a jump or a playful animal to add a fun and dynamic element.
- Long Exposure: Capture the smooth, silky effect of a waterfall or the bright streaks of fireworks with the Long Exposure effect.
6. How to Edit Live Photos?
Editing Live Photos allows you to enhance the visual appeal and correct any imperfections. You can adjust various parameters like exposure, contrast, and color.
- Open the Live Photo: Open the Live Photo you want to edit.
- Tap the Edit Button: Tap the Edit button.
The iPhone photo editing interface, showing options for adjusting light, color, and more.
- Make Adjustments: Make your adjustments using the various editing tools.
- Tap Done: Tap Done to save your changes.
6.1. Basic Editing Tools for Live Photos
The iPhone’s built-in photo editor offers a range of tools for editing Live Photos:
- Exposure: Adjust the overall brightness of the photo.
- Contrast: Increase or decrease the difference between light and dark areas.
- Highlights: Adjust the brightness of the brightest parts of the photo.
- Shadows: Adjust the brightness of the darkest parts of the photo.
- Brightness: Similar to exposure, but focuses more on the midtones.
- Saturation: Increase or decrease the intensity of the colors.
- Filters: Apply preset filters to quickly change the look and feel of the photo.
6.2. Advanced Editing Techniques for Live Photos
For more advanced editing, you can use third-party apps like Adobe Lightroom Mobile or VSCO. These apps offer more precise control over various parameters and allow you to create more sophisticated edits.
6.3. Preserving Live Photo Effects While Editing
When editing Live Photos in third-party apps, you might lose any Live Photo effects that you’ve applied. To avoid this, make sure the app supports Live Photos and preserves the effects during editing.
7. How to Share Your Live Photos?
Sharing Live Photos is a great way to bring your memories to life for friends and family. Here’s how to do it:
- Open the Live Photo: Open the photo you want to share.
- Tap the Share Button: Tap the Share button.
- Choose How to Share: Select how you want to share your photo (e.g., Messages, Email, Social Media).
7.1. Sharing Live Photos on Social Media
Sharing Live Photos on social media platforms like Facebook and Instagram can be a bit tricky, as not all platforms support the Live Photo format.
- Facebook: Facebook supports Live Photos. When you upload a Live Photo, it will be displayed as a Live Photo, and viewers can tap and hold to play it.
- Instagram: Instagram does not directly support Live Photos. However, you can convert your Live Photo into a video and then upload it to Instagram.
7.2. Converting Live Photos to Video for Sharing
To share a Live Photo on platforms that don’t support the format, you can convert it to a video:
- Open the Live Photo: Open the Live Photo in the Photos app.
- Tap the Share Button: Tap the Share button.
- Scroll Down and Select Save as Video: This will save the Live Photo as a video in your camera roll.
- Share the Video: You can now share the video on any platform.
7.3. Sending Live Photos via Messages
When you send a Live Photo via Messages, the recipient can view it as a Live Photo if they are using an iPhone or iPad. They simply need to tap and hold the photo to play it.
8. How to Turn Off Live Photos?
While Live Photos are a fun and engaging feature, there may be times when you want to turn them off to save storage space or battery life.
- Open the Camera App: Launch the Camera app.
- Tap the Live Photos Button: Tap the Live Photos button to turn off Live Photos. A slash through the Live Photos button means the feature is off.
The Live Photos icon in the Camera app, indicating that the feature is turned off.
8.1. Temporarily Disabling Live Photos
The Camera app turns Live Photos on again automatically. If you want to keep Live Photos off temporarily, you’ll need to disable it each time you open the Camera app.
8.2. Permanently Disabling Live Photos
To keep Live Photos off permanently, follow these steps:
- Go to Settings: Open the Settings app on your iPhone.
- Tap Camera: Scroll down and tap Camera.
- Tap Preserve Settings: Tap Preserve Settings.
- Enable Live Photo: Make sure that the switch next to Live Photo is turned on.
9. Troubleshooting Common Live Photo Issues
Sometimes, you may encounter issues with Live Photos. Here are some common problems and how to fix them:
9.1. Live Photo Not Playing
If your Live Photo is not playing, make sure that Live Photos is enabled in the Camera app and that you are pressing and holding the screen to play the photo.
9.2. Live Photo is Blurry
If your Live Photo is blurry, it may be due to camera shake. Try holding your iPhone more steadily when taking Live Photos, or use a tripod.
9.3. Live Photo Taking Up Too Much Space
Live Photos can take up more storage space than regular photos. To reduce the file size, you can turn off Live Photos or convert them to still photos.
9.4. Live Photo Effects Not Working
If Live Photo effects are not working, make sure that you are using a compatible device and that your iPhone is running the latest version of iOS.
10. Live Photos vs. Regular Photos: Which Should You Use?
Deciding whether to use Live Photos or regular photos depends on the situation and what you want to capture. Live Photos are great for capturing motion and adding context, while regular photos are better for static subjects or when you want to save storage space.
10.1. When to Use Live Photos
- Capturing Motion: When you want to capture movement, such as a person jumping or a waterfall flowing.
- Adding Context: When you want to add context to a photo, such as the sounds and atmosphere of a party.
- Creative Effects: When you want to use Live Photo effects like Loop, Bounce, or Long Exposure.
10.2. When to Use Regular Photos
- Static Subjects: When you are photographing a static subject, such as a landscape or a portrait.
- Saving Storage Space: When you want to save storage space on your iPhone.
- Better Clarity: According to recent photography studies, standard photos often provide better clarity and resolution than Live Photos, making them ideal for detailed shots.
10.3. Balancing Storage and Quality
If you find that Live Photos are taking up too much storage space, you can selectively enable them for important moments and use regular photos for everyday shots. You can also use iCloud Photo Library to store your photos in the cloud and free up space on your device.
FAQ: Mastering Live Photos on Your iPhone
1. What exactly is a Live Photo on iPhone?
A Live Photo is a feature on iPhones that captures a short, three-second video clip along with a still image, bringing your photos to life with motion and sound.
2. How do I take a Live Photo on my iPhone?
To take a Live Photo, open the Camera app, ensure Live Photos is enabled (the icon is yellow), hold your device steady, and tap the shutter button.
3. Can I edit a Live Photo after capturing it?
Yes, you can edit Live Photos by changing the key photo, adding effects like Loop, Bounce, and Long Exposure, and adjusting parameters like exposure and contrast.
4. How do I share a Live Photo on social media?
To share a Live Photo on social media, convert it to a video first, as not all platforms support the Live Photo format directly. Then, upload the video to your desired platform.
5. How do I turn off Live Photos on my iPhone?
You can turn off Live Photos temporarily by tapping the Live Photos icon in the Camera app or permanently by going to Settings > Camera > Preserve Settings and enabling the Live Photo switch.
6. What are the benefits of using Live Photos over regular photos?
Live Photos capture motion, add context to your memories, and allow you to apply creative effects, providing a more immersive visual experience compared to still photos.
7. How do I find my Live Photos on my iPhone?
To find your Live Photos, open the Photos app, scroll down to Media Types, and tap Live Photos to view all your Live Photos.
8. What devices support Live Photos?
Live Photos are supported on iPhone 6s and later, iPad (5th generation) and later, iPad Air (3rd generation) and later, iPad mini (5th generation) and later, and iPad Pro models from 2016 or later.
9. Can I convert a Live Photo back to a regular photo?
Yes, you can convert a Live Photo to a regular photo by editing the Live Photo and tapping the Live button at the top of the screen to turn the Live Photo effect off.
10. What should I do if my Live Photo is blurry?
If your Live Photo is blurry, try holding your iPhone more steadily when taking the photo or use a tripod to minimize camera shake.
Mastering Live Photos on your iPhone opens up a world of creative possibilities, allowing you to capture and share your memories in dynamic and engaging ways. Visit dfphoto.net for more tips, tutorials, and inspiration to elevate your photography skills. Explore our resources and connect with a vibrant community of photographers.
For more information, visit our website or contact us at:
Address: 1600 St Michael’s Dr, Santa Fe, NM 87505, United States
Phone: +1 (505) 471-6001
Website: dfphoto.net
Call to Action: Visit dfphoto.net today to discover more about iPhone photography, explore stunning photo collections, and connect with a thriving community of photographers. Enhance your skills and find inspiration for your next masterpiece!