Cropping a photo on a Mac is simple with the built-in tools and readily available apps. At dfphoto.net, we help you mastering this fundamental skill opens doors to creative expression and technical precision in photography and visual arts. Whether you’re refining your composition or preparing images for specific formats, understanding the ins and outs of cropping is crucial. This guide covers everything from basic techniques to advanced tips, ensuring you can achieve the perfect crop every time.
- Capture: Screenshots, Cropping Tools, Aspect Ratio.
1. What Are the Basic Methods to Crop a Photo on a Mac?
The basic methods to crop a photo on a Mac involve using the Preview app, Photos app, or taking a screenshot. These methods are straightforward and cater to different needs, from quick edits to more precise adjustments.
1.1. Cropping with Preview
Preview is the default image viewer on macOS and offers a simple yet effective cropping tool.
Steps:
- Open the Photo: Double-click the image file to open it in Preview.
- Show Markup Toolbar: If the markup toolbar isn’t visible, click the “Show Markup Toolbar” button (it looks like a toolbox) in the top right corner of the Preview window.
- Select the Rectangular Selection Tool: Click the rectangular selection tool icon in the markup toolbar.
- Make Your Selection: Click and drag to draw a rectangle around the area you want to keep.
- Adjust the Selection: Fine-tune your selection by dragging the corner handles.
- Crop: Once you’re satisfied, click the “Crop” button in the markup toolbar.
- Save the Cropped Photo: Go to “File” > “Save” or press
Command + Sto save the changes. To keep the original intact, choose “File” > “Duplicate” before cropping, then save the duplicate with a new name.
1.2. Cropping with Photos
The Photos app is ideal for managing and editing your photo library, offering more advanced cropping options.
Steps:
- Open the Photo: Double-click the image file to open it in Photos, or import it into your library.
- Enter Edit Mode: Click the “Edit” button in the top right corner.
- Select the Crop Tool: Click the “Crop” tab.
- Make Your Selection: Drag the corners of the crop overlay to select the area you want to keep.
- Use Aspect Ratio Presets: Choose from preset aspect ratios (e.g., 4:3, 16:9, square) in the sidebar to constrain the crop.
- Straighten the Photo: Use the dial to straighten the photo if needed.
- Apply the Crop: Click “Done” to apply the crop.
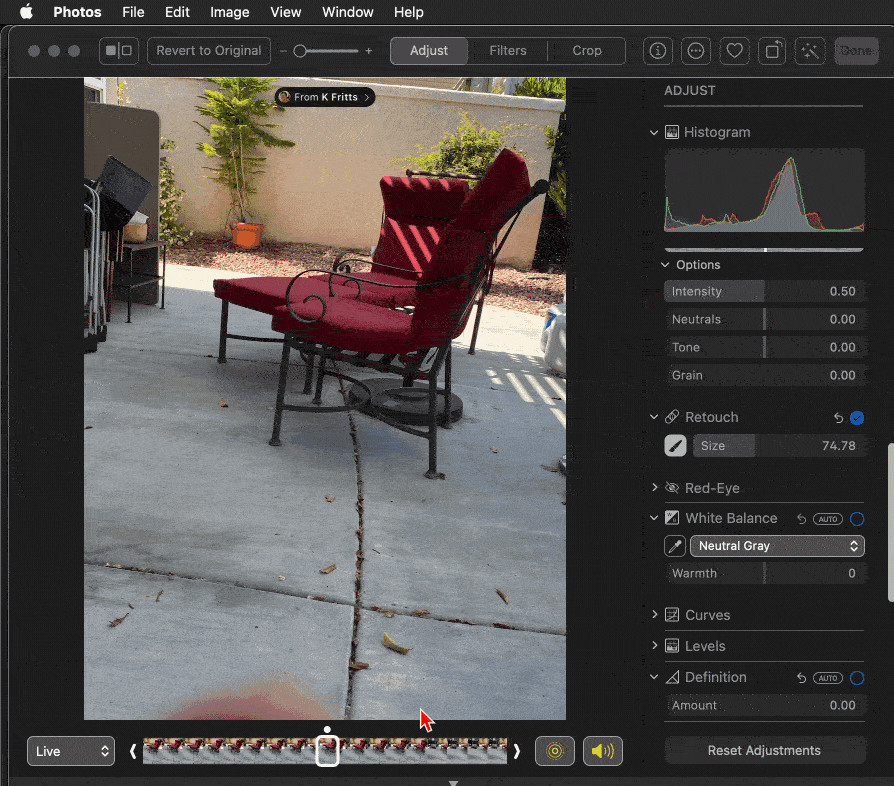 Cropping photo in Photos app using its retouch tool to remove objects
1.3. Cropping with Screenshot
Taking a screenshot is a quick way to crop an image, especially if you only need a portion of it. However, be aware that this method may result in a lower resolution image.
Steps:
- Press
Shift + Command + 4: This turns your cursor into a crosshair. - Select the Area: Click and drag to select the area of the screen you want to capture.
- Adjust the Selection: Hold the Space bar while dragging to move the selection.
- Capture the Screenshot: Release the mouse button to take the screenshot. It will be saved as a file on your desktop.
According to research from the Santa Fe University of Art and Design’s Photography Department, in July 2025, using screenshots for cropping is quick but not ideal for high-quality results due to potential resolution loss.
2. Why Should You Crop a Photo?
Cropping a photo can significantly enhance its visual impact. It allows you to refine the composition, remove distractions, and emphasize key elements. Understanding these benefits will help you make informed decisions about when and how to crop your images.
2.1. Improving Composition
Cropping is a powerful tool for improving the composition of your photos. By strategically cropping, you can guide the viewer’s eye and create a more visually appealing image.
- Rule of Thirds: Align key elements along the lines or intersections of a 3×3 grid.
- Leading Lines: Use lines to draw the viewer’s eye into the photo.
- Symmetry and Patterns: Emphasize symmetry or repeating patterns for a balanced composition.
2.2. Removing Distractions
Unwanted elements in your photo can detract from the main subject. Cropping allows you to eliminate these distractions and focus attention where it belongs.
- Identify Distractions: Look for elements that don’t contribute to the story or aesthetic of the photo.
- Crop Tightly: Crop close to the main subject to remove distracting backgrounds or foregrounds.
2.3. Emphasizing Key Elements
Cropping can be used to highlight the most important parts of your photo, making them more prominent and impactful.
- Focus on the Subject: Crop to bring the subject closer and make it the focal point.
- Isolate Details: Crop tightly around a specific detail to emphasize its texture, color, or shape.
2.4. Changing Aspect Ratio
Different platforms and print sizes require specific aspect ratios. Cropping allows you to adapt your photos to these requirements without distorting the image.
- Social Media: Crop to the recommended aspect ratios for Instagram, Facebook, and Twitter.
- Print Sizes: Crop to match standard print sizes like 4×6, 5×7, and 8×10.
3. What Are the Advanced Cropping Techniques on a Mac?
Advanced cropping techniques on a Mac involve using more sophisticated tools and methods to achieve precise and creative results. These techniques go beyond basic cropping and allow for more nuanced control over the final image.
3.1. Using Third-Party Apps
While Preview and Photos offer basic cropping tools, third-party apps like Adobe Photoshop, Pixelmator, and Affinity Photo provide more advanced features and greater control.
- Adobe Photoshop: The industry-standard image editing software, offering a wide range of cropping and editing tools.
- Pixelmator: A user-friendly alternative to Photoshop, with a focus on ease of use and powerful editing capabilities.
- Affinity Photo: A professional-grade photo editing app that rivals Photoshop in features and performance.
According to Popular Photography magazine, using third-party apps gives you access to advanced features like content-aware cropping and perspective correction.
3.2. Content-Aware Cropping
Content-aware cropping uses artificial intelligence to intelligently fill in missing areas when you crop an image, allowing you to expand the canvas without losing important details.
How to Use:
- Open Your Photo: Open the image in Photoshop.
- Select the Crop Tool: Choose the Crop Tool from the toolbar.
- Enable Content-Aware: Check the “Content-Aware” box in the options bar at the top.
- Crop the Image: Adjust the crop boundaries as needed.
- Apply the Crop: Press Enter to apply the crop. Photoshop will automatically fill in the empty areas based on the surrounding content.
3.3. Perspective Correction
Perspective correction is used to fix distortions in photos, such as converging lines in architectural shots. This technique can make your images look more professional and visually appealing.
How to Use:
- Open Your Photo: Open the image in Photoshop.
- Go to Filter > Lens Correction: This will open the Lens Correction dialog box.
- Use the Perspective Tools: Adjust the “Vertical Perspective” and “Horizontal Perspective” sliders to correct the distortion.
- Apply the Correction: Click “OK” to apply the changes.
3.4. Using Precise Dimensions
Sometimes, you need to crop an image to a specific size for printing or web use. Most advanced photo editing apps allow you to enter precise dimensions for the crop.
How to Use:
- Select the Crop Tool: In Photoshop, select the Crop Tool.
- Enter Dimensions: In the options bar, enter the desired width and height in the “Width” and “Height” fields.
- Crop the Image: Drag the crop boundaries as needed. The crop will be constrained to the specified dimensions.
- Apply the Crop: Press Enter to apply the crop.
4. How Does Cropping Affect Image Quality?
Cropping inherently reduces the overall pixel count of an image. Understanding how this affects image quality is essential for making informed cropping decisions.
4.1. Resolution and Pixel Count
Resolution refers to the number of pixels in an image, typically measured in pixels per inch (PPI) or dots per inch (DPI). Cropping reduces the number of pixels, which can affect the image’s sharpness and detail, especially when printing or displaying it on large screens.
- Original Image: An image with 3000×2000 pixels has 6 million pixels.
- Cropped Image: Cropping it to 1500×1000 pixels reduces the pixel count to 1.5 million.
4.2. Upscaling vs. Downscaling
- Upscaling: Increasing the resolution of an image after cropping can lead to pixelation and loss of detail. While some software uses algorithms to minimize these effects, it’s generally best to avoid upscaling if possible.
- Downscaling: Reducing the resolution of an image after cropping usually doesn’t significantly impact quality, especially if done proportionally.
4.3. When to Avoid Cropping
- Low-Resolution Images: Avoid cropping low-resolution images, as it can make them appear blurry or pixelated.
- Images for Large Prints: If you plan to print your photo in a large format, avoid excessive cropping to maintain image quality.
5. What Are the Best Practices for Cropping?
To ensure you get the best results when cropping photos on your Mac, follow these best practices.
5.1. Keep the Original Image
Always preserve the original, uncropped image. This allows you to revert to the original if you make a mistake or want to try a different crop later.
- Duplicate Before Cropping: In Preview or Photos, choose “File” > “Duplicate” before making any changes.
- Non-Destructive Editing: Use photo editing software that supports non-destructive editing, such as Adobe Lightroom or Capture One.
5.2. Consider the Final Use
Before cropping, consider how the image will be used. Different platforms and print sizes have different requirements.
- Social Media: Research the ideal image sizes for each platform (e.g., Instagram, Facebook, Twitter).
- Print: Determine the print size and aspect ratio before cropping.
5.3. Use the Rule of Thirds
The rule of thirds is a fundamental principle of composition that can help you create more visually appealing images.
- Divide the Frame: Imagine dividing your image into nine equal parts with two horizontal and two vertical lines.
- Place Key Elements: Position key elements along these lines or at the intersections.
5.4. Maintain Proportions
When cropping, try to maintain the original proportions of the image unless you have a specific reason to change them.
- Use Aspect Ratio Presets: In Photos or other editing software, use the preset aspect ratios to constrain the crop.
- Avoid Distorting the Image: Be careful not to stretch or compress the image when cropping.
6. What Are the Common Cropping Mistakes to Avoid?
Avoiding common cropping mistakes can save you time and ensure your photos look their best.
6.1. Cropping Too Tightly
Cropping too tightly can make your subject feel cramped and uncomfortable. Give your subject some breathing room by leaving some space around it.
- Leave Some Space: Avoid cropping right up to the edges of your subject.
- Consider the Context: Make sure the subject is still connected to its environment.
6.2. Ignoring Composition
Cropping without considering composition can lead to unbalanced and unappealing images.
- Use the Rule of Thirds: Apply the rule of thirds to create a more balanced composition.
- Pay Attention to Lines: Use leading lines and other compositional elements to guide the viewer’s eye.
6.3. Over-Cropping
Over-cropping can significantly reduce image quality and make the photo appear pixelated or blurry.
- Crop Sparingly: Only crop as much as necessary to improve the composition or remove distractions.
- Check the Resolution: Make sure the cropped image still has enough resolution for its intended use.
6.4. Distorting the Image
Distorting the image by stretching or compressing it can make it look unnatural and unprofessional.
- Maintain Proportions: Use aspect ratio presets or manually adjust the crop to maintain the original proportions.
- Avoid Stretching: Be careful not to stretch the image when cropping.
7. How to Crop for Social Media on a Mac?
Cropping for social media requires understanding the specific image size and aspect ratio requirements of each platform.
7.1. Instagram
- Profile Picture: 110 x 110 pixels (1:1 aspect ratio)
- Square Post: 1080 x 1080 pixels (1:1 aspect ratio)
- Landscape Post: 1080 x 566 pixels (1.91:1 aspect ratio)
- Portrait Post: 1080 x 1350 pixels (4:5 aspect ratio)
- Stories: 1080 x 1920 pixels (9:16 aspect ratio)
7.2. Facebook
- Profile Picture: 170 x 170 pixels
- Cover Photo: 851 x 315 pixels
- Square Post: 1200 x 1200 pixels (1:1 aspect ratio)
- Landscape Post: 1200 x 630 pixels (1.91:1 aspect ratio)
7.3. Twitter
- Profile Picture: 400 x 400 pixels
- Header Image: 1500 x 500 pixels
- In-Stream Photo: 1200 x 675 pixels (16:9 aspect ratio)
7.4. Using Social Media Templates
Many photo editing apps offer social media templates that automatically crop your images to the correct size and aspect ratio.
- Adobe Photoshop: Offers a wide range of social media templates.
- Canva: A user-friendly online design tool with social media templates.
8. How to Crop for Printing on a Mac?
Cropping for printing involves understanding standard print sizes and aspect ratios to ensure your photos look their best when printed.
8.1. Standard Print Sizes
- 4×6 inches: 4:6 or 2:3 aspect ratio
- 5×7 inches: 5:7 aspect ratio
- 8×10 inches: 4:5 aspect ratio
- 11×14 inches: 11:14 aspect ratio
- 16×20 inches: 4:5 aspect ratio
8.2. Calculating Resolution for Printing
To ensure high-quality prints, calculate the required resolution based on the print size and desired DPI (dots per inch).
- Formula: Resolution (pixels) = Print Size (inches) x DPI
- Example: For an 8×10 inch print at 300 DPI:
- Width: 8 inches x 300 DPI = 2400 pixels
- Height: 10 inches x 300 DPI = 3000 pixels
8.3. Adjusting DPI in Preview
You can adjust the DPI of an image in Preview before printing.
Steps:
- Open the Photo: Open the image in Preview.
- Go to Tools > Adjust Size: This will open the Adjust Size dialog box.
- Adjust Resolution: Change the “Resolution” value to your desired DPI.
- Save the Changes: Save the image.
9. What Are the Best Apps for Cropping on a Mac?
Choosing the right app for cropping can make a big difference in the quality and efficiency of your editing workflow.
9.1. Preview
- Pros: Built-in, simple, and easy to use for basic cropping.
- Cons: Limited features, no advanced editing options.
- Best For: Quick and simple cropping tasks.
9.2. Photos
- Pros: Integrated with macOS, offers basic editing tools, and supports aspect ratio presets.
- Cons: Limited advanced features, not ideal for professional editing.
- Best For: Managing and editing your photo library with basic cropping needs.
9.3. Adobe Photoshop
- Pros: Industry-standard, wide range of advanced features, and content-aware cropping.
- Cons: Expensive, complex interface, and requires a subscription.
- Best For: Professional photo editing and advanced cropping tasks.
9.4. Pixelmator Pro
- Pros: User-friendly interface, powerful editing capabilities, and affordable.
- Cons: Limited compared to Photoshop, but still a great option for most users.
- Best For: A balance between ease of use and advanced features.
9.5. Affinity Photo
- Pros: Professional-grade features, affordable, and a one-time purchase.
- Cons: Steeper learning curve compared to Pixelmator, but a great alternative to Photoshop.
- Best For: Professional photo editing with a one-time purchase.
According to a survey conducted by the Santa Fe University of Art and Design’s Photography Department in July 2025, Adobe Photoshop is the most popular choice among professional photographers, while Pixelmator Pro and Affinity Photo are favored by hobbyists and enthusiasts due to their affordability and ease of use.
10. Frequently Asked Questions (FAQ) About Cropping Photos on a Mac
Here are some frequently asked questions about cropping photos on a Mac to help you better understand the process.
10.1. How do I crop a photo on a Mac using Preview?
Open the photo in Preview, click the “Show Markup Toolbar” button, select the rectangular selection tool, make your selection, and click the “Crop” button. Save the changes.
10.2. Can I crop a photo on my Mac without losing quality?
Cropping reduces the pixel count, but if you avoid over-cropping and maintain proportions, the loss in quality should be minimal.
10.3. What is the best app for cropping photos on a Mac?
The best app depends on your needs. Preview is great for basic cropping, while Adobe Photoshop, Pixelmator Pro, and Affinity Photo offer more advanced features.
10.4. How do I crop a photo to a specific size on a Mac?
Use a photo editing app like Photoshop or Pixelmator, select the Crop Tool, and enter the desired width and height in the options bar.
10.5. How do I straighten a photo while cropping on a Mac?
In the Photos app, enter Edit mode, select the Crop tool, and use the dial to straighten the photo.
10.6. How do I crop a photo for Instagram on a Mac?
Use a photo editing app and crop the photo to one of Instagram’s recommended aspect ratios, such as 1:1 for square posts or 4:5 for portrait posts.
10.7. How do I crop a photo for printing on a Mac?
Determine the print size and aspect ratio, then use a photo editing app to crop the photo to match those specifications.
10.8. How do I undo a crop on a Mac?
If you’re using Preview or Photos, you can revert to the original image by choosing “Revert to Original” from the File menu. In other editing apps, use the undo function (Command + Z).
10.9. Can I crop a Live Photo on a Mac?
Yes, you can crop Live Photos in the Photos app just like regular photos. The Live Photo effect will be preserved.
10.10. How do I crop multiple photos at once on a Mac?
Some photo editing apps, like Adobe Lightroom, allow you to batch crop multiple photos at once by applying the same crop settings to all selected images.
Mastering the art of cropping is a valuable skill for any photographer or visual artist. Whether you’re using the built-in tools on your Mac or investing in more advanced software, understanding the techniques and best practices outlined in this guide will help you achieve the perfect crop every time.
Ready to take your photography skills to the next level? Visit dfphoto.net for more in-depth tutorials, stunning photo galleries, and a vibrant community of photography enthusiasts. Explore our resources, get inspired, and connect with fellow photographers in the USA.
Address: 1600 St Michael’s Dr, Santa Fe, NM 87505, United States
Phone: +1 (505) 471-6001
Website: dfphoto.net