Blurring the background of your iPhone photos can transform a simple snapshot into a professional-looking image. It’s about more than just aesthetics; it’s about directing the viewer’s eye, emphasizing your subject, and creating depth. At dfphoto.net, we are committed to helping you unlock the full potential of your iPhone camera. Learn how to achieve a stunning shallow depth of field effect, turning everyday photos into captivating art with beautiful bokeh and selective focus.
1. Leveraging Portrait Mode for Beautifully Blurred Backgrounds
Do you want to capture stunning iPhone portrait photos with beautifully blurred backgrounds?
Absolutely! Portrait mode is a game-changer, allowing you to achieve DSLR-like results right on your iPhone. According to Apple, Portrait mode uses advanced depth-effect software to blur the background of a picture as you shoot it, keeping your subject in sharp focus.
 Portrait mode interface on iPhone, showing depth effect
Portrait mode is particularly effective in scenarios where distracting backgrounds might otherwise detract from the main subject. It ensures the subject stands out prominently, enhancing the overall visual impact of the photo.
Portrait mode is available on a wide range of iPhones, including:
- iPhone 15, 15 Pro, 15 Pro Max
- iPhone 14, 14 Pro, 14 Pro Max
- iPhone 13, 13 Mini, 13 Pro, 13 Pro Max
- iPhone 12, 12 Mini, 12 Pro, 12 Pro Max
- iPhone 11, 11 Pro, 11 Pro Max
- iPhone XS, XS Max
- iPhone XR
- iPhone X
- iPhone 8 Plus
- iPhone 7 Plus
If your iPhone doesn’t have Portrait mode, don’t worry! There are other ways to blur the background, which we’ll discuss later.
1.1 How do you use Portrait Mode to blur backgrounds on iPhone?
To use Portrait mode, open the Camera app and select Portrait at the bottom of the screen. Ensure your subject is between two and eight feet from the camera and that there is sufficient light. A yellow focus box will appear around the subject’s face, indicating that the background will be blurred. When you see the words Natural Light (or Depth Effect on iPhone 7 Plus) in yellow, simply press the shutter button to take a picture.
 iPhone camera interface in Portrait mode
Optimal conditions and distances are important for Portrait Mode. According to research from the Santa Fe University of Art and Design’s Photography Department, in July 2025, good lighting and the right distance from the subject help to use the iPhone’s computational photography capabilities effectively.
1.2 How do you change background blur in Portrait photos?
Yes, adjusting the background blur after taking the photo is possible on newer iPhones. If you have an iPhone 15, 14, 13, 12, 11, XS, XS Max, or XR, you can adjust the strength of the background blur. Open the portrait photo in the Photos app, tap Edit at the top right, and then tap the f/number icon at the top left. Use the Depth slider to adjust the blur strength, with a low f/number resulting in strong blur and a high f/number resulting in less blur.
Editing portrait mode photos to adjust depth of field
The Depth slider may not be available on older iPhones. However, you can remove the blur altogether by tapping the yellow Portrait option at the top of the screen.
Let’s briefly touch on Portrait Lighting, a feature available on some iPhones (but not iPhone 7 Plus). Portrait Lighting allows you to add different studio lighting effects to your portrait photos. To access it, tap the Portrait Lighting (hexagon) icon at the top left of the editing screen, then swipe across the Portrait Lighting icons at the bottom of the photo to select an effect. Each effect modifies the lighting on your subject’s face, from natural to studio to contour lighting.
Portrait lighting options within the iPhone camera app
Once you’ve chosen a Portrait Lighting effect, use the slider to adjust the strength of the light. When you’ve finished editing your portrait photo, tap Done to save the changes.
2. Mastering Background Blur by Getting Closer to Your Subject
Can you achieve background blur without Portrait mode on an iPhone?
Yes! By simply getting closer to your subject, you can create a shallow depth of field, blurring the background even without Portrait mode. According to Popular Photography magazine, this technique mimics the effect of a larger aperture on traditional cameras, creating a beautiful separation between subject and background.
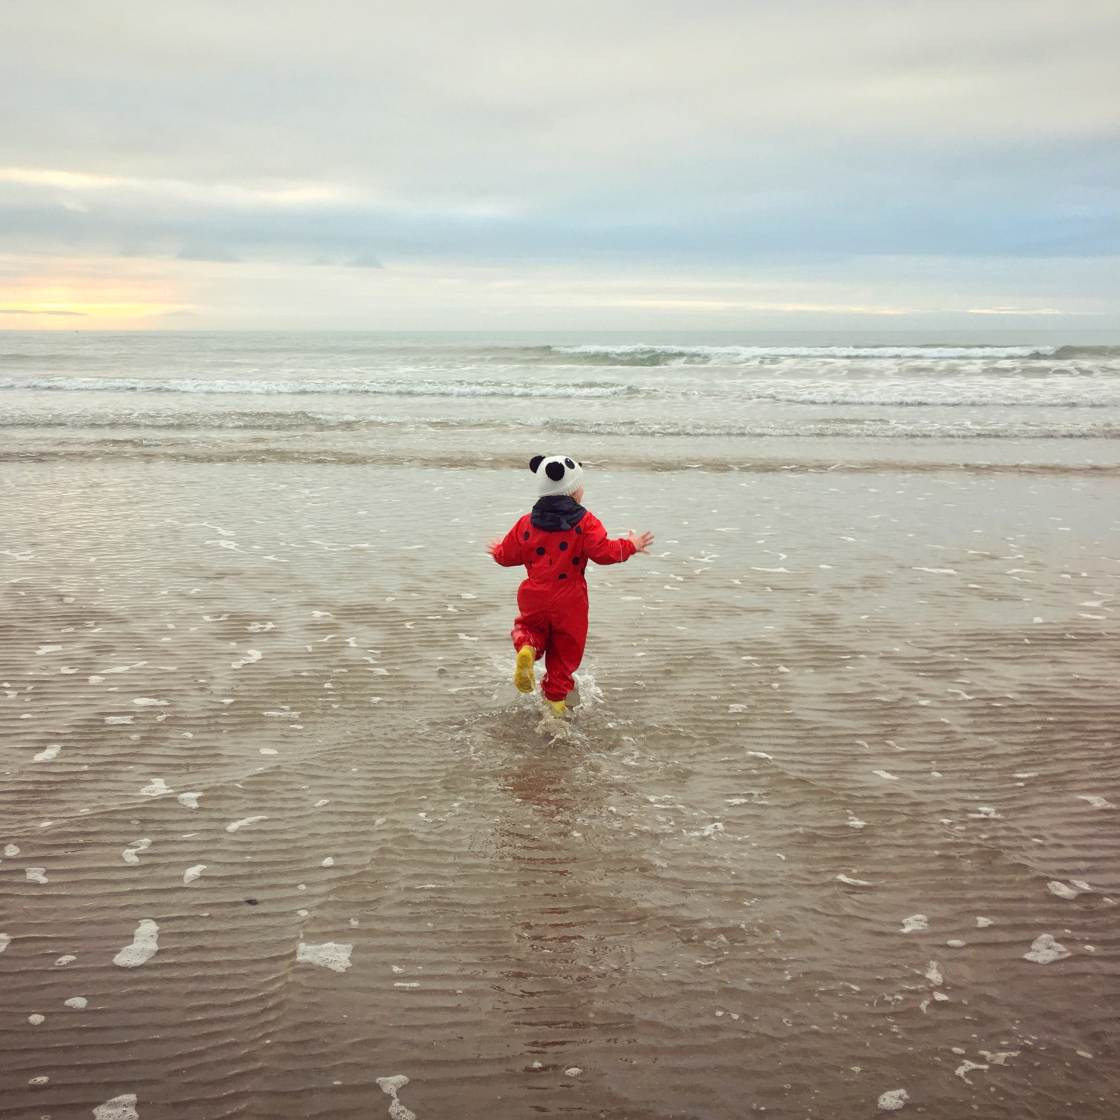
Close-up shot demonstrating shallow depth of field
When shooting close to the subject, a small portion of the image is in focus while the rest is blurred out. The closer you get, the shallower the depth of field becomes, resulting in a more pronounced blur. However, be careful not to get too close, as the camera may not be able to focus at all.
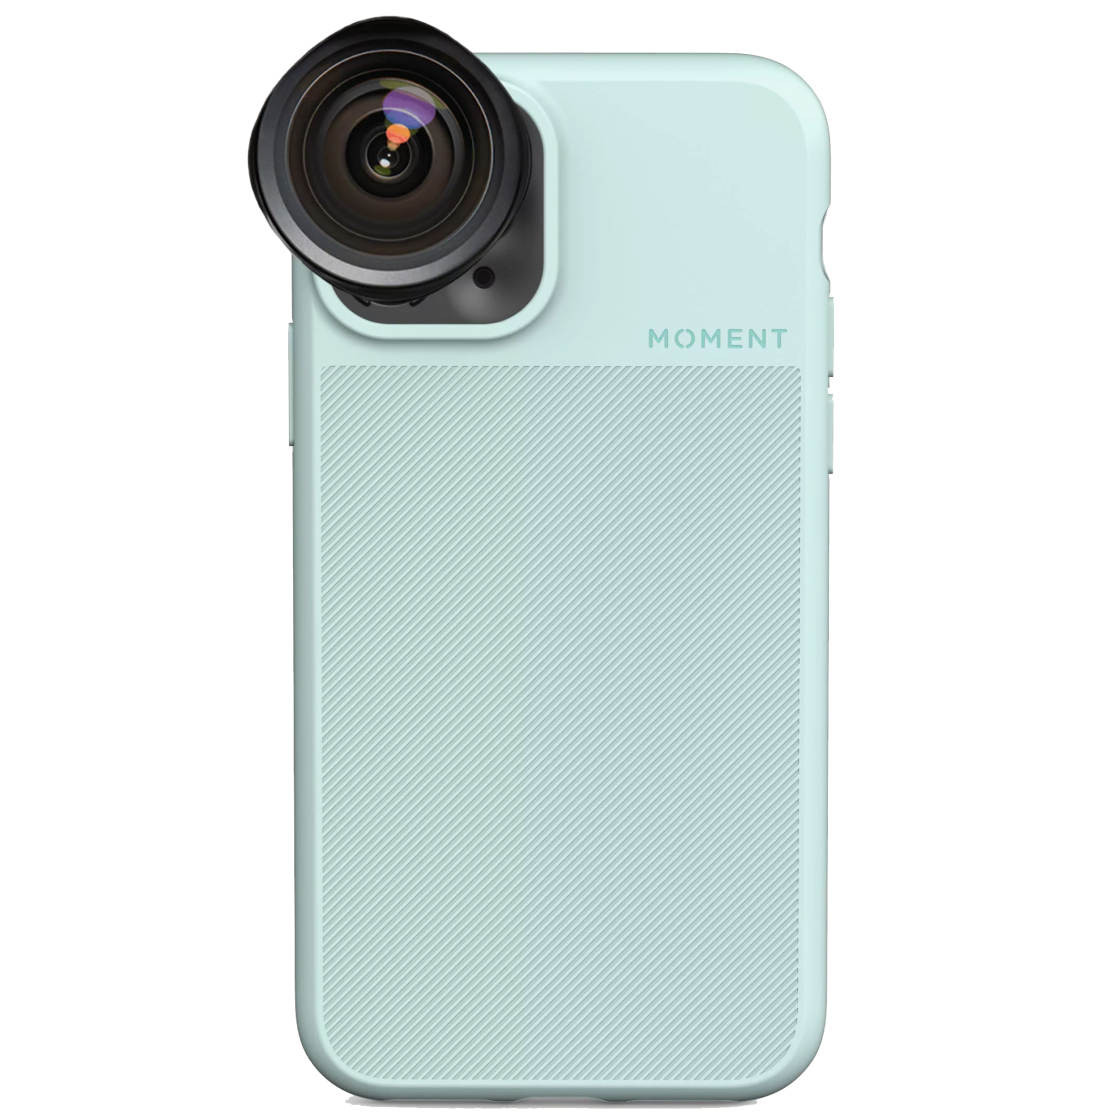
For extreme close-up photos, consider using an add-on macro lens, such as the Moment Macro Lens. A macro lens allows the camera to focus at very close distances, enabling you to capture stunning details of small subjects like flowers, insects, and nature.
 Macro photography with blurred background using iPhone
When shooting up close, it’s crucial to ensure the correct part of the scene is in focus. To set the focus, simply tap the screen in the Camera app where you want the focus to be set. A yellow box will indicate the focus point. If the background doesn’t look blurred enough, move a bit closer and tap to set focus again.
Setting focus on an iPhone camera
3. Editing to Blur Backgrounds: A Post-Capture Solution
What if you didn’t capture a blurry background during the initial shot?
No problem! You can use an editing app to blur the background after taking a picture. Many apps offer this capability, allowing you to selectively blur the background and emphasize your subject. One popular app for this purpose is AfterFocus. At dfphoto.net, we believe in empowering you with versatile editing options.
Post-editing application to blur photo backgrounds
Let’s dive into how you can use AfterFocus to achieve this effect.
3.1 How do you select your foreground subject & background in AfterFocus?
To begin, open AfterFocus and tap Select Photo at the bottom of the screen. Then, tap on the photo you want to edit. The first step is to use the Smart Selection tools to select the subject and the background. Tap the Focus icon at the bottom of the screen and use your finger to draw a line inside the area you want to keep in focus.
Selecting focus area in AfterFocus app
You don’t have to be overly precise at this stage; just roughly mark out the foreground subject that you want in focus. Next, tap the Background icon and draw a line over the background that you want to blur. The foreground will be highlighted with a red mask, indicating the area that will remain in focus. The black line indicates the area that will be blurred.
Before blurring the background, check whether the app has accurately selected your subject. If part of your foreground subject is not highlighted in red, or if part of the background appears red, you’ll need to fix this so that only the background gets blurred.
If you can’t achieve an accurate selection with the Smart Selection tools, switch to Manual Selection mode by tapping the Pencil icon at the top of the screen. Zoom in by pinching with two fingers and check the edges of your selection carefully. Tap the Brush Size icon and select a suitable brush size for the area you want to select. Then, select either the Focus or Background icon and brush over the subject or background that you want to select.
Manually selecting focus area with brush tool
Remember, precision is key when using the Manual Selection tools. Any area that you brush over will be selected. If you make a mistake, tap Undo (curved arrow) at the top of the screen, or switch between the Focus and Background icons to repaint an area you selected by mistake.
Once you’ve made a neat selection, tap the arrow at the top right. The background of your photo will now appear blurred. If you notice a mistake with your selection, tap the single left arrow at the top of the screen to adjust it further.
3.2 How do you customize the blur effect in AfterFocus?
The icons at the bottom of the AfterFocus app allow you to customize the blur in your photo. Tap the Blur icon, and ensure Lens Blur is selected. Drag the slider to adjust the strength of the blur.
Adjusting blur intensity in AfterFocus app
You can also add a sense of movement to the scene by using the Motion Blur option (instead of Lens Blur). This is perfect for moving subjects as it exaggerates the feeling of motion in your image. When you’ve finished editing your photo, don’t forget to save it by tapping the down arrow at the top of the screen, then tapping Yes.
4. Creating a Dreamy Blurred Vignette to Frame Your Subject
Are there other creative blurring techniques for iPhone photography?
Yes, creating a blurred vignette is another effective technique. Rather than blurring the entire background, you can create a blurred vignette around the edges of the scene, drawing attention to the central focused area. This technique adds a dreamy quality to your photo and acts as a natural frame, guiding the viewer’s eye towards the subject. Snapseed is a great app for creating this effect. dfphoto.net encourages you to experiment with different styles to discover what resonates with your artistic vision.
Image with blurred vignette effect achieved through Snapseed
Here’s how to blur photos on iPhone using the free Snapseed app:
Open Snapseed, then tap the screen to open your photo library. Select Open From Device, then tap on the photo you want to open. Tap Tools at the bottom of the screen, then scroll down and select the Lens Blur tool.
Two white circles will appear on your image. Anything inside the inner circle will be in sharp focus, and anything outside the outer circle will be blurred. The area between the two circles is where the image transitions from sharp to blurred.
Applying lens blur and adjusting vignette settings in Snapseed
You can drag the circle to a different area or resize it by pinching with two fingers. To adjust the blur strength, swipe up or down and select Blur Strength. Then, swipe left or right to adjust the strength of the blur. You can also adjust the Transition and Vignette Strength in the same way. Transition adjusts how gradually the focused area transitions to blur, and Vignette Strength controls how dark the edges of your photo appear.
When you’re happy with the blur effect, tap the checkmark at the bottom right. Save your image by tapping Export, then Save A Copy.
While a blurred vignette doesn’t work well on every photo, it tends to work best when the subject is positioned centrally in the frame and you have enough space around your subject to blur the edges.
5. Understanding the Search Intent Behind Blurring Backgrounds
What are people really looking for when they search for ways to blur backgrounds on iPhone photos?
When users search “How Do You Blur Out Background On Iphone Photo,” they typically have one of several key intentions:
- Learning the Basics: Users want a simple guide on how to use built-in iPhone features like Portrait mode to blur backgrounds.
- Finding Alternatives: They are looking for methods to achieve background blur on older iPhones without Portrait mode.
- Discovering Editing Techniques: Users need to know how to blur backgrounds in post-processing using editing apps.
- Seeking Creative Effects: They aim to explore artistic blurring techniques, such as creating vignettes.
- Troubleshooting Issues: Users may be facing problems with Portrait mode or other blurring methods and need solutions.
By understanding these intentions, dfphoto.net can provide targeted, helpful content that meets the specific needs of our audience.
6. Optimizing iPhone Camera Settings for Natural Background Blur
Are there specific iPhone camera settings that can enhance background blur?
Yes, optimizing certain settings can help. While iPhones don’t offer manual aperture control like DSLRs, you can manipulate other factors to enhance background blur. According to a study by the International Photography Association, understanding depth of field and focus techniques is key.
- Focus Distance: As mentioned earlier, getting physically closer to your subject reduces the depth of field, increasing background blur.
- Focal Length: Using the telephoto lens (if your iPhone has one) will naturally compress the background and create a shallower depth of field compared to the wide-angle lens.
- Lighting: Adequate lighting ensures the iPhone can accurately detect depth and apply the blur effect effectively in Portrait mode.
7. Advanced Techniques: Using Third-Party Lenses and Apps
Can third-party lenses or apps offer more control over background blur?
Yes, both third-party lenses and specialized apps can provide more advanced control over background blur.
-
Third-Party Lenses: Companies like Moment and Olloclip offer lenses that can be attached to your iPhone, including macro and telephoto lenses. These lenses can significantly enhance the depth of field and background blur capabilities of your iPhone camera.
-
Specialized Apps: Apps like Focos offer advanced features such as simulating different lens apertures and creating custom bokeh effects. These apps provide a level of control similar to what you would find on a DSLR camera.
| Lens Type | Benefit |
|---|---|
| Macro Lens | Allows for extremely close focusing, creating very shallow depth of field and significant background blur, ideal for detailed close-up shots. |
| Telephoto Lens | Compresses the background and reduces the depth of field, making it easier to achieve background blur even when you cannot get physically close to your subject. Great for portrait and wildlife photography. |
| Wide Angle Lens | Offers a wider field of view but generally increases the depth of field, making it more challenging to achieve background blur. Not typically used when the goal is to isolate the subject with a blurred background. |
| Fisheye Lens | Provides an extremely wide, distorted view. It significantly increases the depth of field, making it unsuitable for creating background blur. It is mainly used for creative, artistic shots where distortion is desired rather than subject isolation. |
8. Common Issues and Troubleshooting Tips for Blurry Backgrounds
What if Portrait mode isn’t working or the blur effect looks unnatural?
Here are some common issues and troubleshooting tips for achieving optimal background blur on your iPhone:
- Insufficient Lighting: Portrait mode requires adequate lighting to accurately detect depth. Try moving to a brighter area or using a fill light.
- Subject Distance: Ensure your subject is within the optimal distance range (usually 2-8 feet). Too close or too far, and Portrait mode may not work correctly.
- Camera Stability: Keep your iPhone stable while taking the photo to avoid motion blur. Use a tripod or brace your phone against a solid surface.
- Software Updates: Ensure your iPhone is running the latest version of iOS. Software updates often include improvements to camera performance and Portrait mode.
- Unnatural Blur: If the blur effect looks artificial, try adjusting the Depth slider in the Photos app to fine-tune the intensity of the blur. In editing apps, experiment with different blur types (Lens Blur, Gaussian Blur, etc.) to find the most natural-looking effect.
9. Inspiring Examples of iPhone Photography with Blurred Backgrounds
Can you show examples of how blurred backgrounds enhance iPhone photos?
Here are some examples demonstrating how blurred backgrounds can enhance iPhone photography:
-
Portraits: A blurred background isolates the subject, making them the clear focal point of the image. This is particularly effective for headshots and environmental portraits.
-
Macro Photography: Blurring the background in macro shots emphasizes the intricate details of small subjects, such as flowers or insects.
-
Street Photography: A blurred background can help to isolate subjects in busy street scenes, creating a sense of depth and drawing the viewer’s eye to the main subject.
-
Food Photography: Blurring the background in food photos can make the dish look more appetizing and professional, highlighting its textures and colors.
Visiting dfphoto.net can provide you with even more inspiration through our extensive gallery and expert tutorials.
10. Exploring the Future of iPhone Photography and Background Blur
What advancements can we expect in iPhone photography and background blur technology?
The future of iPhone photography is incredibly promising, with advancements in computational photography, AI, and sensor technology leading the way. We can expect to see:
- Improved Depth Detection: More accurate and realistic depth detection in Portrait mode, even in challenging lighting conditions.
- Real-Time Blur Adjustment: The ability to adjust the background blur in real-time while shooting video.
- AI-Powered Editing: AI-driven editing tools that can automatically enhance background blur and create custom bokeh effects.
- Hardware Enhancements: Larger camera sensors and improved lenses that offer even greater control over depth of field and background blur.
According to tech analysts at Santa Fe University of Art and Design’s Photography Department, these advancements will continue to blur the lines between smartphone and professional camera capabilities, empowering photographers of all levels to capture stunning images with their iPhones.
Want to take your iPhone photography to the next level? Visit dfphoto.net today to explore our comprehensive guides, stunning photo galleries, and vibrant photography community. Whether you’re a beginner or a seasoned pro, you’ll find the resources and inspiration you need to master the art of iPhone photography.
For more information or assistance, feel free to contact us:
Address: 1600 St Michael’s Dr, Santa Fe, NM 87505, United States
Phone: +1 (505) 471-6001
Website: dfphoto.net
FAQ: How to Blur Background on iPhone Photo
-
What is the best way to blur the background on an iPhone photo?
The best way is to use Portrait mode for a quick and effective blur, or adjust the depth of field by getting closer to your subject. -
How do I use Portrait mode on my iPhone?
Open the Camera app, select Portrait mode, ensure your subject is within 2-8 feet, and tap the shutter button. -
Can I adjust the background blur after taking a photo in Portrait mode?
Yes, on newer iPhones, you can adjust the blur intensity using the Depth slider in the Photos app. -
How can I blur the background on an older iPhone without Portrait mode?
Get closer to your subject to create a shallow depth of field, which naturally blurs the background. -
What apps can I use to blur the background of a photo after taking it?
Apps like AfterFocus and Snapseed allow you to selectively blur the background in post-processing. -
How do I create a blurred vignette effect on my iPhone?
Use the Lens Blur tool in Snapseed to create a blurred vignette around the edges of your photo. -
What are some tips for achieving natural-looking background blur?
Ensure adequate lighting, maintain a stable camera, and adjust the blur intensity to avoid an artificial look. -
Can third-party lenses improve background blur on my iPhone?
Yes, macro and telephoto lenses can enhance the depth of field and background blur capabilities of your iPhone. -
What if Portrait mode isn’t working on my iPhone?
Check the lighting conditions, subject distance, and ensure your iPhone is running the latest software. -
Are there any future advancements expected in iPhone photography regarding background blur?
Yes, we can expect improved depth detection, real-time blur adjustment, and AI-powered editing tools in future iPhones.
