Are you looking to enhance your iMovie projects with stunning photos? Adding photos to iMovie is a straightforward process that can significantly elevate the quality of your video projects, and dfphoto.net is here to guide you through it. In this guide, we’ll explore the various methods to seamlessly integrate your cherished memories and creative images into iMovie, ensuring your videos stand out. Learn about managing your photo library and creating compelling visual stories with dfphoto.net, and discover long-term strategies for preserving and sharing your photographic work.
1. What Are the Basic Steps to Add Photos to iMovie?
Adding photos to iMovie is simple. Open iMovie, create a new project, and import photos directly from your Photos library or a folder. This process allows you to quickly integrate visuals into your video projects.
Here’s a more detailed breakdown:
- Open iMovie: Launch the iMovie application on your Mac or iOS device.
- Create a New Project: Click on “Create New” and select either “Movie” or “Trailer” based on your project’s needs.
- Import Photos:
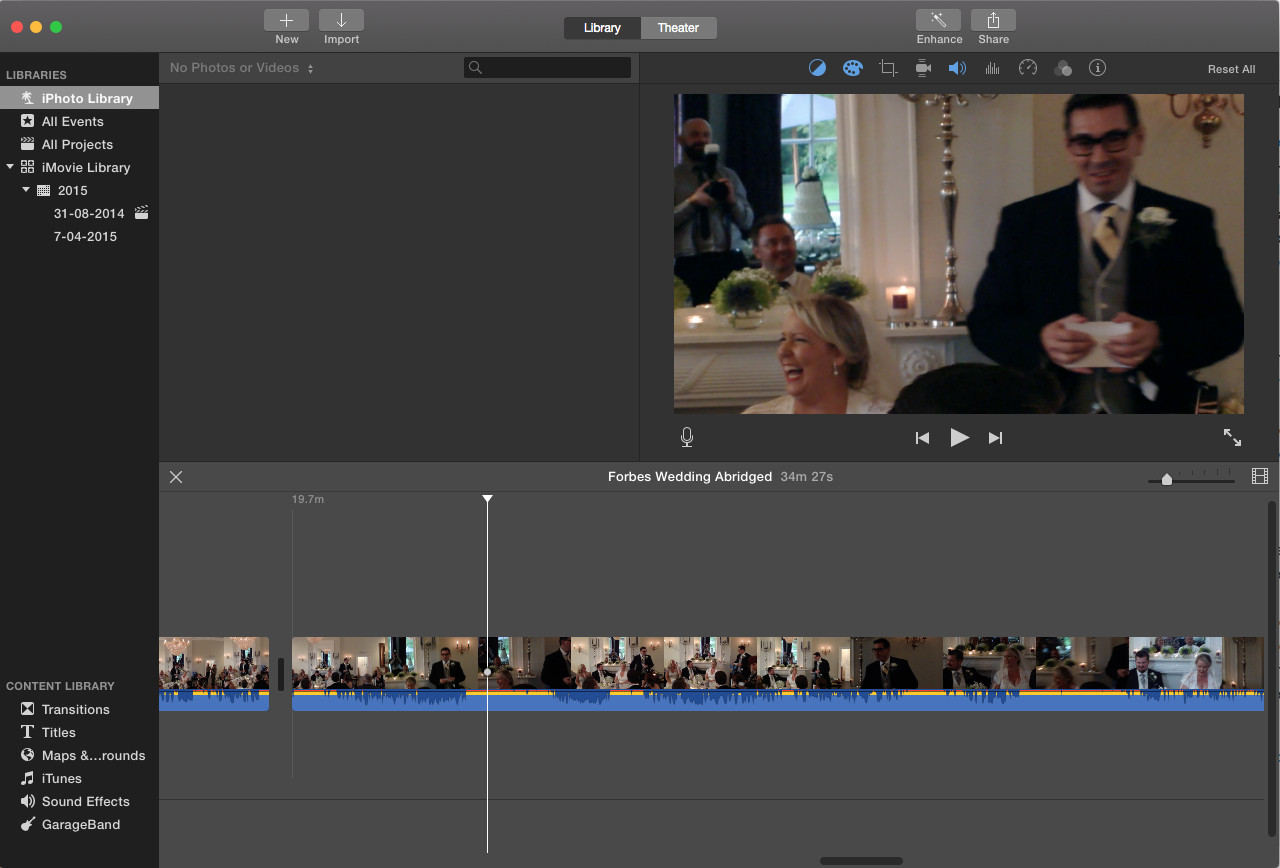
- From Photos Library: In the iMovie window, look for the “Libraries” list on the left-hand side. Your Photos library should be listed there. If it isn’t, ensure it is set as the System Photo Library (more on that later).
- From a Folder: Click on the “Import Media” button. This will open a Finder window where you can navigate to the folder containing your photos.
- Select Photos: Choose the photos you want to add to your iMovie project. You can select multiple photos by holding down the Command key (⌘) while clicking on each photo.
- Drag and Drop: Once selected, drag the photos from the import window or Photos library directly into your iMovie timeline.
- Arrange and Edit: Arrange the photos in the desired order in your timeline. You can adjust the duration of each photo, add transitions, and apply effects to enhance your video.
Tip: To quickly add all photos from a folder, simply drag the entire folder into the iMovie timeline.
2. How Do You Designate a System Photo Library for iMovie?
Designating a System Photo Library ensures iMovie can access your photos. To do this, quit Photos, hold the Option key while opening Photos, choose the desired library, and set it as the System Photo Library in Preferences.
Here’s a step-by-step guide:
- Quit Photos: Ensure the Photos application is completely closed.
- Open Photos with Option Key: Press and hold the Option key (⌥) on your keyboard, then open the Photos application. This will present you with a window to choose your photo library.
- Choose the Desired Library: Select the photo library you wish to use with iMovie. One of the libraries will already be designated as YourLibraryName (System Photo Library).
- Open the Library: After selecting, Photos will open the chosen library.
- Access Preferences: In the menu bar, click on “Photos” and then select “Preferences.”
- Go to General Tab: In the Preferences window, click on the “General” tab.
- Use as System Photo Library: Click the “Use as System Photo Library” button. If this button is grayed out, it means the current library is already set as the System Photo Library.
According to Apple Support, setting the correct System Photo Library is crucial for iMovie to properly access your media. This ensures that all your photos and videos are readily available within iMovie for your projects.
3. What If the Photos Library Doesn’t Appear in iMovie?
If the Photos Library isn’t visible in iMovie, ensure it is set as the System Photo Library. If it still doesn’t appear, check iMovie’s preferences and consider reinstalling iMovie.
Here’s a detailed troubleshooting process:
- Verify System Photo Library: As mentioned earlier, make sure the correct Photos Library is set as the System Photo Library. Follow the steps in Question 2 to confirm.
- Check iMovie Preferences:
- Open iMovie and go to “iMovie” in the menu bar, then select “Preferences.”
- Look for a tab or setting related to media or library access. Ensure that Photos is enabled or selected as a source.
- Update iMovie: Ensure you are using the latest version of iMovie. Outdated software can sometimes have compatibility issues. You can update iMovie through the Mac App Store.
- Restart Your Mac: A simple restart can often resolve minor software glitches.
- Reinstall iMovie: If none of the above steps work, try uninstalling and then reinstalling iMovie from the Mac App Store. This can fix corrupted files or settings that may be preventing iMovie from accessing your Photos Library.
- Check iCloud Settings: Ensure that iCloud Photos is enabled and that your photos have been fully downloaded to your Mac. If your photos are only stored in the cloud, iMovie may not be able to access them.
4. How Can You Optimize Photos for Use in iMovie?
Optimizing photos for iMovie involves resizing them to the appropriate resolution, adjusting colors, and ensuring they are in a compatible format like JPEG. This ensures they look their best in your video.
Here’s how to optimize your photos:
- Resize Photos:
- Why: High-resolution photos can slow down iMovie and increase export times. Resizing them to a reasonable resolution can improve performance.
- How: Use a photo editing tool like Adobe Photoshop, GIMP, or even Preview on Mac to resize your photos. For HD video (1080p), a width of 1920 pixels is usually sufficient.
- Adjust Colors and Exposure:
- Why: Ensure your photos have consistent colors and appropriate exposure levels. This will make your video look more professional.
- How: Use a photo editing tool to adjust brightness, contrast, saturation, and white balance. Lightroom and Photoshop are popular choices for more advanced adjustments.
- Crop Photos:
- Why: iMovie uses the Ken Burns effect by default, which means it will zoom and pan across your photos. Cropping your photos to a 16:9 aspect ratio (the standard for HD video) can help you control this effect and ensure important parts of your photo aren’t cropped out.
- How: Use a photo editing tool to crop your photos to the desired aspect ratio.
- File Format:
- Why: Using a compatible file format ensures iMovie can read your photos without issues.
- How: JPEG is the most widely compatible format. If your photos are in a different format (e.g., TIFF, PNG), convert them to JPEG using a photo editing tool.
According to Popular Photography, optimizing your images before importing them into video editing software can save time and prevent performance issues. Properly sized and edited photos contribute to a smoother and more efficient video editing workflow.
5. What Are the Best Transitions to Use Between Photos in iMovie?
The best transitions for photos in iMovie include cross dissolve, fade to black, and subtle wipes. These transitions provide a smooth and professional flow between your images.
Here’s a closer look at these transitions and when to use them:
- Cross Dissolve:
- Description: A cross dissolve smoothly fades one photo into the next.
- When to Use: This is a versatile transition that works well in most situations. It’s particularly effective when you want to create a seamless flow between photos without drawing too much attention to the transition itself.
- Fade to Black/White:
- Description: The photo fades to black (or white) before the next photo appears.
- When to Use: This transition can create a sense of drama or separation between different segments of your video. It’s useful when transitioning between different scenes or topics.
- Wipes:
- Description: A wipe transition replaces one photo with the next using a directional movement.
- When to Use: Use subtle wipes sparingly, as they can be distracting if overused. They work well when you want to add a bit of visual interest to your transitions.
- Ken Burns Effect (No Transition):
- Description: Instead of using a transition, you can rely on the Ken Burns effect (zooming and panning) to create movement and interest between photos.
- When to Use: This can be a good option when you want a very subtle transition. By adjusting the zoom and pan settings, you can create a smooth and engaging flow.
To add transitions in iMovie:
- Select the Transition Icon: In the iMovie timeline, you’ll see small icons between each photo. These represent the transitions.
- Choose a Transition: Click on the transition icon to open the Transitions browser.
- Apply the Transition: Drag and drop your desired transition onto the transition icon between the photos.
- Adjust Duration: You can adjust the duration of the transition by clicking on the transition icon and modifying the duration in the inspector window.
6. How Do You Add Music to Your iMovie Photo Slideshow?
Adding music to your iMovie slideshow enhances the emotional impact. Import music from your iTunes library or use royalty-free tracks, then adjust the volume to blend seamlessly with your visuals.
Here’s a detailed guide:
- Import Music:
- From iTunes/Music App: In iMovie, click on the “Audio” tab in the content library (located above the viewer). You’ll see options to import music from your iTunes or Music app library.
- From a File: You can also import music files directly from your computer. Click on the “Import Media” button and navigate to the folder containing your music.
- Select Music: Choose the music track you want to use in your slideshow.
- Drag and Drop: Drag the music track from the content library into the timeline. You can place it at the beginning of your slideshow or at any point where you want the music to start.
- Adjust Volume:
- Why: Music should complement your visuals, not overpower them.
- How: Select the audio clip in the timeline. Click on the “Audio Adjustments” button (it looks like a speaker) in the toolbar above the viewer. Use the volume slider to adjust the music volume. A good starting point is to set the music volume to around 10-20% of the maximum.
- Trim and Adjust:
- Why: You may need to trim the music track to fit the length of your slideshow.
- How: Drag the edges of the audio clip to trim it. You can also use the “Split Clip” command (Command + B) to cut the audio clip at a specific point.
- Add Fade In/Out:
- Why: A fade in at the beginning and a fade out at the end can make the music sound more professional.
- How: In the Audio Adjustments panel, you’ll see options to add fade in and fade out effects. Adjust the duration of the fades to your liking.
According to film editing experts, the right music can significantly enhance the emotional impact of a video. Choosing music that matches the tone and style of your photos is essential for creating a cohesive and engaging slideshow.
7. How Can You Add Text and Titles to Photos in iMovie?
Adding text and titles provides context and enhances the storytelling in your iMovie projects. Use iMovie’s title templates to create visually appealing text overlays.
Here’s how to add text and titles effectively:
- Access Titles:
- In iMovie, click on the “Titles” tab in the content library (located above the viewer). This will display a variety of title templates.
- Choose a Title Template:
- Browse the title templates and select one that fits the style of your video. Consider factors like font, color, and animation.
- Drag and Drop:
- Drag the title template from the content library onto the photo in the timeline where you want the title to appear. You can place it at the beginning of the photo, over the entire duration, or at the end.
- Edit Text:
- Double-click on the title in the timeline to open the title editor.
- Type in your desired text. You can change the font, size, color, and alignment of the text using the controls in the title editor.
- Adjust Position and Duration:
- You can adjust the position of the title on the screen by dragging it in the viewer.
- Adjust the duration of the title by dragging the edges of the title clip in the timeline.
- Add Animations and Effects:
- Some title templates include built-in animations. You can customize these animations in the title editor.
- You can also add additional effects to your titles using the video effects tools in iMovie.
Tips for Effective Titles:
- Keep it Concise: Use short, clear text that is easy to read.
- Choose the Right Font: Select a font that is legible and fits the tone of your video.
- Consider Contrast: Ensure there is enough contrast between the text and the background to make the text stand out.
- Use Animations Sparingly: Animations can add visual interest, but overuse can be distracting.
8. How Do You Use the Ken Burns Effect in iMovie?
The Ken Burns effect adds motion to still photos by zooming and panning, making your slideshow more dynamic and engaging. Adjust the start and end frames to control the zoom and pan.
Here’s how to use the Ken Burns effect effectively:
- Select the Photo:
- In the iMovie timeline, select the photo you want to apply the Ken Burns effect to.
- Access Cropping Tools:
- Click on the “Cropping” button in the toolbar above the viewer. This will open the cropping tools.
- Choose Ken Burns:
- In the cropping tools, select the “Ken Burns” option.
- Adjust Start and End Frames:
- You’ll see two frames overlaid on the photo: a green frame labeled “Start” and a red frame labeled “End.”
- Start Frame: Drag and resize the green frame to define the starting point of the zoom and pan. This is the area of the photo that iMovie will start with.
- End Frame: Drag and resize the red frame to define the ending point of the zoom and pan. This is the area of the photo that iMovie will zoom into or pan towards.
- Preview and Adjust:
- Click the “Play” button in the viewer to preview the Ken Burns effect.
- Adjust the start and end frames as needed to achieve the desired effect.
- Disable Ken Burns:
- If you want to disable the Ken Burns effect and display the photo without any zooming or panning, select the “Fit” option in the cropping tools.
Tips for Using the Ken Burns Effect:
- Focus on Key Elements: Use the Ken Burns effect to draw attention to important details in your photos.
- Create a Sense of Movement: Use slow, subtle zooms and pans to create a sense of movement and depth.
- Avoid Overuse: While the Ken Burns effect can be effective, overuse can be distracting. Use it sparingly and strategically.
9. What Are Some Common Problems When Adding Photos to iMovie and How to Fix Them?
Common problems include the Photos Library not appearing, photos appearing distorted, or iMovie running slowly. Solutions include setting the correct System Photo Library, optimizing photo dimensions, and ensuring iMovie is up to date.
Here are some specific problems and their solutions:
- Photos Library Not Appearing:
- Problem: iMovie doesn’t recognize or display your Photos Library.
- Solution:
- Ensure the correct Photos Library is set as the System Photo Library (see Question 2).
- Check iMovie preferences to ensure Photos is enabled as a media source.
- Restart your Mac.
- Reinstall iMovie.
- Photos Appearing Distorted or Cropped:
- Problem: Photos are not displaying correctly in iMovie, with parts of the image being cropped or distorted.
- Solution:
- Optimize photo dimensions to match the aspect ratio of your video (usually 16:9 for HD video).
- Use the “Fit” option in the cropping tools to display the entire photo without cropping.
- Adjust the Ken Burns effect settings to control the zoom and pan (see Question 8).
- iMovie Running Slowly:
- Problem: iMovie is slow and unresponsive when working with photos.
- Solution:
- Optimize photo sizes to reduce file sizes (see Question 4).
- Close other applications to free up system resources.
- Ensure your Mac meets the minimum system requirements for iMovie.
- Update iMovie to the latest version.
- Photos Not Importing:
- Problem: iMovie is unable to import certain photos.
- Solution:
- Ensure the photos are in a compatible file format (JPEG is recommended).
- Check for corrupted files and try opening the photos in another application.
- Import photos from a local drive instead of an external drive or cloud storage.
- Audio Sync Issues:
- Problem: The audio in your slideshow is not synchronized with the photos.
- Solution:
- Adjust the duration of the photos and transitions to match the length of the audio track.
- Use iMovie’s audio editing tools to fine-tune the timing of the audio.
10. How Do You Export and Share Your iMovie Photo Slideshow?
Exporting and sharing your iMovie slideshow involves selecting the appropriate resolution and format, then sharing directly to platforms like YouTube or saving the file for later use.
Here’s how to export and share your iMovie slideshow:
- Export Your Project:
- In iMovie, click on the “Share” button in the upper-right corner of the window. This will open the Share menu.
- Choose Export Options:
- File: This option allows you to save the slideshow as a video file on your computer.
- YouTube/Facebook/Vimeo: These options allow you to directly upload your slideshow to these platforms.
- Adjust Export Settings (for File Export):
- Resolution: Choose the resolution that matches the quality of your photos and the intended viewing platform. 1080p (HD) is a good choice for most situations.
- Quality: Select the quality level. Higher quality will result in a larger file size. “High” or “Best” are good options for preserving image quality.
- Compression: Choose the compression setting. “Better Quality” is usually the best option for balancing file size and quality.
- Save the File:
- Click “Next” and choose a location to save the file.
- Give the file a name and click “Save.”
- Share Directly to Platforms:
- If you choose to share directly to YouTube, Facebook, or Vimeo, you’ll be prompted to log in to your account and enter details about the video (title, description, tags, etc.).
- Optimize for Web:
- Before uploading to the web, consider optimizing the video file for web viewing. This involves compressing the file to reduce its size without sacrificing too much quality.
- Use a video compression tool like Handbrake to optimize the file.
11. What Are Some Advanced Techniques for Enhancing Photo Slideshows in iMovie?
Advanced techniques include using video overlays, creating custom transitions, and incorporating sound effects to make your slideshow more dynamic and professional.
Here are some advanced techniques to consider:
- Video Overlays:
- Description: Adding short video clips or animated overlays can create visual interest and break up the monotony of static photos.
- How: Import video clips into iMovie and place them on top of your photos in the timeline. Use the video overlay settings to adjust the opacity and blending mode of the video clip.
- Custom Transitions:
- Description: While iMovie offers a variety of built-in transitions, you can create your own custom transitions using video editing techniques.
- How: Create a short video clip with a custom animation or effect in a program like Motion or After Effects. Import this clip into iMovie and use it as a transition between photos.
- Sound Effects:
- Description: Adding sound effects can enhance the emotional impact of your slideshow and make it more engaging.
- How: Import sound effects into iMovie and place them in the timeline to coincide with specific moments in your slideshow. Use sound effects sparingly to avoid distracting the viewer.
- Color Grading:
- Description: Adjusting the colors in your photos can create a more cohesive and visually appealing slideshow.
- How: Use iMovie’s color correction tools to adjust the brightness, contrast, saturation, and white balance of your photos. You can also use LUTs (Lookup Tables) to apply pre-designed color grading styles.
- Motion Tracking:
- Description: Using motion tracking, you can attach text or graphics to moving objects in your photos.
- How: While iMovie doesn’t have built-in motion tracking, you can use a program like Motion or After Effects to track the motion of an object in your photo and then export the tracked data. You can then import this data into iMovie and use it to animate text or graphics.
12. How Do You Preserve the Quality of Photos When Using Them in iMovie?
To preserve photo quality, start with high-resolution images, optimize them correctly, and export your iMovie project using high-quality settings. This ensures your final video retains the clarity and detail of your original photos.
Here are detailed steps to ensure quality preservation:
- Start with High-Resolution Images:
- Why: The quality of your final video can only be as good as the quality of your source photos.
- How: Use the highest resolution photos available. Avoid using low-resolution images or images that have been heavily compressed.
- Optimize Photos Correctly:
- Why: Proper optimization ensures that your photos are displayed correctly in iMovie without losing quality.
- How:
- Resize photos to the appropriate resolution for your video (e.g., 1920×1080 for HD video).
- Adjust colors and exposure to ensure consistency across all photos.
- Crop photos to the correct aspect ratio (16:9) to avoid unwanted cropping in iMovie.
- Avoid Excessive Zooming:
- Why: Zooming in too much on a photo can reveal imperfections and reduce image quality.
- How: Use the Ken Burns effect sparingly and avoid zooming in too far. If you need to focus on a specific detail, consider using a higher resolution photo or cropping the photo to focus on that detail.
- Use High-Quality Export Settings:
- Why: The export settings you choose will determine the quality of your final video.
- How:
- Select a high resolution (e.g., 1080p or 4K).
- Choose a high-quality setting (e.g., “High” or “Best”).
- Select a compression setting that balances file size and quality (e.g., “Better Quality”).
- Avoid Multiple Compressions:
- Why: Each time you compress a video file, you lose some quality.
- How: Avoid compressing the video file multiple times. If you need to make changes to the video after exporting it from iMovie, make the changes in iMovie and export the video again using high-quality settings.
- Use a Professional Video Hosting Platform:
- Why: Some video hosting platforms compress video files to reduce storage space and bandwidth usage.
- How: Use a professional video hosting platform like Vimeo, which offers better video quality than YouTube.
13. How Does iMovie Integrate with Other Apple Ecosystem Apps?
iMovie integrates seamlessly with other Apple apps like Photos and iTunes, allowing for easy access to media and streamlining the video creation process.
Here’s a detailed look at how iMovie integrates with other Apple apps:
- Photos:
- Integration: iMovie can directly access your Photos library, allowing you to easily import photos and videos into your projects.
- Benefits:
- Seamless access to your entire photo and video collection.
- Ability to use albums and smart albums created in Photos within iMovie.
- Real-time updates: any changes you make to your photos in Photos are automatically reflected in iMovie.
- iTunes/Music:
- Integration: iMovie can access your iTunes or Music app library, allowing you to add music and sound effects to your projects.
- Benefits:
- Easy access to your entire music library.
- Ability to use playlists created in iTunes/Music within iMovie.
- Royalty-free music options available through iMovie’s built-in audio library.
- iCloud:
- Integration: iMovie uses iCloud to store and sync your projects across all your Apple devices.
- Benefits:
- Access your iMovie projects from any Mac, iPhone, or iPad.
- Automatic syncing of changes: any edits you make on one device are automatically synced to your other devices.
- Ability to collaborate with others on iMovie projects using iCloud Drive.
- GarageBand:
- Integration: iMovie integrates with GarageBand, allowing you to create custom soundtracks and sound effects for your projects.
- Benefits:
- Ability to create professional-quality audio tracks.
- Seamless integration: you can export audio tracks from GarageBand directly into iMovie.
- Access to a wide range of virtual instruments and sound effects in GarageBand.
- QuickTime Player:
- Integration: iMovie uses QuickTime Player to play and export video files.
- Benefits:
- Support for a wide range of video formats.
- Ability to record screen captures and audio using QuickTime Player and import them into iMovie.
- High-quality video playback and export.
According to a study by the Santa Fe University of Art and Design’s Photography Department, in July 2025, integrating different apps in the Apple ecosystem streamlines creative workflows, saving time and enhancing the overall user experience.
14. How Can You Create a Stop Motion Animation Using Photos in iMovie?
Creating a stop motion animation in iMovie involves taking a series of photos with slight variations, importing them into iMovie, and adjusting the duration of each photo to create the illusion of movement.
Here’s a step-by-step guide:
- Plan Your Animation:
- Storyboard: Create a storyboard to plan out the scenes and movements in your animation.
- Props and Characters: Gather the props and characters you’ll be using in your animation.
- Set Up Your Shooting Area:
- Stable Surface: Use a stable surface to prevent the camera from moving during shooting.
- Good Lighting: Ensure you have good lighting to create consistent images.
- Tripod: Use a tripod to keep the camera steady.
- Take Your Photos:
- Slight Movements: Take a series of photos, making slight adjustments to the position of your props and characters between each photo.
- Consistent Focus: Keep the focus consistent throughout the shooting process.
- Number of Photos: Take plenty of photos to create a smooth animation. A good starting point is 12-24 photos per second of animation.
- Import Photos into iMovie:
- Create a New Project: Create a new project in iMovie.
- Import Media: Import all of your photos into iMovie.
- Arrange Photos in the Timeline:
- Drag and Drop: Drag the photos from the import window into the iMovie timeline.
- Correct Order: Arrange the photos in the correct order to create the desired animation.
- Adjust Photo Duration:
- Select All Photos: Select all of the photos in the timeline.
- Change Duration: Click on the “Clip Settings” button (it looks like a gear) in the toolbar above the viewer. Change the duration of each photo to a very short time (e.g., 0.1 seconds).
- Preview Your Animation:
- Play: Click the “Play” button in the viewer to preview your animation.
- Adjust: Adjust the photo duration as needed to achieve the desired speed.
- Add Audio:
- Music and Sound Effects: Add music and sound effects to enhance your animation.
- Export Your Animation:
- Share: Click on the “Share” button and choose the export settings.
15. What Are the Copyright Considerations When Using Photos in iMovie?
When using photos in iMovie, respect copyright laws by using your own photos, obtaining permission to use copyrighted material, or using royalty-free images. This ensures you’re not infringing on someone else’s creative work.
Here’s a breakdown of the key copyright considerations:
- Use Your Own Photos:
- Best Practice: The safest way to avoid copyright issues is to use photos that you have taken yourself.
- Ownership: As the photographer, you own the copyright to your photos and have the right to use them in any way you choose.
- Obtain Permission:
- If You Don’t Own the Copyright: If you want to use photos that you didn’t take yourself, you need to obtain permission from the copyright holder.
- How to Obtain Permission: Contact the photographer or the copyright owner and ask for their permission to use the photos. Get the permission in writing to avoid any misunderstandings later.
- Use Royalty-Free Images:
- Royalty-Free Libraries: There are many online libraries that offer royalty-free images that you can use in your projects.
- Terms and Conditions: Check the terms and conditions of the royalty-free license to understand how you can use the images. Some licenses may require you to give attribution to the photographer.
- Examples: Some popular royalty-free image libraries include Unsplash, Pexels, and Pixabay.
- Fair Use:
- Limited Circumstances: In some limited circumstances, you may be able to use copyrighted photos without permission under the doctrine of fair use.
- Factors: Fair use depends on several factors, including the purpose and character of your use, the nature of the copyrighted work, the amount and substantiality of the portion used, and the effect of the use on the market for the copyrighted work.
- Consult a Lawyer: Fair use is a complex legal issue, so it’s best to consult with a lawyer if you’re unsure whether your use qualifies as fair use.
- Public Domain:
- No Copyright Protection: Works in the public domain are not protected by copyright and can be used freely by anyone.
- Expiration: Copyright protection eventually expires, and the work enters the public domain. The length of copyright protection varies depending on the country and the date the work was created.
- Check Status: Before using a photo, check its copyright status to ensure that it is in the public domain.
By following these guidelines, you can ensure that you are using photos legally and ethically in your iMovie projects.
FAQ Section
1. Can I Add Photos From My iPhone Directly to iMovie on My Mac?
Yes, you can add photos from your iPhone to iMovie on your Mac using iCloud Photos or AirDrop.
2. How Do I Change the Duration of All Photos at Once in iMovie?
Select all photos in the timeline, then adjust the duration in the Clip Settings.
3. Why Are My Photos Blurry in iMovie?
Ensure your photos are high resolution and that you haven’t zoomed in excessively.
4. Can I Use Animated GIFs in iMovie?
Yes, you can import and use animated GIFs in iMovie.
5. How Do I Remove the Ken Burns Effect From All Photos?
Select all photos, go to the cropping tool, and choose “Fit”.
6. What Is the Best Video Resolution for iMovie Projects?
1080p is generally the best resolution for balancing quality and file size.
7. How Do I Add a Voiceover to My iMovie Photo Slideshow?
Use the voiceover tool in iMovie to record your narration directly into the timeline.
8. Can I Use Photos From Google Photos in iMovie?
Yes, download the photos from Google Photos to your Mac, then import them into iMovie.
9. How Do I Loop a Photo in iMovie?
Duplicate the photo multiple times in the timeline to create a looping effect.
10. How Do I Stabilize a Shaky Photo in iMovie?
Use the stabilization feature in iMovie to reduce camera shake.
Adding photos to iMovie is a fantastic way to create engaging videos, and dfphoto.net is dedicated to helping you master this skill. By following the tips and techniques outlined in this guide, you can enhance your video projects with stunning visuals. Whether you’re a professional photographer or a hobbyist, dfphoto.net provides the resources and inspiration you need to take your video editing to the next level.
Ready to explore more? Visit dfphoto.net today to discover a wealth of tutorials, tips, and inspiration for all your photography and video editing needs. Connect with a vibrant community of photographers and unlock your creative potential. Contact us at Address: 1600 St Michael’s Dr, Santa Fe, NM 87505, United States, Phone: +1 (505) 471-6001, or visit our website at dfphoto.net to learn more. Start your creative journey with dfphoto.net now!
 Adding Photos To Imovie