Instagram, boasting over a billion active users, stands as a powerhouse for visual storytelling and brand building. If you’re looking to tap into this vibrant platform, mastering the art of posting photos is your first step. Whether you’re a budding influencer, a business aiming for greater visibility, or simply eager to share your life’s moments, understanding how to upload photos on Instagram is essential.
This guide will walk you through each step of posting photos on Instagram, ensuring you can effortlessly share your visual content and connect with your audience. Let’s dive into how you can start uploading your photos and making the most of Instagram’s dynamic platform.
Step 1. Initiate Your Post by Tapping the Plus (+) Icon
To begin your Instagram photo upload journey, look for the + icon, usually located at the top center or top right of your Instagram screen. This universally recognized plus sign is your gateway to creating new content. Give it a tap, and you’ll be on your way to sharing your chosen photo with the world.
Step 2. Select Your Photo or Video from Your Phone’s Library
Upon tapping the plus icon, Instagram will open your phone’s photo and video library. Here, you can browse through your camera roll and choose the perfect photo or video you want to share. If you haven’t captured the moment yet, you also have the option to take a new photo or video directly within the Instagram app by selecting the camera icon.
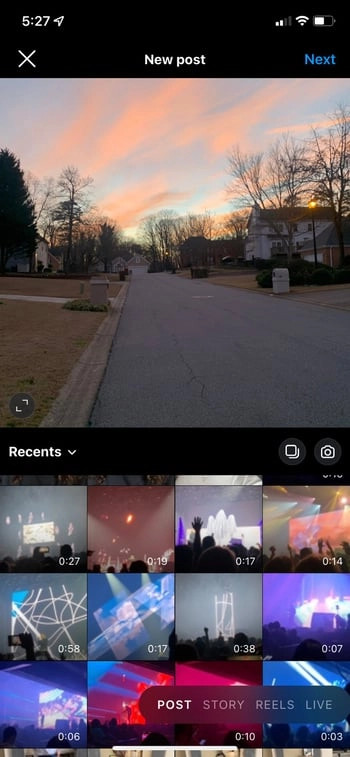 Choose a photo from your phone's library to upload to Instagram
Whether you choose a pre-existing image or decide to capture a new one on the spot, once you’ve made your selection, you’re ready to proceed to the next stage of the Instagram photo upload process. After selecting your image, tap ‘Next’ typically found in the top right corner to move forward.
Step 3. Leverage the Carousel Feature to Post Multiple Images
Want to share a series of photos that tell a story or showcase different aspects of a moment? Instagram’s carousel feature is your answer. This handy tool allows you to include multiple photos and videos in a single post, letting your followers swipe through a collection of content.
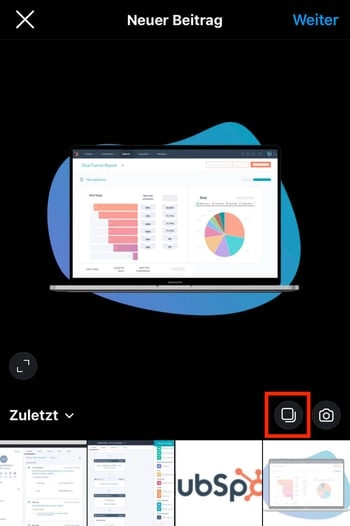 Select the stacked squares icon to upload multiple photos to an Instagram post
To use the carousel, when you are in your library selecting your photos, tap the “Select multiple” icon – it looks like stacked squares, usually located above your photo grid. Once activated, you can select up to 10 photos and videos to include in your carousel post. The order you select them in will be the order they appear in your post.
Step 4. Refine Your Image with Cropping Adjustments
Instagram offers flexibility beyond the square format. While its roots are in square images, you can also share photos in their original aspect ratio, whether horizontal or vertical. To ensure your entire image is visible, you might need to make minor cropping adjustments.
When you select a photo, Instagram will initially fit it into a square frame. To reveal the full image dimensions, simply pinch the screen on the photo. This action zooms out and fits the entire photo within the posting frame, whether it’s a wide landscape or a tall portrait.
While Instagram is accommodating to various aspect ratios, keep in mind that there are still dimension limitations to ensure optimal display within the app. Minor cropping might still be necessary to perfectly frame your shot for Instagram’s display.
Step 5. Enhance Your Photo with Filters
Filters are a signature Instagram feature, offering a quick way to alter the mood and aesthetic of your photos. Instagram provides a diverse range of filters to choose from. To explore them, simply swipe left across the filter options displayed at the bottom of your screen.
Tap on each filter to preview how it transforms your photo in real-time. If you find a filter effect too strong, you can adjust its intensity. After applying a filter, tap on the filter’s icon again. This will usually open a slider, allowing you to reduce the filter’s strength and create a more subtle effect.
For more nuanced adjustments, look for the ‘Edit’ option, typically located after the filters. This opens up a suite of editing tools beyond filters, allowing for detailed photo refinement.
Step 6. Utilize Instagram’s Editing Tools for Fine-Tuning
For those who want more control over their image’s final look, Instagram provides a comprehensive suite of editing tools. Access these by tapping ‘Edit’ at the bottom right corner after you’ve selected your photo and chosen (or skipped) a filter. These tools offer granular control over various aspects of your image:
- Adjust: Straighten or subtly rotate your image.
- Brightness: Lighten or darken the overall image.
- Contrast: Enhance or soften the intensity of colors.
- Structure: Add definition and detail to your photo, making elements ‘pop’.
- Warmth: Adjust the temperature of your photo, making it cooler or warmer in tone.
- Saturation: Control the vibrancy of colors, from monochrome to intensely colorful.
- Color: Overlay color tints for creative effects.
- Fade: Soften blacks for a vintage, aged look.
- Highlights: Adjust the brightness of the lightest parts of your image.
- Shadows: Modify the darkness of the shadows in your photo.
- Vignette: Darken the image edges, focusing attention on the center.
- Tilt Shift: Blur parts of the image to create depth of field effects.
- Sharpen: Enhance the clarity and sharpness of details.
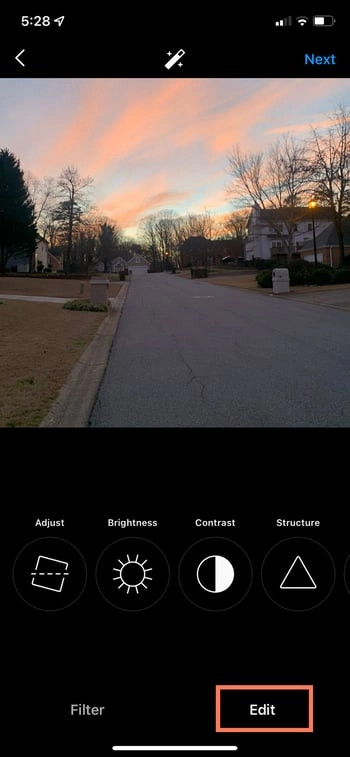 Use Instagram's editing tools to refine your photo before posting
Experiment with these tools to achieve the perfect look for your photo before sharing it with your Instagram audience.
Step 7. Craft a Compelling Caption
A well-written Instagram caption adds context, personality, and encourages engagement with your photo. Tap the ‘Write a caption’ area below your image to start typing. This is your space to tell a story, ask a question, or simply add relevant details about your photo.
Captions also play a role in Instagram’s search functionality. Including relevant keywords can improve your post’s discoverability. Think about what words people might search for to find content like yours and incorporate them naturally into your caption.
Step 8. Boost Visibility with Hashtags
Hashtags are crucial for expanding your post’s reach on Instagram. They categorize your content and make it discoverable to users interested in specific topics. Integrate relevant hashtags into your caption to tap into these communities and increase visibility.
 Add relevant hashtags to your Instagram post for better discoverability
Research trending and relevant hashtags for your niche or photo content. Use a mix of broad and specific hashtags to maximize your chances of being found. Instagram allows up to 30 hashtags per post, but aim for quality over quantity. A strategic selection of 5-10 highly relevant hashtags is often more effective.
Step 9. Tag Friends and Connections
If your photo includes friends, family, or collaborators, tagging them is a great way to share the post with their networks too. Tagging notifies the tagged individuals and can increase the post’s visibility among their followers.
You can tag people in two ways:
- Using ‘Tag People’ before posting: On the ‘New Post’ screen, tap ‘Tag People’. Then, tap on individuals in the photo to tag them. You can search for their Instagram usernames to add the tags.
- Mentioning in the caption: Simply type the ‘@’ symbol followed by their username directly in your caption.
Step 10. Add Your Location to Contextualize Your Post
Adding a location to your Instagram post provides context and can help people discover your content based on geographic areas. If you’re at a specific place, consider adding the location to your post.
Tap ‘Add Location’ on the ‘New Post’ screen. You can search for a place or select from nearby locations suggested by Instagram. When you add a location, it appears publicly with your post, allowing users to explore photos and videos shared from that same location. This can be particularly useful for businesses or travel-related content.
Step 11. Enhance Captions with Emojis
Emojis can add personality and visual appeal to your Instagram captions. Use emojis to complement your text, convey emotion, or highlight key points. Instagram provides a wide range of emojis that you can easily insert into your captions using your device’s emoji keyboard.
While emojis can be fun and engaging, use them judiciously. Ensure they are relevant to your caption and photo and don’t overuse them to the point of diluting your message. A few well-placed emojis can enhance your caption’s tone and readability.
Step 12. Cross-Post to Other Social Media Platforms
To broaden your reach, Instagram offers the option to simultaneously share your post to other connected social media platforms like Facebook, Twitter, and more. Before you finalize your post, look for the ‘Also post to’ section.
Toggle the buttons next to the social media platforms where you want to share your Instagram post. Once you hit ‘Share’ on Instagram, your post will automatically be published on these connected platforms as well, saving you time and effort in sharing across multiple channels.
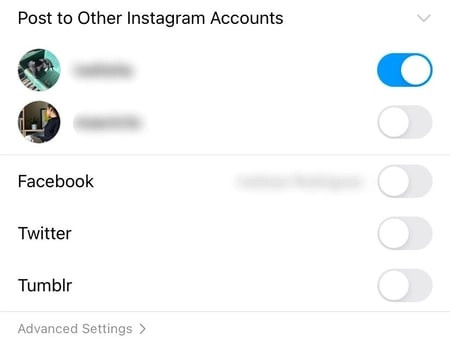 Share your Instagram post to connected social media accounts
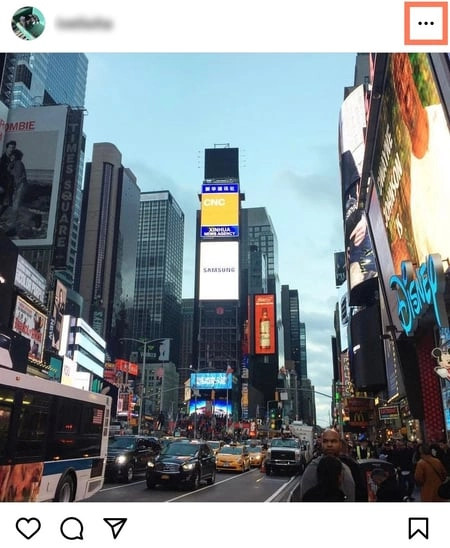
Step 13. Edit Your Post After Publishing
Made a typo or want to tweak your caption after posting? No worries, Instagram allows you to edit your posts even after they are live.
To edit, navigate to your published post and tap the three dots (…) located at the top right corner of the post. From the options that appear, select ‘Edit’. This allows you to modify your caption, add or change tags, adjust location, and make other adjustments. Once you’ve made your edits, tap ‘Done’ (or the checkmark icon) to save your changes.
 Edit your Instagram post after publishing by tapping the three dots and selecting edit
This edit feature offers flexibility and ensures you can maintain the quality and accuracy of your Instagram content even after it’s been shared.
Expand Your Instagram Presence
Mastering how to upload photos on Instagram is just the beginning. Consistent posting and engaging content are key to growing your audience and making an impact on this platform. Whether for personal branding or business growth, Instagram offers powerful tools to connect visually and build a thriving community. Start posting today and explore the potential of visual storytelling on Instagram!