Uploading photos might seem straightforward, but sometimes you can encounter a few bumps in the road. If you’re wondering “How Do I Upload A Photo” and are facing difficulties, especially when using a Mac, this guide is for you. We’ll walk you through the common methods and troubleshoot potential issues to make photo uploading a breeze.
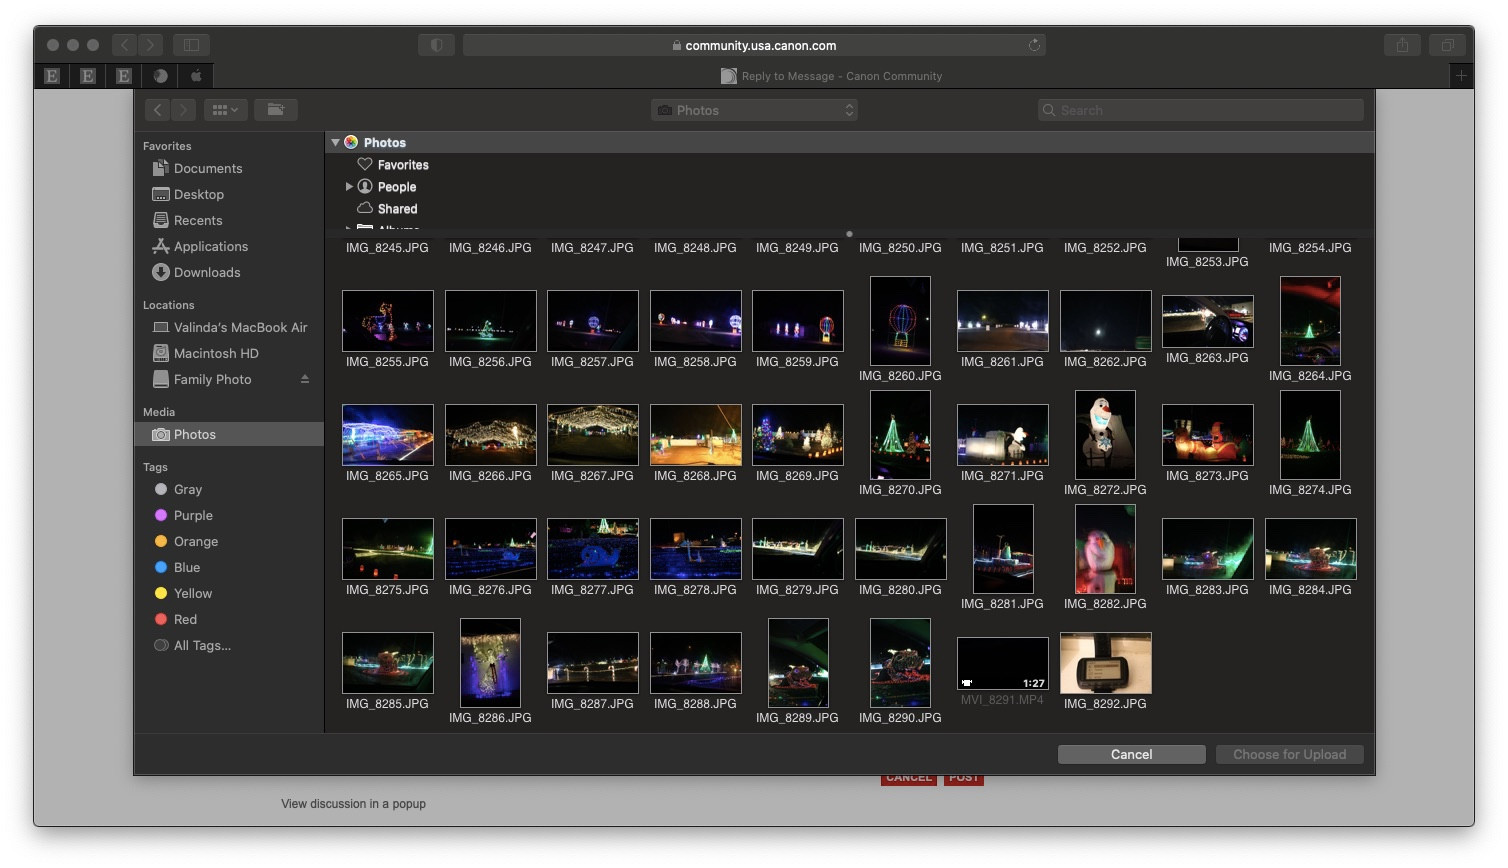
One common way to upload photos is through your web browser. Many websites and platforms allow you to directly upload images. Typically, you’ll find an “upload” button or icon on the webpage. Clicking this usually opens a file selection window, allowing you to choose the photo from your computer’s files.
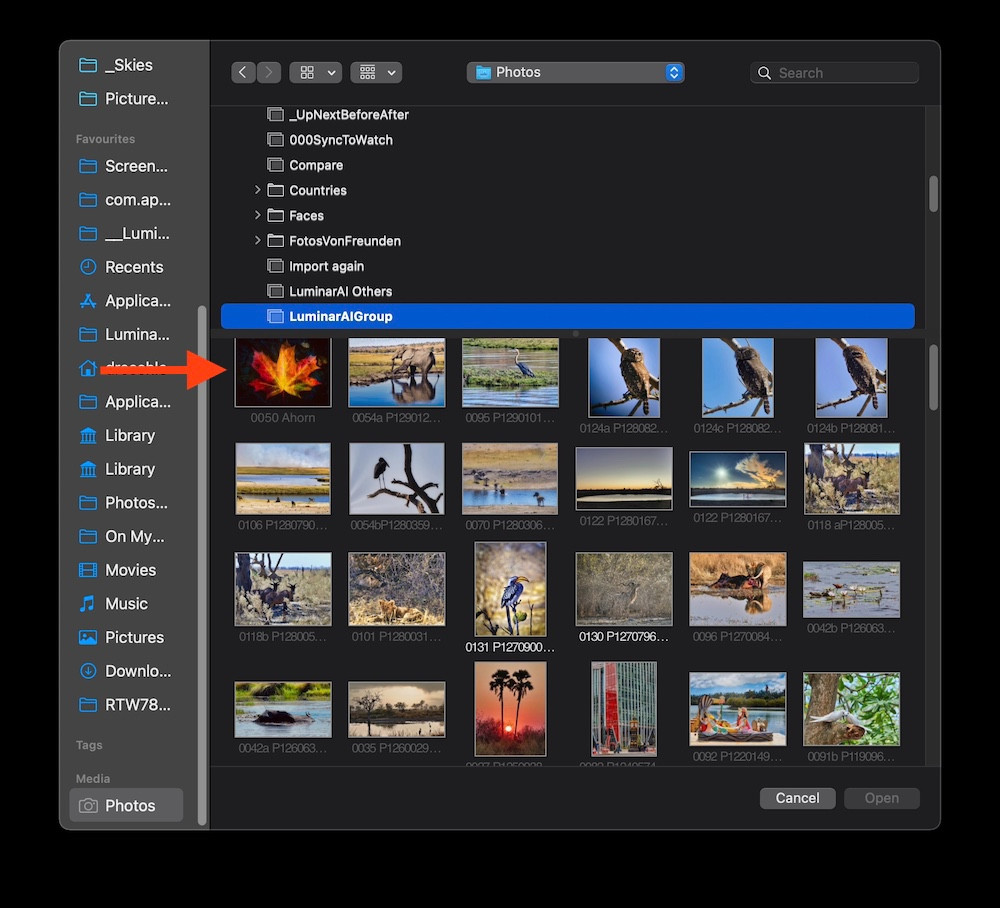
 File chooser window showing "Pictures" selected in the sidebar
Sometimes, users expect to see their “Photos” library directly in the upload window, especially on macOS. You might be looking for a “Media” option in the sidebar of the file chooser. If you only see “Pictures” or other folders, don’t worry. Even if “Media” appears greyed out, it’s still worth clicking. Often, clicking on “Media” will reveal your “Photos” library, giving you access to all your images stored there.
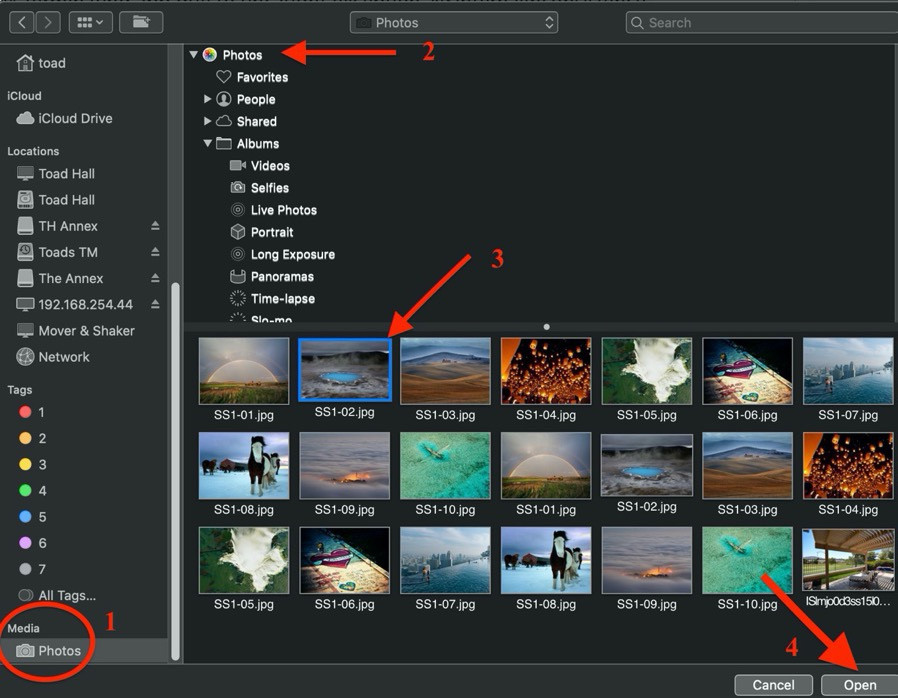
 Media browser window with "Photos" selected, but greyed out
However, you might still face issues if your photos are in a format that’s not universally accepted by all websites. A prime example is the HEIC format, which is commonly used by iPhones. If your photos are synced from your iPhone to your Mac as HEIC files, they might appear dimmed or not be uploadable on some websites. This is because some platforms may not natively support the HEIC format. JPEG is still the most widely compatible image format for web uploads.
If you encounter this HEIC issue, there are a couple of solutions. One is to ensure your iPhone is set to capture photos in “Most Compatible” format (JPEG) under Camera settings, if possible for future photos. For existing HEIC photos, you can convert them to JPEG. You can easily export photos from your Photos app as JPEGs.
Another point to consider is your System Photo Library. For your “Photos” library to be readily accessible through the Media Browser, it needs to be designated as the System Photo Library within the Photos application settings. Also, if your System Photo Library is located on an external drive, ensure that the drive is connected to your computer when you are trying to upload.
 Photos app showing the option to "Use as System Photo Library" greyed out because it's already the system library
If you’re still having trouble directly accessing your Photos library via the Media Browser, a reliable alternative is to export the photo you want to upload to your desktop or another easily accessible folder. Within the Photos app, simply select the photo, go to “File” -> “Export” and choose a location like your desktop. Then, when you use the website’s upload function, you can navigate to the exported JPEG file on your desktop and upload it without issues.
In summary, uploading a photo generally involves using a website’s upload button and selecting your image file. If you are on a Mac and want to upload from your Photos library, look for the “Media” option in the file chooser, even if it’s greyed out. Be mindful of image formats like HEIC and consider exporting to JPEG if needed. Finally, ensure your System Photo Library is correctly set up if you expect seamless access through the Media Browser. By following these steps, you should be able to easily upload your photos to any website.