Photos are visual memories we cherish, and moving them to a new Android phone should be seamless, not stressful. Upgrading your device or simply sharing snapshots shouldn’t mean losing your precious photo library. This comprehensive guide, crafted by the experts at dfphoto.net, will walk you through the best methods on how to transfer photos from Android to Android, ensuring you never lose a moment.
Whether you prioritize speed, security, or ease of use, we’ve tested and compiled six effective ways to transfer your photos. Let’s dive into each method, exploring their pros and cons to help you choose the perfect solution for your needs.
Key Considerations When Choosing a Photo Transfer Method
Before we jump into the “how-to”, let’s think about what matters most to you in a photo transfer method:
- Storage Preferences: Do you want your photos stored directly on your Android devices, backed up in the cloud, or kept locally on your computer? Cloud services offer convenience but might come with storage limits and subscription fees. Local storage provides more control and privacy.
- Compatibility: Ensure the method you choose works with both your old and new Android devices and their Android versions. Some methods might have specific requirements.
- Transfer Scope: Are you only transferring photos, or do you also need to move videos, and other file types? Some methods are photo-focused, while others are more versatile for broader data transfer.
Let’s explore the methods now!
Method 1: Transfer Photos via PC Using Droid Transfer
For users who prefer managing their photo library on a computer, using a PC as an intermediary offers robust control and security. Droid Transfer software, paired with the free Transfer Companion app on your Android, provides a powerful solution.
Droid Transfer allows you to transfer photos from your Android to your PC, and then easily transfer those photos to another Android device. Beyond photos, Droid Transfer handles music, contacts, messages, and more, making it a comprehensive Android management tool.
Explore Droid Transfer for Photo Transfers Download Droid Transfer for Free
Here’s how to transfer photos between Android devices using your PC and Droid Transfer:
-
Connect your old Android to your PC: Launch Droid Transfer on your PC and connect your Android phone via Wi-Fi or USB cable, following the on-screen instructions.
-
Access Photos: In Droid Transfer, navigate to the “Photos” section.
-
Save Photos to PC: Select the photos you want to move and click “Save to PC“. Choose a destination folder on your computer.
-
Disconnect Old Android, Connect New Android: Once the transfer is complete, safely disconnect your old phone and connect your new Android device to your PC.
-
Add Photos to New Android: In Droid Transfer with your new phone connected, go back to the “Photos” section and click “Add Photos to Device“.
-
Select Photos from PC: Choose the folder on your PC where you saved your photos and select the photos you wish to transfer to your new Android. Click “Open” to begin the transfer.
Droid Transfer also offers an invaluable “Export New Photos” feature for regular photo backups to your PC. This ensures your photo library is safely stored and easily accessible. You can try Droid Transfer with a limit of 100 photo copies using the free download. For unlimited transfers and full features, a license purchase is available.
Advantages of Using Droid Transfer
- Local and Secure Storage: Photos are stored on your devices and PC, providing secure, offline access.
- Versatile Compatibility: Works with Windows 10+ PCs and Android 5.0+ devices.
- Comprehensive Android Management: More than just transfer; manage, edit, backup, and sync various Android content types.
- Multiple Connection Options: Transfer via Wi-Fi or USB.
- Excellent Value: Feature-rich and competitively priced.
Disadvantages of Using Droid Transfer
- Indirect Transfer: Requires an intermediate step of transferring photos to a PC before moving them to the new Android.
Method 2: Bluetooth for Direct Android to Android Photo Transfer
Bluetooth, a long-standing wireless technology, remains a viable option for direct device-to-device file sharing, including photos.
Before starting, ensure Bluetooth is enabled and both devices are paired.
To activate Bluetooth on Android: Go to Settings > Bluetooth and toggle Bluetooth to ON. To pair devices, in Bluetooth settings, tap “Pair new device” and select your other Android phone.
Here’s how to transfer photos via Bluetooth:
-
Open Photos App: On the Android with your photos, open your photo gallery app.
-
Select Photos: Choose the photos you want to transfer. For multiple selections, tap and hold one photo, then tap to select others.
-
Share via Bluetooth: Tap “Share“, choose “Bluetooth“, and select your target Android device from the list.
-
Accept Transfer on New Device: On your new Android, you’ll receive a notification to accept the incoming Bluetooth transfer. Tap “Accept” to begin receiving photos.
Keep in mind that Bluetooth can present security risks if not used cautiously. Follow best practices, such as keeping your devices updated and disabling Bluetooth when not in use.
Advantages of Bluetooth Transfer
- Wireless and Direct: Transfers photos directly between Android devices without needing cables or a computer.
- Local Storage: Photos remain stored on your Android devices.
- Wide Compatibility: Bluetooth is a standard feature on almost all modern smartphones.
- Versatile File Sharing: Supports transfer of photos, videos, audio, and other file types.
Disadvantages of Bluetooth Transfer
- Slow Transfer Speeds: Significantly slower compared to Wi-Fi or USB, especially for large photo libraries.
- Limited Bandwidth: Not ideal for transferring large files or batches of photos.
- Connection Instability: Bluetooth connections can be prone to interference and pairing issues, potentially disrupting the transfer process.
- Security Concerns: Bluetooth vulnerabilities exist; cautious usage is advised.
Method 3: Google Photos Cloud Transfer
Cloud storage services like Google Photos offer an efficient and convenient way to transfer photos and back up your entire photo library. Google Photos stores your photos in the cloud, freeing up space on your devices. While Google provides 15GB of free storage shared across Google Drive, Gmail, and Photos, larger libraries may require a Google One subscription for expanded storage.
With your photos in the cloud, you can access them from any device with an internet connection. This eliminates the need for direct transfers in many cases; you can simply access your photos from your new Android phone. If needed, you can download photos from Google Photos back to your device.
Here’s how to use Google Photos for transfer:
-
Backup from Old Android: Open Google Photos on your old Android and sign in with your Google account.
-
Enable Backup: Tap your profile icon in the top right corner. If “Backup is off,” tap “Turn on backup“.
-
Choose Google Account: Select the Google account you’ll use on your new Android.
-
Confirm Backup: Tap “Turn on backup“. The initial backup time depends on your library size and internet speed.
-
Access Photos on New Android: On your new Android, open Google Photos and sign in with the same Google account. Your backed-up photos will be available in the cloud.
-
Download Photos (Optional): To save photos directly to your new Android, select a photo, tap “More” (three dots), and then “Download“.
Advantages of Google Photos
- Fast, Wireless, and Easy: Cloud-based transfer is quick and requires no cables.
- Flexible Storage: Photos can reside in the cloud, on your devices, or both.
- Universal Compatibility: Google Photos is available on virtually all Android devices.
Disadvantages of Google Photos
- Limited Free Storage: The 15GB free storage can fill up quickly, especially with videos and high-resolution photos. Requires Google One subscription for more space.
- Photo and Video Focus: Primarily designed for photos and videos. Google One/Drive is needed for other file types.
Method 4: Quick Share (Nearby Share) for Fast Wireless Transfers
Quick Share, formerly known as Nearby Share, is Google’s enhanced answer to wireless file sharing, similar to Apple’s AirDrop. Developed in collaboration with Samsung, Quick Share provides a faster and more efficient way to transfer files wirelessly between Android devices in close proximity, using a combination of Bluetooth and Wi-Fi.
Like Bluetooth, be mindful of security best practices when using Quick Share, especially since Bluetooth is involved in device discovery.
Quick Share is available on devices running Android 6.0 and higher and is pre-installed on many modern Android phones.
To use Quick Share:
-
Enable Quick Share, Bluetooth, and Wi-Fi: Ensure Quick Share is enabled on both Android devices. Also, turn on both Bluetooth (for device discovery) and Wi-Fi (for faster data transfer).
-
Open Photos App: Open the photo gallery on your Android phone.
-
Select Photos: Select the photos to transfer.
-
Share via Quick Share: Tap “Share“, then select “Quick Share“.
-
Device Discovery: Your device will scan for nearby Android devices with Quick Share and Bluetooth enabled.
-
Select Recipient Device: Choose your new Android phone from the list of available devices.
-
Accept Transfer: On your new Android, accept the incoming transfer request to receive the photos.
Advantages of Quick Share
- Direct and Wireless Transfer: Quick Share facilitates direct, cable-free transfers between Android devices.
- Local Storage: Photos are stored directly on your Android devices.
- Broad Compatibility: Works with most Android devices running Android 6.0 and newer.
- Versatile File Support: Transfers photos, videos, audio, and other file types.
- Fast Transfer Speeds: Utilizes Wi-Fi for significantly faster transfers compared to Bluetooth alone.
Disadvantages of Quick Share
- Bluetooth Security Considerations: While Quick Share is more secure than basic Bluetooth sharing, some Bluetooth security considerations still apply.
Method 5: Android Beam (NFC) for Proximity-Based Transfer
Android Beam was a pioneering feature for Android, introduced in Android 4.0, but has been deprecated since Android 10, with Quick Share as its successor. Android Beam used NFC (Near Field Communication), the same technology powering contactless payments.
NFC requires devices to be physically close, even touching, to initiate data transfer.
To use Android Beam (if your devices support it):
-
Enable NFC and Android Beam: On both Android devices, check for NFC and Android Beam settings. These might be under “Connected Devices” or “Wireless & Networks” > “More” in Settings. Ensure both are turned ON.
-
Open Photos and Select: On your old Android, open the Photos app and select the photos to transfer.
-
Touch Devices Back-to-Back: Ensure both Android devices are unlocked and physically touch their backs together.
-
Tap to Beam: On the sending device, you’ll see a “Tap to Beam” prompt.
-
Initiate Transfer: Tap the screen to beam your photos to the receiving Android.
Advantages of Android Beam
- Direct Wireless Transfer: Android Beam allows for direct, wireless photo transfer between Android devices.
- Local Storage: Photos are stored on your Android devices.
- File Versatility: Supports transfer of photos, videos, audio, and other files.
Disadvantages of Android Beam
- Limited Compatibility: Supported only on Android versions 4.0 to 9.0. Deprecated in Android 10 and later, making it less relevant for modern devices.
- Deprecation: Being deprecated means fewer and fewer devices will support it over time.
- Proximity Requirement: Requires devices to be in very close contact, which can be cumbersome.
Method 6: Smart Switch for Samsung Galaxy Device Migration
Smart Switch is Samsung’s dedicated app for simplifying device migration, especially useful when upgrading to a new Samsung Galaxy phone from an older Android device.
Smart Switch streamlines the process of transferring all your content to a new Samsung Galaxy.
Here’s how to use Smart Switch:
-
Install Smart Switch: Ensure the Smart Switch app is installed on both Android devices (it’s often pre-loaded on new Samsung Galaxy phones).
-
Launch and Initiate Receive: On your new Samsung Galaxy, open Smart Switch and tap “Receive data” > “Galaxy/Android“.
-
Choose Connection Method: Select your preferred connection method: “USB cable” or “Wi-Fi“. Follow the prompts to establish a connection between the two devices.
-
Select Content to Transfer: Choose “Pictures” and any other content types you wish to transfer.
-
Transfer and Finish: Tap “Transfer“. Once complete, tap “Done“.
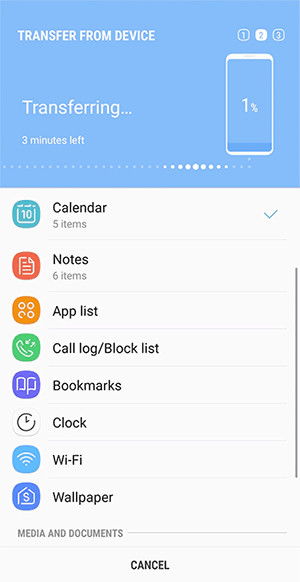 Samsung Smart Switch
Advantages of Smart Switch
- Direct Android to Android Transfers: Facilitates direct transfers, especially optimized for Samsung to Samsung migrations.
- Multiple Transfer Methods: Supports transfer via Wi-Fi, USB cable, or even SD card.
- Local Storage: Photos are stored on your Android devices.
- Comprehensive Data Transfer: Transfers photos, videos, music, messages, apps, and more.
Disadvantages of Smart Switch
- Samsung Ecosystem Lock-in: Primarily designed for transferring content to Samsung Galaxy devices. While it can transfer from other Androids, its primary purpose is Samsung-centric migrations.
- Compatibility Limitations: Best suited for Android 4.3+ devices transferring to Samsung Galaxy phones.
Conclusion: Choosing the Best Photo Transfer Method
This guide has provided you with a comprehensive overview of six effective methods for transferring photos from Android to Android. The best method for you depends on your priorities:
- For comprehensive Android management and secure local backups: Droid Transfer.
- For quick, direct wireless transfers of small batches: Bluetooth.
- For cloud backup and access across devices: Google Photos.
- For fast, wireless direct transfers: Quick Share.
- For older devices (if applicable): Android Beam.
- For migrating to a new Samsung Galaxy: Smart Switch.
By understanding the advantages and disadvantages of each method, you can confidently choose the ideal solution to transfer your precious photo memories to your new Android device.
Publisher: dfphoto.net Experts
[
Droid Transfer](/droidtransfer/transfer-photos-from-android-to-pc.php) Transfer photos from Android to Android and easily back up your media to PC.
Related Articles
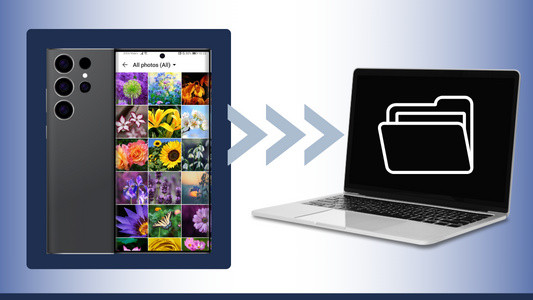 4 Easy Ways to Transfer Photos from Android to PC 4 Easy Ways to Transfer Photos from Android to PC
▷ Free Download
Droid Transfer X
Easily transfer photos from Android to Android and regularly back up your media using your PC.
Find out more > Try Droid Transfer free, today!
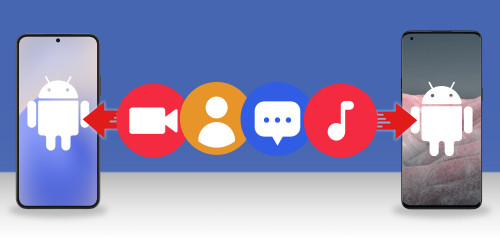 How to Transfer Data from Android to Android Read Next: How to Transfer Data from Android to Android >
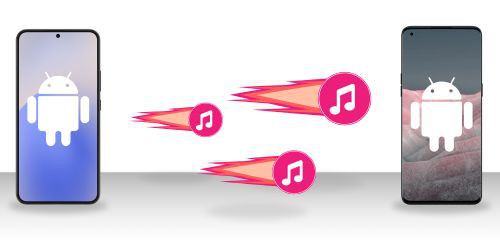 6 Quick and Easy ways to transfer music from one Android to another 6 Quick and Easy ways to transfer music from one Android to another
 The Top 6 Methods to Transfer your Android Contacts to a New Phone The Top 6 Methods to Transfer your Android Contacts to a New Phone
 3 ways to transfer files from Android to PC using Wi-Fi 3 ways to transfer files from Android to PC using Wi-Fi
