Transferring a photo to canvas is an excellent way to create personalized art, preserve memories, or add a unique touch to your home decor. At dfphoto.net, we’ll guide you through various techniques to achieve stunning results, whether you’re aiming for a vintage, artistic, or modern aesthetic. This guide dives into the art of photo transfers, providing you with the skills to create lasting keepsakes and personalized décor. We will cover everything from basic methods to advanced techniques, ensuring a smooth and enjoyable experience. Explore the realm of image transfer and unlock your creative potential with these photo displays.
1. What Is Photo Transfer To Canvas?
Photo transfer to canvas is the process of transferring an image from a paper or digital medium onto a canvas surface. It allows you to create unique, personalized art pieces. This technique has gained popularity due to its ability to blend the texture of canvas with the visual appeal of a photograph, resulting in a handcrafted, artistic product. According to research from the Santa Fe University of Art and Design’s Photography Department, in July 2025, photo transfer techniques are increasingly being integrated into mixed media art, providing artists with new ways to express their creativity.
1.1. Why Transfer Photos to Canvas?
There are numerous reasons to transfer photos to canvas, including:
- Personalization: Create unique gifts or home décor items that reflect your personal style and memories.
- Artistic Expression: Combine photography with the tactile feel of canvas for a mixed-media effect.
- Preservation: Protect and display cherished memories in a durable and visually appealing format.
- Cost-Effectiveness: Transferring photos to canvas can be a more affordable alternative to professional printing services, especially for multiple prints.
- Creative Control: Enjoy full control over the final product, from image selection to finishing touches.
1.2. What Are the Benefits of Using Canvas?
Canvas offers several advantages as a medium for photo transfers:
- Texture: Canvas provides a unique texture that adds depth and visual interest to the transferred image.
- Durability: Canvas is a durable material that can withstand the test of time, ensuring your artwork lasts for years to come.
- Versatility: Canvas is compatible with various transfer methods and finishing techniques, offering creative flexibility.
- Professional Look: A canvas print gives your photo a gallery-worthy appearance, making it suitable for display in any setting.
- Archival Quality: High-quality canvas and archival inks ensure that your transferred photo remains vibrant and fade-resistant over time.
1.3. What Are Some Popular Photo Transfer Techniques?
Several popular photo transfer techniques can be used to transfer images to canvas, each with its own unique characteristics and requirements. Some of the most common methods include:
- Mod Podge Transfer: This involves adhering a printed image to the canvas using Mod Podge, then removing the paper backing to reveal the transferred image.
- Gel Medium Transfer: Similar to Mod Podge, gel medium is used to adhere the image, offering a more textured finish.
- Citrus Solvent Transfer: This method uses citrus-based solvents to dissolve the ink from the printed image and transfer it to the canvas.
- Iron-On Transfer: This technique involves printing an image onto iron-on transfer paper and then using heat to transfer it to the canvas.
- Acetone Transfer: Acetone is used to transfer the image by dissolving the ink and pressing it onto the canvas.
2. What Materials Will I Need to Transfer a Photo to Canvas?
To successfully transfer a photo to canvas, you’ll need to gather a few essential materials. The specific materials may vary slightly depending on the transfer technique you choose, but here’s a general list of what you’ll need:
2.1. What Kind of Photo Should I Use?
- Printed Image: A laser-printed image is typically recommended for most transfer techniques, as inkjet prints may smudge.
- Digital Image: If you’re using an iron-on transfer, you’ll need a digital image to print onto the transfer paper.
- Image Quality: Ensure the image is high-resolution for the best results on canvas.
- Reversed Image: For some techniques, you’ll need to reverse the image before printing (mirror image) to ensure it appears correctly on the canvas.
2.2. What Kind of Canvas Should I Use?
- Stretched Canvas: A pre-stretched canvas is the most common choice, available in various sizes and depths.
- Canvas Board: A canvas board is a more rigid alternative to a stretched canvas, suitable for smaller projects.
- Raw Canvas: If you prefer, you can purchase raw canvas and stretch it yourself onto a wooden frame.
- Canvas Quality: Opt for a high-quality canvas with a smooth, even surface for optimal image transfer.
2.3. What Adhesives and Transfer Mediums Are Needed?
- Mod Podge: A popular water-based sealer, glue, and finish commonly used for photo transfers.
- Gel Medium: An acrylic-based medium that provides a thicker, more textured finish than Mod Podge.
- Citrus Solvent: A natural solvent that dissolves ink and facilitates image transfer.
- Acetone: A strong solvent that can be used to transfer images, but should be handled with care.
2.4. What Kind of Tools and Accessories Are Needed?
- Soft Sponge or Cloth: For applying transfer mediums and gently removing paper.
- Brayer or Roller: To smooth out the image and ensure good contact with the canvas.
- Plastic Card or Scraper: To remove air bubbles and excess medium.
- Spray Bottle with Water: To dampen the paper during the removal process.
- Scissors or Craft Knife: To trim the image to the desired size.
- Ruler or Straight Edge: To align the image on the canvas.
- Protective Gloves: To protect your hands when using solvents or other chemicals.
- Apron or Old Clothes: To protect your clothing from stains and spills.
- Well-Ventilated Area: To ensure proper ventilation when using solvents or chemicals.
3. How Do I Transfer a Photo to Canvas Using Mod Podge?
The Mod Podge transfer method is a popular and straightforward technique for transferring photos to canvas. Here’s a step-by-step guide:
3.1. Preparing Your Image and Canvas
- Print Your Image:
- Use a laser printer to print your image. Inkjet prints may smudge during the transfer process.
- Reverse the image before printing (mirror image) to ensure it appears correctly on the canvas.
- Trim the image to the desired size, leaving a small border if needed.
- Prepare Your Canvas:
- Ensure the canvas is clean and free of dust or debris.
- If desired, apply a thin layer of gesso to the canvas and let it dry completely. This can help create a smoother surface for the transfer.
3.2. Applying Mod Podge
- Coat the Canvas:
- Apply a generous layer of Mod Podge to the surface of the canvas using a soft sponge or brush.
- Ensure the entire area where the image will be placed is evenly coated.
- Position the Image:
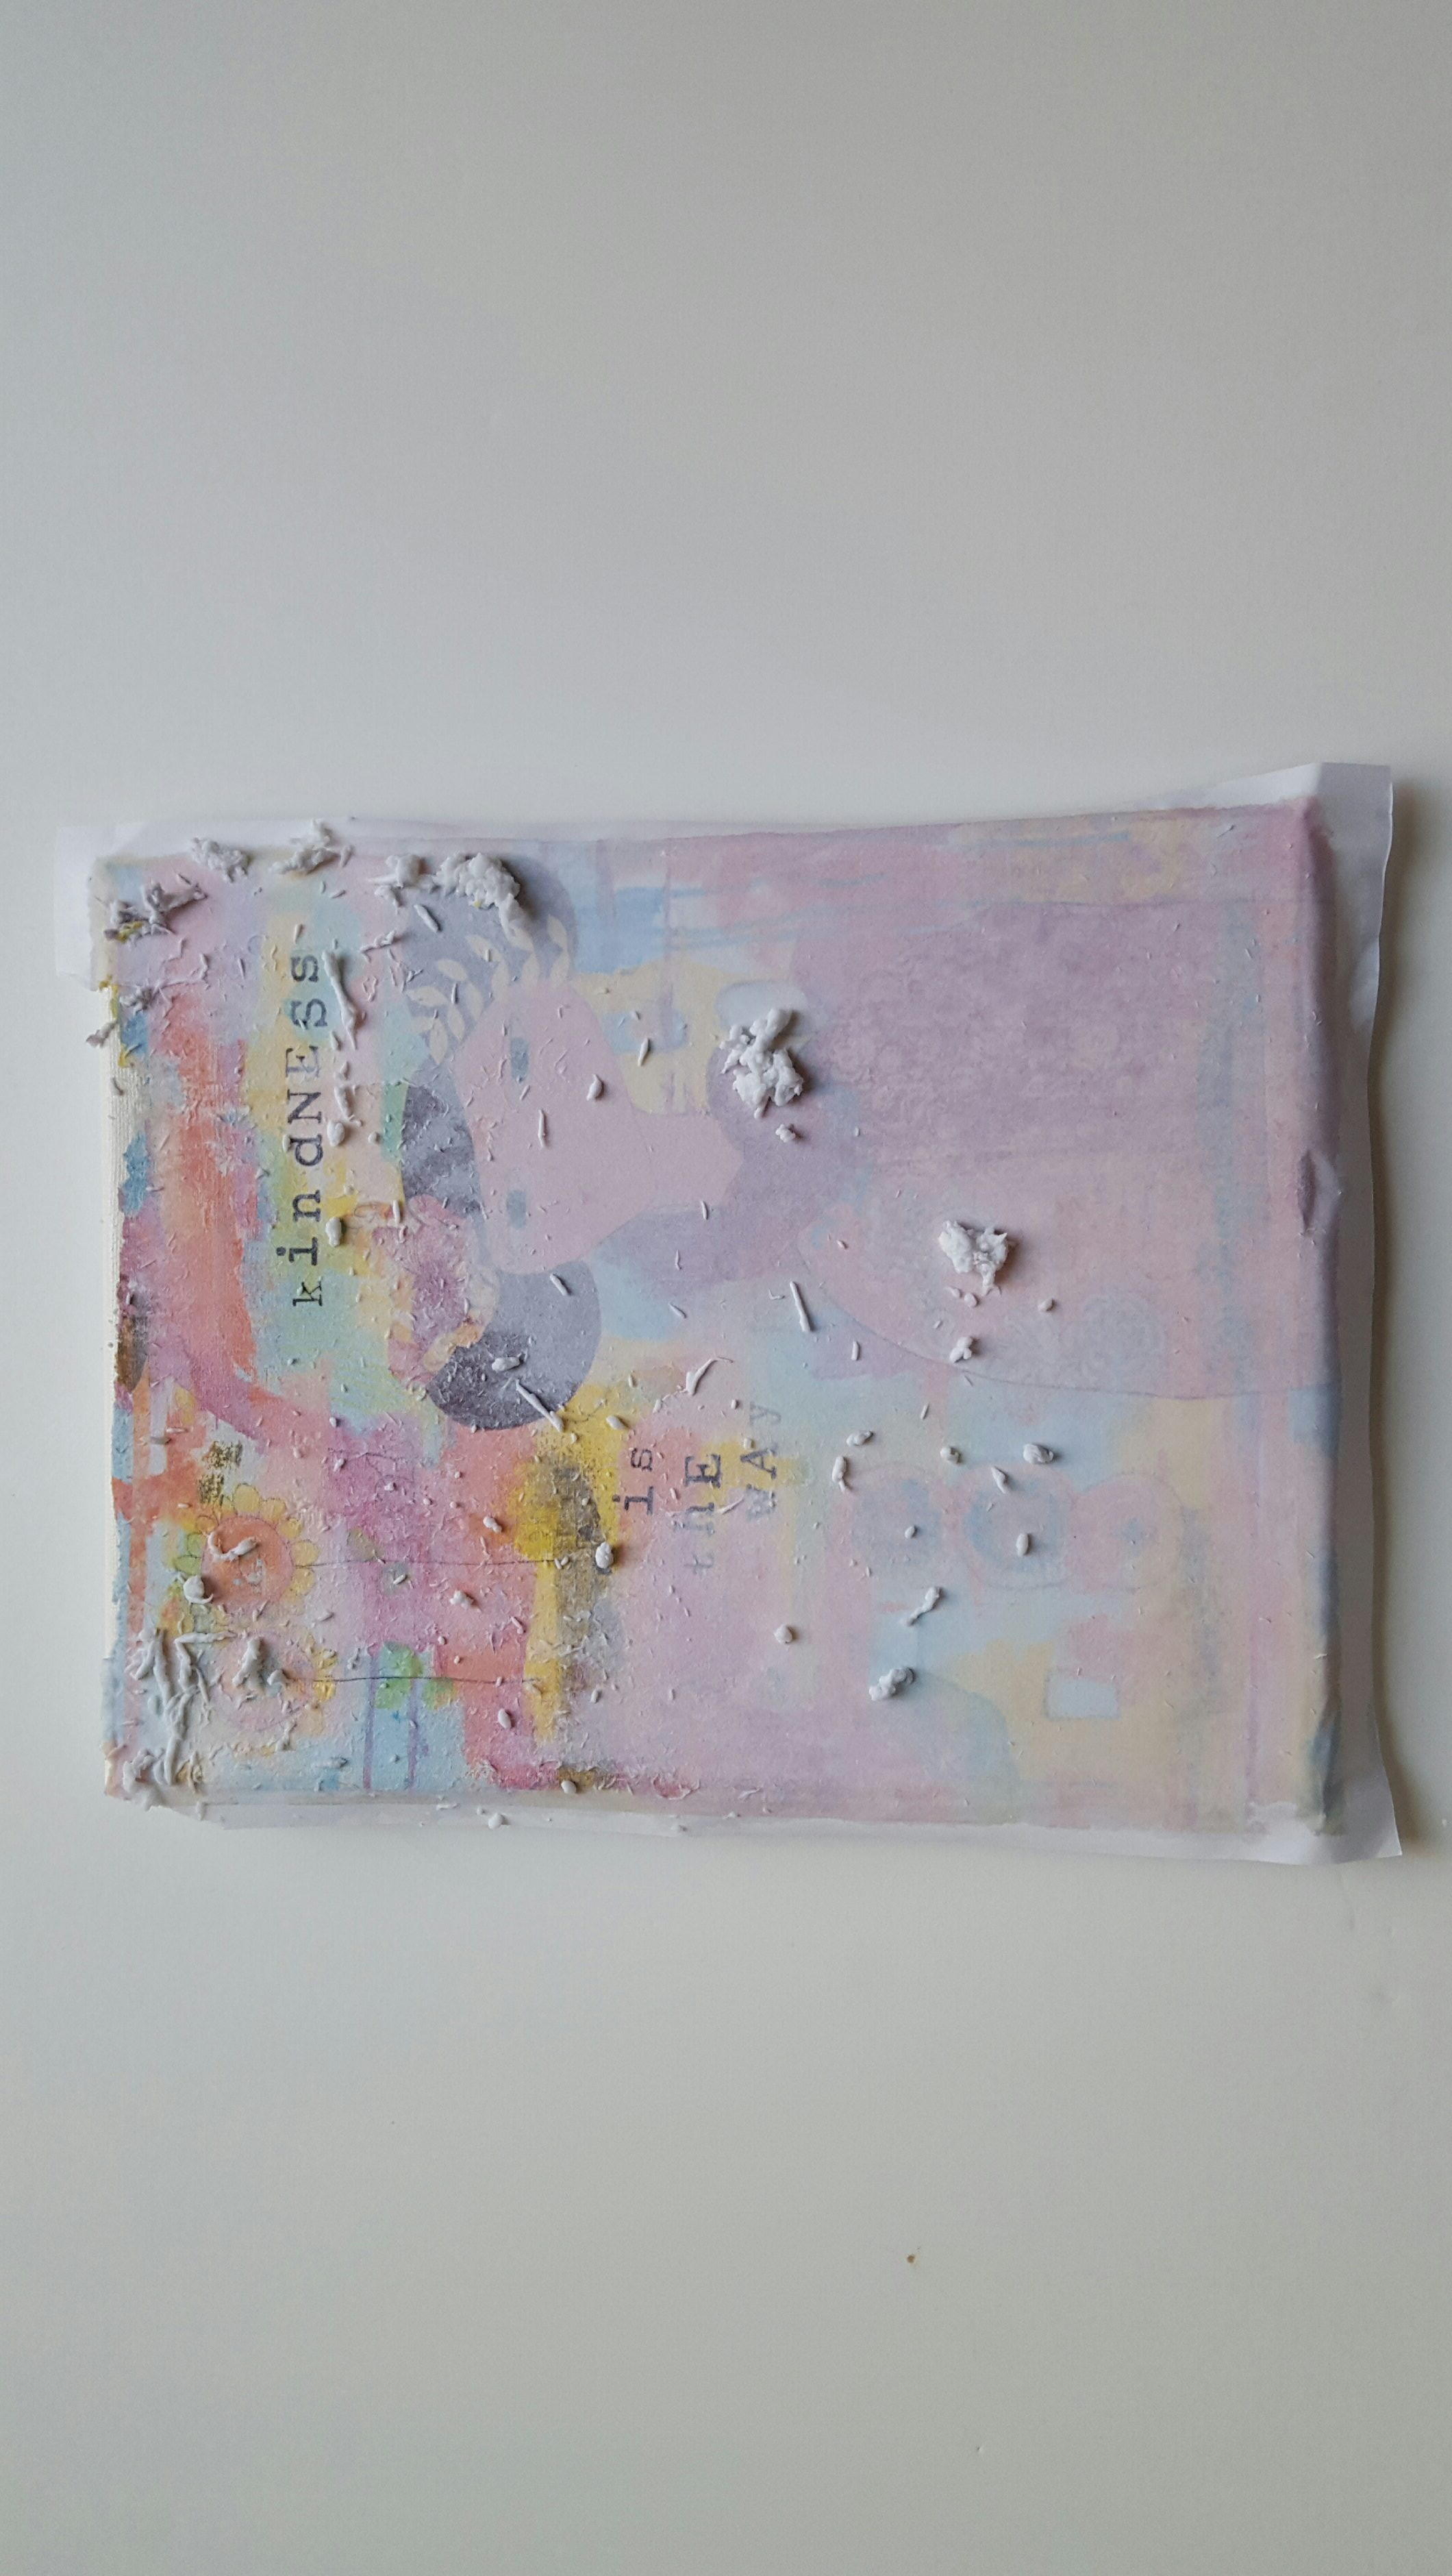
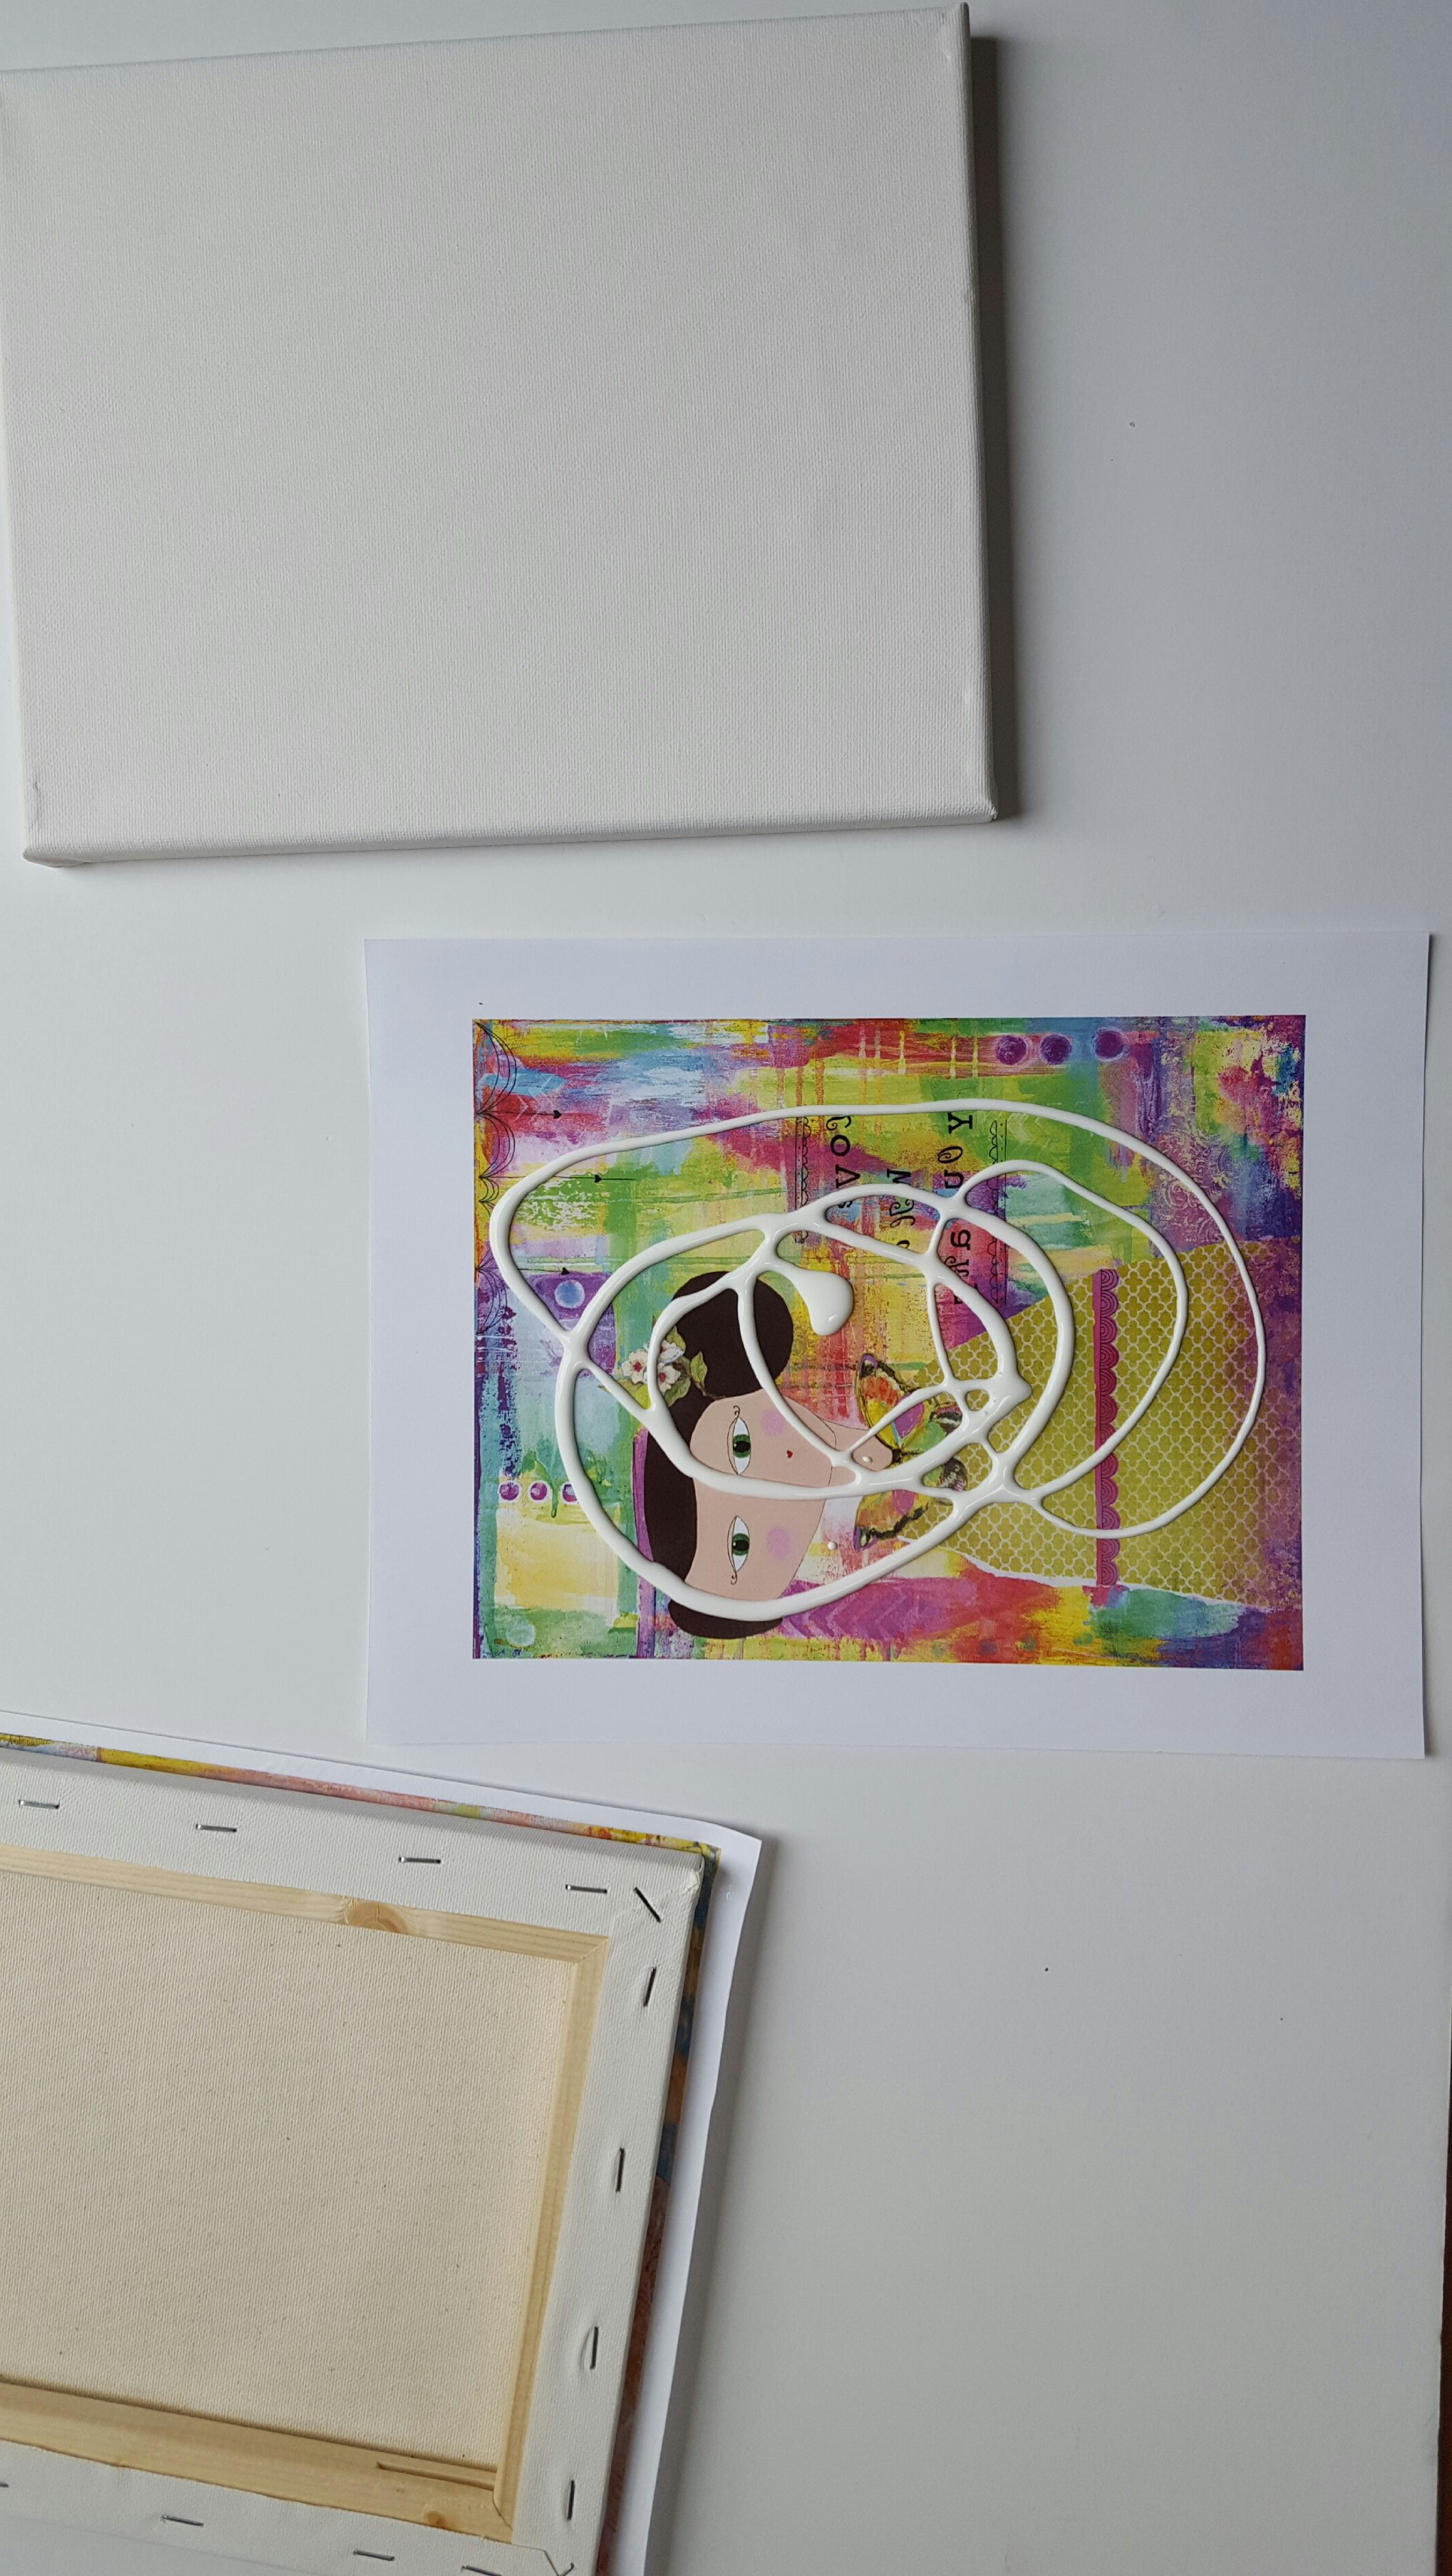 After I applied it, you can see that the image is barely visible through the layer of modpodge. That’s what you want. When everything is evenly coated, take the paper and lay it centered on your canvas. Then, as best you can, smooth out any air bubbles with your credit/gift card. A little warning here: be gentle. The paper is wet and will rip easily if you’re not careful so just glide that card around and get the paper as flat as you can against the canvas.
*   Carefully place the printed image face down onto the Mod Podge-coated canvas.
* Align the image as desired.- Smooth Out the Image:
 Come on over and check out how to transfer a photo to canvas. Click through for the quick and easy step-by-step instructions.
*   Use a brayer, roller, or plastic card to smooth out any air bubbles or wrinkles.
*   Apply even pressure to ensure good contact between the image and the canvas.
*   Wipe away any excess Mod Podge that squeezes out from the edges.
3.3. Drying and Removing the Paper
- Let It Dry:
- Allow the Mod Podge to dry completely for at least 24 hours. This is crucial for a successful transfer.
- You can place weights on top of the canvas to ensure the image stays flat during the drying process.
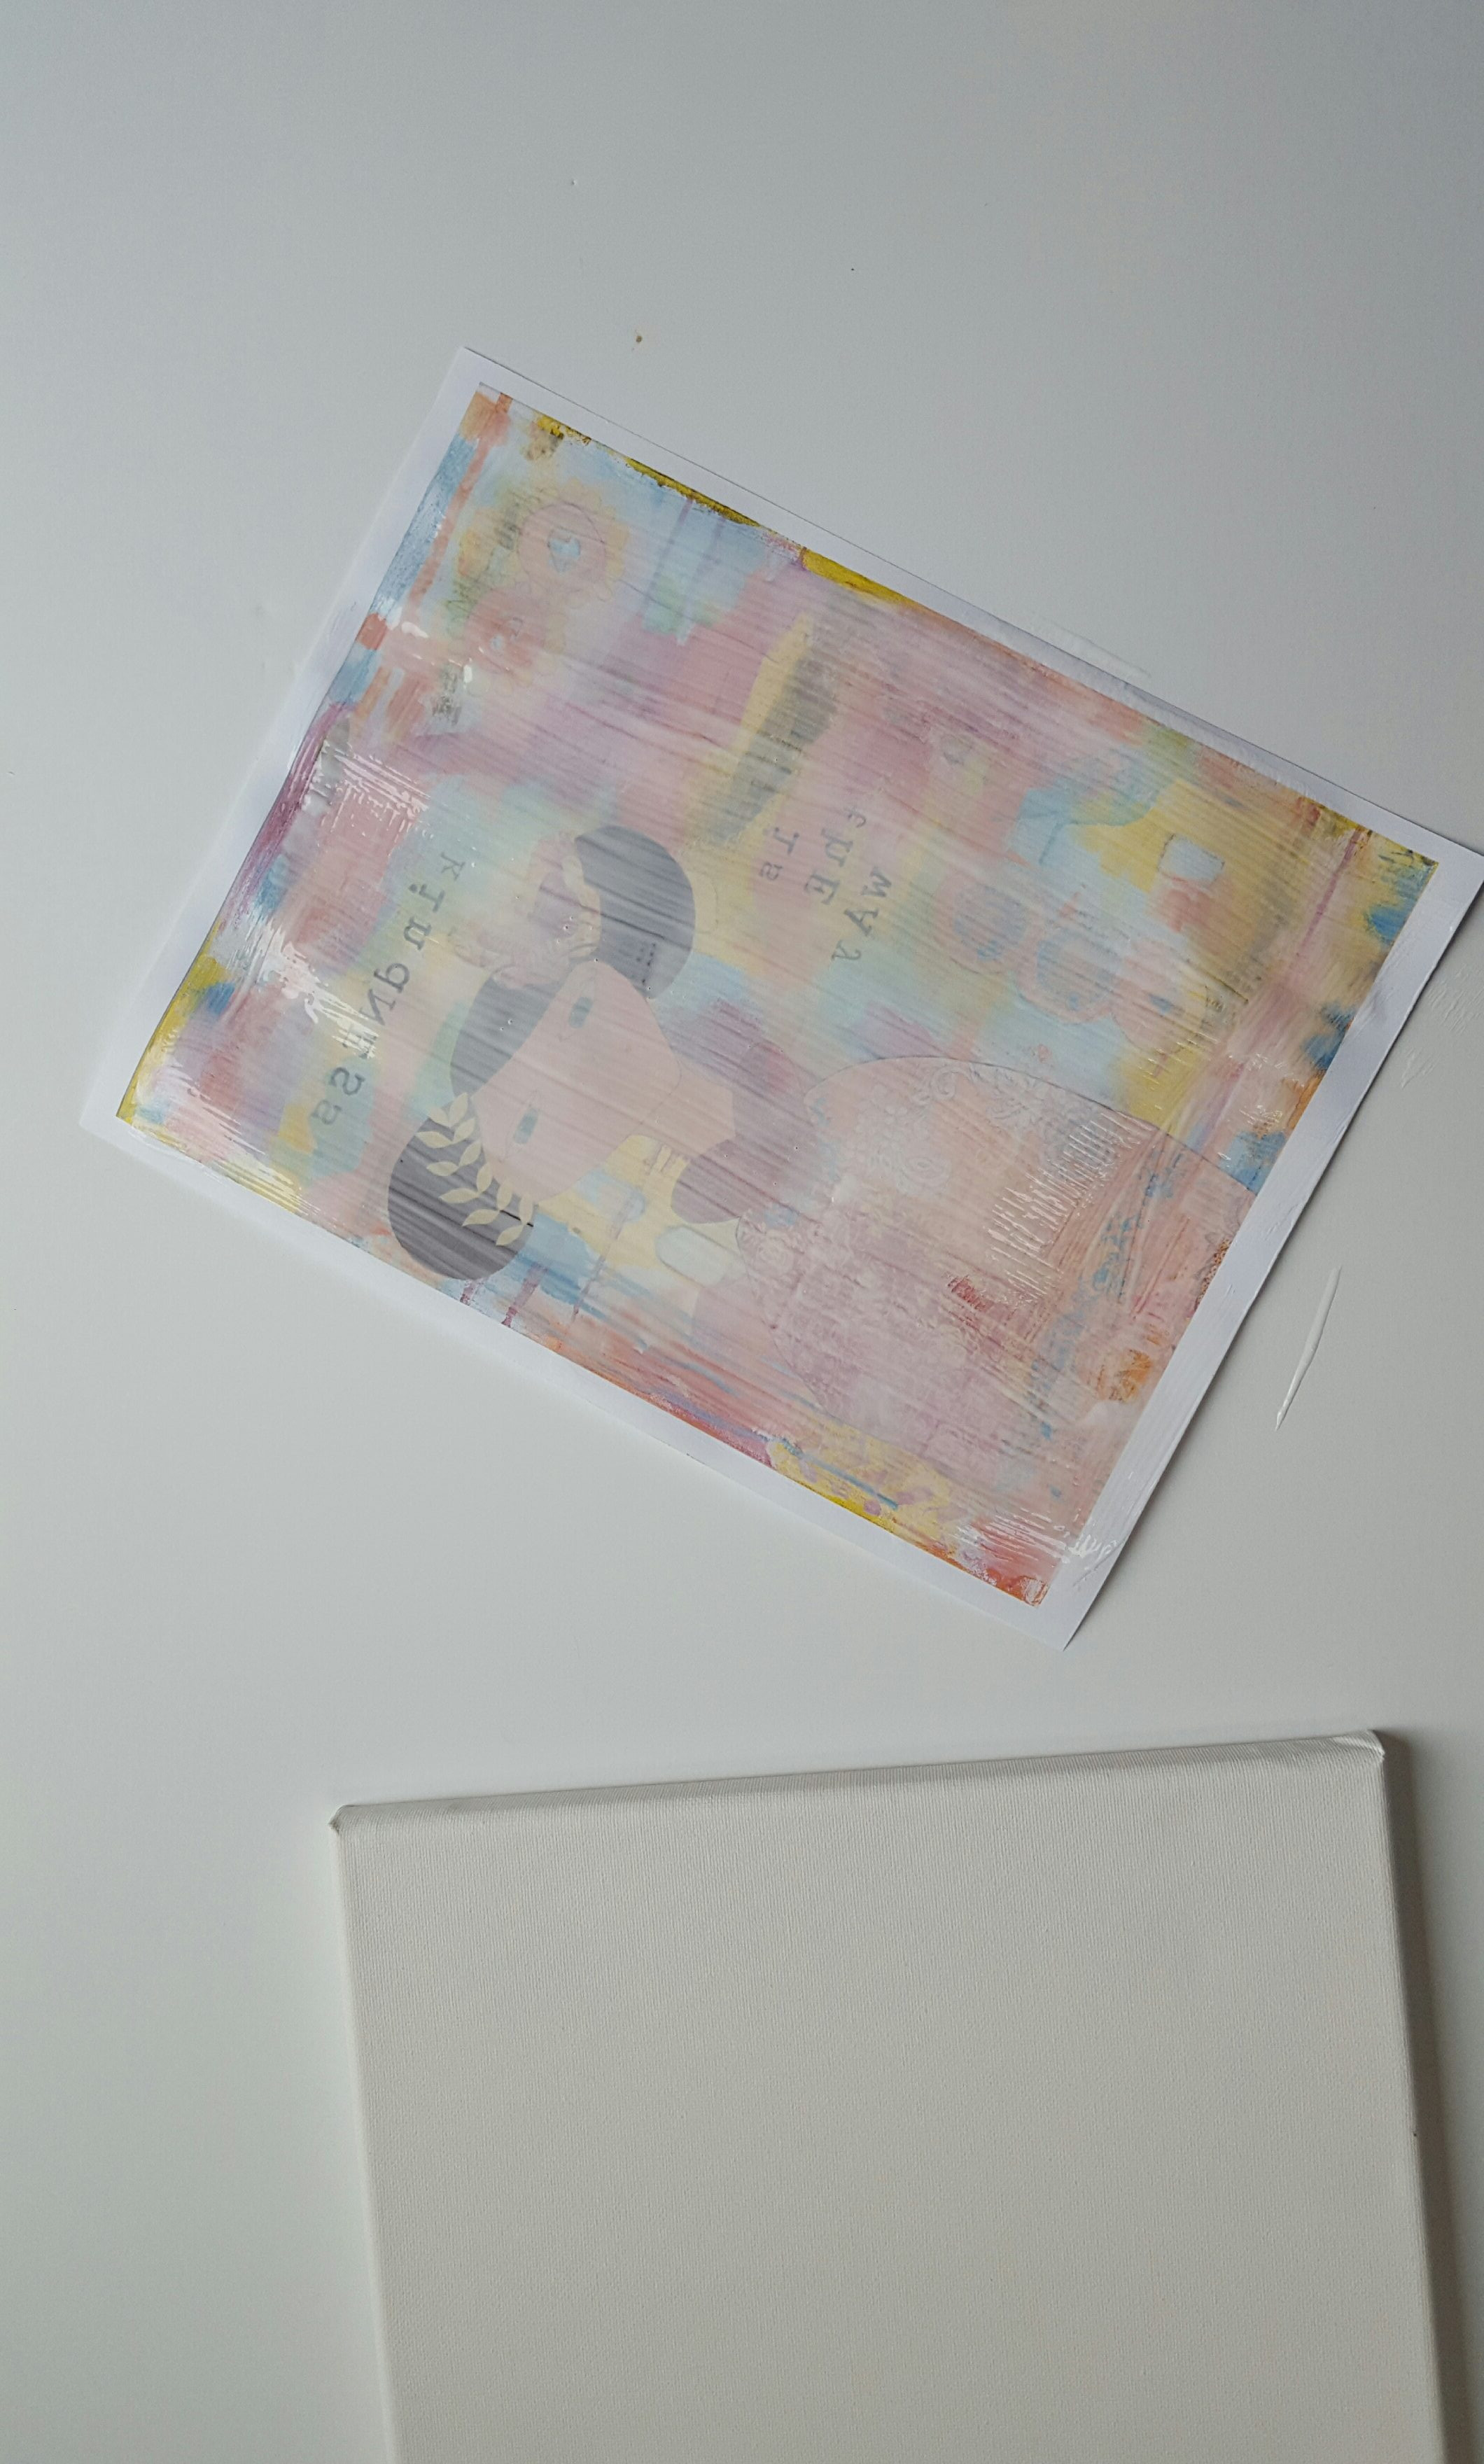
- Dampen the Paper:
- After 24 hours, use a spray bottle or sponge to dampen the paper backing with water.
- The water will help soften the paper and make it easier to remove.
- Rub Off the Paper:
 Come on over and check out how to transfer a photo to canvas. Click through for the quick and easy step-by-step instructions!
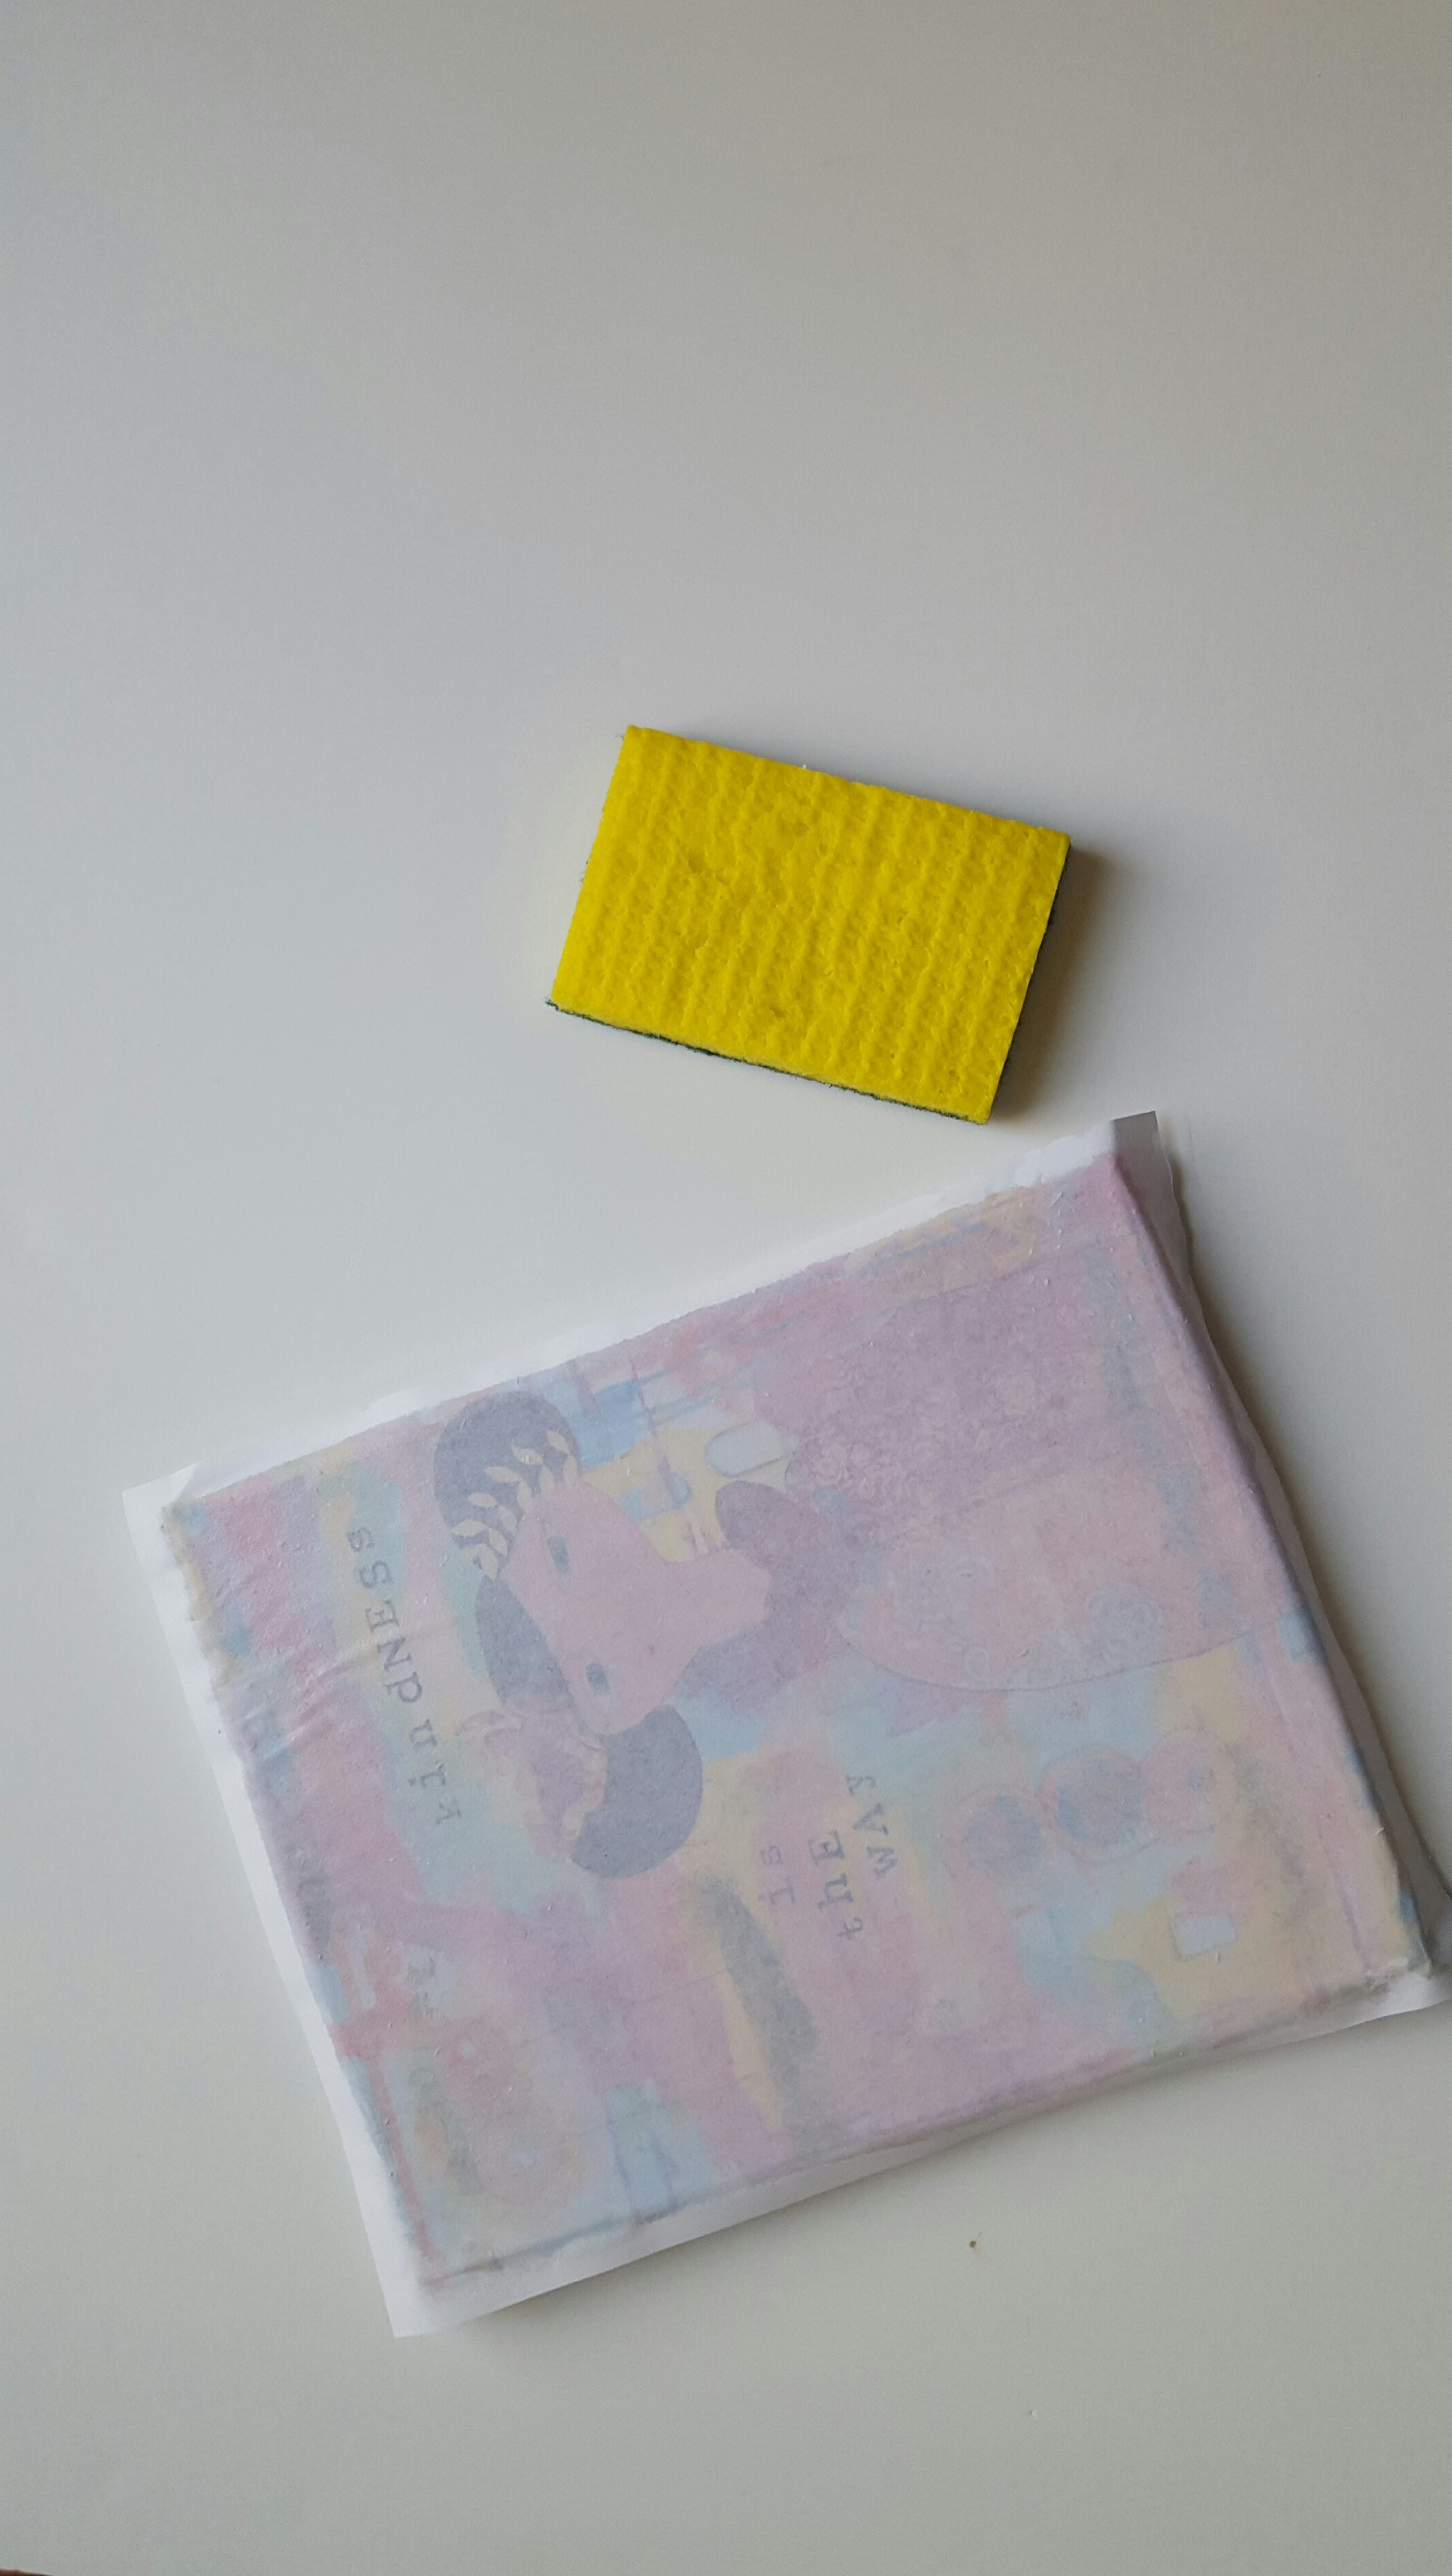
*   Gently rub the paper off the canvas using a soft sponge or your fingertips.
*   Work in small sections and be careful not to rub too hard, as this can damage the transferred image.
*   Continue to dampen the paper as needed to loosen it from the canvas.
3.4. Revealing the Image
- Remove Remaining Paper:
 Come on over and check out how to transfer a photo to canvas. Click through for the quick and easy step-by-step instructions!
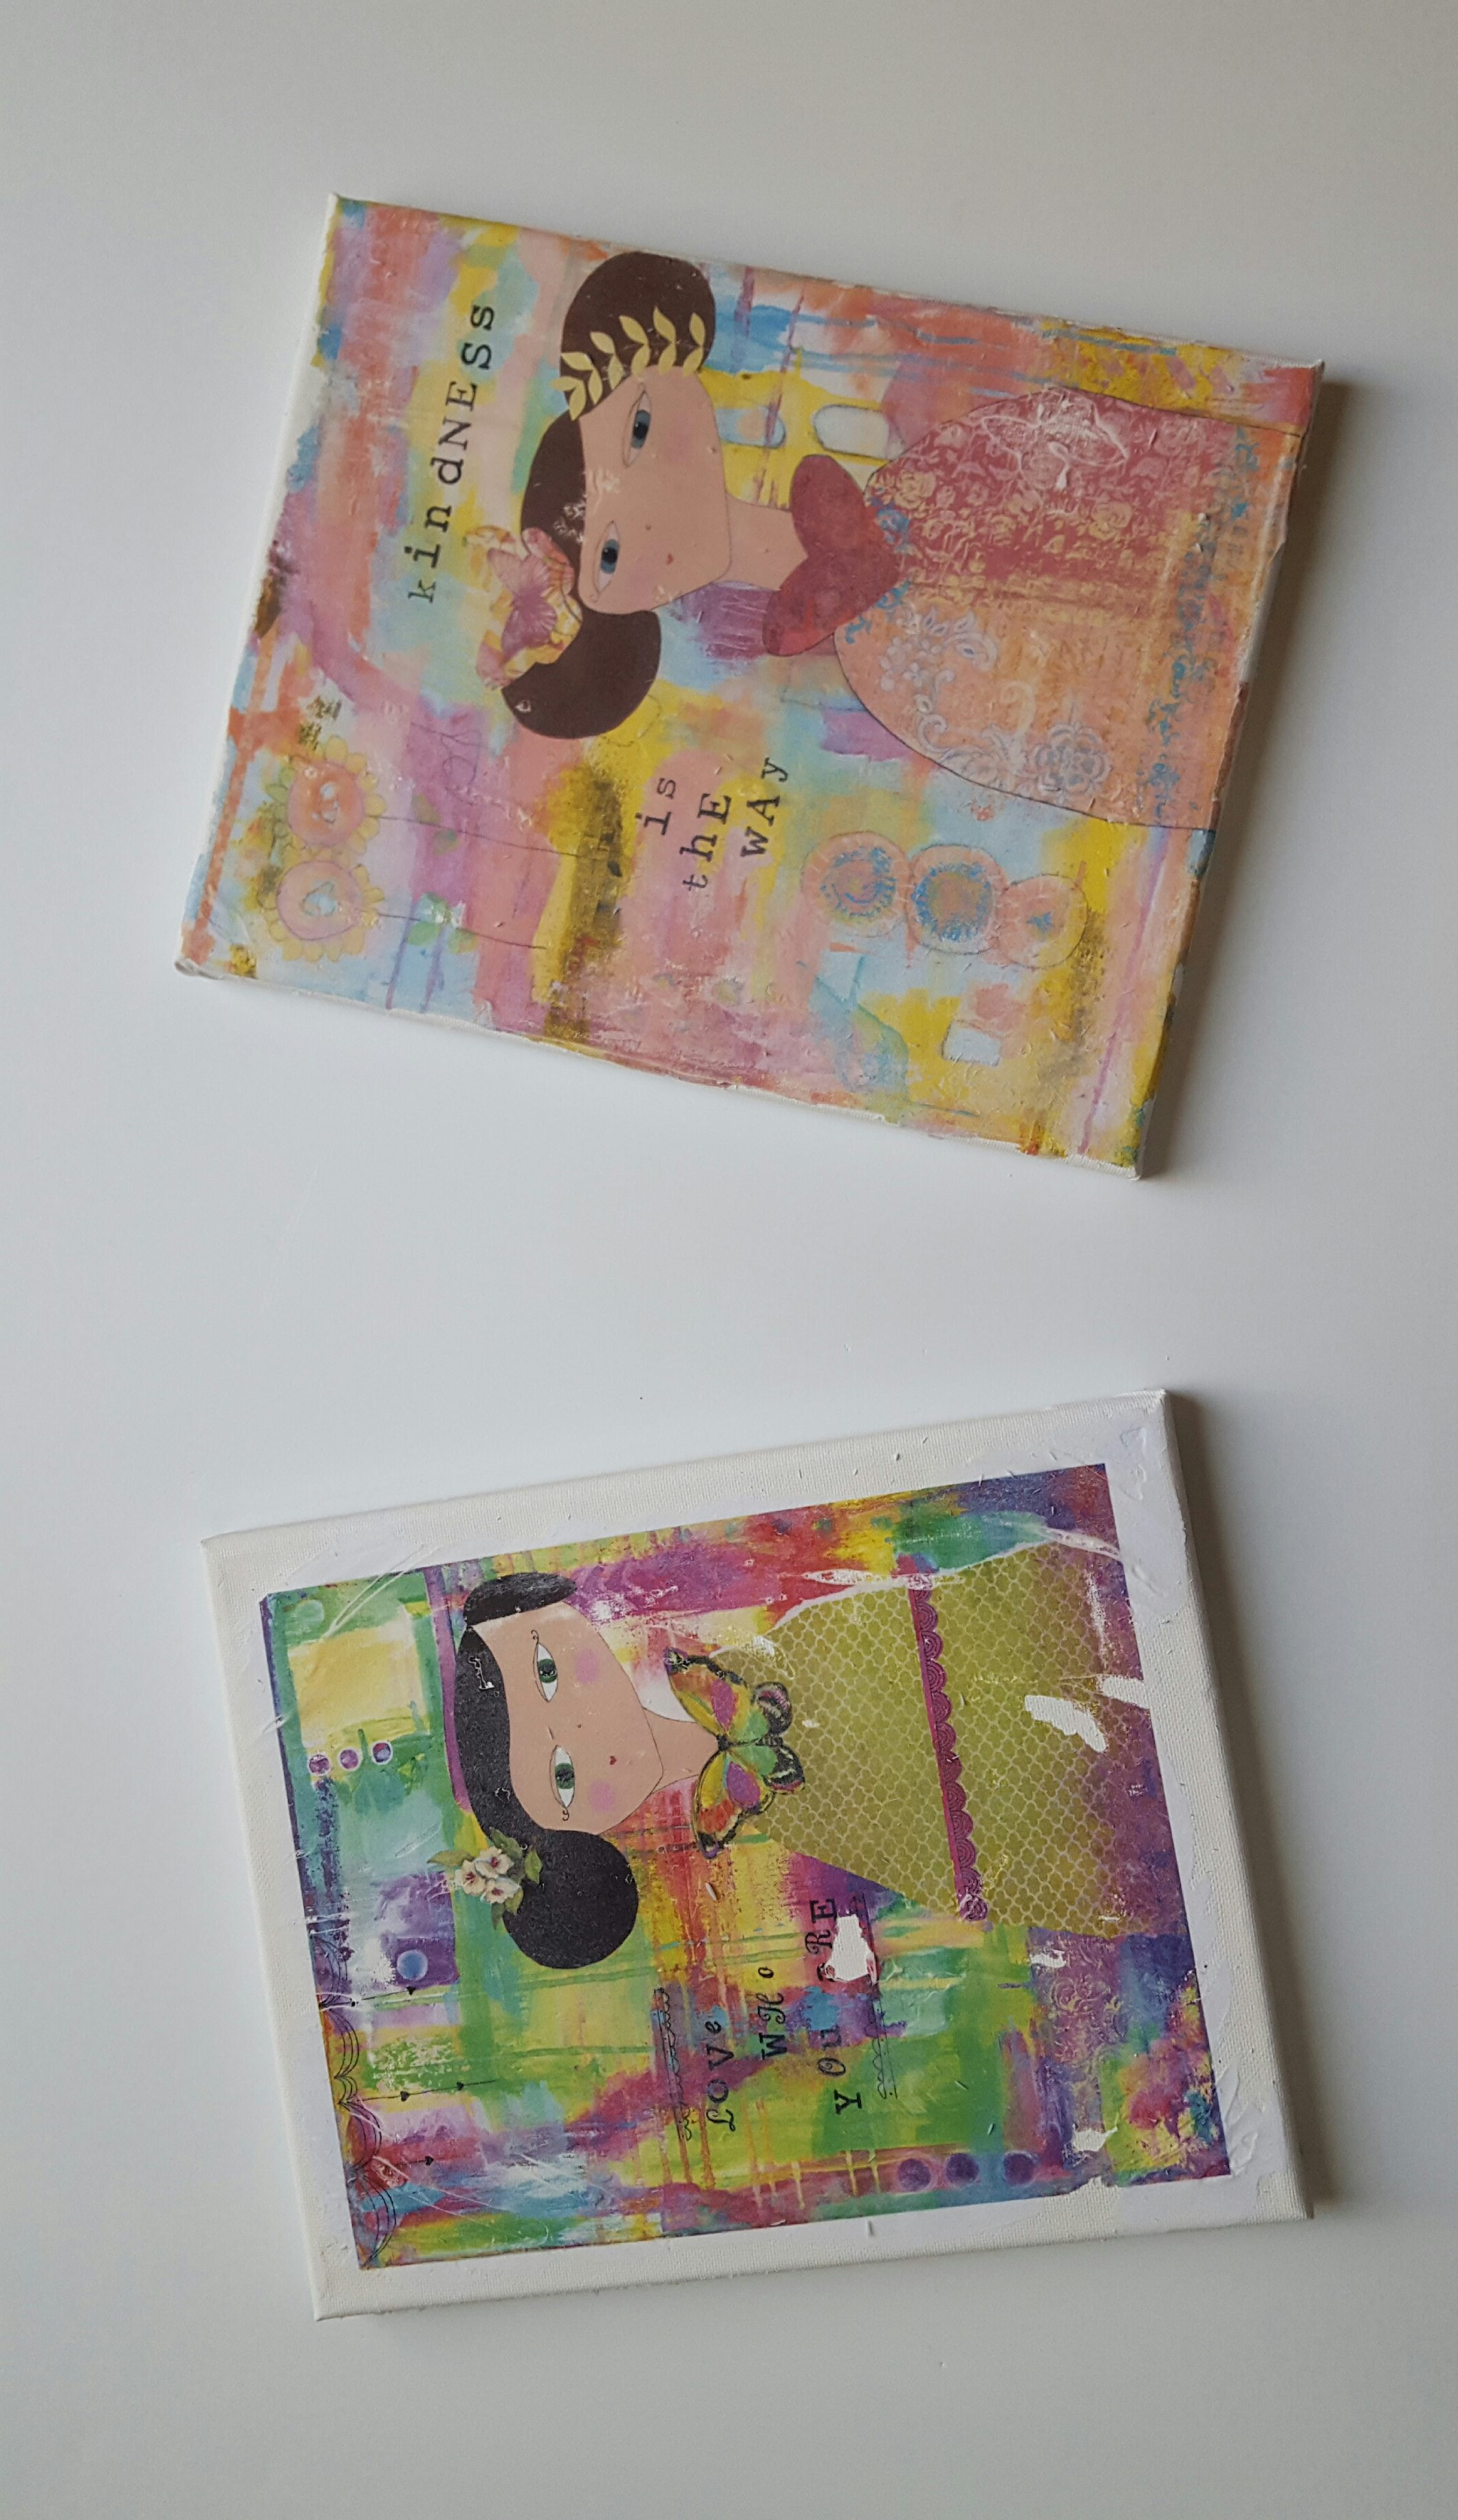
*   As you rub away the paper, the transferred image will gradually appear on the canvas.
* Be patient and continue to work gently until all the paper is removed.- Final Touches:
 Come on over and check out how to transfer a photo to canvas. Click through for the quick and easy step-by-step instructions!
*   Once all the paper is removed, let the canvas dry completely.
*   Apply a final coat of Mod Podge to seal and protect the transferred image.
*   If desired, you can add additional embellishments or paint to enhance the artwork.
4. How Do I Transfer a Photo to Canvas Using Gel Medium?
The gel medium transfer method is similar to the Mod Podge technique but uses a thicker, acrylic-based medium for a more textured finish. Here’s how to do it:
4.1. Image and Canvas Preparation
- Print Your Image:
- Use a laser printer to print your image. Inkjet prints may not work as well with this method.
- Reverse the image before printing to ensure it appears correctly on the canvas.
- Trim the image to the desired size.
- Prepare Your Canvas:
- Ensure the canvas is clean and dry.
- Applying a layer of gesso can help create a smoother surface.
4.2. Applying Gel Medium
- Coat the Image:
- Apply a thick layer of gel medium to the printed side of the image.
- Ensure the entire image is evenly coated.
- Position on Canvas:
- Place the gel medium-coated side of the image face down onto the canvas.
- Align the image as desired.
4.3. Smoothing and Drying
- Smooth Out the Image:
- Use a brayer or roller to smooth out any air bubbles or wrinkles.
- Apply firm, even pressure to ensure good contact.
- Drying Time:
- Allow the gel medium to dry completely for at least 24 hours.
- Place weights on top to keep the image flat.
4.4. Removing the Paper
- Dampen the Paper:
- After 24 hours, dampen the paper backing with water using a spray bottle or sponge.
- Let the water soak in for a few minutes.
- Rub Off the Paper:
- Gently rub the paper off the canvas using a soft sponge or your fingertips.
- Work in small sections, being careful not to damage the transferred image.
- Continue to dampen the paper as needed.
4.5. Revealing and Sealing
- Remove Remaining Paper:
- Continue rubbing until all the paper is removed and the transferred image is revealed.
- Final Touches:
- Let the canvas dry completely.
- Apply a final coat of gel medium to seal and protect the image.
- Add any desired embellishments or paint.
5. How Do I Transfer a Photo to Canvas Using Citrus Solvent?
The citrus solvent transfer method uses natural solvents to dissolve the ink from the printed image and transfer it to the canvas. This technique is known for creating a vintage or distressed look.
5.1. Preparing Your Materials
- Print Your Image:
- Use a laser printer to print your image. This method relies on the toner in laser prints.
- Reverse the image before printing.
- Trim the image to the desired size.
- Prepare Your Canvas:
- Ensure the canvas is clean and dry.
- You may want to lightly sand the canvas surface to create a bit of texture for the transfer.
- Gather Supplies:
- Citrus solvent (such as orange oil or Goo Gone).
- Cotton balls or soft cloth.
- Brayer or roller.
- Protective gloves.
- Well-ventilated area.
5.2. Applying Citrus Solvent
- Soak Cotton Ball:
- Saturate a cotton ball or soft cloth with citrus solvent.
- Ensure you are working in a well-ventilated area and wearing protective gloves.
- Apply to Back of Image:
- Place the printed image face down onto the canvas.
- Gently dab the citrus solvent onto the back of the image, using the cotton ball or cloth.
- Apply even pressure, but be careful not to saturate the paper too much, as this can cause it to tear.
5.3. Transferring the Image
- Roll with Brayer:
- Use a brayer or roller to apply firm, even pressure to the back of the image.
- Roll back and forth several times to ensure the ink transfers to the canvas.
- Check Transfer:
- Carefully lift a corner of the image to check the transfer.
- If the image is not transferring evenly, apply more citrus solvent and continue rolling.
5.4. Revealing and Finishing
- Remove the Paper:
- Once the image has transferred to your satisfaction, carefully remove the paper from the canvas.
- Dry and Seal:
- Allow the canvas to dry completely.
- Apply a sealant, such as Mod Podge or a clear acrylic spray, to protect the transferred image.
6. How Do I Transfer a Photo to Canvas Using Iron-On Transfer Paper?
Using iron-on transfer paper is a convenient method for transferring photos to canvas, especially for those who prefer a heat-based technique.
6.1. Preparing the Image and Canvas
- Select Your Image:
- Choose a high-resolution digital image for the best results.
- Use photo editing software to adjust the image as needed (e.g., brightness, contrast, color).
- Print on Transfer Paper:
- Purchase iron-on transfer paper specifically designed for inkjet or laser printers, depending on your printer type.
- Follow the manufacturer’s instructions for printing.
- Reverse the image before printing if required by the transfer paper instructions.
- Trim the image to the desired size.
- Prepare Your Canvas:
- Ensure the canvas is clean, dry, and free of any debris.
- Iron the canvas to remove any wrinkles or creases.
6.2. Transferring the Image
- Position the Image:
- Place the iron-on transfer paper onto the canvas with the image facing down.
- Align the image as desired.
- Ironing:
- Set your iron to the appropriate heat setting according to the transfer paper instructions (usually medium to high heat, no steam).
- Place a protective sheet (such as parchment paper or a thin cloth) over the transfer paper.
- Press the iron firmly onto the protective sheet and move it in a slow, circular motion.
- Apply even pressure for the recommended time (usually 1-3 minutes, depending on the paper).
6.3. Revealing and Sealing
- Cool Down:
- Allow the transfer paper to cool completely before peeling it off.
- Some transfer papers are designed for “hot peel” (peeling while warm), so follow the manufacturer’s instructions.
- Peel Off the Paper:
- Carefully peel off the transfer paper, starting from one corner.
- The image should now be transferred to the canvas.
- Seal the Image:
- To protect the transferred image, apply a sealant such as Mod Podge or a clear acrylic spray.
- Follow the sealant instructions for application and drying time.
7. How Do I Transfer a Photo to Canvas Using Acetone?
The acetone transfer method involves using acetone to dissolve the ink from a printed image and transfer it to the canvas. This technique requires caution due to the chemical nature of acetone.
7.1. Preparing Your Materials
- Print Your Image:
- Use a laser printer to print your image. The toner in laser prints works best with this method.
- Reverse the image before printing.
- Trim the image to the desired size.
- Prepare Your Canvas:
- Ensure the canvas is clean and dry.
- Lightly sanding the surface can help with the transfer.
- Gather Supplies:
- Acetone (available at hardware stores).
- Cotton balls or soft cloth.
- Brayer or roller.
- Protective gloves.
- Well-ventilated area.
7.2. Applying Acetone
- Safety Precautions:
- Work in a well-ventilated area.
- Wear protective gloves to avoid skin contact with acetone.
- Apply Acetone:
- Place the printed image face down onto the canvas.
- Saturate a cotton ball or soft cloth with acetone.
- Gently dab the acetone onto the back of the image.
- Apply even pressure, but avoid over-saturating the paper.
7.3. Transferring the Image
- Roll with Brayer:
- Use a brayer or roller to apply firm, even pressure to the back of the image.
- Roll back and forth to ensure the ink transfers.
- Check Transfer:
- Carefully lift a corner to check the transfer.
- Apply more acetone and continue rolling if needed.
7.4. Revealing and Finishing
- Remove the Paper:
- Carefully remove the paper from the canvas.
- Dry and Seal:
- Allow the canvas to dry completely.
- Apply a sealant to protect the image.
8. What Are Some Tips for a Successful Photo Transfer?
To ensure your photo transfer project is a success, consider these helpful tips:
8.1. What Are Some Image Preparation Tips?
- Use High-Resolution Images: High-resolution images result in clearer and more detailed transfers.
- Reverse the Image: Remember to reverse the image before printing for most transfer techniques.
- Adjust Brightness and Contrast: Adjusting the brightness and contrast of your image can enhance the final result.
- Print on the Right Paper: Use the appropriate paper for your chosen transfer method (e.g., laser paper for Mod Podge, iron-on transfer paper for heat transfers).
8.2. What Are Some Canvas Preparation Tips?
- Clean the Canvas: Ensure the canvas is clean and free of dust or debris.
- Apply Gesso: Applying a layer of gesso can create a smoother surface for the transfer.
- Stretch Canvas Properly: If using raw canvas, stretch it tightly and evenly onto the frame.
8.3. What Are Some Application and Transfer Tips?
- Apply Even Pressure: Use a brayer or roller to apply even pressure during the transfer process.
- Don’t Over-Saturate: Avoid over-saturating the paper with solvents or water, as this can cause tearing or smudging.
- Be Patient: Allow sufficient drying time for the adhesive or medium to set properly.
- Work in a Well-Ventilated Area: When using solvents or chemicals, work in a well-ventilated area to avoid inhaling harmful fumes.
8.4. What Are Some Finishing and Sealing Tips?
- Remove Paper Gently: Gently rub off the paper to avoid damaging the transferred image.
- Seal the Image: Apply a sealant to protect the transferred image from scratches, fading, and moisture.
- Add Embellishments: Consider adding paint, embellishments, or other artistic touches to enhance your artwork.
- Display Properly: Display your finished canvas in a suitable location away from direct sunlight and extreme temperatures.
9. How Do I Troubleshoot Common Photo Transfer Problems?
Even with careful preparation and execution, photo transfer projects can sometimes encounter problems. Here are some common issues and how to troubleshoot them:
9.1. What If the Image Doesn’t Transfer Evenly?
- Uneven Pressure: Ensure you are applying even pressure with a brayer or roller during the transfer process.
- Insufficient Medium: Make sure you are using enough adhesive or transfer medium.
- Paper Quality: Try using a different type of paper for printing your image.
- Canvas Surface: Ensure the canvas surface is smooth and even.
9.2. What If the Image Is Blurry or Smudged?
- Inkjet Prints: Avoid using inkjet prints with techniques that involve water or solvents, as they can smudge easily.
- Over-Saturation: Do not over-saturate the paper with water or solvents.
- Excessive Rubbing: Be gentle when rubbing off the paper to avoid damaging the transferred image.
9.3. What If the Paper Is Difficult to Remove?
- Insufficient Soaking: Make sure the paper is thoroughly dampened with water before attempting to remove it.
- Drying Time: Ensure the adhesive or medium is completely dry before removing the paper.
- Gentle Rubbing: Use a soft sponge or your fingertips to gently rub off the paper.
9.4. What If the Image Is Too Light or Faded?
- Image Quality: Use a high-resolution image for the best results.
- Adjust Contrast: Adjust the brightness and contrast of your image before printing.
- Multiple Layers: Consider applying multiple layers of adhesive or medium for a more vibrant transfer.
9.5. What If the Canvas Is Damaged During the Transfer?
- Gentle Handling: Handle the canvas with care during the transfer process.
- Soft Tools: Use soft sponges and cloths to avoid scratching or damaging the canvas surface.
- Protective Layers: Use protective layers, such as parchment paper, when ironing or applying heat.
10. How Can I Explore Advanced Photo Transfer Techniques?
Once you’ve mastered the basic photo transfer techniques, you can explore more advanced methods to create unique and artistic effects.
10.1. What Are Some Mixed Media Techniques?
- Adding Paint: Incorporate acrylic paints, watercolors, or other art mediums to enhance your transferred image.
- Using Stencils: Apply stencils to create patterns or designs on your canvas before or after the transfer.
- Incorporating Texture: Add texture to your canvas using texture pastes, gels, or found objects.
- Applying Gold Leaf: Use gold leaf to add a touch of elegance and shimmer to your artwork.
10.2. How Can I Create Distressed or Vintage Effects?
- Sanding: Lightly sand the transferred image to create a distressed or worn look.
- Staining: Apply stains, such as tea or coffee, to the canvas to give it a vintage appearance.
- Crackle Medium: Use crackle medium to create a crackled effect on the transferred image.
- Layering Images: Layer multiple transferred images to create a collage effect.
10.3. How Can I Incorporate Digital Effects?
- Digital Manipulation: Use photo editing software to apply digital effects to your image before transferring it to the canvas.
- Printing on Different Materials: Experiment with printing your image on different types of transfer paper or fabric.
- Using Digital Stencils: Create digital stencils and print them onto transfer paper to add unique designs to your canvas.
10.4. How Can I Use Alternative Transfer Methods?
- Image Transfer Pencils: Use image transfer pencils to draw or trace an image onto transfer paper, then iron it onto the canvas.
- Sun Printing: Use the power of the sun to transfer images onto canvas using sun-sensitive dyes or paints.
- Decoupage: Apply multiple layers of paper cutouts to create a collage effect on the canvas.
Transferring photos to canvas is a rewarding way to create personalized art and décor. With the right techniques and materials, you can transform your cherished memories into lasting keepsakes. Whether you choose the simplicity of Mod Podge, the texture of gel medium, or the vintage look of citrus solvent, the possibilities are endless. At dfphoto.net, we encourage you to explore these techniques and discover the joy of creating your own unique canvas art. For further inspiration, tutorials, and a vibrant community of fellow photography enthusiasts, visit dfphoto.net today.
FAQ: How Do I Transfer A Photo To Canvas?
1. What is the best way to transfer a photo to canvas?
The best way to transfer a photo to canvas depends on your desired outcome and the materials you have available; however, the Mod Podge method is a popular and straightforward technique. It involves adhering a printed image to the canvas using Mod Podge and then removing the paper backing to reveal the transferred image. Gel medium, citrus solvent, iron-on transfer, and acetone methods are other viable options.
2. Can I use an inkjet printer for photo transfers to canvas?
It’s generally recommended to use a laser printer for most photo transfer techniques because inkjet prints may smudge, especially when using water-based mediums. However, if you’re using iron-on transfer paper, follow the manufacturer’s instructions regarding printer compatibility.
3. Do I need to reverse my image before transferring it to canvas?
Yes, for most transfer techniques, you need to reverse the image (mirror image) before printing to ensure it appears correctly on the canvas; however, always check the specific instructions for your chosen method to confirm if image reversal is necessary.
4. What is gesso, and why should I use it on my canvas before transferring a photo?
Gesso is a primer typically made from a mixture of gypsum, chalk, pigment, and glue; it’s used to prepare the canvas surface for painting and other art techniques. Applying a thin layer of gesso to the canvas before transferring a photo can create a smoother surface, improve adhesion, and prevent the image from sinking into the canvas fibers.
5. How long should I let the Mod Podge dry before removing the paper?
You should let the Mod Podge dry completely for at least 24 hours before removing the paper; this ensures that the image adheres properly to the canvas and prevents a messy transfer.
6. What is the best way to remove the paper from the canvas after transferring the image?
The best way to remove the paper is to dampen the paper backing with water using a spray bottle or sponge and then gently rub the paper off the canvas using a soft sponge or your fingertips; work in small sections and be careful not to rub too hard, as this can damage the transferred image.
7. Can I use a hair dryer to speed up the drying process?
While you can use a hair dryer to speed up the drying process, it’s generally not recommended; rapid drying can cause the adhesive or medium to crack or become uneven. It’s best to allow the canvas to dry naturally for the best results.
8. How can I protect the transferred image on the canvas?
To protect the transferred image, apply a final coat of sealant, such as Mod Podge or a clear acrylic spray; this will shield the image from scratches, fading, and moisture.
9. What are some common mistakes to avoid when transferring photos to canvas?
Common mistakes to avoid include using inkjet prints with water-based mediums, not reversing the image before printing, not applying even pressure during the transfer process, over-saturating the paper with water or solvents, and not allowing sufficient drying time.
10. Where can I find inspiration and tutorials for photo transfer projects?
You can find inspiration and tutorials for photo transfer projects at dfphoto.net, where you’ll discover a wealth of resources, including step-by-step guides, creative ideas, and a vibrant community of fellow photography enthusiasts. You can also explore photography in Santa Fe by visiting 1600 St Michael’s Dr, Santa Fe, NM 87505, United States or calling +1 (505) 471-6001.