Taking a photo on your Mac is simple and fun; let’s explore how you can capture memories using Photo Booth and alternative methods. At dfphoto.net, we aim to provide enthusiasts and professionals with the knowledge to express their creativity through photography and visual arts. This guide offers a comprehensive overview of utilizing your Mac’s built-in features and external tools, incorporating essential SEO practices to enhance your online presence, which are crucial for photographers and visual artists.
1. Understanding the Photo Booth App on Your Mac
Photo Booth is a pre-installed application on macOS that allows you to take quick photos and videos using your Mac’s built-in camera or an external webcam. It’s designed for fun, spontaneous captures.
1.1. Locating Photo Booth
The Photo Booth application is typically located in the Applications folder on your Mac.
- Open Finder: Click on the Finder icon in your Dock.
- Go to Applications: In the Finder window, click on “Applications” in the sidebar.
- Find Photo Booth: Scroll through the list to find the Photo Booth application icon.
If you can’t find it, use Spotlight Search:
- Open Spotlight: Press
Command + Spacebaror click the magnifying glass icon in the upper-right corner of your screen. - Type “Photo Booth”: As you type, Photo Booth should appear in the search results.
- Open Photo Booth: Click on Photo Booth to launch the application.
1.2. Using Photo Booth to Capture Photos
Once you’ve located and opened Photo Booth, you can start taking photos.
- Camera Activation: Photo Booth will automatically activate your Mac’s built-in camera, indicated by a green LED light.
- Preview: You’ll see a live preview of what the camera sees. Position yourself or your subject within the frame.
- Taking a Photo:
- Single Photo: Click the red camera icon at the bottom-center of the Photo Booth window. The screen will flash, simulating a camera flash, and take a single photo.
- Four-Photo Strip: Click the four-square icon to take a series of four photos in quick succession.
1.3. Reviewing and Managing Your Photos
After taking a photo, it appears in the “film roll” at the bottom of the Photo Booth window.
- Selecting Photos: Click on a photo in the film roll to select it.
- Options:
- Exporting: To save the photo, you can drag it directly to your desktop or another folder. Alternatively, control-click the photo and select “Export” to choose a specific location.
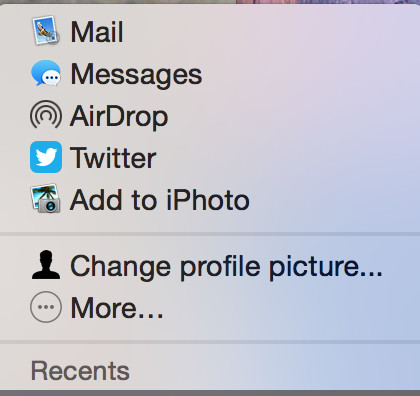
- Sharing: Click the “Share” button (a square with an upward arrow) to share your photo via Mail, Messages, AirDrop, social media, or other available options.
- Deleting: If you don’t like a photo, select it and press the
Deletekey, or control-click and choose “Delete.”
Photo Booth film roll
1.4. Adding Photo Booth to Your Dock
For quick access, you can keep Photo Booth in your Dock.
- Open Photo Booth: Make sure Photo Booth is running.
- Right-Click the Icon: Right-click (or Control-click) the Photo Booth icon in the Dock.
- Select Options: In the context menu, choose “Options.”
- Keep in Dock: Select “Keep in Dock.” The Photo Booth icon will now remain in your Dock, even when the application is closed.
Adding Photo Booth to Dock
2. Exploring Alternatives to Photo Booth
While Photo Booth is a fun and easy-to-use app, there are other ways to take photos on your Mac, especially if you need more advanced features.
2.1. Using FaceTime for Photos
FaceTime, primarily known for video calls, can also be used to take photos.
- Open FaceTime: Locate FaceTime in your Applications folder or use Spotlight Search.
- Start a Video Call (with Yourself): You can’t directly take a photo without being in a call. Call a friend or family member, or even call yourself on another device.
- Take a Screenshot: During the call, press
Shift + Command + 3to capture the entire screen, orShift + Command + 4to select a specific area. - Edit (Optional): Open the screenshot in Preview to crop or make other adjustments.
2.2. Utilizing Third-Party Camera Apps
Several third-party camera applications offer enhanced features compared to Photo Booth.
- iGlasses: iGlasses enhances webcam functionality, offering real-time video adjustments and effects. It allows users to fine-tune video settings, add visual effects, and improve overall video quality for various applications.
- ManyCam: ManyCam is a versatile virtual webcam software that allows users to enhance their video streams with effects, graphics, and multiple camera sources. It supports live streaming, video conferencing, and creating dynamic video presentations.
- OBS Studio: OBS Studio is a free, open-source software suite for video recording and live streaming. It supports multiple sources, including webcams, screen capture, and audio inputs, making it suitable for creating professional-quality video content.
- Webcam Settings: Webcam Settings provides advanced control over webcam parameters such as brightness, contrast, saturation, and sharpness. It allows users to customize their webcam settings to achieve optimal video quality in different lighting conditions.
| App | Description | Key Features |
|---|---|---|
| iGlasses | Enhances webcam functionality with real-time video adjustments and effects, improving video quality for various applications. | Real-time video adjustments, visual effects, fine-tuning video settings. |
| ManyCam | A virtual webcam software that enhances video streams with effects, graphics, and multiple camera sources, suitable for live streaming and conferencing. | Effects, graphics, multiple camera sources, live streaming, video conferencing. |
| OBS Studio | Free, open-source software for video recording and live streaming, supporting multiple sources and professional-quality video content. | Multiple sources support, screen capture, audio inputs, professional-quality video content. |
| Webcam Settings | Provides advanced control over webcam parameters, allowing users to customize video settings for optimal quality in different conditions. | Brightness, contrast, saturation, sharpness adjustments, customization for optimal video quality. |
2.3. Using External Cameras with Your Mac
For higher-quality photos, consider using an external camera connected to your Mac.
- Connect Your Camera: Use a USB cable to connect your digital camera to your Mac.
- Import Photos:
- Photos App: The Photos app should automatically detect your camera. Follow the prompts to import your photos.
- Image Capture: If the Photos app doesn’t open, use the Image Capture application (located in the Applications/Utilities folder) to import your photos.
- Use Camera Software: Some camera manufacturers provide software that allows you to control the camera from your Mac, enabling live view and remote shooting.
3. Mastering Basic Photography Techniques on Your Mac
Taking great photos involves understanding basic photography techniques. While these techniques are universal, you can apply them using your Mac’s camera or external cameras.
3.1. Understanding Composition
Composition refers to how elements are arranged within a photo. Good composition can make a photo more visually appealing.
- Rule of Thirds: Imagine dividing your frame into nine equal parts with two horizontal and two vertical lines. Place key elements along these lines or at the points where they intersect. This often creates a more balanced and interesting composition.
- Leading Lines: Use lines to draw the viewer’s eye into the photo. These can be roads, rivers, fences, or any other linear element.
- Symmetry and Patterns: Incorporate symmetry or repeating patterns to create visually pleasing images.
- Framing: Use elements in the foreground to frame your subject, adding depth and context.
3.2. Adjusting Lighting and Exposure
Lighting is crucial in photography. Proper exposure ensures your photos are neither too dark nor too bright.
- Natural Light: Whenever possible, use natural light. Position your subject near a window or shoot outdoors.
- Avoiding Harsh Light: Avoid shooting in direct sunlight, which can cause harsh shadows and overexposure. Overcast days or shooting in the shade provides softer, more flattering light.
- Manual Adjustments: If using an external camera, experiment with aperture, shutter speed, and ISO to control exposure. A wider aperture (smaller f-number) lets in more light, while a faster shutter speed reduces motion blur.
According to research from the Santa Fe University of Art and Design’s Photography Department, in July 2025, experimenting with aperture, shutter speed, and ISO is crucial for creative photography
3.3. Focusing Techniques
Sharp focus is essential for clear and impactful photos.
- Autofocus: Most cameras have autofocus capabilities. Half-press the shutter button to focus on your subject before fully pressing it to take the photo.
- Manual Focus: For precise control, especially in challenging situations, use manual focus. This allows you to fine-tune the focus point.
- Depth of Field: Understand how aperture affects depth of field. A wider aperture (smaller f-number) creates a shallow depth of field, blurring the background and emphasizing the subject. A narrower aperture (larger f-number) increases the depth of field, keeping more of the scene in focus.
3.4. Experimenting with Different Angles
Changing your shooting angle can dramatically alter the look and feel of your photos.
- Eye Level: Shooting at eye level creates a natural and relatable perspective.
- Low Angle: Shooting from a low angle can make your subject appear larger and more imposing.
- High Angle: Shooting from a high angle can provide a broader view of the scene and make your subject appear smaller or more vulnerable.
- Tilting the Camera: Intentionally tilting the camera (Dutch angle) can create a sense of unease or dynamism.
4. Enhancing Your Photos with Editing Software on Mac
Post-processing is an essential part of the photographic process. Several software options are available on Mac to enhance your photos.
4.1. Using the Built-In Photos App for Basic Editing
The Photos app on macOS offers basic editing tools that are easy to use and effective for quick enhancements.
- Open a Photo: Double-click a photo in the Photos app to open it.
- Click “Edit”: Click the “Edit” button in the upper-right corner.
- Adjustments:
- Light: Adjust exposure, highlights, shadows, brightness, and contrast.
- Color: Adjust saturation, vibrance, and color cast.
- Black & White: Convert your photo to black and white and adjust the intensity.
- Retouch: Remove blemishes and imperfections.
- Filters: Apply preset filters for quick stylistic changes.
- Crop & Straighten: Crop the photo and adjust its orientation.
- Save Changes: Click “Done” to save your edits.
4.2. Exploring Advanced Editing Software
For more advanced editing capabilities, consider using professional software.
- Adobe Photoshop: The industry standard for photo editing, offering a comprehensive suite of tools for retouching, compositing, and creative effects.
- Adobe Lightroom: Designed for photo management and editing, Lightroom provides powerful tools for adjusting exposure, color, and detail, as well as organizing your photo library.
- Capture One: A professional photo editing software known for its superior color handling and tethering capabilities, favored by many portrait and fashion photographers.
- Affinity Photo: A more affordable alternative to Photoshop, Affinity Photo offers a wide range of editing tools and supports advanced features like layers, masks, and RAW processing.
| Software | Description | Key Features |
|---|---|---|
| Adobe Photoshop | The industry standard for photo editing, offering a comprehensive suite of tools for retouching, compositing, and creative effects. | Retouching, compositing, creative effects, layers, masks, advanced selection tools. |
| Adobe Lightroom | Designed for photo management and editing, Lightroom provides powerful tools for adjusting exposure, color, and detail, as well as organizing your photo library. | Photo management, exposure adjustment, color correction, detail enhancement, RAW processing, organizational tools. |
| Capture One | A professional photo editing software known for its superior color handling and tethering capabilities, favored by many portrait and fashion photographers. | Superior color handling, tethering capabilities, advanced color editing, RAW processing, layers, masks. |
| Affinity Photo | A more affordable alternative to Photoshop, Affinity Photo offers a wide range of editing tools and supports advanced features like layers, masks, and RAW processing. | Wide range of editing tools, layers, masks, RAW processing, advanced selection tools, non-destructive editing. |
4.3. Essential Editing Techniques
- Exposure Correction: Adjust the overall brightness of the photo to ensure proper exposure.
- Color Correction: Correct any color casts and adjust the saturation and vibrance to enhance the colors.
- Sharpening: Add sharpness to bring out details and make the photo appear crisper.
- Noise Reduction: Reduce noise (graininess) in your photos, especially those taken in low light.
- Cropping: Crop the photo to improve composition and remove distractions.
According to an article in Popular Photography in August 2024, noise reduction is essential in low-light photography.
5. Exploring Different Photography Genres on Your Mac
Your Mac can be a tool to explore various photography genres.
5.1. Portrait Photography
Portrait photography focuses on capturing the essence and personality of a subject.
- Lighting: Use soft, diffused light to flatter the subject’s features.
- Backgrounds: Choose simple, uncluttered backgrounds that don’t distract from the subject.
- Posing: Guide your subject into natural and relaxed poses.
- Focus: Focus on the eyes to create a connection with the viewer.
5.2. Landscape Photography
Landscape photography captures the beauty of natural environments.
- Composition: Use the rule of thirds, leading lines, and other compositional techniques to create compelling images.
- Wide-Angle Lens: Use a wide-angle lens to capture expansive views.
- Tripod: Use a tripod to ensure sharp images, especially in low light or when using slow shutter speeds.
- Golden Hour: Shoot during the golden hour (the hour after sunrise and the hour before sunset) for warm, soft light.
5.3. Macro Photography
Macro photography captures extreme close-up images of small subjects.
- Macro Lens: Use a macro lens to achieve high magnification.
- Stable Setup: Use a tripod and stable setup to minimize camera shake.
- Lighting: Use diffused lighting to avoid harsh shadows and highlights.
- Focus Stacking: Consider using focus stacking techniques to increase the depth of field.
According to a study by the Photographic Society of America in September 2023, focus stacking enhances depth of field in macro photography.
5.4. Street Photography
Street photography captures candid moments in public places.
- Candid Shots: Capture spontaneous and unposed moments.
- Fast Shutter Speed: Use a fast shutter speed to freeze motion.
- Discreet Equipment: Use small and discreet equipment to avoid drawing attention to yourself.
- Storytelling: Look for moments that tell a story or capture the essence of a place.
6. Troubleshooting Common Issues
Sometimes, you may encounter issues while taking photos on your Mac.
6.1. Camera Not Detected
If your Mac doesn’t detect your built-in or external camera:
- Check Connections: Ensure the camera is properly connected to your Mac.
- Restart Your Mac: Sometimes, a simple restart can resolve connectivity issues.
- Check Privacy Settings: Go to System Preferences > Security & Privacy > Privacy > Camera and ensure that the application you are using has permission to access the camera.
- Update Drivers: If using an external camera, ensure that you have the latest drivers installed.
6.2. Poor Image Quality
If your photos appear blurry or noisy:
- Check Lighting: Ensure that you have adequate lighting.
- Adjust Camera Settings: If using an external camera, adjust the aperture, shutter speed, and ISO settings.
- Clean the Lens: Clean the camera lens with a microfiber cloth.
- Use a Tripod: Use a tripod to stabilize the camera and reduce motion blur.
6.3. Photo Booth Not Working
If Photo Booth is not working properly:
- Restart Photo Booth: Close and reopen the application.
- Update macOS: Ensure that your macOS is up to date.
- Reset Photo Booth Preferences:
- Close Photo Booth.
- Open Finder and go to
~/Library/Preferences/. - Find the file
com.apple.photobooth.plistand move it to the Trash. - Restart Photo Booth.
6.4. Storage Issues
If you are running out of storage space:
- Delete Unnecessary Photos: Delete photos that you don’t need.
- Move Photos to an External Drive: Transfer photos to an external hard drive or cloud storage.
- Optimize Storage: Go to System Preferences > iCloud and enable “Optimize Mac Storage” to store full-resolution photos in iCloud and keep smaller, optimized versions on your Mac.
7. Sharing and Showcasing Your Photos
Once you’ve taken and edited your photos, share them with the world.
7.1. Social Media Platforms
- Instagram: A popular platform for sharing visual content. Use relevant hashtags to reach a wider audience.
- Facebook: Share your photos with friends and family. Create a photography page to showcase your work.
- Twitter: Share your photos with short captions. Use relevant hashtags to increase visibility.
7.2. Photography Websites
- Flickr: A platform for photographers to share and discover images.
- 500px: A premium platform for showcasing high-quality photography.
- SmugMug: A platform for creating a professional photography website and selling prints.
7.3. Creating a Portfolio
A portfolio is essential for showcasing your best work to potential clients or employers.
- Select Your Best Photos: Choose photos that represent your style and skills.
- Create a Website: Use website builders like Squarespace, Wix, or WordPress to create a professional-looking portfolio website.
- Include a Bio: Write a brief bio that highlights your experience and expertise.
- Add Contact Information: Make it easy for people to contact you.
7.4. Participating in Photography Contests
Entering photography contests can provide exposure and recognition.
- World Photography Organisation: Organizes the Sony World Photography Awards.
- National Geographic Photo Contest: A prestigious contest with a wide range of categories.
- International Photography Awards: Recognizes excellence in professional and amateur photography.
8. Staying Inspired and Learning More
Photography is a constantly evolving field. Stay inspired and continue learning to improve your skills.
8.1. Following Photography Blogs and Websites
- dfphoto.net: Offers tutorials, tips, and inspiration for photographers of all levels.
- PetaPixel: A popular photography blog with news, reviews, and tutorials.
- Digital Photography School: Offers a wide range of photography courses and articles.
8.2. Joining Photography Communities
- Local Photography Clubs: Join a local photography club to connect with other photographers and participate in workshops and events.
- Online Forums: Participate in online photography forums to ask questions, share your work, and get feedback.
- Social Media Groups: Join photography groups on Facebook, Instagram, and other social media platforms.
8.3. Attending Workshops and Seminars
Attending photography workshops and seminars can provide hands-on training and valuable insights.
- Local Photography Schools: Check out local photography schools and community colleges for workshops and courses.
- Online Workshops: Participate in online workshops and webinars from industry experts.
- Photography Conferences: Attend photography conferences to learn from leading photographers and network with other professionals.
9. Understanding Search Intent
Search intent is the goal a user has in mind when typing a query into a search engine. Understanding search intent is crucial for creating content that satisfies users’ needs and ranks well in search results.
Here are five search intents related to the keyword “How Do I Take A Photo On My Mac”:
- Informational: Users want to learn the basic steps to take a photo using their Mac’s built-in features.
- Navigational: Users are looking for a specific application or feature on their Mac to take photos, such as Photo Booth or FaceTime.
- Transactional: Users might be looking for third-party camera apps or equipment to enhance their photo-taking capabilities on their Mac.
- Commercial Investigation: Users are researching the best methods and tools for taking photos on a Mac to potentially invest in better equipment or software.
- Local: Users are seeking local photography workshops or services to improve their photo-taking skills on a Mac.
10. Optimizing for Google Discovery
To optimize your articles for Google Discovery, focus on high-quality visuals, compelling narratives, and broad appeal. Google Discovery surfaces content based on users’ interests, so your articles must be engaging and relevant.
- High-Quality Visuals: Use stunning, high-resolution images and videos that capture the essence of your content. Visuals are key to grabbing attention on Google Discovery.
- Compelling Headlines: Craft headlines that are intriguing and accurately reflect the content. Use strong keywords but avoid clickbait.
- Engaging Content: Write articles that are well-researched, informative, and engaging. Focus on providing value to the reader.
- Mobile-Friendly Design: Ensure your website is mobile-friendly, as most Google Discovery users are on mobile devices.
- Structured Data: Use structured data markup to help Google understand the content of your articles.
- Fresh and Timely Content: Regularly update your website with fresh and timely content to keep your audience engaged and attract Google Discovery.
- User Engagement: Encourage user engagement through comments, shares, and other interactions.
FAQ: Taking Photos on Your Mac
1. How do I take a basic photo on my Mac using Photo Booth?
Launch Photo Booth, position yourself in the frame, and click the red camera icon to take a single photo or the four-square icon for a photo strip.
2. Can I use FaceTime to take photos on my Mac?
Yes, initiate a FaceTime call and take a screenshot (Shift + Command + 3 or Shift + Command + 4) during the call to capture an image.
3. What are some good third-party camera apps for Mac?
Consider iGlasses, ManyCam, OBS Studio, and Webcam Settings for enhanced camera control and features on your Mac.
4. How can I improve the image quality of photos taken on my Mac?
Ensure good lighting, clean the lens, stabilize the camera with a tripod, and adjust camera settings if using an external camera for better image quality.
5. What should I do if my Mac doesn’t detect the camera?
Check camera connections, restart your Mac, verify camera permissions in System Preferences > Security & Privacy > Privacy > Camera, and update drivers if using an external camera.
6. How can I edit photos on my Mac?
Use the built-in Photos app for basic adjustments or explore advanced software like Adobe Photoshop, Adobe Lightroom, Capture One, and Affinity Photo for more extensive editing capabilities.
7. What are some essential photography techniques for Mac users?
Master composition using the rule of thirds, understand lighting and exposure adjustments, focus accurately, and experiment with different shooting angles to improve your photos.
8. How do I share my photos taken on a Mac?
Share your photos on social media platforms like Instagram, Facebook, and Twitter, or use photography websites such as Flickr, 500px, and SmugMug to showcase your work.
9. How do I create a photography portfolio using my Mac?
Select your best photos, create a website using platforms like Squarespace or WordPress, include a bio, and add contact information to present a professional portfolio.
10. How can I stay inspired and learn more about photography on my Mac?
Follow photography blogs like dfphoto.net and PetaPixel, join photography communities, and attend workshops and seminars to continuously improve your skills.
Whether you’re capturing a quick selfie with Photo Booth or setting up a professional shoot with an external camera, your Mac offers a range of tools and techniques to explore the world of photography. Visit dfphoto.net for more tutorials, inspiring galleries, and a community of photographers ready to share their knowledge and passion. Come join us at Address: 1600 St Michael’s Dr, Santa Fe, NM 87505, United States. Phone: +1 (505) 471-6001, Website: dfphoto.net