Want to capture exactly what’s on your iPhone screen? Taking a screenshot is the perfect way to save a moment, share a conversation, or document anything from error messages to high scores. It’s simpler than you might think, and the method varies slightly depending on your iPhone model. This guide will walk you through taking screenshots on all types of iPhones, ensuring you never miss capturing important on-screen information.
Taking a Screenshot on iPhone Models with Face ID (iPhone 14, and later)
If you own a modern iPhone like the iPhone 14, or any model that uses Face ID instead of a Home button, here’s how to take a screenshot in a flash:
- Simultaneously Press the Side Button and the Volume Up Button. The side button is located on the right side of your iPhone, while the volume up button is on the left. Make sure to press both at the same time for the screenshot to register.
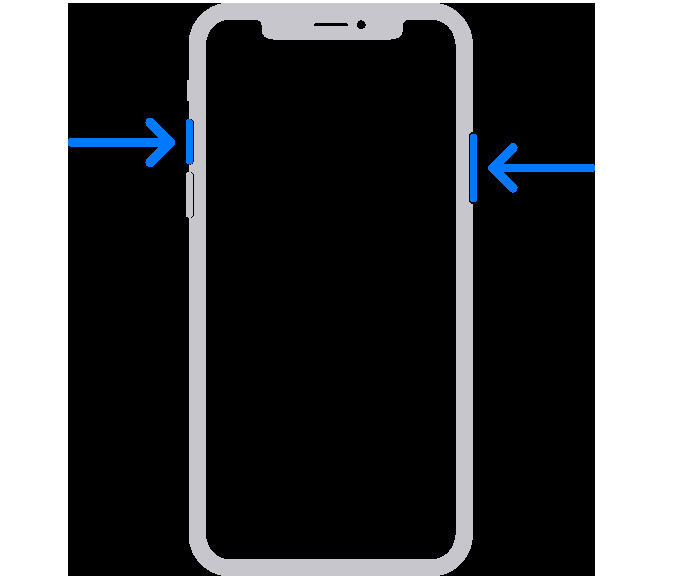 Pressing side button and volume up button simultaneously on iPhone 14 with Face ID to take a screenshot
-
Quickly Release Both Buttons. A swift press and release are key. Holding the buttons down might trigger other functions like the emergency SOS or volume controls.
-
Locate the Screenshot Thumbnail. Immediately after taking the screenshot, a small preview thumbnail will briefly appear in the lower-left corner of your iPhone’s screen.
-
Interact with the Thumbnail. You have a couple of options at this stage:
- Tap the thumbnail: Tapping it will open the screenshot, allowing you to edit, share, or delete it right away.
- Swipe left on the thumbnail: If you don’t need to immediately interact with the screenshot, simply swipe left on the thumbnail to dismiss it. The screenshot is automatically saved.
Taking a Screenshot on iPhone Models with Touch ID and Side Button
For iPhone models that feature a Touch ID Home button and a side button (like iPhone 8 and iPhone SE (2nd and 3rd generation)), the process is slightly different:
- Press the Side Button and the Home Button at the Same Time. The side button is on the right, and the Home button is the round button at the bottom center of your iPhone’s front.
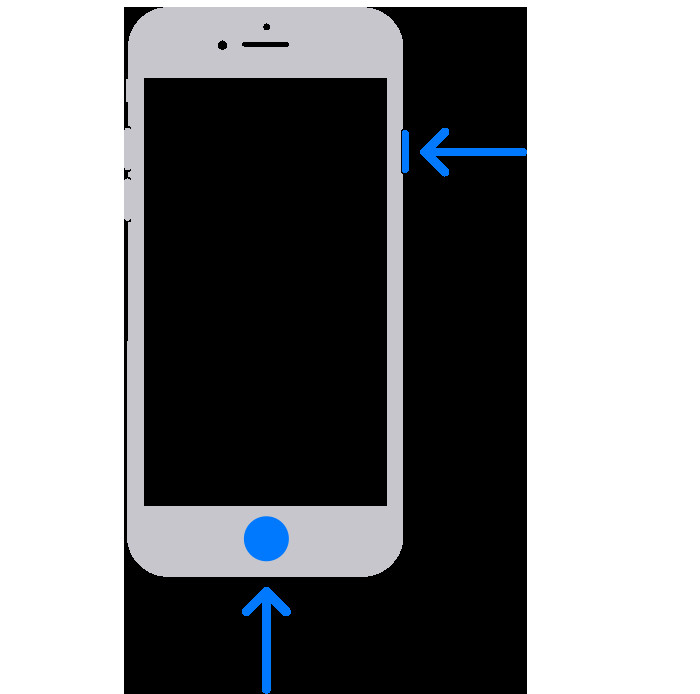 Using side button and Home button on iPhone with Touch ID and side button to capture screen
-
Quickly Release Both Buttons. As with Face ID iPhones, a quick press and release is important to avoid triggering other functions.
-
Find the Screenshot Thumbnail. A thumbnail preview will appear in the lower-left corner of your screen, just like on Face ID iPhones.
-
Handle the Thumbnail. Tap to edit or share, or swipe left to dismiss and save automatically.
Taking a Screenshot on iPhone Models with Touch ID and Top Button
Older iPhone models, such as the original iPhone SE and iPhone 5s, feature a Touch ID Home button and a top button (power button located on the top edge of the phone). Here’s how to screenshot on these devices:
- Press the Top Button and the Home Button Simultaneously. The top button is on the top right edge, and the Home button is at the bottom center front.
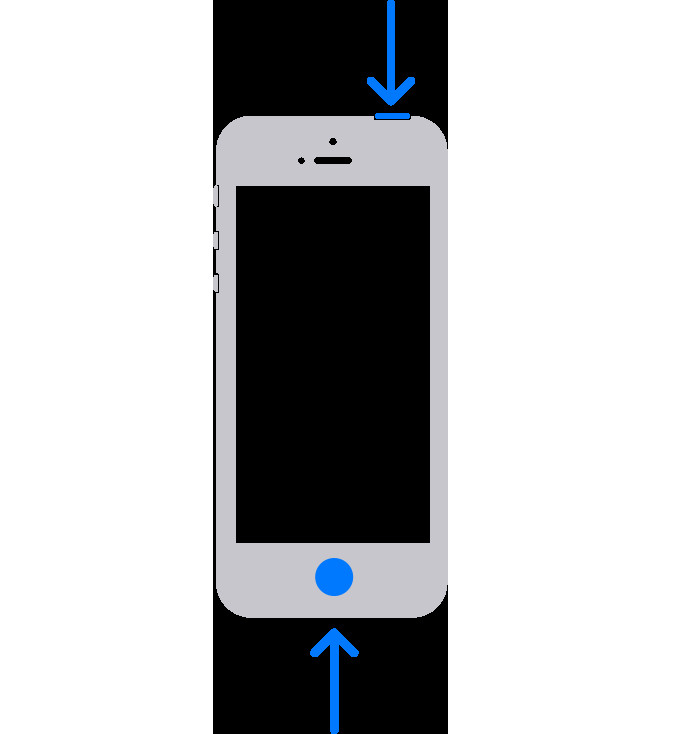 Taking a screenshot on iPhone SE with Touch ID and top button using top and Home buttons
-
Quickly Release Both. Ensure a quick press and release to correctly capture the screenshot.
-
Screenshot Thumbnail Appears. The familiar thumbnail will pop up in the lower-left corner.
-
Interact with the Thumbnail. Tap to open and edit or share, or swipe to dismiss and save.
Where to Find Your Screenshots
Once you’ve taken a screenshot, you might wonder where it goes. All your screenshots are conveniently saved in the Photos app. To find them:
- Open the Photos App.
- Tap on “Albums” at the bottom of the screen.
- Scroll down to “Media Types” and tap on “Screenshots”.
You’ll find all your captured screenshots neatly organized in this album, making it easy to access, share, or manage them.
Taking a screenshot on your iPhone is a fundamental skill that unlocks numerous possibilities for saving and sharing information. Whether you have the latest iPhone or an older model, mastering the button combination for your device will quickly become second nature.