Losing precious photo memories can be distressing, but don’t worry, dfphoto.net is here to help you navigate the recovery process, whether you’re a professional photographer or simply treasure personal snapshots. We’ll explore various methods, from checking your device’s recycle bin to using specialized recovery software and services, ensuring you have the best chance of retrieving your valuable images. Our guide covers multiple platforms and devices, providing practical steps and advice for both beginners and experienced users. Let’s dive into the image revival and digital preservation techniques to get your photos back where they belong!
1. Understanding Photo Loss Scenarios
Photo loss can occur in various ways, each requiring a different approach to recovery. Being aware of these scenarios will help you determine the best course of action.
1.1. Accidental Deletion
Accidental deletion is the most common cause of photo loss. It happens when you unintentionally tap the delete button or empty the recycle bin without realizing it.
1.2. Device Malfunction
A malfunctioning device, such as a smartphone, camera, or computer, can lead to data corruption and photo loss. This can be due to hardware failure, software glitches, or viruses.
1.3. Storage Media Failure
Storage media like SD cards, USB drives, and hard drives can fail due to physical damage, wear and tear, or corruption. This can result in the loss of all photos stored on the device.
1.4. Software Errors
Software errors during file transfer, editing, or storage can cause photos to become corrupted or lost. This can occur with photo editing software, operating systems, or cloud storage services.
1.5. Malware and Viruses
Malware and viruses can infect your devices and storage media, leading to data corruption and photo loss. These malicious programs can delete, encrypt, or move your photos without your knowledge.
2. Immediate Actions to Take After Photo Loss
When you realize you’ve lost photos, taking quick action is crucial to maximize your chances of recovery. Here are some immediate steps to follow.
2.1. Stop Using the Device
The most important step is to immediately stop using the device or storage medium where the photos were lost. Any further use can overwrite the deleted data, making it unrecoverable.
2.2. Do Not Save New Files
Avoid saving any new files to the device. New data can overwrite the space occupied by the deleted photos, reducing the likelihood of successful recovery.
2.3. Turn Off the Device
Turn off the device to prevent any background processes from overwriting the deleted data. This is especially important for smartphones and computers.
2.4. Remove Storage Media
If the photos were stored on an SD card or USB drive, remove it from the device to prevent further data loss. Store the media in a safe place until you are ready to attempt recovery.
2.5. Consult a Professional
If the photos are extremely important or the data loss is due to a severe issue like physical damage, consider consulting a professional data recovery service. They have specialized tools and expertise to handle complex recovery scenarios.
3. Checking Basic Recovery Options
Before resorting to advanced methods, start with the basic recovery options available on your devices and platforms.
3.1. Recycle Bin (Windows)
The Recycle Bin is a temporary storage location for deleted files on Windows computers.
3.1.1. How to Access the Recycle Bin
- Double-click the Recycle Bin icon on your desktop.
- A window will open, displaying the deleted files.
3.1.2. Restoring Photos from the Recycle Bin
- Locate the deleted photos in the Recycle Bin.
- Right-click on the photo(s) you want to restore.
- Select “Restore” from the context menu.
- The photos will be moved back to their original location.
3.2. Trash (Mac)
The Trash is the equivalent of the Recycle Bin on macOS.
3.2.1. How to Access the Trash
- Click on the Trash icon in the Dock.
- A window will open, showing the deleted files.
3.2.2. Restoring Photos from the Trash
- Find the deleted photos in the Trash.
- Right-click on the photo(s) you want to restore.
- Select “Put Back” from the context menu.
- The photos will be returned to their original location.
3.3. Recently Deleted Album (iOS)
iOS devices have a “Recently Deleted” album that stores deleted photos for 30 days.
3.3.1. How to Access the Recently Deleted Album
- Open the Photos app on your iPhone or iPad.
- Tap on the “Albums” tab at the bottom of the screen.
- Scroll down and tap on “Recently Deleted.”
3.3.2. Recovering Photos from the Recently Deleted Album
- Locate the photos you want to recover in the “Recently Deleted” album.
- Tap on the “Recover” button at the bottom of the screen.
- Confirm that you want to recover the photos.
- The photos will be restored to your photo library.
3.4. Recently Deleted Folder (Android)
Some Android devices have a “Recently Deleted” or “Trash” folder in the Gallery app.
3.4.1. How to Access the Recently Deleted Folder
- Open the Gallery app on your Android device.
- Look for a “Recently Deleted” or “Trash” folder in the album list. The exact name and location may vary depending on your device and Android version.
3.4.2. Recovering Photos from the Recently Deleted Folder
- Find the photos you want to recover in the “Recently Deleted” or “Trash” folder.
- Tap on the “Restore” or “Recover” button.
- The photos will be restored to your photo gallery.
 Examining the Recently Deleted album on an iPhone
3.5. Cloud Storage Services
If you use cloud storage services like Google Photos, iCloud, or Dropbox, check the trash or deleted items folder in those services.
3.5.1. Google Photos
- Open the Google Photos app or website.
- Click on “Trash” in the left sidebar.
- Select the photos you want to restore and click “Restore.”
3.5.2. iCloud Photos
- Go to iCloud.com and sign in with your Apple ID.
- Click on “Photos.”
- Click on “Recently Deleted” in the sidebar.
- Select the photos you want to recover and click “Recover.”
3.5.3. Dropbox
- Go to Dropbox.com and sign in to your account.
- Click on “Deleted files” in the left sidebar.
- Select the photos you want to restore and click “Restore.”
4. Using Data Recovery Software
If the basic recovery options don’t work, you can try using data recovery software. These tools scan your device or storage media for deleted files and attempt to recover them.
4.1. Choosing the Right Software
Selecting the right data recovery software is crucial for successful photo restoration. Here are some factors to consider.
4.1.1. Compatibility
Ensure the software is compatible with your operating system (Windows, macOS, Android, iOS) and the type of storage media you are using (hard drive, SD card, USB drive).
4.1.2. Features
Look for software that supports various file formats, deep scanning, and previewing of recoverable files.
4.1.3. Ease of Use
Choose software with a user-friendly interface and clear instructions to simplify the recovery process.
4.1.4. Reviews and Ratings
Check online reviews and ratings to gauge the software’s effectiveness and reliability.
4.1.5. Cost
Consider the cost of the software and whether it offers a free trial or money-back guarantee.
4.2. Top Data Recovery Software Options
Here are some of the top data recovery software options available.
| Software | Compatibility | Key Features |
|---|---|---|
| Recuva | Windows | Free version available, deep scan, secure overwrite |
| EaseUS Data Recovery | Windows, macOS | Recovers from various storage devices, supports multiple file formats, preview before recovery |
| Disk Drill | Windows, macOS | Recovers from various storage devices, includes data protection tools, user-friendly interface |
| Stellar Data Recovery | Windows, macOS | Recovers from various storage devices, supports multiple file formats, recovers from formatted drives |
| PhotoRec | Windows, macOS, Linux | Free and open-source, recovers a wide range of file types, command-line interface |
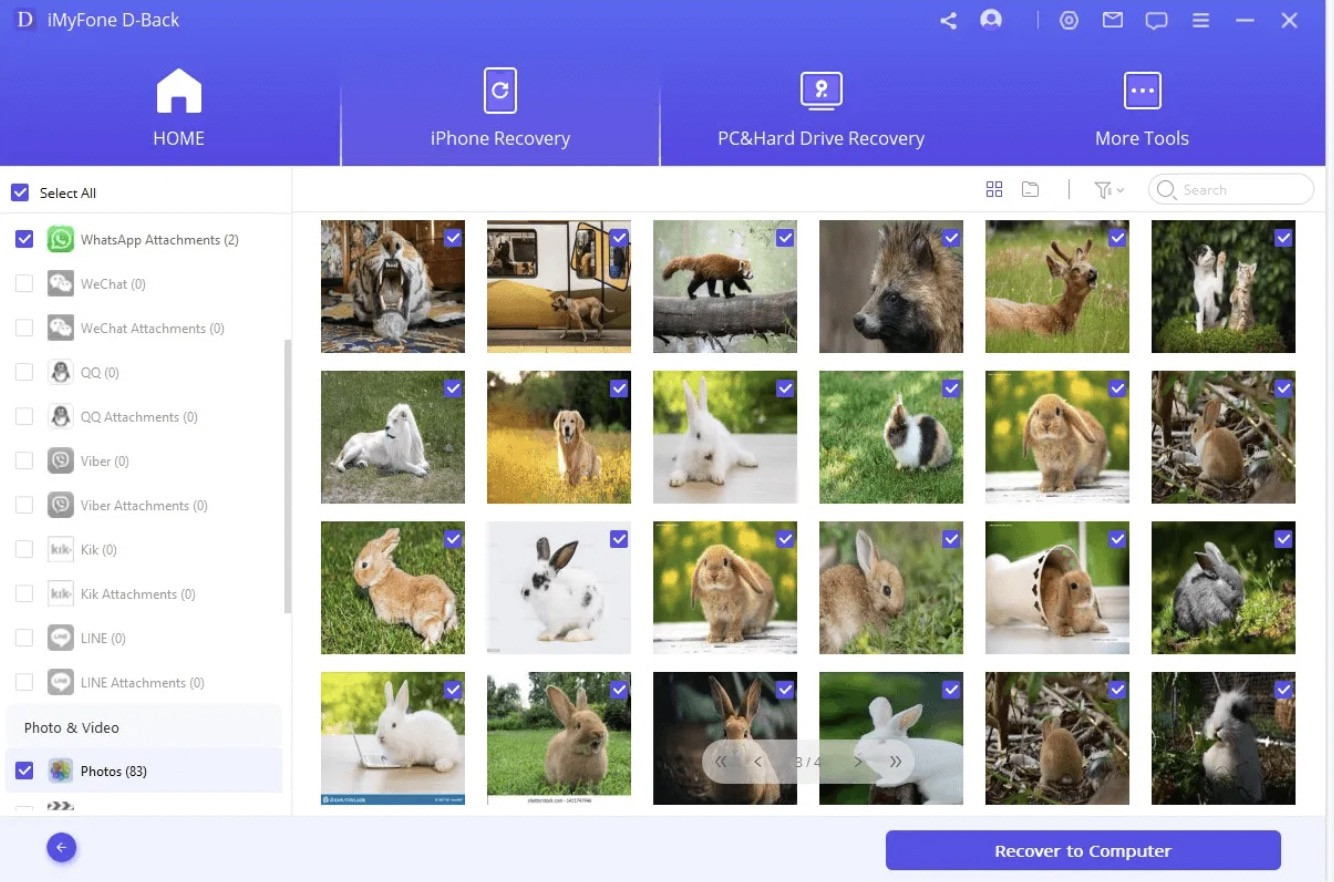
| iMyFone D-Back | iOS | Specifically designed for iOS devices, recovers from iCloud and iTunes backups, recovers from various data loss scenarios |
| Dr.Fone | Android, iOS | Recovers from various devices, supports multiple file formats, user-friendly interface |
| PhoneRescue | Android, iOS | Recovers from various devices, supports multiple file formats, recovers from damaged devices |
4.3. Step-by-Step Guide to Using Data Recovery Software
Here’s a general step-by-step guide to using data recovery software.
4.3.1. Download and Install the Software
Download the data recovery software from the official website and install it on your computer.
4.3.2. Select the Drive or Device
Launch the software and select the drive or device where the photos were lost. This could be your computer’s hard drive, an SD card, or a USB drive.
4.3.3. Scan for Lost Files
Start the scanning process. The software will scan the selected drive or device for deleted files. Some software offers a quick scan and a deep scan option. A deep scan takes longer but can find more files.
4.3.4. Preview Recoverable Files
Once the scan is complete, the software will display a list of recoverable files. Preview the photos to ensure they are the ones you want to restore.
4.3.5. Recover the Photos
Select the photos you want to recover and choose a location to save them. It’s important to save the recovered photos to a different drive or device to avoid overwriting the original data.
4.4. Tips for Successful Data Recovery
To improve your chances of successful data recovery, follow these tips.
4.4.1. Act Quickly
The sooner you start the recovery process, the better your chances of success. Deleted data can be overwritten quickly, so don’t delay.
4.4.2. Use Deep Scan
If the quick scan doesn’t find the photos you are looking for, try using the deep scan option. It takes longer but can find more files.
4.4.3. Save to a Different Drive
Always save the recovered photos to a different drive or device. Saving them to the same drive can overwrite the original data and make it unrecoverable.
4.4.4. Try Multiple Software Options
If one data recovery software doesn’t work, try another one. Different software uses different algorithms and may be able to find files that others miss.
4.4.5. Seek Professional Help
If the photos are extremely important or the data loss is due to a severe issue, consider seeking professional help from a data recovery service.
5. Recovering Photos from Specific Devices
The process of recovering photos can vary depending on the device you are using. Here are some specific instructions for different devices.
5.1. Recovering Photos from iPhone
Recovering photos from an iPhone can be done using several methods, including the Recently Deleted album, iCloud backups, iTunes backups, and data recovery software.
5.1.1. Using the Recently Deleted Album
- Open the Photos app on your iPhone.
- Tap on the “Albums” tab.
- Scroll down and tap on “Recently Deleted.”
- Select the photos you want to recover and tap “Recover.”
5.1.2. Restoring from iCloud Backup
- Go to Settings > General > Reset > Erase All Content and Settings.
- Your iPhone will restart and display the setup screen.
- Follow the on-screen instructions until you reach the “Apps & Data” screen.
- Select “Restore from iCloud Backup.”
- Sign in to your iCloud account and choose the most recent backup that contains the photos.
- Wait for the restore process to complete.
5.1.3. Restoring from iTunes Backup
- Connect your iPhone to your computer using a USB cable.
- Open iTunes on your computer.
- Select your iPhone when it appears in iTunes.
- Click on “Restore Backup.”
- Choose the most recent backup that contains the photos and click “Restore.”
- Wait for the restore process to complete.
5.1.4. Using Data Recovery Software for iPhone
- Download and install data recovery software for iOS, such as iMyFone D-Back or Dr.Fone.
- Connect your iPhone to your computer using a USB cable.
- Launch the software and follow the instructions to scan your iPhone for deleted photos.
- Preview the recoverable photos and select the ones you want to restore.
- Choose a location to save the recovered photos.
5.2. Recovering Photos from Android Devices
Recovering photos from an Android device can be done using the Recently Deleted folder, Google Photos, and data recovery software.
5.2.1. Using the Recently Deleted Folder
- Open the Gallery app on your Android device.
- Look for a “Recently Deleted” or “Trash” folder.
- Select the photos you want to recover and tap “Restore.”
5.2.2. Restoring from Google Photos
- Open the Google Photos app on your Android device.
- Tap on “Library” at the bottom of the screen.
- Tap on “Trash.”
- Select the photos you want to restore and tap “Restore.”
5.2.3. Using Data Recovery Software for Android
- Download and install data recovery software for Android, such as Dr.Fone or PhoneRescue.
- Connect your Android device to your computer using a USB cable.
- Enable USB debugging on your Android device.
- Launch the software and follow the instructions to scan your Android device for deleted photos.
- Preview the recoverable photos and select the ones you want to restore.
- Choose a location to save the recovered photos.
5.3. Recovering Photos from SD Cards
SD cards are commonly used in cameras and other devices to store photos. If you lose photos from an SD card, you can use data recovery software to retrieve them.
5.3.1. Connecting the SD Card to Your Computer
- Remove the SD card from your camera or device.
- Insert the SD card into an SD card reader.
- Connect the SD card reader to your computer using a USB cable.
5.3.2. Using Data Recovery Software for SD Cards
- Download and install data recovery software, such as Recuva or EaseUS Data Recovery.
- Launch the software and select the SD card as the drive to scan.
- Start the scanning process.
- Preview the recoverable photos and select the ones you want to restore.
- Choose a location to save the recovered photos.
5.4. Recovering Photos from Digital Cameras
Digital cameras store photos on internal memory or SD cards. The recovery process is similar to recovering photos from SD cards.
5.4.1. Connecting the Camera to Your Computer
- Connect your digital camera to your computer using a USB cable.
- Turn on the camera and select the USB connection mode.
5.4.2. Using Data Recovery Software for Digital Cameras
- Download and install data recovery software, such as Stellar Data Recovery or Disk Drill.
- Launch the software and select the camera’s drive as the drive to scan.
- Start the scanning process.
- Preview the recoverable photos and select the ones you want to restore.
- Choose a location to save the recovered photos.
6. Professional Data Recovery Services
When data loss is severe or the photos are extremely important, professional data recovery services can offer the best chance of recovery.
6.1. When to Consider Professional Help
Consider professional help in the following situations.
6.1.1. Physical Damage
If the device or storage media is physically damaged (e.g., water damage, broken hard drive), professional services are necessary.
6.1.2. Complex Data Loss
If the data loss is due to a complex issue like file system corruption or drive failure, professional expertise is required.
6.1.3. Sensitive Data
If the photos are highly sensitive or confidential, professional services can ensure data privacy and security during the recovery process.
6.1.4. Time Sensitivity
If you need the photos recovered quickly, professional services can expedite the process.
6.2. Finding a Reputable Data Recovery Service
Finding a reputable data recovery service is crucial for ensuring successful recovery and protecting your data.
6.2.1. Check Reviews and Ratings
Look for online reviews and ratings to gauge the service’s reputation and effectiveness.
6.2.2. Verify Credentials
Ensure the service has the necessary certifications and experience in data recovery.
6.2.3. Ask About the Process
Ask the service about their recovery process, success rates, and data privacy policies.
6.2.4. Get a Quote
Get a detailed quote for the recovery service and understand the payment terms.
6.2.5. Inquire About Data Security
Inquire about the security measures they have in place to protect your data during the recovery process.
6.3. What to Expect from a Professional Service
Here’s what you can expect from a professional data recovery service.
6.3.1. Initial Assessment
The service will perform an initial assessment of the device or storage media to determine the extent of the damage and the feasibility of recovery.
6.3.2. Data Recovery Process
The service will use specialized tools and techniques to recover the data. This may involve repairing damaged hardware, rebuilding file systems, or using advanced data recovery software.
6.3.3. Data Verification
The service will verify the recovered data to ensure its integrity and completeness.
6.3.4. Data Delivery
The recovered data will be delivered to you on a new storage device or through a secure online transfer.
6.3.5. Data Security
The service will ensure the security and confidentiality of your data throughout the recovery process.
7. Preventing Future Photo Loss
Preventing future photo loss is essential for preserving your valuable memories. Here are some proactive measures you can take.
7.1. Regular Backups
Regular backups are the most effective way to prevent photo loss. Back up your photos to multiple locations, such as external hard drives, cloud storage services, and other devices.
7.1.1. External Hard Drives
Back up your photos to an external hard drive regularly. You can use software like Windows Backup or macOS Time Machine to automate the process.
7.1.2. Cloud Storage Services
Use cloud storage services like Google Photos, iCloud, or Dropbox to automatically back up your photos.
7.1.3. Multiple Devices
Store your photos on multiple devices, such as your computer, smartphone, and tablet, to create redundancy.
7.2. Using Cloud Storage
Cloud storage services offer automatic backups, accessibility from multiple devices, and protection against device failure.
7.2.1. Google Photos
Google Photos offers unlimited storage for photos and videos (with some compression) and automatic backups.
7.2.2. iCloud Photos
iCloud Photos seamlessly integrates with Apple devices and offers automatic backups and syncing.
7.2.3. Dropbox
Dropbox offers file storage and syncing across multiple devices and platforms.
7.3. Organizing Your Photos
Organizing your photos can help prevent accidental deletion and make it easier to find and manage your images.
7.3.1. Create Folders
Create folders for different events, dates, or categories.
7.3.2. Use Descriptive File Names
Use descriptive file names that include the date, event, or subject of the photo.
7.3.3. Tag Your Photos
Tag your photos with keywords to make them easier to search and find.
7.4. Safe Handling of Storage Media
Handle your storage media carefully to prevent physical damage and data loss.
7.4.1. Protect from Physical Damage
Protect your devices and storage media from physical damage, such as drops, impacts, and extreme temperatures.
7.4.2. Avoid Moisture
Avoid exposing your devices and storage media to moisture, which can cause corrosion and data loss.
7.4.3. Eject Properly
Always eject storage media properly from your computer or device to prevent data corruption.
7.5. Using Reliable Hardware
Using reliable hardware can reduce the risk of data loss due to device failure.
7.5.1. Choose Reputable Brands
Choose devices and storage media from reputable brands with a proven track record of reliability.
7.5.2. Keep Devices Updated
Keep your devices updated with the latest software and firmware to fix bugs and improve performance.
7.5.3. Monitor Device Health
Monitor the health of your devices and storage media using diagnostic tools to detect and address potential issues early.
8. Understanding File Formats and Corruption
Understanding different file formats and how corruption can occur is crucial for effective photo recovery and prevention.
8.1. Common Photo File Formats
Different photo file formats have different characteristics and uses.
8.1.1. JPEG (JPG)
JPEG is the most common photo file format, known for its compression capabilities and compatibility with various devices and platforms. It’s suitable for everyday photos but can lose quality with repeated editing and saving.
8.1.2. PNG
PNG is a lossless file format that preserves image quality and supports transparency. It’s ideal for graphics, logos, and images with text.
8.1.3. TIFF
TIFF is a high-quality, lossless file format often used in professional photography and printing. It preserves all image data but results in larger file sizes.
8.1.4. RAW
RAW is a file format that contains unprocessed data captured by a digital camera’s sensor. It provides the most flexibility for editing and adjustments but requires specialized software to view and edit.
8.2. Causes of Photo Corruption
Photo corruption can occur due to various factors.
8.2.1. Improper Ejection
Improperly ejecting storage media can cause file system corruption and data loss.
8.2.2. Power Interruption
Power interruptions during file transfer or saving can lead to incomplete or corrupted files.
8.2.3. Viruses and Malware
Viruses and malware can infect your devices and storage media, leading to data corruption and photo loss.
8.2.4. Physical Damage
Physical damage to storage media can cause data corruption and make photos unreadable.
8.3. Identifying Corrupted Photos
Corrupted photos may exhibit various symptoms.
8.3.1. Unable to Open
The photo file may be unable to open or display an error message.
8.3.2. Distorted Images
The photo may display distorted colors, lines, or patterns.
8.3.3. Missing Sections
Parts of the photo may be missing or replaced with gray areas.
8.3.4. Error Messages
Error messages may appear when trying to open or edit the photo.
8.4. Repairing Corrupted Photos
Several methods can be used to repair corrupted photos.
8.4.1. Using Photo Repair Software
Photo repair software can scan and repair corrupted photo files.
8.4.2. Converting to a Different Format
Converting the photo to a different file format can sometimes fix corruption issues.
8.4.3. Using Online Repair Tools
Online photo repair tools can attempt to repair corrupted photos.
8.4.4. Seeking Professional Help
Professional data recovery services can repair severely corrupted photos.
9. Ethical Considerations in Photo Recovery
When recovering photos, it’s important to consider ethical and legal implications.
9.1. Respecting Privacy
Respect the privacy of others when recovering photos. Do not attempt to recover photos from devices or storage media that do not belong to you without permission.
9.2. Adhering to Copyright Laws
Adhere to copyright laws when recovering photos. Do not attempt to recover or use copyrighted photos without permission from the copyright holder.
9.3. Data Security
Ensure the security and confidentiality of recovered photos. Do not share or distribute recovered photos without permission from the owner.
9.4. Legal Compliance
Comply with all applicable laws and regulations when recovering photos.
10. FAQ: How Do I Restore My Photos?
Here are some frequently asked questions about photo restoration.
-
Can I recover deleted photos from my iPhone without a backup?
Yes, you can attempt to recover deleted photos from your iPhone without a backup using data recovery software. However, the success rate may vary depending on the circumstances. -
How long do deleted photos stay in the Recently Deleted album?
Deleted photos typically stay in the Recently Deleted album for 30 days. After 30 days, they are permanently deleted. -
What is the best data recovery software for recovering photos?
Some of the best data recovery software options for recovering photos include Recuva, EaseUS Data Recovery, Disk Drill, and Stellar Data Recovery. -
Can I recover photos from a damaged SD card?
Yes, you can attempt to recover photos from a damaged SD card using data recovery software or professional data recovery services. -
How can I prevent future photo loss?
You can prevent future photo loss by regularly backing up your photos to multiple locations, using cloud storage services, organizing your photos, handling storage media carefully, and using reliable hardware. -
What should I do immediately after realizing I’ve lost photos?
Stop using the device, do not save new files, turn off the device, and remove the storage media. -
Is it possible to recover photos that have been overwritten?
It is generally not possible to recover photos that have been overwritten with new data. -
What are the common causes of photo corruption?
Common causes of photo corruption include improper ejection, power interruption, viruses and malware, and physical damage. -
How can I identify if a photo is corrupted?
Corrupted photos may be unable to open, display distorted images, have missing sections, or show error messages. -
When should I consider professional data recovery services?
Consider professional data recovery services when the device or storage media is physically damaged, the data loss is complex, the photos are highly sensitive, or you need the photos recovered quickly.
Losing your photos can be a stressful experience, but by following these steps and using the right tools, you can significantly increase your chances of restoring your precious memories. Remember to act quickly, choose reliable software, and always back up your photos to prevent future loss.
At dfphoto.net, we’re committed to providing you with the best resources and information for all your photography needs. Visit our website at dfphoto.net to explore more tips, tutorials, and inspiration for your photography journey. Whether you’re looking to master new techniques, discover stunning images, or connect with a vibrant community of photographers, dfphoto.net is your ultimate destination. Find us at 1600 St Michael’s Dr, Santa Fe, NM 87505, United States, or give us a call at +1 (505) 471-6001. Let dfphoto.net help you preserve and celebrate your visual stories!