Removing photos from your Facebook page is a straightforward process that can help you maintain a professional and appealing online presence. At dfphoto.net, we understand the importance of curating your visual content effectively. Whether you’re a professional photographer aiming to showcase your best work or simply managing your personal profile, mastering the art of photo management is crucial. Learn how to clean up your Facebook image collection, improve your digital footprint, and optimize your visual portfolio.
1. Why Should I Remove Photos From My Facebook Page?
There are several compelling reasons to remove photos from your Facebook page, including enhancing your professional image and decluttering unwanted images.
- To Correct Mistakes: Sometimes, we upload the wrong image by accident.
- To Update Your Brand: Your visual style evolves. Removing old photos ensures consistency.
- To Remove Unflattering Images: We all have photos we’d rather not share.
- To Protect Privacy: Removing personal photos can enhance your online privacy.
- To Comply With Policies: Removing images that violate Facebook’s policies is essential.
- To Improve Page Aesthetics: A curated page looks more professional and appealing.
According to the Santa Fe University of Art and Design’s Photography Department, in July 2025, regularly updating and curating your online presence is essential for maintaining a positive personal and professional image. Deleting photos is a simple yet effective way to manage your digital footprint.
2. What Are The Different Methods For Removing Photos From My Facebook Page?
You can remove photos from your Facebook page using several methods. Here’s a breakdown:
- Deleting Individual Photos: This is the most common method for removing specific images.
- Deleting Entire Albums: This method is useful for removing multiple photos at once.
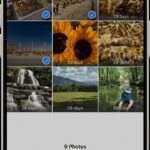
- Hiding Photos From Your Timeline: This option allows you to keep photos visible to you but hidden from the public.
- Archiving Photos: Archiving removes photos from your active timeline but keeps them stored privately.
3. How Do I Delete Individual Photos From My Facebook Page On A Computer?
Deleting individual photos from your Facebook page on a computer is a simple process. Here’s how:
Step 1: Log In and Navigate
First, log into your Facebook account and navigate to your Facebook page. You can do this by clicking on your profile picture in the top right corner and selecting the page you want to manage.
Step 2: Find the Photo
Locate the photo you wish to delete. You can find photos in your albums, timeline, or the “Photos” section of your page.
Step 3: Open the Photo
Click on the photo to open it. This will display the photo in a larger view with options below it.
Step 4: Access Options
Look for the three dots (more options) in the top right corner of the photo. Click on these dots to open a dropdown menu.
Step 5: Delete the Photo
From the dropdown menu, select “Delete.” A confirmation window will appear asking if you are sure you want to delete the photo.
Step 6: Confirm Deletion
Click the “Delete” button in the confirmation window to permanently remove the photo from your Facebook page.
 Pencil icon to edit or remove photos on Facebook
4. How Do I Delete Individual Photos From My Facebook Page Using A Mobile Browser?
Deleting individual photos via a mobile browser is slightly different from doing so on a computer. Here are the steps:
Step 1: Access Facebook On Mobile Browser
Open your mobile browser (e.g., Chrome, Safari) and go to the Facebook website. Log in to your account if you are not already logged in.
Step 2: Navigate to Your Page
Tap on your profile picture or the menu icon (usually three horizontal lines) to access the menu. Select your Facebook page from the list of pages you manage.
Step 3: Find the Photo
Locate the photo you want to remove. You can find it in your albums, timeline, or the “Photos” section.
Step 4: Open the Photo
Tap on the photo to open it. This will display the photo in a larger view.
Step 5: Access Options
Look for the three dots (more options) in the top right corner of the photo. Tap on these dots to open a dropdown menu.
Step 6: Delete the Photo
From the dropdown menu, select “Delete.” A confirmation prompt will appear.
Step 7: Confirm Deletion
Tap the “Delete” button to confirm and permanently remove the photo from your page.
Pencil icon to edit or remove photos on Facebook
5. How Do I Delete Photos From The Facebook Mobile App?
The Facebook mobile app provides a streamlined process for deleting photos. Follow these steps:
Step 1: Open The Facebook App
Launch the Facebook app on your smartphone or tablet.
Step 2: Go To Your Page
Tap the menu icon (usually three horizontal lines) in the top right or bottom right corner, depending on your device. Scroll down and select your Facebook page from the list.
Step 3: Find The Photo
Navigate to the photo you wish to delete. You can find photos in your albums, timeline, or the “Photos” section.
Step 4: Open The Photo
Tap on the photo to open it. This will display the photo in a larger view.
Step 5: Access Options
Look for the three dots (more options) in the top right corner of the photo’s page. Tap on these dots to open a menu.
Step 6: Delete Photo
Select “Delete Photo” from the menu that pops up.
Step 7: Confirm Deletion
Confirm your deletion on the next screen by tapping “Delete.”
Pencil icon to edit or remove photos on Facebook
6. What Should I Do If I Want To Remove An Entire Photo Album From My Facebook Page?
Removing an entire photo album can be more efficient if you want to clear out a large number of photos at once. Here’s how to do it:
Step 1: Navigate To The Photos Section
Go to your Facebook page and click on the “Photos” tab.
Step 2: Find The Album
Click on the “Albums” tab to view all your photo albums.
Step 3: Open The Album
Click on the album you want to delete to open it.
Step 4: Edit The Album
Look for the three dots (more options) or an “Edit Album” button. Click on it to access the album settings.
Step 5: Delete The Album
In the album settings, you should find an option to “Delete Album.” Click on this option.
Step 6: Confirm Deletion
A confirmation window will appear, asking if you’re sure you want to delete the album. Click “Delete” to confirm.
Important Note: Deleting an album will permanently remove all photos within that album. Make sure you have backups of any photos you want to keep.
7. Can I Hide Photos From My Timeline Instead Of Deleting Them?
Yes, you can hide photos from your timeline if you don’t want to delete them entirely. Hiding a photo means it won’t appear on your timeline or in the news feeds of your friends or followers, but it will still be accessible in your albums.
Step 1: Find The Photo
Locate the photo you want to hide on your timeline.
Step 2: Access Options
Click on the three dots (more options) in the top right corner of the post containing the photo.
Step 3: Hide From Timeline
Select “Hide from Timeline” from the dropdown menu.
Confirmation: The photo will no longer appear on your timeline, but it will still be available in your albums.
8. What Is Archiving, And How Does It Differ From Deleting Or Hiding Photos?
Archiving is another option for managing your photos on Facebook. When you archive a photo, it is removed from your timeline and is no longer visible to the public, but it remains stored in your archived photos section.
Key Differences:
- Deleting: Permanently removes the photo from Facebook.
- Hiding: Removes the photo from your timeline but keeps it visible in albums.
- Archiving: Removes the photo from your timeline and makes it visible only to you in the archived photos section.
How to Archive a Photo:
Step 1: Find The Photo
Locate the photo you want to archive.
Step 2: Access Options
Click on the three dots (more options) in the top right corner of the post containing the photo.
Step 3: Move to Archive
Select “Move to Archive” from the dropdown menu.
9. How Do Facebook’s Privacy Settings Affect Photo Visibility?
Facebook’s privacy settings play a crucial role in determining who can see your photos. Understanding these settings can help you control the visibility of your images effectively.
- Public: Anyone on or off Facebook can see your photos.
- Friends: Only your Facebook friends can see your photos.
- Only Me: Only you can see your photos.
- Custom: You can specify which friends or lists of friends can see your photos.
How to Adjust Privacy Settings for Individual Photos:
Step 1: Open The Photo
Click on the photo to open it.
Step 2: Edit Privacy
Look for the audience selector icon (usually a globe or a silhouette of people) next to the date and time of the post. Click on this icon.
Step 3: Choose Audience
Select the audience you want to allow to see the photo (e.g., Public, Friends, Only Me).
How to Adjust Privacy Settings for Albums:
Step 1: Go To Albums
Navigate to the “Albums” section of your Facebook page.
Step 2: Edit Album
Click on the album you want to edit.
Step 3: Edit Privacy
Look for the “Edit” button or the three dots (more options) to access the album settings.
Step 4: Choose Audience
In the album settings, you should find an option to adjust the privacy settings for the entire album.
10. What Are The Potential Consequences Of Posting Inappropriate Photos On My Facebook Page?
Posting inappropriate photos on your Facebook page can have several negative consequences, affecting both your personal and professional life.
- Damaged Reputation: Inappropriate photos can damage your reputation among friends, family, and colleagues.
- Professional Repercussions: Employers may view your Facebook profile, and inappropriate content can affect your job prospects.
- Social Consequences: You may lose friends or followers due to offensive or inappropriate content.
- Legal Issues: Posting illegal content can lead to legal repercussions.
- Facebook Penalties: Facebook may remove inappropriate content and suspend or terminate your account.
11. How Can I Download My Photos From Facebook Before Deleting Them?
Before deleting photos from Facebook, it’s a good idea to download them to ensure you have a backup. Here’s how:
Downloading Individual Photos:
Step 1: Open The Photo
Click on the photo you want to download.
Step 2: Access Options
Look for the three dots (more options) in the bottom right corner of the photo. Click on these dots.
Step 3: Download
Select “Download” from the menu.
Downloading An Entire Album:
Step 1: Go To Albums
Navigate to the “Albums” section of your Facebook page.
Step 2: Open The Album
Click on the album you want to download.
Step 3: Access Options
Look for the three dots (more options) or an “Edit Album” button. Click on it to access the album settings.
Step 4: Download Album
In the album settings, you should find an option to “Download Album.” Click on this option. Facebook will create a ZIP file containing all the photos in the album.
Downloading All Your Facebook Data (Including Photos):
Step 1: Go To Settings
Click on the dropdown arrow in the top right corner of Facebook and select “Settings & Privacy,” then click “Settings.”
Step 2: Your Facebook Information
In the left column, click on “Your Facebook Information.”
Step 3: Download Your Information
Click on “Download Your Information.”
Step 4: Select Options
Choose the date range, format (HTML or JSON), and media quality. Make sure “Photos and videos” is selected.
Step 5: Request Download
Click “Create File.” Facebook will compile your data and notify you when it’s ready to download.
12. What Are Some Best Practices For Managing Photos On My Facebook Page?
Managing photos effectively on your Facebook page involves more than just deleting unwanted images. Here are some best practices:
- Regularly Review Your Photos: Make it a habit to review your photos periodically to ensure they align with your current personal and professional image.
- Use Albums To Organize Photos: Organize your photos into albums to make them easier to find and manage.
- Choose Appropriate Privacy Settings: Adjust the privacy settings for each photo and album to control who can see your content.
- Tag Photos Appropriately: Tag people in your photos to increase engagement and visibility, but be mindful of their privacy preferences.
- Write Descriptive Captions: Add descriptive captions to your photos to provide context and engage your audience.
- Backup Your Photos: Before deleting any photos, make sure you have a backup in case you want to access them later.
- Comply With Facebook’s Policies: Ensure that all photos you post comply with Facebook’s community standards and policies.
13. What Tools Or Apps Can Help Me Manage My Facebook Photos More Efficiently?
Several tools and apps can help you manage your Facebook photos more efficiently. Here are a few examples:
Facebook’s Built-In Tools:
- Album Organization: Use Facebook’s album feature to categorize and manage your photos.
- Privacy Settings: Utilize Facebook’s privacy settings to control who can see your photos.
- Activity Log: Review your activity log to track and manage your photo-related activities.
Third-Party Apps:
- PhotoSync: This app allows you to easily backup your photos from Facebook to other cloud storage services.
- IFA Facebook Album Downloader: This tool helps you download entire albums from Facebook.
- Social Media Management Platforms: Platforms like Hootsuite and Buffer can help you schedule and manage your photo posts.
14. How Does Facebook’s Facial Recognition Technology Affect My Photos?
Facebook’s facial recognition technology can identify you and your friends in photos. This technology can affect your photos in several ways:
- Tag Suggestions: Facebook may suggest that you tag yourself or your friends in photos.
- Automatic Tagging: In some cases, Facebook may automatically tag you in photos.
- Privacy Concerns: Some users have privacy concerns about Facebook’s use of facial recognition technology.
How to Manage Facial Recognition Settings:
Step 1: Go To Settings
Click on the dropdown arrow in the top right corner of Facebook and select “Settings & Privacy,” then click “Settings.”
Step 2: Face Recognition
In the left column, click on “Face Recognition.”
Step 3: Review Settings
Review and adjust your face recognition settings to control how Facebook uses facial recognition technology with your photos.
15. What Should I Do If Someone Else Posts An Inappropriate Photo Of Me On Facebook?
If someone else posts an inappropriate photo of you on Facebook, you have several options:
- Ask The Person To Remove The Photo: The simplest solution is to contact the person who posted the photo and ask them to remove it.
- Report The Photo To Facebook: If the person refuses to remove the photo, you can report it to Facebook.
- Block The Person: If the person is harassing you or posting inappropriate content, you can block them.
How to Report a Photo to Facebook:
Step 1: Open The Photo
Click on the photo to open it.
Step 2: Access Options
Look for the three dots (more options) in the top right corner of the photo. Click on these dots.
Step 3: Report Photo
Select “Report Photo” from the menu.
Step 4: Follow The Instructions
Follow the instructions to provide details about why you are reporting the photo.
16. How Do I Prevent Unwanted Photos Of Me From Being Posted On Facebook?
Preventing unwanted photos from being posted on Facebook involves managing your privacy settings and being proactive about your online presence.
- Adjust Your Tag Review Settings: Require that you approve tags before they appear on your profile.
- Limit Who Can See Your Posts: Adjust your privacy settings to limit who can see your posts and photos.
- Be Careful About What You Share: Think twice before sharing personal photos or information online.
- Talk To Your Friends: Ask your friends to be mindful of what they post about you on Facebook.
How to Adjust Tag Review Settings:
Step 1: Go To Settings
Click on the dropdown arrow in the top right corner of Facebook and select “Settings & Privacy,” then click “Settings.”
Step 2: Profile and Tagging
In the left column, click on “Profile and Tagging.”
Step 3: Review Settings
Review and adjust your tagging settings to control who can tag you in photos and posts.
17. Can I Recover A Photo That I Accidentally Deleted From My Facebook Page?
Once you delete a photo from your Facebook page, it is generally permanently removed and cannot be recovered. However, there are a few potential scenarios where you might be able to recover a deleted photo:
- Check Your Device’s Backup: If you originally uploaded the photo from your computer or phone, check your device’s backup to see if the photo is still there.
- Ask Your Friends: If the photo was also posted by someone else, ask them to share the photo with you.
- Check Facebook’s Archive: In some cases, Facebook may retain deleted photos for a limited time. You can try checking your Facebook archive to see if the photo is there.
How to Access Your Facebook Archive:
Step 1: Go To Settings
Click on the dropdown arrow in the top right corner of Facebook and select “Settings & Privacy,” then click “Settings.”
Step 2: Your Facebook Information
In the left column, click on “Your Facebook Information.”
Step 3: Access Archive
Click on “Access Your Information.” Look for the “Archived” section to see if your deleted photo is there.
18. How Do I Clear My Facebook Page’s Cache To Ensure Photos Are Properly Removed?
Clearing your Facebook page’s cache can help ensure that photos are properly removed and that you’re seeing the most up-to-date version of your page. Here’s how to do it:
Clear Your Browser’s Cache:
- Chrome: Go to
chrome://settings/clearBrowserDataor click the three dots in the top right corner, select “More tools,” then “Clear browsing data.” - Firefox: Go to
about:preferences#privacyor click the three horizontal lines in the top right corner, select “Options,” then “Privacy & Security.” - Safari: Go to “Safari” in the menu bar, select “Preferences,” then click on the “Advanced” tab and check “Show Develop menu in menu bar.” Then, go to “Develop” in the menu bar and select “Empty Caches.”
Clear The Facebook App’s Cache (On Mobile):
- Android: Go to “Settings,” then “Apps,” find the Facebook app, and tap “Storage.” Then, tap “Clear Cache.”
- iOS: There is no direct way to clear the cache for individual apps on iOS. You may need to uninstall and reinstall the Facebook app.
19. What Are The Current Trends In Visual Content On Facebook Pages?
Staying up-to-date with current trends in visual content can help you create more engaging and effective posts on your Facebook page. Here are some trends:
- Short-Form Video: Short, engaging videos are highly popular on Facebook.
- Live Video: Live videos can create a sense of immediacy and engagement with your audience.
- User-Generated Content: Sharing content created by your followers can increase engagement and build community.
- Authentic Photography: Authentic, unedited photos can resonate with your audience more than highly polished images.
- Interactive Content: Polls, quizzes, and other interactive content can increase engagement and drive traffic to your page.
20. How Can dfphoto.net Help Me Improve My Photography Skills For Better Facebook Content?
At dfphoto.net, we offer a wealth of resources to help you improve your photography skills and create better content for your Facebook page.
- Photography Tutorials: Access detailed tutorials on various photography techniques, including composition, lighting, and editing.
- Equipment Reviews: Get expert reviews and recommendations on cameras, lenses, and other photography equipment.
- Inspiration Galleries: Browse our curated galleries of stunning photographs to find inspiration for your own work.
- Community Forums: Connect with other photographers in our community forums to share tips, ask questions, and get feedback on your photos.
- Workshops and Courses: Participate in workshops and courses led by experienced photographers to enhance your skills.
Visit dfphoto.net to discover how you can elevate your photography and create compelling content for your Facebook page.
FAQ: Removing Photos From Your Facebook Page
1. How Do I Remove Photos From My Facebook Page if I accidentally posted the wrong image?
Simply navigate to the photo, click the three dots for options, and select “Delete.” Confirm the deletion to remove the incorrect image.
2. How do I remove photos from my Facebook page using my iPhone?
Open the Facebook app, find the photo, tap the three dots, select “Delete Photo,” and confirm.
3. How do I remove photos from my Facebook page that are embarrassing or unflattering?
Locate the photo, access the options menu (three dots), and choose “Delete” to remove any unflattering images.
4. How do I remove photos from my Facebook page to protect my privacy?
Go to the photo, click the three dots, and select “Delete.” Alternatively, adjust the privacy settings to “Only Me” to hide it from others.
5. How do I remove photos from my Facebook page that violate Facebook’s policies?
Report the photo to Facebook by clicking the three dots and selecting “Report Photo.” Facebook will review and remove policy-violating content.
6. How do I remove photos from my Facebook page to improve its overall aesthetic?
Regularly review your photos and delete those that don’t align with your desired aesthetic to maintain a professional look.
7. How do I remove photos from my Facebook page using the mobile site?
Access Facebook via your mobile browser, find the photo, tap “More Options,” then “Delete,” and confirm.
8. How do I remove photos from my Facebook page on someone else’s profile that I am tagged in?
Untag yourself from the photo by clicking the three dots, selecting “Remove Tag,” and confirming. This removes the photo from your timeline.
9. How do I remove photos from my Facebook page quickly if I need to clean up my profile before a job application?
Use the “Activity Log” to quickly find and delete multiple photos. Go to your profile, click “View Activity Log,” and filter by “Photos” to delete efficiently.
10. How do I remove photos from my Facebook page while ensuring I have a backup copy?
Before deleting, download the photo by clicking the three dots and selecting “Download.” Then, proceed with deleting the photo from Facebook.
Maintaining a curated and professional Facebook page is essential in today’s digital age. Whether you’re looking to correct mistakes, update your brand, or protect your privacy, knowing how to effectively remove photos is a valuable skill. At dfphoto.net, we’re dedicated to helping you master these techniques and elevate your photography game. Explore our tutorials, equipment reviews, and community forums to enhance your skills and create compelling content. Remember, a well-managed Facebook page not only enhances your online presence but also opens doors to new opportunities. Visit dfphoto.net today at 1600 St Michael’s Dr, Santa Fe, NM 87505, United States, or call us at +1 (505) 471-6001 to start your journey towards photographic excellence.