In today’s digital world, high-quality images are essential for engaging content online. However, large image file sizes can significantly slow down website loading times, impacting user experience and SEO rankings. Understanding how to reduce the MB size of a photo is a crucial skill for anyone working with digital images, especially for web content creators. This guide will walk you through the most effective methods to compress your images without sacrificing too much quality, ensuring your website loads quickly and your photos still look great.
The primary method for reducing the file size of an image involves increasing compression. This is typically managed within image editing software when you save or export your image in formats like JPEG, PNG, or GIF. The more compression you apply, the smaller the file becomes, which directly translates to faster loading speeds on web pages.
Before diving into compression techniques, it’s important to understand the three main image file formats commonly used online: JPEG, PNG, and GIF. The best choice depends on your image type and needs. For photographs with a wide range of colors or complex illustrations with gradients, JPEG (or JPG) is often the most efficient for reducing file size. If you need lossless compression or require transparent areas in a photo, PNG-24 is necessary. For simple graphics with limited colors and solid blocks, GIF or PNG-8 formats are generally the best options. Let’s explore how to optimize compression for each of these file types, starting with JPEGs.
Compressing JPG Images: Balancing Quality and File Size
Compressing a JPG image is generally straightforward, revolving mainly around adjusting the quality setting. When you export an image as a JPG, your image editing software will present you with quality options. These may be presented as presets like “low,” “medium,” “high,” and “maximum,” a numerical scale (e.g., 0-12), or a percentage (0-100%). The key principle is to select the lowest quality setting that still maintains acceptable visual quality for your intended purpose.
A practical approach to finding the optimal quality level is to start with a relatively high setting and then progressively reduce it while visually inspecting the image. If a lower quality setting still looks good enough, try reducing it further. Continue this process until you notice an unacceptable degradation in image quality. Then, revert to the last quality level that was satisfactory. Always consider the image’s purpose. For example, a high-quality image might be crucial for a botanical encyclopedia to showcase fine details of a flower, while a lower quality image might suffice for a casual social media post celebrating spring.
Let’s examine a practical demonstration with a slice of a flower photo, exported at six different JPG quality settings to illustrate the trade-off between quality and file size.
100% Quality, 103 KB File Size
Exporting at 100% quality results in the largest file size. This setting is rarely necessary for web use and offers minimal compression.
 Daylily flower and buds at 100% quality
80% Quality, 48 KB File Size
At 80% quality, the visual difference from the 100% setting is almost imperceptible, yet the file size is significantly reduced.
 Daylily flower and buds at 80% quality
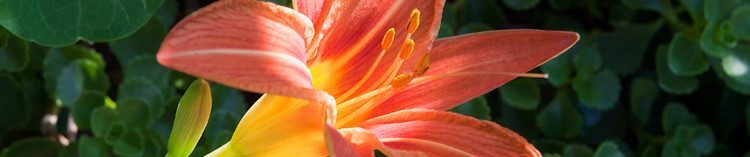
60% Quality, 28 KB File Size
Even at 60% quality, most viewers would struggle to distinguish it from the 100% version. The file size is now a quarter of the original, leading to much faster loading times.
 Daylily flower and buds at 60% quality
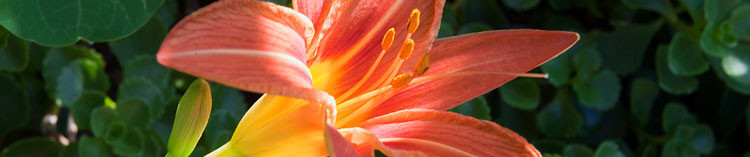
40% Quality, 17 KB File Size
For many general web uses, 40% quality is still acceptable. The file is now five times smaller than the original, drastically improving page load speed.
 Daylily flower and buds at 40% quality
20% Quality, 12 KB File Size
At 20% quality, noticeable image degradation begins to appear.
 Daylily flower and buds at 20% quality
0% Quality, 7 KB File Size
Extreme JPG compression at 0% quality results in significant blockiness and poor image quality.
 Daylily flower and buds at 0% quality
Sample photo showcasing JPG quality levels, originally from FCIT’s plant photo collection on ClipPix ETC website.
Another effective technique to reduce JPG file size is to subtly blur the image before compression. Images with fewer sharp edges and fine details compress more efficiently. This is particularly useful for background images. You can selectively blur parts of an image to achieve file size reduction. Consider the example below of a daylily with a detailed background. At 60% quality, the original image is 77 KB.
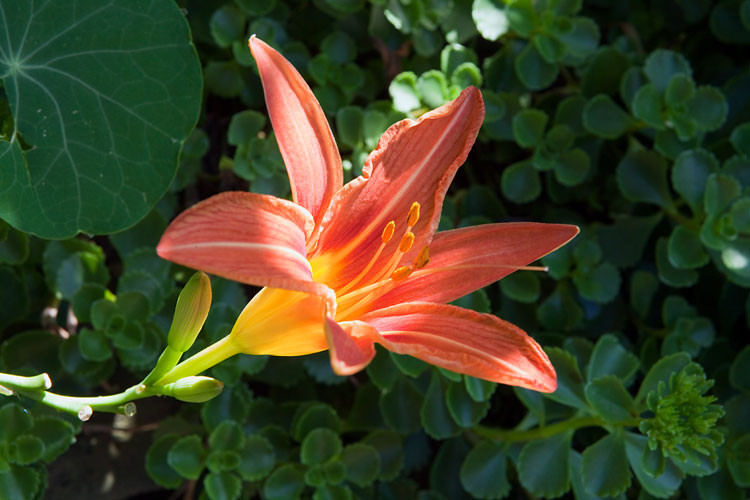 Daylily flower with sharp background at 60% quality
By blurring the background in an image editor like Photoshop while keeping the flower sharp, and then exporting at the same 60% quality, the file size reduces to just 54 KB – a file size saving of approximately 30%. This not only decreases file size but also artistically enhances the photo by focusing attention on the flower.
 Daylily flower with blurred background at 60% quality
A crucial point to remember about JPG is that it’s a lossy format. Each time you save a JPG, you lose some image data, which can degrade quality over repeated saves. Always preserve your original image in a lossless format like TIFF or PSD. Export to JPG only for web use, and always from the original file. Avoid re-saving a JPG as a JPG after editing, as this compounds quality loss, similar to making photocopies of photocopies.
Compressing GIF Images: Optimizing Color Palettes and Transparency
GIF (Graphics Interchange Format) is traditionally favored for graphics with solid colors and limited palettes. While PNG-8 now offers similar capabilities with often smaller file sizes, GIF remains relevant, especially for animations.
GIF images are restricted to a maximum of 256 colors. Reducing the color depth significantly decreases file size. For optimal compression, aim for color palette sizes close to powers of 2: 256, 128, 64, 32, 16, 8, 4, or 2. For instance, if an image contains 33 colors, reducing the palette to 32 colors will yield substantial file size savings, whereas minimal reduction would occur by going from 32 to 31 colors.
For a deeper understanding of color depth, refer to resources explaining “bit depth” in digital images.
When saving or exporting as a GIF, first, select the desired number of colors. Second, if you notice “banding” (unwanted stepped color gradients), especially in areas with smooth color transitions, consider using a dither pattern. Dithering helps to simulate a larger color palette by strategically placing pixels of different colors. The “diffusion” dither pattern usually works best for minimizing banding. Third, if your image requires transparency, ensure the “transparent” option is selected.
Settings like “Web snap” can generally be ignored as they are remnants from older display technologies. Similarly, the “Matte” setting, once useful for blending transparent GIF edges, is less critical today, and PNG often provides better transparency handling.
GIF’s traditional strength lies in animated images, although PNG is increasingly becoming a viable alternative in this domain as well.
 Animated dancing robot GIF example
Example of a GIF animation, originating from FCIT’s robot illustrations collection on the TIM website.
Compressing PNG Images: Choosing Between PNG-8 and PNG-24
PNG (Portable Network Graphics) has gained significant popularity, combining features of both JPG and GIF. It’s crucial to understand the distinction between PNG-8 and PNG-24.
PNG-8 is analogous to GIF, best suited for graphics with limited colors and solid areas like logos. However, PNG-8 typically achieves smaller file sizes than comparable GIFs. Similar to GIF, when exporting to PNG-8, you’ll configure color numbers (2, 4, 8, 16, 32, 64, 128, or 256), dither options, and transparency. The primary advantage of PNG-8 over GIF is often a smaller file size for similar visual quality.
Consider this cartoon example saved as a 32-color GIF. The file size is 13.6 KB.
 Cartoon image saved as GIF format
The same cartoon, exported as a 32-color PNG with identical settings, results in a file size of just 10.2 KB – a 25% reduction in file size.
Cartoon image saved as PNG format
Cartoon example comparing GIF and PNG-8 file sizes, from FCIT’s tech cartoons collection on the TIM website.
PNG-24, in contrast, is a lossless format like TIFF, making it suitable for photographs and images with more than 256 colors, similar to JPG in application. However, unlike JPG, PNG-24 retains all image data, resulting in higher quality but larger file sizes compared to JPGs at similar visual quality.
Here is a photo of macaws saved as PNG-24, resulting in a large file size of 400 KB.
 Photo of macaws saved as PNG-24 format
The same photo exported as a JPG at maximum (100%) quality yields a file size of 259 KB.
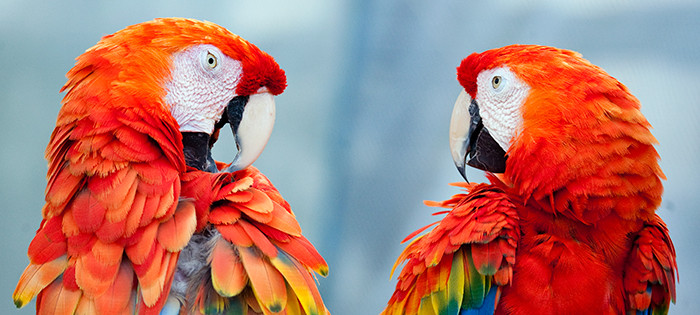 Photo of macaws saved as JPG at maximum quality
And at a high (60%) quality JPG setting, the file size dramatically reduces to only 69 KB.
 Photo of macaws saved as JPG at high quality
Photo example comparing PNG-24 and JPG file sizes and quality, from FCIT’s animal photo collection on ClipPix ETC website.
Considering the significantly larger file size of PNG-24 compared to JPG, you might wonder when to choose PNG-24. There are several compelling reasons:
- Transparency: PNG-24 supports transparency, which JPG does not. If your image needs transparent areas, PNG-24 is essential.
- Lossless Quality: PNG-24 is lossless. Even at the highest quality, JPG compression discards image information, potentially leading to subtle degradation, especially noticeable over multiple saves. If preserving every detail is paramount, choose PNG-24.
- Sharp Details and Text: For images with fine lines, sharp text, or screenshots with small fonts, PNG-24 is superior. JPG compression can “smudge” fine details and text, making them less clear. PNG-24 reproduces these elements pixel-perfectly.
Conclusion: Balancing Image Quality and File Size for Web Optimization
Reducing the MB size of your photos is critical for website performance and user experience. By understanding the characteristics of JPEG, GIF, and PNG formats and mastering compression techniques, you can effectively optimize your images for the web. Remember to choose the appropriate format based on image type and requirements, experiment with quality settings to find the optimal balance between visual quality and file size, and always preserve your original images in a lossless format. By implementing these strategies, you can ensure your website is fast-loading and visually appealing.
Related Resources:
- What is the difference between bitmap and vector images?
- What is bit depth?