Ordering photos from Walgreens is straightforward and convenient. This guide from dfphoto.net will provide a complete walkthrough of the process, explore the available options, and offer tips for outstanding photo printing and photo gifts. Let’s explore how you can easily transform your digital snapshots into tangible memories and personalized photo products.
1. Understanding Your Options for Photo Ordering at Walgreens
What are the different ways you can order photos from Walgreens?
Walgreens offers a variety of ways to order photo prints and personalized photo gifts, providing flexibility and convenience to suit different preferences and needs. These options include online ordering, mobile app ordering, and in-store kiosk ordering. Here’s a detailed look at each method:
1.1 Ordering Photos Online
How Do I Order Photos From Walgreens online?
Ordering photos online from Walgreens is a convenient option that allows you to upload your photos from your computer or various online sources and customize your order from the comfort of your home.
Steps to Order Photos Online:
-
Visit the Walgreens Photo Website: Go to the Walgreens Photo website using your preferred web browser.
-
Create an Account or Log In: If you’re a new user, you’ll need to create a Walgreens account. If you already have an account, simply log in with your credentials.
-
Upload Your Photos: Click on the “Upload Photos” button to begin. You can upload photos from your computer, Google Photos, Facebook, Instagram, or other online sources. Walgreens supports various image formats, including JPEG, PNG, and TIFF.
-
Select Your Print Sizes and Quantities: Once your photos are uploaded, you can select the print sizes and quantities for each photo. Walgreens offers a range of standard sizes, such as 4×6, 5×7, 8×10, and wallet-sized prints.
-
Customize Your Order (Optional): Walgreens provides options to customize your prints. You can apply filters, crop photos, add text, and adjust brightness and contrast.
-
Choose Pickup or Delivery: Select whether you want to pick up your order at a local Walgreens store or have it delivered to your home. Same-day pickup is often available for standard prints.
-
Review and Place Your Order: Before finalizing your order, review all the details, including the selected print sizes, quantities, and total cost. If everything looks correct, proceed to place your order.
-
Payment: Enter your payment information to complete the purchase. Walgreens accepts major credit cards, debit cards, and Walgreens gift cards.
-
Confirmation: After placing your order, you will receive a confirmation email with your order details and estimated pickup or delivery time.
1.2 Ordering Photos Via the Walgreens Mobile App
Can I order photos from Walgreens using their mobile app?
Yes, the Walgreens mobile app offers a convenient way to order photo prints and personalized photo products directly from your smartphone or tablet.
Steps to Order Photos Using the Mobile App:
-
Download and Install the App: Download the Walgreens mobile app from the App Store (iOS) or Google Play Store (Android). Once downloaded, install the app on your device.
-
Log In or Create an Account: Open the app and log in with your Walgreens account credentials. If you don’t have an account, you can create one within the app.
-
Select “Photo”: Navigate to the “Photo” section of the app.
-
Upload Your Photos: Tap on the “Prints” or “Create a Product” option, then select the photos you want to print from your device’s photo library or cloud storage services like Google Photos or iCloud.
-
Choose Print Sizes and Quantities: Select the desired print sizes and quantities for each photo. The app offers the same standard sizes as the online platform.
-
Customize Your Order (Optional): Use the app’s editing tools to crop, rotate, or apply filters to your photos. You can also add text or create collages.
-
Select Pickup or Delivery: Choose whether you want to pick up your order at a local Walgreens store or have it delivered to your home. Same-day pickup is often available for many print sizes.
-
Review and Place Your Order: Review your order details, including print sizes, quantities, and total cost. Confirm that everything is correct and proceed to place your order.
-
Payment: Enter your payment information or use a saved payment method to complete the purchase. The app supports major credit cards, debit cards, and Walgreens gift cards.
-
Confirmation: After placing your order, you will receive a confirmation notification within the app and an email with your order details and estimated pickup or delivery time.
1.3 Ordering Photos At a Walgreens Kiosk
Are there in-store kiosks for ordering photos at Walgreens?
Yes, Walgreens provides in-store photo kiosks that allow you to print photos directly from your devices, memory cards, or USB drives.
Steps to Order Photos at a Kiosk:
-
Locate a Kiosk: Visit your local Walgreens store and find the photo kiosk. These kiosks are typically located in the photo or electronics section of the store.
-
Connect Your Device or Media: Connect your smartphone, tablet, USB drive, or memory card to the kiosk using the available ports or card readers. Some kiosks also offer wireless connectivity options.
-
Select Your Photos: Browse the photos on your connected device or media and select the ones you want to print.
-
Choose Print Sizes and Quantities: Select the desired print sizes and quantities for each photo. The kiosk offers various standard sizes, similar to the online and mobile app platforms.
-
Customize Your Order (Optional): Use the kiosk’s editing tools to crop, rotate, or adjust your photos. Some kiosks also offer basic editing features like brightness and contrast adjustments.
-
Review and Confirm Your Order: Review your order details, including print sizes, quantities, and total cost. Ensure that everything is correct before proceeding.
-
Print Your Photos: Once you’re satisfied with your order, initiate the printing process. The kiosk will print your photos on the spot.
-
Payment: Pay for your order directly at the kiosk using a credit card, debit card, or Walgreens gift card.
-
Collect Your Prints: Collect your freshly printed photos from the kiosk’s output tray.
 Walgreens Photo Kiosk
1.4 Comparison of Ordering Methods
| Feature | Online Ordering | Mobile App Ordering | In-Store Kiosk Ordering |
|---|---|---|---|
| Convenience | Order from home | Order from anywhere | Instant printing |
| Customization | Advanced editing options | Basic editing options | Basic editing options |
| Speed | May require shipping time or same-day pickup | May require shipping time or same-day pickup | Instant printing |
| Device Support | Computer, tablet | Smartphone, tablet | USB, memory card, smartphone |
| Payment | Credit card, debit card, Walgreens gift card | Credit card, debit card, Walgreens gift card | Credit card, debit card, Walgreens gift card |
| Accessibility | Requires internet access | Requires internet access | Requires a visit to a Walgreens store |
2. Step-by-Step Guide to Ordering Photos from Walgreens Online
How do I specifically order photos online through Walgreens’ website?
Ordering photos online from Walgreens is a simple process. Here’s a detailed, step-by-step guide:
2.1 Account Creation or Login
-
Visit Walgreens Photo: Navigate to the Walgreens Photo website.
-
Create an Account:
- If you don’t have an account, click on the “Create Account” or “Sign Up” button.
- Fill in the required information, such as your name, email address, password, and phone number.
- Agree to the terms and conditions and click “Create Account.”
-
Log In:
- If you already have an account, click on the “Log In” button.
- Enter your email address and password.
- Click “Log In” to access your account.
2.2 Uploading Photos
-
Navigate to the Photo Prints Section:
- Once logged in, look for the “Prints” or “Photo Prints” section on the website. It is usually located in the navigation menu or on the homepage.
-
Start Uploading:
- Click on the “Upload Photos” button to begin the uploading process.
-
Select Your Source:
- Choose the source from which you want to upload your photos. Options may include:
- My Computer: Upload photos directly from your computer’s hard drive.
- Google Photos: Access and upload photos from your Google Photos account.
- Facebook: Upload photos from your Facebook account.
- Instagram: Upload photos from your Instagram account.
- Other Sources: Some platforms also support uploading from other cloud storage services or websites.
- Choose the source from which you want to upload your photos. Options may include:
-
Select Photos:
- Browse your files or online albums and select the photos you want to upload.
- You can select multiple photos at once to upload them in bulk.
-
Wait for Upload to Complete:
- Wait for the uploading process to complete. The time it takes will depend on your internet connection speed and the size and number of photos you are uploading.
- Ensure that you have a stable internet connection to avoid interruptions during the upload.
2.3 Selecting Print Sizes and Quantities
-
View Uploaded Photos:
- Once the upload is complete, you will see thumbnails of all the photos you uploaded.
-
Select Print Sizes:
- Click on a photo to select it.
- Choose the print size you want from the available options. Common sizes include 4×6, 5×7, 8×10, wallet size, and square prints.
-
Specify Quantities:
- Enter the number of prints you want for each selected size.
- You can order different quantities for different sizes of the same photo.
-
Add to Cart:
- After selecting the print size and quantity, click “Add to Cart” to save your selections.
-
Repeat for All Photos:
- Repeat the process for all the photos you want to order.
- Review your selections in the cart to ensure accuracy.
2.4 Customization Options
-
Access Editing Tools:
- In the cart or while selecting print sizes, look for options to edit your photos.
-
Basic Adjustments:
- Crop: Adjust the cropping of your photo to focus on the desired area.
- Rotate: Rotate your photo if it is oriented incorrectly.
- Brightness: Adjust the brightness to improve the photo’s visibility.
- Contrast: Modify the contrast to enhance details and tones.
-
Filters:
- Apply filters to add creative effects to your photos. Options might include black and white, sepia, vintage, and more.
-
Text and Stickers:
- Add text to your photos to include captions, dates, or personalized messages.
- Insert stickers or graphics to add fun and decorative elements.
-
Red-Eye Removal:
- Use the red-eye removal tool to correct red-eye caused by camera flash.
-
Color Correction:
- Enable automatic color correction to enhance the colors in your photos.
-
Preview Changes:
- Preview all changes before saving to ensure you are satisfied with the edits.
2.5 Choosing Pickup or Delivery
-
Go to Your Cart:
- Once you have finished selecting print sizes, quantities, and customization options, go to your cart.
-
Review Your Order:
- Review all the items in your cart to ensure everything is correct.
-
Select Pickup or Delivery:
- Choose whether you want to pick up your order at a local Walgreens store or have it delivered to your home.
-
Pickup:
- If you choose pickup, select the Walgreens store location where you want to pick up your order.
- Same-day pickup is often available for standard prints.
-
Delivery:
- If you choose delivery, enter your shipping address.
- Select the shipping method you prefer (e.g., standard, expedited).
- Note the estimated delivery time and shipping costs.
2.6 Review and Payment
-
Review Your Order:
- Before finalizing your order, review all the details, including the selected print sizes, quantities, customization options, and shipping or pickup information.
-
Apply Promo Codes:
- If you have a promo code, enter it in the designated field and click “Apply” to receive the discount.
-
Proceed to Checkout:
- Click on the “Checkout” button to proceed to the payment page.
-
Enter Payment Information:
- Enter your payment information, including your credit card number, expiration date, and CVV code.
- Alternatively, you can use a saved payment method or a Walgreens gift card.
-
Review Billing Address:
- Ensure that your billing address is correct.
-
Place Your Order:
- After entering your payment information and reviewing your order, click “Place Order” to finalize the purchase.
2.7 Confirmation
-
Confirmation Page:
- After placing your order, you will see a confirmation page with your order details and a confirmation number.
-
Confirmation Email:
- You will also receive a confirmation email with the same information.
- The email will include your order number, a summary of your order, the pickup or delivery details, and the total cost.
-
Check Order Status:
- You can check the status of your order by logging into your Walgreens account and navigating to the “Order History” or “Order Details” section.
- You will receive updates via email or text message as your order progresses.
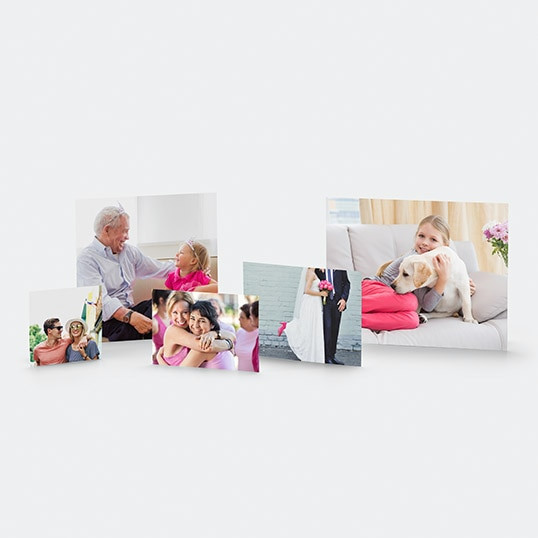
3. Understanding Walgreens Photo Print Sizes and Products
What are the common print sizes and photo products offered by Walgreens?
Walgreens offers a variety of print sizes and photo products to cater to different needs and preferences. Here’s a breakdown of the common options:
3.1 Standard Print Sizes
| Print Size | Dimensions | Common Uses |
|---|---|---|
| 4×6 | 4 inches x 6 inches | Standard prints for albums, frames, and sharing |
| 5×7 | 5 inches x 7 inches | Slightly larger prints for displaying in frames |
| 8×10 | 8 inches x 10 inches | Ideal for wall display and larger frames |
| Wallet | 2.5 inches x 3.5 inches | Small prints for carrying in wallets or sharing with friends and family |
| 4×4 | 4 inches x 4 inches | Square prints, often used for Instagram photos |
3.2 Photo Products
- Canvas Prints: Transform your photos into gallery-quality canvas prints, perfect for home decor.
- Posters: Create large-format posters for special events, decorations, or personalized art.
- Photo Books: Compile your favorite memories into custom photo books.
- Cards: Design personalized greeting cards for birthdays, holidays, or special occasions.
- Calendars: Create custom calendars featuring your own photos.
- Gifts: Customize mugs, phone cases, and other gifts with your favorite photos.
- Magnets: Turn your photos into magnets for refrigerators or other magnetic surfaces.
- Ornaments: Design personalized ornaments for holiday decorations.
- Blankets: Create cozy blankets featuring your favorite photos.
 Photo Products
3.3 Paper and Finish Options
- Glossy: Provides a shiny finish with vibrant colors.
- Matte: Offers a non-reflective finish with a soft, subtle look.
- Pearl: Combines the best of both glossy and matte finishes with a slightly iridescent appearance.
3.4 Pricing and Promotions
Walgreens frequently offers promotions and discounts on photo prints and products. Check the Walgreens Photo website or app for current deals. Prices vary depending on the print size, product type, and paper finish.
4. Tips for High-Quality Photo Printing at Walgreens
How can I ensure my photos print well when ordering from Walgreens?
To ensure you receive high-quality photo prints from Walgreens, consider these expert tips:
4.1 Image Resolution
- Check Resolution: Ensure your photos have a high enough resolution for the print size you want. A low-resolution image will appear blurry or pixelated when printed.
- Recommended DPI: Aim for at least 300 DPI (dots per inch) for the best results.
4.2 File Format
- Use JPEG: Save your photos as JPEG files with high-quality settings. JPEG is a widely supported format that balances file size and image quality.
- Avoid Compression: Avoid excessive compression, which can reduce image quality.
4.3 Color Settings
- sRGB Color Space: Use the sRGB color space for your photos. This is the standard color space for most printers and online services, ensuring accurate color reproduction.
- Calibrate Your Monitor: Calibrate your monitor to ensure accurate color representation when editing your photos.
4.4 Editing and Adjustments
- Brightness and Contrast: Adjust the brightness and contrast of your photos to ensure they look their best when printed.
- Color Correction: Correct any color imbalances or issues in your photos.
- Sharpening: Apply a slight sharpening effect to enhance details and clarity.
- Avoid Over-Editing: Avoid over-editing your photos, which can lead to unnatural-looking results.
4.5 Cropping
- Crop Appropriately: Crop your photos to the correct aspect ratio for the print size you want. This will prevent unwanted cropping or distortion during printing.
- Consider Composition: Pay attention to the composition of your photos when cropping to ensure the final print looks balanced and visually appealing.
4.6 Test Prints
- Order Test Prints: If you are ordering a large number of prints or a large-format print, consider ordering a test print first to check the quality and color accuracy.
4.7 Monitor Calibration
- Calibrate Your Monitor: A properly calibrated monitor ensures that the colors you see on your screen accurately reflect the colors in your digital images.
- Use Calibration Tools: Use monitor calibration tools or software to adjust your monitor’s settings for optimal color accuracy.
4.8 Printer Settings
- Check Printer Settings: If you are printing photos at home, check your printer settings to ensure they are optimized for photo printing.
- Use Photo Paper: Use high-quality photo paper designed for inkjet or laser printers for the best results.
4.9 Avoid Screenshots
- Use Original Files: Avoid printing screenshots of photos, as they often have lower resolution and can result in poor print quality.
- Obtain Original Images: Always use the original image files for printing to ensure the best possible quality.
4.10 Clean Your Lenses
- Dust and Smudges: Clean your camera lens and filters regularly to remove dust, smudges, and fingerprints that can affect image clarity.
- Microfiber Cloth: Use a microfiber cloth designed for cleaning lenses to avoid scratching the glass.
5. How to Create Photo Gifts at Walgreens
Can I make personalized photo gifts through Walgreens?
Yes, Walgreens offers a wide range of personalized photo gifts that you can create using your favorite photos. Here’s how:
5.1 Selecting a Product
- Browse Products: Visit the Walgreens Photo website or app and browse the available photo gifts.
- Choose a Product: Select the product you want to customize, such as a mug, canvas print, photo book, or phone case.
5.2 Uploading Photos
- Upload Photos: Upload the photos you want to use for your photo gift.
- Select Source: Choose the source from which you want to upload your photos, such as your computer, Google Photos, Facebook, or Instagram.
5.3 Customizing Your Product
- Arrange Photos: Arrange your photos on the product template.
- Add Text and Graphics: Add text, captions, or graphics to personalize your photo gift.
- Adjust Layout: Adjust the layout, background, and design elements to create a unique and personalized product.
5.4 Review and Order
- Review Your Design: Review your design to ensure everything looks correct.
- Add to Cart: Add your customized photo gift to your cart.
- Checkout: Proceed to checkout and complete your order.
5.5 Photo Gift Ideas
- Mugs: Design a custom mug with a favorite photo or inspirational quote.
- Canvas Prints: Create a gallery-quality canvas print of a memorable photo.
- Photo Books: Compile your favorite memories into a custom photo book.
- Phone Cases: Personalize a phone case with a favorite photo or design.
- Blankets: Create a cozy blanket featuring your favorite photos.
- Calendars: Design a custom calendar with photos of family, friends, or pets.
- Ornaments: Personalize ornaments with holiday photos or special memories.
- Puzzles: Turn a favorite photo into a custom jigsaw puzzle.
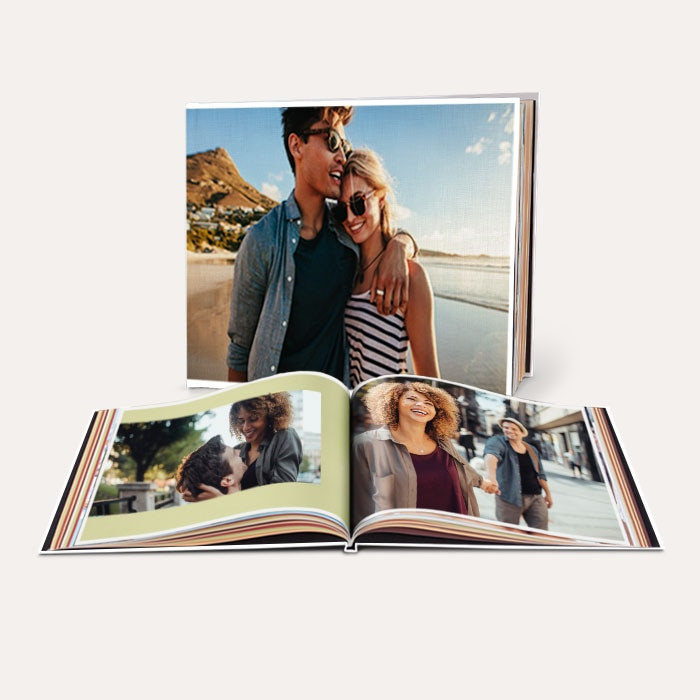 Photo Gift
6. Walgreens Photo App Tutorial
How do I use the Walgreens Photo App for mobile photo printing?
The Walgreens Photo App provides a convenient way to order photo prints and create personalized photo products directly from your smartphone or tablet. Here’s a detailed tutorial:
6.1 Downloading and Installing the App
-
Open the App Store:
- On your iOS device, open the App Store.
- On your Android device, open the Google Play Store.
-
Search for Walgreens Photo:
- In the search bar, type “Walgreens Photo” and search.
-
Download the App:
- Find the Walgreens Photo app in the search results and tap the “Install” button.
-
Install the App:
- Wait for the app to download and install on your device.
6.2 Logging In or Creating an Account
-
Open the App:
- Tap the Walgreens Photo app icon on your home screen to open the app.
-
Log In:
- If you already have a Walgreens account, tap the “Log In” button.
- Enter your email address and password, and tap “Log In.”
-
Create an Account:
- If you don’t have an account, tap the “Create Account” or “Sign Up” button.
- Fill in the required information, such as your name, email address, password, and phone number.
- Agree to the terms and conditions and tap “Create Account.”
6.3 Navigating the App
-
Homepage:
- The homepage displays various options, including “Prints,” “Photo Gifts,” “Cards,” “Calendars,” and more.
- Use the navigation menu at the bottom of the screen to access different sections of the app.
-
Prints Section:
- Tap the “Prints” option to order standard photo prints.
-
Photo Gifts Section:
- Tap the “Photo Gifts” option to create personalized photo gifts like mugs, canvas prints, and phone cases.
-
Cards Section:
- Tap the “Cards” option to design custom greeting cards for various occasions.
-
Calendars Section:
- Tap the “Calendars” option to create custom calendars featuring your photos.
-
Account Section:
- Tap the “Account” icon to manage your account settings, view order history, and update your information.
6.4 Ordering Prints
-
Select Prints:
- In the “Prints” section, tap the “Order Prints” button.
-
Select Photos:
- Choose the photos you want to print from your device’s photo library.
- You can select multiple photos at once.
-
Choose Print Sizes and Quantities:
- Select the desired print sizes for each photo.
- Enter the number of prints you want for each size.
-
Customize Your Order:
- Use the app’s editing tools to crop, rotate, or apply filters to your photos.
- Adjust brightness, contrast, and color settings as needed.
-
Add to Cart:
- Tap the “Add to Cart” button to save your selections.
6.5 Creating Photo Gifts
-
Select Photo Gifts:
- In the “Photo Gifts” section, browse the available products and tap the one you want to customize.
-
Upload Photos:
- Upload the photos you want to use for your photo gift.
- Select the source from which you want to upload your photos.
-
Customize Your Product:
- Arrange your photos on the product template.
- Add text, captions, or graphics to personalize your photo gift.
- Adjust the layout, background, and design elements to create a unique product.
-
Add to Cart:
- Tap the “Add to Cart” button to save your customized photo gift.
6.6 Checkout Process
-
Review Your Cart:
- Tap the “Cart” icon to review your order.
- Ensure that all the items in your cart are correct.
-
Apply Promo Codes:
- If you have a promo code, enter it in the designated field and tap “Apply.”
-
Select Pickup or Delivery:
- Choose whether you want to pick up your order at a local Walgreens store or have it delivered to your home.
-
Pickup:
- If you choose pickup, select the Walgreens store location where you want to pick up your order.
-
Delivery:
- If you choose delivery, enter your shipping address.
- Select the shipping method you prefer.
-
Enter Payment Information:
- Enter your payment information, including your credit card number, expiration date, and CVV code.
- Alternatively, you can use a saved payment method or a Walgreens gift card.
-
Place Your Order:
- After entering your payment information and reviewing your order, tap “Place Order” to finalize the purchase.
6.7 Order Confirmation
-
Confirmation Screen:
- After placing your order, you will see a confirmation screen with your order details and a confirmation number.
-
Confirmation Email:
- You will also receive a confirmation email with the same information.
- The email will include your order number, a summary of your order, the pickup or delivery details, and the total cost.
-
Check Order Status:
- You can check the status of your order by navigating to the “Order History” section in the app.
- You will receive updates via push notifications as your order progresses.
7. Walgreens Photo Kiosk Guide
How do I use a Walgreens Photo Kiosk in-store?
Walgreens Photo Kiosks offer a convenient way to print photos directly from your devices in-store. Here’s a comprehensive guide on how to use them:
7.1 Locating a Kiosk
-
Visit Walgreens:
- Go to your local Walgreens store.
-
Find the Photo Center:
- Look for the photo center or photo department within the store.
- Photo kiosks are typically located in this area.
7.2 Connecting Your Device
-
Identify Connection Options:
- Photo kiosks usually have several connection options, including:
- USB Ports: For connecting USB drives or devices.
- Memory Card Slots: For inserting SD cards, CF cards, and other memory cards.
- Bluetooth: For wireless connections with smartphones and tablets (if available).
- Cable Connections: For direct connections with smartphones and tablets (if available).
- Photo kiosks usually have several connection options, including:
-
Connect Your Device:
- Use the appropriate connection method to connect your device to the kiosk.
- If using a USB drive or memory card, insert it into the corresponding port or slot.
- If using Bluetooth, follow the kiosk’s instructions to pair your device.
- If using a cable connection, connect your device using the appropriate cable.
7.3 Selecting Photos
-
Browse Your Device:
- Once your device is connected, the kiosk will display the contents of your device or memory card.
- Browse through the folders and files to find the photos you want to print.
-
Select Photos:
- Tap on the photos you want to print to select them.
- You can select multiple photos at once.
-
Review Your Selections:
- The kiosk will display a preview of the selected photos.
- Review your selections to ensure you have chosen the correct photos.
7.4 Choosing Print Options
-
Select Print Sizes:
- Choose the desired print sizes for your photos.
- Common sizes include 4×6, 5×7, 8×10, and wallet size.
-
Specify Quantities:
- Enter the number of prints you want for each selected size.
-
Choose Paper Type:
- Select the paper type you prefer, such as glossy or matte.
-
Adjust Print Settings:
- Adjust the print settings, such as brightness, contrast, and color.
- Enable or disable automatic enhancements as needed.
-
Crop and Rotate:
- Crop and rotate your photos to ensure they are properly aligned and framed.
7.5 Previewing and Editing
-
Preview Your Prints:
- The kiosk will display a preview of how your prints will look.
- Review the previews to ensure the photos are cropped, rotated, and adjusted to your liking.
-
Make Adjustments:
- If necessary, make additional adjustments to the print settings, cropping, or rotation.
7.6 Placing Your Order
-
Review Your Order:
- Review your order summary to ensure that all the details are correct.
- Check the print sizes, quantities, paper type, and total cost.
-
Place Your Order:
- Tap the “Place Order” or “Continue” button to proceed.
7.7 Payment
-
Select Payment Method:
- Choose your payment method, such as credit card, debit card, or Walgreens gift card.
-
Insert or Swipe Your Card:
- Follow the kiosk’s instructions to insert or swipe your card.
-
Enter Your PIN:
- If prompted, enter your PIN.
-
Complete Payment:
- Wait for the payment to process.
7.8 Printing and Collecting Your Photos
-
Wait for Printing:
- The kiosk will begin printing your photos.
- Wait for the printing process to complete.
-
Collect Your Photos:
- Collect your printed photos from the output tray.
-
Collect Your Receipt:
- Collect your receipt from the kiosk.
-
Remove Your Device:
- Remove your device or memory card from the kiosk.
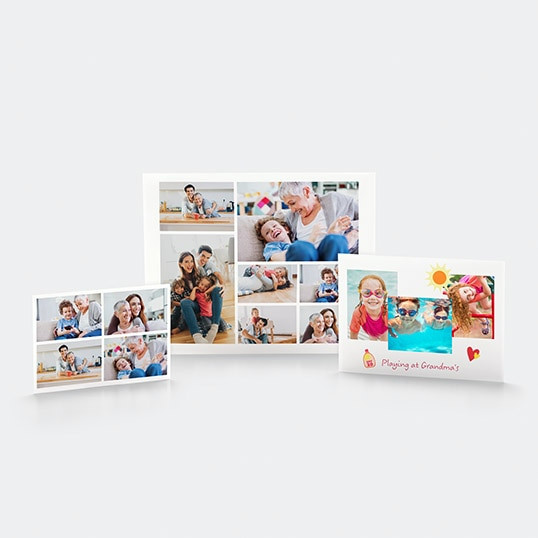 Photo Printing
8. Troubleshooting Common Issues When Ordering Photos From Walgreens
What should I do if I encounter problems while ordering my photos from Walgreens?
Encountering issues while ordering photos from Walgreens can be frustrating, but many common problems have straightforward solutions. Here’s how to troubleshoot some frequent issues:
8.1 Website or App Issues
- Problem: Website or app is not loading or functioning correctly.
- Solutions:
- Check Internet Connection: Ensure you have a stable internet connection.
- Clear Cache and Cookies: Clear your browser’s cache and cookies or the app’s cache.
- Update App: Make sure you are using the latest version of the Walgreens Photo app.
- Try a Different Browser or Device: Try accessing the website or app on a different browser or device.
- Contact Support: Contact Walgreens customer support for assistance.
8.2 Uploading Problems
- Problem: Photos are not uploading or the upload process is stuck.
- Solutions:
- Check File Size and Format: Ensure your photos meet the file size and format requirements.
- Reduce File Size: Reduce the file size of your photos if they are too large.
- Use a Stable Connection: Use a stable internet connection for uploading.
- Try Uploading One Photo at a Time: Try uploading photos one at a time instead of in bulk.
- Restart Browser or App: Restart your browser or the app and try again.
8.3 Print Quality Issues
- Problem: Photos are printing blurry, pixelated, or with poor color quality.
- Solutions:
- Check Image Resolution: Ensure your photos have a high enough resolution for the print size.
- Use High-Quality Files: Use the original, high-quality photo files for printing.
- Adjust Print Settings: Adjust the print settings, such as brightness, contrast, and color.
- Try a Different Paper Type: Try a different paper type, such as glossy or matte.
- Contact Support: Contact Walgreens customer support for assistance and consider requesting a reprint.
8.4 Order Issues
- Problem: Incorrect order details, missing items, or order not received.
- Solutions:
- Review Order Confirmation: Review your order confirmation email to ensure all details are correct.
- Check Order Status: Check the status of your order online or in the app.
- Contact Support: Contact Walgreens customer support to report the issue and request assistance.
- Visit the Store: If you chose pickup, visit the store and speak with a staff member.
8.5 Payment Problems
- Problem: Payment is not processing or the order is not going through.
- Solutions:
- Check Payment Information: Ensure your payment information