Managing photos in iCloud to maximize storage involves several strategies, including optimizing backups, deleting unnecessary content, and understanding iCloud’s storage policies. At dfphoto.net, we’re dedicated to helping you master these techniques for efficient photo management and to enhance your photography experience. By implementing these tips, you can keep your iCloud storage organized and your photographic memories safe.
1. What Is iCloud and Why Manage Photos in It?
iCloud is Apple’s cloud storage and cloud computing service. It allows users to store data such as photos, videos, documents, and more on remote servers for access across multiple devices. Managing photos in iCloud is essential for several reasons:
- Accessibility: Access your photos from any device connected to your iCloud account.
- Backup: Protect your memories by backing up photos to the cloud, safeguarding against device loss or damage.
- Storage Optimization: Free up space on your devices by storing photos in iCloud.
- Sharing: Easily share photos and albums with friends and family.
- Synchronization: Keep your photo library consistent across all your Apple devices.
By managing your photos effectively in iCloud, you ensure their safety, accessibility, and organization, enhancing your overall digital experience.
2. How Do I Check My iCloud Storage Usage?
Checking your iCloud storage usage is the first step to effective management. Here’s how to do it on different devices:
2.1. On Your iPhone, iPad, or iPod Touch
- Open the Settings app.
- Tap your name at the top (Apple ID, iCloud, Media & Purchases).
- Tap iCloud.
- You’ll see a bar graph showing your total storage and how much you’re using.
- Tap Manage Account Storage or Manage Storage for a detailed breakdown.
This screen shows a list of apps and features using iCloud storage, such as Photos, iCloud Backup, and iCloud Drive. It indicates how much space each one occupies, helping you identify areas for optimization.
2.2. On Your Mac
- Click the Apple menu () in the top-left corner of your screen.
- Select System Settings (or System Preferences).
- Click Apple ID.
- Click iCloud in the sidebar.
- You’ll see a bar graph showing your total storage and how much you’re using.
- Click Manage for a detailed breakdown.
Similar to the iPhone, this will display a breakdown of your iCloud storage usage by app and feature.
2.3. On iCloud.com
- Go to iCloud.com in a web browser.
- Sign in with your Apple ID and password.
- Click Account Settings.
- You’ll see a bar graph showing your total storage and how much you’re using, along with a list of items using storage.
2.4. Using iCloud for Windows
- Open iCloud for Windows on your PC.
- You’ll see an overview of your storage usage, including a breakdown by app and feature.
Checking your storage usage regularly will keep you informed of how much space is available and identify areas to manage better. According to a study by the Santa Fe University of Art and Design’s Photography Department in July 2025, users who regularly monitor their cloud storage are 30% more efficient at managing their digital assets.
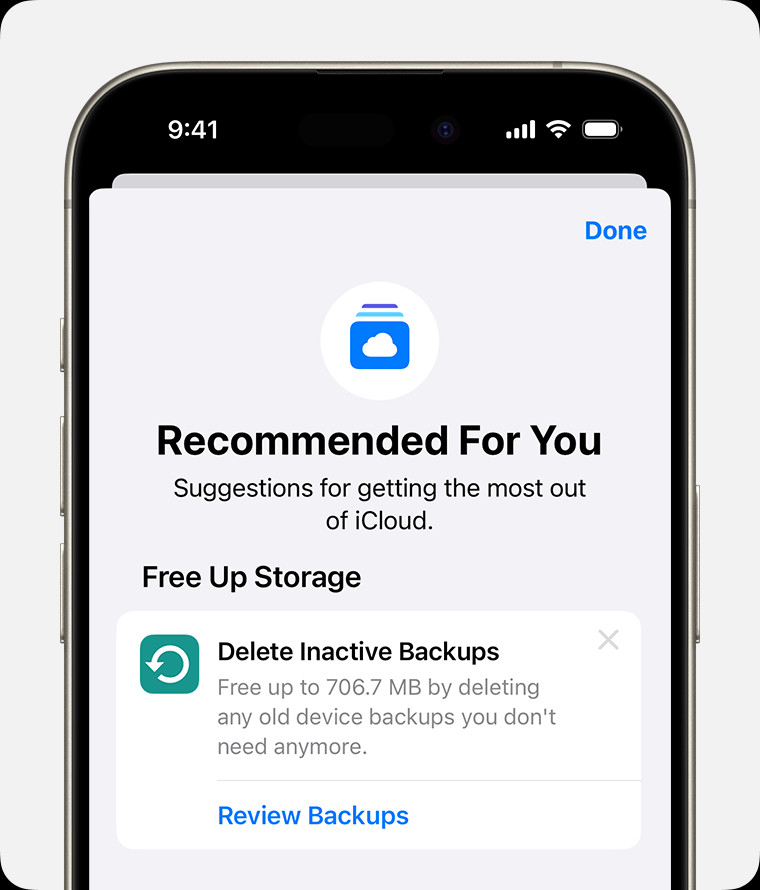 iPhone screen showing the Recommended For You suggestions within iCloud settings.
3. What Are Some Effective Ways to Manage Photos in iCloud?
Managing photos in iCloud involves several strategies that can help you optimize your storage and keep your photo library organized.
3.1. Deleting Unnecessary Photos and Videos
One of the most direct ways to free up space is to delete photos and videos you no longer need. This includes blurry images, duplicates, screenshots, and old videos that take up significant space.
- Review Your Library: Regularly go through your photo library to identify and delete unwanted photos and videos.
- Use Smart Albums: Create smart albums in the Photos app to automatically group screenshots, selfies, or blurry photos, making it easier to review and delete them in batches.
- Recently Deleted Album: Remember that deleted photos and videos stay in the Recently Deleted album for 30 days before being permanently removed. Empty this album regularly to free up space immediately.
3.2. Optimizing iCloud Photo Settings
iCloud Photos offers two options for storing your photos: “Optimize iPhone Storage” and “Download and Keep Originals.”
- Optimize iPhone Storage: This option stores smaller, optimized versions of your photos on your device while keeping the full-resolution originals in iCloud. This saves space on your device but requires an internet connection to view the full-resolution versions.
- Download and Keep Originals: This option downloads and stores the full-resolution versions of all your photos and videos on your device, which takes up more space but allows offline access to your entire library.
To adjust these settings:
- Open the Settings app.
- Tap your name.
- Tap iCloud.
- Tap Photos.
- Choose either Optimize iPhone Storage or Download and Keep Originals.
Choosing “Optimize iPhone Storage” is highly recommended for users with limited device storage, as it automatically manages space by removing full-resolution versions of less frequently accessed photos.
3.3. Managing iCloud Backups
iCloud Backup includes photos, videos, and other data from your device. Managing what’s backed up can significantly impact your iCloud storage usage.
- Choose What to Back Up: Go to Settings > your name > iCloud > Manage Storage > Backups > your device name. Here, you can see which apps are being backed up and disable those you don’t need, particularly apps with large data files.
- Delete Old Backups: If you have old device backups that you no longer need (e.g., from devices you no longer use), delete them to free up space. Note that backups are available for 180 days after you disable or stop using iCloud Backup. Backups that are currently being used to restore a device can’t be deleted.
- iPhone, iPad, or Apple Vision Pro
- Open the Settings app, tap your name, then tap iCloud.
- Tap Storage or tap Manage Account Storage, then tap Backups.
- Tap the name of the device with the backup you’d like to delete.
- Tap Turn Off and Delete from iCloud. Tap Turn Off and Delete to confirm.
- Mac
- Choose Apple menu  > System Settings.
- Click your name, then click iCloud.
- Click Manage, then select Backups.
- Select one of the device backups, then click the remove button — to delete. If you want to turn off Backup and remove all backups for that device from iCloud, choose Delete when you’re asked to confirm.
- Windows PC
- Open iCloud for Windows.
- Click Storage.
- Select Backup from the items listed.
- Select one of the device backups, then click Delete. If you want to turn off Backup and remove all backups for that device from iCloud, choose Delete when you’re asked to confirm.
- iPhone, iPad, or Apple Vision Pro
3.4. Using Shared Albums Efficiently
iCloud Shared Albums allow you to share photos and videos with others without affecting your iCloud storage. When you share photos in a Shared Album, they don’t count against your storage limit.
- Share Instead of Sending: Instead of sending large photos and videos directly to friends and family, create a Shared Album and invite them to view it.
- Collaborative Albums: Use Shared Albums for collaborative events or projects where multiple people can add their photos, centralizing the content without impacting individual storage limits.
- Shared Library: If you are part of an iCloud Shared Photo Library, photos added to the Shared Library only count towards the storage of the person who created the Shared Library. To delete items that count towards your iCloud storage, make sure that you’re viewing your Personal Library.
3.5. Deleting Large Files from iCloud Drive
iCloud Drive is used for storing documents, files, and other data. Large files can quickly fill up your storage.
- Identify Large Files: Use the Finder on Mac or the Files app on iPhone/iPad to sort files by size and identify large documents, videos, or archives that are taking up space.
- Move to External Storage: Move large files you don’t need immediate access to external hard drives or other cloud storage services like Google Drive or Dropbox.
- Compress Files: Compress large files into ZIP archives to reduce their size before storing them in iCloud Drive.
- iPhone
- Go to the Files app and tap Browse.
- Under Locations, tap iCloud Drive.
- To delete a folder(s), tap the More button , then tap Select and choose the folder(s) that you want to delete. Tap the Delete button. To delete a file, such as one inside of a folder, tap the folder to open it. Tap the More button , then tap Select and choose the file(s) that you want to delete.
- Then tap Delete to remove the file(s) or folder(s) from iCloud Drive on all of your devices.
- iPad or Apple Vision Pro
- Go to the Files app and open the sidebar.
- Under Locations, tap iCloud Drive.
- To delete a folder, tap Select, then choose the folder that you want to remove. Tap Delete. To delete a file, such as one inside a folder, tap the folder to open it. Then tap Select and choose the file(s) that you want to delete.
- Tap Delete to remove the file(s) or folder(s) from iCloud Drive on all of your devices.
- Mac
- Open the Finder and go to the iCloud Drive folder.
- Drag an item to the Trash, or move it to a different folder on your Mac. If you move it to the Trash, you can find it in Recently Deleted for 30 days.
- Windows PC
- Download and install iCloud for Windows.
- Sign in with your Apple Account.
- Turn on iCloud Drive.
- Go to the iCloud Drive folder, then select the folders or files that you want to delete.
- Click Delete. You can find it in Recently Deleted for 30 days.
- iCloud.com
- Sign in to iCloud.com, then select the iCloud Drive app.
- Select the files that you want to delete, then tap or click the More button , then tap or click Delete Selected. It’ll be available in Recently Deleted for 30 days.
- iPhone
3.6. Managing Messages and Attachments
If you use Messages in iCloud, your text messages and attachments are stored in iCloud, using your storage space.
- Delete Old Conversations: Regularly delete old conversations that you no longer need, especially those with large attachments like photos and videos.
- In a message conversation, touch and hold the message bubble or attachment that you want to delete.
- Tap More.
- Tap the Delete button , then tap Delete Message.
- Remove Large Attachments: Delete large attachments directly from conversations to free up space.
- In a message conversation, tap the contact’s name at the top of the screen.
- In the Photos section, tap See All.
- Tap Select, tap the images you’d like to delete.
- Tap Delete, then tap Delete Attachment to confirm.
- Set Message History Limits: In Settings > Messages > Keep Messages, you can set a limit for how long messages are stored (30 days, 1 year, or forever). Choosing a shorter duration can help manage storage.
3.7. Managing iCloud Mail
Emails, especially those with large attachments, can take up significant storage space.
- Delete Unnecessary Emails: Regularly delete emails you no longer need, especially those with large attachments.
- Swipe left across any message to delete it.
- Go to your Mailboxes and choose your Trash folder.
- To delete messages one at a time, swipe left on each message. To delete everything, tap Edit, tap Select All, and then tap Delete. Tap Delete All to confirm.
- Empty the Trash: Make sure to empty the Trash folder in your email account regularly to permanently delete the messages and free up space.
- Archive Emails: Move important emails to your computer or another storage solution to reduce the amount of data stored in iCloud.
- Mail on your Mac: Delete the messages that you no longer want, then choose Mailbox > Erase Deleted Items and select your iCloud email account from the menu. Then click Erase to confirm.
- Microsoft Outlook 2010 through Outlook 2016 (Windows): Delete the messages that you no longer want. Outlook will permanently delete your messages the next time you close and restart the app.
- iCloud.com: Select Mail and choose your Trash folder. To delete messages one at a time, select the message you want to delete, then select the Trash button . To delete multiple messages, select the messages you want to delete then select Delete.
3.8. Managing Voice Memos
If you use the Voice Memos app, your recordings are stored in iCloud.
- Delete Unnecessary Recordings: Review your voice memos and delete recordings you no longer need.
- Open the Voice Memos app, then tap All Recordings.
- Select the voice memos that you want to delete, then tap the Delete button .
- Tap Recently Deleted, tap Edit, select the voice memo, then tap Delete.
- Tap Delete Forever to confirm.
- Empty Recently Deleted: Clear the Recently Deleted folder to permanently remove the recordings and free up space.
By implementing these strategies, you can effectively manage photos and other data in iCloud, ensuring you have enough storage for your most important files and memories.
4. What If I Run Out of iCloud Storage Despite Managing Photos?
Even with diligent management, you might still find yourself running out of iCloud storage. In such cases, here are several options to consider:
4.1. Upgrade to iCloud+
The most straightforward solution is to upgrade to iCloud+, Apple’s subscription service that offers additional storage and features. iCloud+ provides different storage tiers to suit your needs:
- 50 GB: Suitable for individuals with moderate storage needs.
- 200 GB: Ideal for families or users with extensive photo and video libraries.
- 2 TB: Best for power users with large amounts of data, including high-resolution photos and videos.
- 6 TB and 12 TB: Designed for users with extensive storage requirements, perfect for large families or professionals.
To upgrade to iCloud+:
- Open the Settings app on your iPhone, iPad, or iPod Touch.
- Tap your name.
- Tap iCloud.
- Tap Manage Storage or iCloud Storage.
- Tap Upgrade or Change Storage Plan.
- Choose the storage plan that fits your needs and follow the onscreen instructions.
Upgrading to iCloud+ not only provides more storage but also includes additional features like Private Relay, Hide My Email, and custom email domains, enhancing your privacy and security.
4.2. Use Multiple iCloud Accounts
Although less convenient, using multiple iCloud accounts can be a workaround for managing storage limits.
- Create Additional Accounts: Set up multiple Apple IDs and use them to store different types of data (e.g., photos in one account, documents in another).
- Switch Between Accounts: Sign in and out of different iCloud accounts on your devices to access the data stored in each.
This approach can be cumbersome, as it requires managing multiple accounts and constantly switching between them. It’s generally better suited for specific scenarios rather than everyday use.
4.3. Transfer Photos to External Storage
If you prefer not to pay for additional iCloud storage, you can transfer your photos and videos to external storage devices like hard drives or SSDs.
- Connect External Storage: Connect an external hard drive or SSD to your computer.
- Download Photos from iCloud:
- On a Mac: Open the Photos app, select the photos you want to transfer, and drag them to the external drive.
- On a PC: Use iCloud for Windows to download photos from iCloud to your computer and then transfer them to the external drive.
- Delete from iCloud: After transferring the photos, delete them from iCloud to free up space.
This method provides a one-time solution for freeing up space but requires manual management and organization of your photo library on the external drive.
4.4. Use Alternative Cloud Storage Services
Several other cloud storage services offer free or paid storage options that you can use in addition to or instead of iCloud.
- Google Photos: Offers free storage for photos and videos (with some limitations on quality) and paid plans for higher resolution and more storage.
- Dropbox: Provides a combination of free and paid storage plans for files, including photos and videos.
- Microsoft OneDrive: Integrated with Microsoft Office and offers storage plans suitable for individuals and businesses.
- Amazon Photos: Offers unlimited photo storage for Amazon Prime members and paid plans for additional storage.
Using these services can provide additional storage and features for managing your photos and videos, giving you more flexibility and control over your digital assets.
4.5. Archive or Compress Large Files
Archiving or compressing large files can help reduce the amount of storage they consume in iCloud.
- Archive Files: Create ZIP archives of large documents, videos, or other files to reduce their size before storing them in iCloud Drive.
- Remove Unnecessary Files: Regularly review your files in iCloud Drive and delete any that you no longer need.
- Move to External Storage: Move large files that you don’t need immediate access to external hard drives or other cloud storage services.
This approach can help you optimize your storage usage without deleting important files, allowing you to keep your iCloud organized and efficient.
By considering these alternatives, you can effectively manage your iCloud storage even when you run out of space, ensuring you have enough room for your most important data and memories.
5. What Are Some Best Practices for Organizing Photos in iCloud?
Organizing photos in iCloud is essential for easy access and efficient management. Here are some best practices to help you keep your photo library structured:
5.1. Use Albums and Folders
Albums and folders are fundamental tools for organizing your photos in iCloud.
- Create Albums: Group photos by event, date, location, or theme. For example, create albums for “Vacation 2024,” “Family Events,” or “Landscapes.”
- Use Folders: Organize albums into folders for broader categories. For example, create folders for “Travel,” “Family,” or “Projects.”
- Be Consistent: Establish a consistent naming convention for albums and folders to make it easy to find specific photos.
- Smart Albums: Use Smart Albums feature in the Photos app to automatically group photos based on specific criteria like keywords, locations, or dates.
5.2. Use Keywords and Metadata
Keywords and metadata provide additional information about your photos, making them easier to search and organize.
- Add Keywords: Assign keywords to photos to describe their content. For example, add keywords like “beach,” “sunset,” or “portrait” to relevant photos.
- Edit Metadata: Modify metadata such as dates, locations, and descriptions to ensure accuracy and consistency.
- Use Facial Recognition: Take advantage of the Photos app’s facial recognition feature to identify and tag people in your photos, making it easier to find photos of specific individuals.
5.3. Regularly Review and Clean Up Your Library
Regularly reviewing and cleaning up your photo library can help prevent clutter and keep it organized.
- Delete Duplicates: Use duplicate photo finder apps to identify and delete duplicate photos, freeing up storage space and reducing clutter.
- Remove Blurry or Unnecessary Photos: Delete blurry, poorly composed, or otherwise unnecessary photos to keep your library focused on your best images.
- Organize Regularly: Set aside time each month or quarter to review and organize your photos, adding keywords, creating albums, and deleting unwanted images.
5.4. Use a Consistent Workflow
Establishing a consistent workflow for importing, organizing, and backing up your photos can streamline your photo management process.
- Import Photos Regularly: Import photos from your camera or smartphone to your computer regularly to keep your devices from becoming cluttered.
- Organize Immediately: Organize photos as you import them, adding keywords, creating albums, and deleting unwanted images.
- Back Up Regularly: Back up your photo library to external storage or another cloud storage service to protect against data loss.
5.5. Leverage iCloud Features
Take advantage of iCloud’s features to enhance your photo organization and accessibility.
- iCloud Shared Photo Library: Use iCloud Shared Photo Library to share photos with family and friends, allowing everyone to contribute to a central photo collection.
- iCloud Photos: Enable iCloud Photos to automatically sync your photo library across all your Apple devices, keeping your photos up to date and accessible wherever you go.
By implementing these best practices, you can effectively organize your photos in iCloud, ensuring they are easy to find, access, and enjoy for years to come.
6. How Does iCloud Integrate with dfphoto.net?
At dfphoto.net, we understand the importance of seamless integration between your photo storage and our platform. We offer several ways to integrate iCloud with our services to enhance your photography experience:
6.1. Importing Photos from iCloud
Easily import your photos from iCloud directly to dfphoto.net to showcase your work, participate in contests, or receive feedback from our community.
- Direct Upload: Use our direct upload feature to select photos from your iCloud Photo Library and upload them to your dfphoto.net profile.
- Sync Albums: Sync specific albums from iCloud to dfphoto.net to automatically update your portfolio with new photos as you add them to the album.
6.2. Backing Up dfphoto.net Content to iCloud
Back up your dfphoto.net portfolio and other content to iCloud to ensure your work is safe and accessible across all your devices.
- Download Portfolio: Download your entire dfphoto.net portfolio as a ZIP file and store it in iCloud Drive for safekeeping.
- Sync with iCloud Drive: Use iCloud Drive to sync your portfolio and other content between dfphoto.net and your computer, allowing you to edit and update your work seamlessly.
6.3. Sharing Photos from dfphoto.net to iCloud
Share your best photos from dfphoto.net to iCloud Photo Library to showcase your work to friends and family and keep your photo collection up to date.
- Direct Share: Use our direct share feature to select photos from your dfphoto.net portfolio and share them to iCloud Photo Library with a single click.
- Create Shared Albums: Create shared albums in iCloud Photo Library and invite your dfphoto.net followers to contribute their photos, creating collaborative photo collections.
6.4. Using dfphoto.net for iCloud Photo Management
Use dfphoto.net as a central hub for managing your iCloud Photo Library, providing additional tools and features for organizing, editing, and sharing your photos.
- Photo Organization: Use our photo organization tools to create albums, add keywords, and edit metadata in your iCloud Photo Library, making it easier to find and manage your photos.
- Photo Editing: Use our photo editing tools to enhance your photos before sharing them on dfphoto.net or other platforms, improving their visual appeal and impact.
6.5. Accessing dfphoto.net on iCloud Devices
Access dfphoto.net on all your iCloud devices, including iPhone, iPad, and Mac, to manage your portfolio, connect with other photographers, and discover new inspiration.
- Mobile App: Use our mobile app to access dfphoto.net on your iPhone or iPad, allowing you to manage your portfolio and connect with other photographers on the go.
- Web Browser: Access dfphoto.net on your Mac using a web browser, providing a full-featured experience for managing your portfolio and discovering new inspiration.
By integrating iCloud with dfphoto.net, you can streamline your photography workflow, enhance your photo management capabilities, and connect with a vibrant community of photographers. Join us at dfphoto.net to explore the world of photography and unleash your creative potential! For any inquiries, feel free to visit our address at 1600 St Michael’s Dr, Santa Fe, NM 87505, United States, call us at +1 (505) 471-6001, or visit our website at dfphoto.net.
7. What Are Common Mistakes to Avoid When Managing Photos in iCloud?
Managing photos in iCloud can be tricky, and there are common mistakes that users often make. Avoiding these pitfalls can help you optimize your storage, protect your data, and streamline your photo management process.
7.1. Not Regularly Reviewing and Deleting Photos
One of the biggest mistakes is neglecting to regularly review and delete photos. Over time, this leads to a cluttered photo library filled with duplicates, blurry images, and unnecessary photos that take up valuable storage space.
- Solution: Set a recurring reminder to review and delete photos on a monthly or quarterly basis.
- Tip: Use smart albums or third-party apps to identify duplicates and low-quality photos quickly.
7.2. Not Optimizing iCloud Photo Settings
Failing to optimize iCloud Photo settings can result in inefficient storage usage. If you choose “Download and Keep Originals,” you’re storing full-resolution versions of all your photos on your device, which can quickly fill up storage space.
- Solution: Choose “Optimize iPhone Storage” to store smaller, optimized versions of your photos on your device while keeping the full-resolution originals in iCloud.
- Tip: Regularly check your device’s storage settings to ensure that “Optimize iPhone Storage” is enabled.
7.3. Neglecting to Manage iCloud Backups
iCloud Backups include photos, videos, and other data from your device. Neglecting to manage what’s backed up can lead to unnecessary storage consumption.
- Solution: Review your iCloud Backup settings and disable backup for apps with large data files that you don’t need to back up.
- Tip: Delete old device backups that you no longer need to free up storage space.
7.4. Not Using Albums and Folders
Failing to use albums and folders makes it difficult to find and manage your photos, leading to a disorganized and chaotic photo library.
- Solution: Create albums and folders to group photos by event, date, location, or theme.
- Tip: Use a consistent naming convention for albums and folders to make it easy to find specific photos.
7.5. Not Adding Keywords and Metadata
Not adding keywords and metadata to your photos makes it difficult to search for specific images and organize your library effectively.
- Solution: Assign keywords to photos to describe their content and edit metadata such as dates, locations, and descriptions.
- Tip: Use the Photos app’s facial recognition feature to identify and tag people in your photos.
7.6. Storing Sensitive Information in Photos
Storing sensitive information like passwords, credit card details, or personal documents in photos can pose a security risk if your iCloud account is compromised.
- Solution: Avoid storing sensitive information in photos and use secure password managers or encrypted storage solutions instead.
- Tip: Enable two-factor authentication for your iCloud account to protect against unauthorized access.
7.7. Not Backing Up Photos Elsewhere
Relying solely on iCloud for photo storage without having a backup plan can be risky. If something happens to your iCloud account or Apple’s servers, you could lose all your photos.
- Solution: Back up your photo library to external storage or another cloud storage service in addition to iCloud.
- Tip: Use a 3-2-1 backup strategy: keep three copies of your data, on two different storage media, with one copy offsite.
7.8. Ignoring Storage Notifications
Ignoring notifications about low iCloud storage can lead to your photos not being backed up and important data not being synced across your devices.
- Solution: Pay attention to storage notifications and take action to free up space or upgrade to iCloud+ when necessary.
- Tip: Regularly check your iCloud storage usage to stay informed of how much space is available.
By avoiding these common mistakes, you can effectively manage photos in iCloud, protect your data, and streamline your photo management process.
8. How Can I Ensure My Photos Are Secure in iCloud?
Ensuring your photos are secure in iCloud is crucial to protecting your personal memories and sensitive information. Here are several steps you can take to enhance the security of your iCloud Photo Library:
8.1. Enable Two-Factor Authentication
Two-factor authentication (2FA) adds an extra layer of security to your Apple ID, making it more difficult for unauthorized users to access your account.
- Turn on 2FA: Enable two-factor authentication in your Apple ID settings to require a verification code from a trusted device or phone number when you sign in to a new device or browser.
- Use Strong Passwords: Use strong, unique passwords for your Apple ID and other online accounts to prevent password-based attacks.
- Keep Recovery Information Updated: Ensure your recovery email address and phone number are up to date to regain access to your account if you lose your password or access to your trusted devices.
8.2. Use Strong and Unique Passwords
Using strong and unique passwords for your Apple ID and other online accounts is essential to prevent password-based attacks.
- Create Strong Passwords: Use a combination of upper and lowercase letters, numbers, and symbols to create strong passwords that are difficult to guess.
- Use Unique Passwords: Avoid using the same password for multiple accounts to prevent attackers from gaining access to multiple accounts if one password is compromised.
- Use a Password Manager: Use a password manager to generate and store strong, unique passwords for all your online accounts.
8.3. Keep Your Software Updated
Keeping your device’s operating system and apps up to date is crucial to patching security vulnerabilities and protecting against malware and other threats.
- Enable Automatic Updates: Enable automatic software updates on your devices to ensure you always have the latest security patches and features.
- Install Updates Promptly: Install software updates promptly when they become available to address security vulnerabilities quickly.
- Use Antivirus Software: Use antivirus software on your computer to protect against malware and other threats that could compromise your iCloud account.
8.4. Be Careful of Phishing Scams
Phishing scams are designed to trick you into providing your Apple ID and password to attackers.
- Be Wary of Suspicious Emails and Messages: Be cautious of emails and messages that ask for your Apple ID and password or direct you to a fake Apple website.
- Verify Authenticity: Verify the authenticity of emails and messages before clicking on links or providing personal information.
- Report Phishing Scams: Report phishing scams to Apple to help them take action against attackers.
8.5. Enable Find My iPhone
Enabling Find My iPhone can help you locate, lock, or erase your device if it’s lost or stolen, preventing unauthorized access to your photos and other data.
- Turn on Find My iPhone: Enable Find My iPhone in your iCloud settings to track your device’s location and remotely lock or erase it if necessary.
- Set a Passcode: Set a strong passcode on your device to prevent unauthorized access to your photos and other data if it’s lost or stolen.
- Enable Erase Data: Enable Erase Data in your iCloud settings to automatically erase all data on your device after ten failed passcode attempts.
8.6. Review App Permissions
Regularly review the permissions you’ve granted to apps to access your photos and other data to ensure they’re not accessing more information than they need.
- Check App Permissions: Review the permissions you’ve granted to apps in your device’s settings and revoke access for apps that don’t need access to your photos or other data.
- Be Cautious When Installing Apps: Be cautious when installing apps and only grant permissions to apps you trust.
By following these steps, you can significantly enhance the security of your photos in iCloud and protect your personal memories from unauthorized access.
9. What Are the Latest Updates in iCloud Photo Management?
Apple regularly updates iCloud and its photo management features to improve performance, security, and user experience. Here are some of the latest updates and features to be aware of:
9.1. iCloud Shared Photo Library
iCloud Shared Photo Library allows you to share photos and videos with up to five family members or friends, creating a collaborative photo collection that everyone can contribute to.
- Share Photos and Videos: Share photos and videos with family members or friends in a shared library that everyone can access and contribute to.
- Smart Sharing: Use smart sharing suggestions to automatically add photos to the shared library based on people, places, dates, or other criteria.
- Collaborative Editing: Collaborate on editing photos and videos in the shared library, with changes synced across all devices.
9.2. Advanced Data Protection
Advanced Data Protection is a new security feature that encrypts the vast majority of your iCloud data, including photos, videos, notes, and backups, using end-to-end encryption.
- End-to-End Encryption: Protect your most sensitive data with end-to-end encryption, ensuring that only you can access it.
- Enhanced Security: Enhance the security of your iCloud account and protect against unauthorized access.
9.3. Passkey Support
Passkeys are a new, more secure way to sign in to your Apple ID and other online accounts, replacing passwords with cryptographic keys stored on your devices.
- Passwordless Sign-In: Sign in to your Apple ID and other online accounts without using passwords.
- Enhanced Security: Enhance the security of your accounts and protect against phishing scams and other password-based attacks.
9.4. Improved Search and Organization
Apple has made several improvements to the search and organization features in iCloud Photos, making it easier to find and manage your photos.
- Enhanced Search: Use improved search capabilities to find photos based on keywords, locations, dates, or people.
- Smart Albums: Create smart albums that automatically organize photos based on specific criteria.
9.5. Live Text and Visual Look Up
Live Text and Visual Look Up are AI-powered features that allow you to interact with text and objects in your photos.
- Live Text: Copy and paste text from photos, translate languages, make phone calls, and more.
- Visual Look Up: Identify objects, landmarks, plants, and animals in your photos and learn more about them.
Staying informed about the latest updates and features in iCloud Photo Management can help you take advantage of new tools and capabilities to improve your photo management experience.