Google Photos is a fantastic tool for safeguarding your precious memories. At dfphoto.net, we understand the importance of accessing your backed-up photos. This guide will provide you with clear, step-by-step instructions on how to retrieve and manage your Google Photos. Learn about photo storage, cloud backup solutions, and image management tips to keep your memories safe and accessible.
1. What is Google Photos and Why Use It?
Yes, Google Photos is a photo-sharing and storage service developed by Google that lets users back up, organize, and share photos and videos. It’s a versatile platform offering automatic organization, powerful search capabilities, and seamless sharing options.
- Automatic Backup: Google Photos automatically backs up your photos and videos to the cloud, ensuring they are safe even if your device is lost or damaged.
- Organization: The service organizes your media by people, places, and things, making it easy to find specific photos.
- Sharing: Sharing photos and videos with friends and family is simple and straightforward.
- Editing Tools: Google Photos includes basic editing tools to enhance your images.
- Free Storage: Every Google Account comes with 15 GB of free storage shared across Gmail, Google Drive, and Google Photos. You can choose to back up your photos in “Storage saver” quality (previously known as “High quality”) or “Original quality.” Photos backed up in “Storage saver” before June 1, 2021, don’t count toward your Google Account storage, offering a significant advantage.
2. How to Access Your Google Photos on Different Devices
Yes, you can easily access your Google Photos on a variety of devices, ensuring you can view and manage your memories wherever you are.
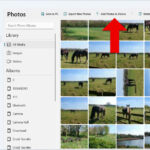
2.1. On a Computer (Web Browser)
- Open Your Browser: Launch your preferred web browser, such as Chrome, Firefox, or Safari.
- Go to Google Photos: Type
photos.google.cominto the address bar and press Enter. - Sign In: If you’re not already signed in, enter your Google Account credentials (username and password).
- View Your Photos: Once logged in, you’ll see all your backed-up photos and videos organized by date.
2.2. On an Android Device
- Open the App: Locate the Google Photos app icon on your home screen or app drawer and tap to open it. The icon typically looks like a colorful pinwheel.
- Sign In (If Necessary): If you’re not already signed in, the app will prompt you to sign in with your Google Account.
- Browse Your Photos: The app will display your photos and videos, automatically synced from your Google Account.
2.3. On an iOS Device (iPhone or iPad)
- Download the App: If you haven’t already, download the Google Photos app from the App Store.
- Install and Open: Once the app is installed, tap the icon to open it.
- Sign In: Sign in with your Google Account.
- Access Your Photos: The app will sync and display your photos and videos.
2.4. Using Google Drive
While Google Photos is the primary way to access your backed-up photos, you can also find them through Google Drive, especially if you’ve enabled the option to sync Google Photos with Google Drive.
- Open Google Drive: Go to
drive.google.comin your web browser or open the Google Drive app on your mobile device. - Navigate to Google Photos: Look for the “Google Photos” folder in your Drive. If you don’t see it, ensure that you have enabled the “Google Photos” folder in your Google Drive settings.
- View Your Photos: Inside the Google Photos folder, you’ll find your photos and videos organized by year and month.
3. Understanding Google Photos Settings
Yes, customizing your Google Photos settings is essential for managing storage, backup quality, and sharing preferences. Understanding these settings ensures your photos are stored and managed according to your needs.
3.1. Backup and Sync Settings
These settings control how your photos and videos are backed up to Google Photos.
- Access Settings:
- On a Computer: Go to
photos.google.com, click the settings icon (gear), and select “Settings.” - On Mobile: Open the Google Photos app, tap your profile picture, then “Photos settings,” and finally “Backup & sync.”
- On a Computer: Go to
- Backup & Sync:
- Turn On/Off: Enable or disable the “Backup & sync” option to control whether your photos are automatically backed up.
- Choose Account: Select the Google Account you want to use for backups.
- Upload Size:
- Storage Saver: This option compresses your photos and videos to save storage space. Photos are compressed to 16MP, and videos are reduced to 1080p. Media backed up in “Storage saver” before June 1, 2021, don’t count toward your Google Account storage.
- Original Quality: This option backs up your photos and videos in their original resolution, preserving all details. This counts against your Google Account storage.
- Mobile Data Usage:
- Daily Limit: Set a daily limit for mobile data usage for backups to avoid exceeding your data plan.
- Backup Over Wi-Fi Only: Enable this option to back up photos and videos only when connected to a Wi-Fi network.
- Backup Device Folders:
- Choose Folders: Select which folders on your device you want to back up to Google Photos. This is useful for backing up photos from other apps or cameras.
3.2. Sharing Settings
These settings control how you share your photos and videos with others.
- Shared Libraries:
- Grant Access: Allow a trusted person to access all your photos. Go to “Sharing” and select “Shared libraries.” You can invite someone to share your library and set preferences for sharing.
- Partner Sharing:
- Choose a Partner: Select a partner to automatically share photos of specific people or from a specific date onward.
- Sharing Suggestions:
- Enable/Disable: Turn on or off smart sharing suggestions to easily share photos with people in them.
3.3. Notification Settings
Customize which notifications you receive from Google Photos.
- Access Notifications:
- On Mobile: Go to “Photos settings” and select “Notifications.”
- Customize Notifications:
- Suggestions: Receive suggestions for creating collages, animations, and more.
- Sharing: Get notified when someone shares photos with you or adds photos to a shared album.
- Memories: Receive notifications for rediscovering photos from the past.
- Prints: Get updates on print orders and promotions.
3.4. Location Settings
These settings control how Google Photos uses location data.
- Location Information:
- Location Accuracy: Improve location accuracy by allowing Google Photos to use Wi-Fi and mobile networks.
- Hide Location Data: Choose to hide location data when sharing photos.
- Location Grouping:
- Enable/Disable: Allow Google Photos to group photos by location.
3.5. General Settings
These settings cover various aspects of Google Photos.
- Memories:
- Hide People & Pets: Hide specific people or pets from appearing in Memories.
- Hide Dates: Hide specific dates from appearing in Memories.
- Suggestions:
- Edit Suggestions: Receive suggestions for editing your photos.
- Group Similar Faces:
- Enable/Disable: Allow Google Photos to group photos by similar faces for easier organization. Note that face grouping is not available in all countries.
4. Downloading Photos from Google Photos
Yes, downloading photos from Google Photos is a straightforward process, whether you need to retrieve a single image or an entire album. Here’s how you can do it on different devices.
4.1. Downloading Single Photos
On a Computer:
- Open Google Photos: Go to
photos.google.comand sign in to your Google Account. - Select the Photo: Click on the photo you want to download.
- Download:
- Click the three vertical dots (More options) in the top right corner.
- Select “Download.” The photo will be downloaded to your computer’s default download folder.
On a Mobile Device (Android or iOS):
- Open the Google Photos App: Launch the app on your device.
- Select the Photo: Tap on the photo you want to download.
- Download:
- Tap the three vertical dots (More options) in the top right corner.
- Select “Download.” The photo will be saved to your device’s gallery or camera roll.
4.2. Downloading Multiple Photos
On a Computer:
- Open Google Photos: Go to
photos.google.comand sign in to your Google Account. - Select Photos:
- Hover over the first photo you want to select. A checkmark will appear in the top left corner.
- Click the checkmark to select the photo.
- Repeat this process for all the photos you want to download.
- Download:
- Once you’ve selected all the photos, click the three vertical dots (More options) in the top right corner.
- Select “Download.” The selected photos will be downloaded as a ZIP file to your computer’s default download folder.
On a Mobile Device (Android or iOS):
- Open the Google Photos App: Launch the app on your device.
- Select Photos:
- Long-press on the first photo you want to select. A checkmark will appear.
- Tap on the other photos you want to download.
- Download:
- Tap the “Share” icon (usually a triangle pointing upwards).
- Select “Save to device” or “Download.” The selected photos will be saved to your device’s gallery or camera roll. If you’re downloading a large number of photos, they may be saved in a ZIP file.
4.3. Downloading an Entire Album
On a Computer:
- Open Google Photos: Go to
photos.google.comand sign in to your Google Account. - Open the Album: Click on the album you want to download.
- Download:
- Click the three vertical dots (More options) in the top right corner.
- Select “Download all.” The album will be downloaded as a ZIP file to your computer’s default download folder.
On a Mobile Device (Android or iOS):
- Open the Google Photos App: Launch the app on your device.
- Open the Album: Tap on the album you want to download.
- Download:
- Unfortunately, there is no direct “Download all” option for albums on the mobile app.
- You need to select multiple photos as described above and download them in batches. Alternatively, you can use the Google Takeout service (described below) for a more efficient way to download entire albums.
4.4. Using Google Takeout
Google Takeout allows you to export all your data from various Google services, including Google Photos. This is useful for downloading large amounts of photos and videos.
- Go to Google Takeout: Visit
takeout.google.comand sign in to your Google Account. - Select Google Photos:
- Deselect all services by clicking “Deselect all.”
- Scroll down and select “Google Photos.”
- Customize Export:
- Click “All photo albums included” to choose specific albums you want to download, or leave it to download all albums.
- Click “Multiple formats” to choose the file type for your photos and videos (e.g., .jpg, .mp4).
- Choose Export Settings:
- Click “Next step.”
- Choose the delivery method (e.g., send download link via email, add to Drive, Dropbox, OneDrive, or Box).
- Choose the frequency (export once or schedule regular exports every 2 months for a year).
- Choose the file type (.zip or .tgz) and the maximum file size (e.g., 2 GB, 50 GB).
- Create Export: Click “Create export.” Google will start preparing your export, which may take a few hours or days depending on the amount of data.
- Download Your Data: Once the export is complete, you’ll receive an email with a download link. Follow the link to download your photos and videos.
4.5. Considerations for Downloading
- Storage Space: Ensure you have enough storage space on your device or computer before downloading.
- File Size: Large numbers of photos and videos can result in large file sizes, especially if they are in original quality.
- ZIP Files: When downloading multiple photos or albums, they will be compressed into a ZIP file. You’ll need to extract the files after downloading. On Windows, right-click the ZIP file and select “Extract All.” On macOS, double-click the ZIP file. On mobile devices, you may need a file manager app to extract ZIP files.
- Internet Connection: A stable and fast internet connection is recommended for downloading large amounts of data.
- Mobile Data: Be mindful of your mobile data usage when downloading photos on a mobile device. Consider using Wi-Fi to avoid data charges.
5. Organizing and Managing Your Google Photos
Yes, Google Photos offers various tools to help you organize and manage your photos effectively, ensuring you can easily find and enjoy your memories.
5.1. Creating Albums
Albums are a great way to group photos based on events, trips, or themes.
- Create a New Album:
- On a Computer: Go to
photos.google.com, click “Albums” in the left sidebar, and then click “+ Create album.” - On Mobile: Open the Google Photos app, tap “Library” at the bottom, and then tap “+ New album.”
- On a Computer: Go to
- Add Photos:
- Give your album a title.
- Select the photos you want to add to the album by clicking or tapping on them.
- Click “Done” when you’ve added all the desired photos.
- Edit Album:
- To add more photos later, open the album and click “Add photos.”
- To change the album title, click the title and edit it.
- To rearrange photos, drag and drop them in the desired order.
- To delete a photo from the album, open the photo and click the trash icon.
5.2. Using the Search Function
Google Photos’ search function is incredibly powerful, allowing you to find photos based on people, places, things, or dates.
- Search by People:
- Type a person’s name into the search bar. Google Photos uses facial recognition to identify people in your photos, so you can easily find all photos of a specific person. Note that face grouping is not available in all countries.
- Search by Places:
- Type a location into the search bar (e.g., “Santa Fe,” “Paris”). Google Photos uses location data to tag your photos, making it easy to find photos from specific places.
- Search by Things:
- Type an object or activity into the search bar (e.g., “dog,” “beach,” “birthday cake”). Google Photos uses image recognition to identify objects and activities in your photos.
- Search by Date:
- Type a date or month into the search bar (e.g., “July 2023,” “2020”). Google Photos will display photos taken during that time period.
5.3. Adding Descriptions and Tags
Adding descriptions and tags to your photos can make them even easier to find and organize.
- Add a Description:
- Open the photo you want to describe.
- Click “Add a description” (on a computer) or swipe up from the bottom (on mobile).
- Type your description and press Enter or tap the checkmark to save.
- Add Tags:
- While Google Photos doesn’t have a dedicated tagging feature, you can use descriptions to add tags. For example, you could add “#familyvacation” or “#sunset” to your description.
- You can then search for these tags using the search bar.
5.4. Favoriting Photos
Favoriting photos is a simple way to mark your best shots for easy access.
- Favorite a Photo:
- Open the photo you want to favorite.
- Click the star icon (on a computer) or tap the star icon (on mobile).
- Find Your Favorites:
- On a computer, click “Favorites” in the left sidebar.
- On mobile, tap “Library” at the bottom and then tap “Favorites.”
5.5. Archiving Photos
Archiving photos allows you to hide them from the main timeline without deleting them. This is useful for decluttering your main view while still keeping your photos safe.
- Archive a Photo:
- Open the photo you want to archive.
- Click the three vertical dots (More options) in the top right corner and select “Archive.”
- Find Your Archived Photos:
- On a computer, click “Archive” in the left sidebar.
- On mobile, tap “Library” at the bottom and then tap “Archive.”
- Unarchive a Photo:
- Open the archived photo.
- Click the three vertical dots (More options) and select “Unarchive.”
5.6. Deleting Photos
Deleting photos removes them from your Google Photos account and frees up storage space.
- Delete a Photo:
- Open the photo you want to delete.
- Click the trash icon (on a computer) or tap the trash icon (on mobile).
- Review Deleted Photos:
- Deleted photos are moved to the “Trash” or “Bin” folder, where they remain for 60 days before being permanently deleted.
- To review deleted photos, click “Trash” or “Bin” in the left sidebar (on a computer) or tap “Library” at the bottom and then tap “Trash” or “Bin” (on mobile).
- Restore or Permanently Delete:
- In the “Trash” or “Bin” folder, you can restore a photo by selecting it and clicking “Restore,” or permanently delete it by selecting it and clicking “Delete permanently.”
5.7. Utilizing Smart Features
Google Photos offers several smart features that can help you organize and manage your photos automatically.
- Memories:
- Google Photos automatically creates “Memories” that highlight photos from past years. These Memories are a fun way to rediscover old photos.
- You can customize the types of Memories you see in the settings.
- Collages and Animations:
- Google Photos can automatically create collages and animations from your photos.
- You can also create your own collages and animations by selecting multiple photos and clicking the “+” icon.
- Style Transfers:
- Use style transfers to apply artistic styles to your photos.
- Open a photo, click “Edit,” and then select “Suggestions” or “Tools” to find style transfer options.
6. Troubleshooting Common Issues
Yes, like any digital service, Google Photos can sometimes present issues. Here are some common problems and how to troubleshoot them.
6.1. Photos Not Backing Up
If your photos aren’t backing up to Google Photos, try these steps:
- Check Internet Connection:
- Ensure you have a stable internet connection, preferably Wi-Fi.
- If you’re using mobile data, make sure you haven’t exceeded your data limit or set a daily limit in the Google Photos settings.
- Verify Backup & Sync is Enabled:
- Open the Google Photos app.
- Tap your profile picture, then “Photos settings,” and finally “Backup & sync.”
- Make sure “Backup & sync” is turned on.
- Check Storage Space:
- Ensure you have enough storage space in your Google Account.
- If you’re running out of space, you can free up storage by deleting unnecessary files from Google Drive and Gmail, or by purchasing additional storage through Google One.
- Clear Cache and Data:
- On Android: Go to “Settings” > “Apps” > “Google Photos” > “Storage.” Tap “Clear cache” and “Clear data.” Note that clearing data will reset the app, so you’ll need to sign in again.
- On iOS: There is no direct way to clear cache and data for individual apps. You can try uninstalling and reinstalling the Google Photos app.
- Update the App:
- Make sure you have the latest version of the Google Photos app installed.
- Check for updates in the App Store (iOS) or Google Play Store (Android).
- Check Battery Saver Settings:
- On some devices, battery saver settings can interfere with background processes like Google Photos backup.
- Disable battery saver mode or add Google Photos to the list of apps excluded from battery optimization.
6.2. Photos Not Showing Up
If you can’t find your photos in Google Photos, try these steps:
- Check the Date:
- Make sure you’re looking at the correct date in the timeline.
- Sometimes, photos may be sorted incorrectly due to incorrect date information.
- Search for the Photos:
- Use the search function to search for the photos by people, places, or things.
- Check the “Recently added” section to see if the photos are there.
- Check the Archive:
- Make sure the photos haven’t been accidentally archived.
- Go to the “Archive” section to check for missing photos.
- Check the Trash/Bin:
- Make sure the photos haven’t been accidentally deleted.
- Go to the “Trash” or “Bin” section to check for missing photos.
- Syncing Issues:
- Ensure that your Google Account is properly synced with the Google Photos app.
- Go to your device’s settings and check that your Google Account is syncing correctly.
6.3. Storage Full Issues
If you receive a notification that your Google Account storage is full, you have several options:
- Free Up Storage:
- Delete unnecessary files from Google Drive and Gmail.
- Delete large photos and videos from Google Photos.
- Use the “Manage storage” tool in Google Photos to identify and delete blurry photos, screenshots, and other unnecessary files.
- Change Upload Size:
- Switch to “Storage saver” quality (previously known as “High quality”) for future backups. This will compress your photos and videos, saving storage space.
- Go to “Photos settings” > “Backup & sync” and select “Storage saver.”
- Purchase Additional Storage:
- Upgrade your Google One storage plan to get more storage space.
- Subscriptions start at $1.99/month for 100 GB in the US. Pricing and availability can vary by region.
- Review and Delete Old Backups:
- Check for old backups of your device and delete any that are no longer needed.
- Go to
drive.google.comand look for backup folders.
6.4. App Crashing or Freezing
If the Google Photos app is crashing or freezing, try these steps:
- Restart the App:
- Close the app completely and reopen it.
- Restart Your Device:
- Restart your phone or tablet.
- Clear Cache and Data:
- On Android: Go to “Settings” > “Apps” > “Google Photos” > “Storage.” Tap “Clear cache” and “Clear data.”
- On iOS: Uninstall and reinstall the Google Photos app.
- Update the App:
- Make sure you have the latest version of the Google Photos app installed.
- Check for updates in the App Store (iOS) or Google Play Store (Android).
- Check for Compatibility Issues:
- Ensure that your device meets the minimum system requirements for the Google Photos app.
- Older devices may not be fully compatible with the latest app version.
6.5. Sharing Problems
If you’re having trouble sharing photos from Google Photos, try these steps:
- Check Internet Connection:
- Ensure you have a stable internet connection.
- Verify Recipient’s Email Address:
- Double-check that you’re entering the correct email address for the recipient.
- Check Sharing Permissions:
- Make sure you have the necessary permissions to share the photos.
- If you’re sharing from a shared album, ensure that you have the right to share photos.
- Try a Different Sharing Method:
- Instead of sharing via email, try creating a shareable link and sending it to the recipient.
- You can also try sharing directly to another app, such as WhatsApp or Facebook.
- Clear Cache and Data:
- Clearing the app’s cache and data can sometimes resolve sharing issues.
7. Maximizing Your Google Photos Experience
Yes, to truly make the most of Google Photos, here are some advanced tips and tricks to elevate your photo management and enjoyment.
7.1. Using Google Lens
Google Lens is a powerful tool integrated into Google Photos that allows you to search what you see in your photos.
- Access Google Lens:
- Open a photo in Google Photos.
- Tap the Google Lens icon (a square with a dot in the center) at the bottom of the screen.
- Identify Text:
- Google Lens can identify text in your photos, allowing you to copy and paste it. This is useful for extracting text from documents, signs, or handwritten notes.
- Identify Objects:
- Google Lens can identify objects in your photos, providing you with information about them. For example, you can identify plants, animals, landmarks, and products.
- Take Action:
- Google Lens can also help you take action based on what it sees in your photos. For example, you can use it to translate text, add events to your calendar, or find similar products online.
7.2. Creating Movies and Animations
Google Photos allows you to create movies and animations from your photos and videos.
- Create a Movie:
- Open the Google Photos app.
- Tap “Library” at the bottom.
- Tap “Utilities” at the top.
- Scroll down to “Create new” and select “Movie.”
- Choose the photos and videos you want to include in your movie.
- Tap “Create” at the top right.
- You can then customize your movie by adding music, text, and filters.
- Create an Animation:
- Open the Google Photos app.
- Tap “Library” at the bottom.
- Tap “Utilities” at the top.
- Scroll down to “Create new” and select “Animation.”
- Choose the photos you want to include in your animation.
- Tap “Create” at the top right.
- Google Photos will automatically create an animation from your selected photos.
7.3. Using Live Albums
Live Albums are a great way to automatically share photos of specific people or pets with your friends and family.
- Create a Live Album:
- Open the Google Photos app.
- Tap “Library” at the bottom.
- Tap “Utilities” at the top.
- Scroll down to “Create new” and select “Live Album.”
- Give your album a title.
- Select the people and pets you want to include in the album.
- Tap “Confirm.”
- Google Photos will automatically add photos of the selected people and pets to the album as you take them.
- Share the Album:
- Share the album with your friends and family.
- They will automatically receive new photos as they are added to the album.
7.4. Rediscovering Memories
Google Photos’ “Memories” feature helps you rediscover photos from the past.
- View Memories:
- Memories are displayed at the top of the Google Photos app.
- Tap on a Memory to view the photos and videos included in it.
- Customize Memories:
- You can customize the types of Memories you see in the settings.
- You can also hide specific people or dates from appearing in Memories.
7.5. Printing Photos
Google Photos makes it easy to print your photos.
- Order Prints:
- Open the Google Photos app.
- Select the photo you want to print.
- Tap the three vertical dots (More options) in the top right corner.
- Select “Order print.”
- Choose the print size and quantity.
- Enter your shipping information and payment details.
- Print at Home:
- You can also print photos at home using a printer.
- Download the photo from Google Photos.
- Open the photo on your computer or mobile device.
- Select “Print” and choose your printer settings.
8. Understanding Google Photos Storage and Pricing
Yes, Google Photos offers a flexible storage system with both free and paid options. Understanding how storage works and what the pricing plans are is crucial for managing your photo library effectively.
8.1. Free Storage Options
Every Google Account comes with 15 GB of free storage, which is shared across Gmail, Google Drive, and Google Photos. You can use this free storage to back up your photos and videos.
- Storage Saver Quality: If you choose to back up your photos and videos in “Storage saver” quality (previously known as “High quality”), Google will compress your media to save storage space. Photos are compressed to 16MP, and videos are reduced to 1080p.
- Original Quality: If you choose to back up your photos and videos in their original resolution, they will count against your Google Account storage.
- Storage Saver Benefit: Photos and videos backed up in “Storage saver” quality before June 1, 2021, don’t count toward your Google Account storage, offering a significant advantage.
8.2. Google One Storage Plans
If you need more than 15 GB of storage, you can upgrade to a Google One storage plan. Google One offers expanded storage and additional benefits, such as access to Google experts, extra member benefits, and family sharing.
Here are the Google One storage plans and pricing (as of October 2024; pricing may vary by region):
| Storage Space | Price (Monthly) | Price (Annually) | Benefits |
|---|---|---|---|
| 100 GB | $1.99 | $19.99 | Extra storage, Google expert access, member benefits, family sharing |
| 200 GB | $2.99 | $29.99 | More storage, Google expert access, member benefits, family sharing |
| 2 TB | $9.99 | $99.99 | Even more storage, Google expert access, member benefits, family sharing, and more |
8.3. Managing Your Storage
It’s important to manage your Google Account storage to ensure you don’t run out of space. Here are some tips for managing your storage:
- Check Your Storage Usage:
- Go to
one.google.comto see how much storage you’re using and what’s taking up the most space.
- Go to
- Delete Unnecessary Files:
- Delete large files from Google Drive and Gmail that you no longer need.
- Delete blurry photos, screenshots, and other unnecessary files from Google Photos.
- Compress Existing Photos and Videos:
- Use the “Recover storage” tool in Google Photos to compress existing photos and videos to “Storage saver” quality.
- Go to “Photos settings” > “Backup & sync” and click “Recover storage.”
- Review and Delete Old Backups:
- Check for old backups of your device and delete any that are no longer needed.
- Go to
drive.google.comand look for backup folders.
- Choose the Right Upload Size:
- Decide whether you need to back up your photos and videos in “Original quality” or “Storage saver” quality.
- If you don’t need the highest possible resolution, “Storage saver” quality can save you a lot of storage space.
8.4. Family Sharing
Google One allows you to share your storage plan with up to five family members. This is a great way to save money and ensure that everyone in your family has enough storage space.
- Set Up Family Sharing:
- Go to
one.google.com. - Click “Settings” in the left sidebar.
- Turn on “Share Google One with your family.”
- Follow the instructions to invite family members to join your Google One plan.
- Go to
- Manage Family Members:
- You can manage your family members and their storage usage in the Google One settings.
- You can also remove family members from your plan if needed.
9. Privacy and Security in Google Photos
Yes, Google Photos prioritizes the privacy and security of your photos and videos. Understanding the privacy settings and security measures is