Retrieving your cherished memories from the digital depths of iCloud is easier than you might think. This dfphoto.net guide provides comprehensive strategies to recover old photos from iCloud, ensuring your precious moments are never truly lost, and also explores some tips on photography.
1. Understanding iCloud Photo Storage and Recovery
iCloud is Apple’s cloud storage service that seamlessly syncs photos, videos, and other data across your devices. Understanding how it works is crucial for effective photo recovery. Let’s learn about recovering your photography today!
- iCloud Photos: This service automatically uploads and stores your photos and videos in iCloud, keeping them up to date across all your devices where you’re signed in with the same Apple ID.
- iCloud Backup: This creates a complete backup of your iPhone, iPad, or iPod touch, including photos not stored in iCloud Photos.
- Recently Deleted Album: When you delete a photo or video from iCloud Photos, it’s moved to the Recently Deleted album, where it remains for 30 days before being permanently deleted.
2. Quick Recovery: Retrieving Photos from the Recently Deleted Album
This is the easiest way to recover photos if you’ve deleted them within the last 30 days.
2.1. Steps to Recover from Recently Deleted on iCloud.com:
- Visit iCloud.com in your web browser and sign in with your Apple ID.
- Click on “Photos.”
- Select the “Recently Deleted” album in the sidebar.
- Choose the photos or videos you want to restore.
- Click “Recover.”
2.2. Steps to Recover from Recently Deleted on iPhone, iPad, or iPod Touch:
- Open the Photos app.
- Tap “Albums” at the bottom of the screen.
- Scroll down to “Recently Deleted” under the “Utilities” section.
- Tap “Select” in the upper-right corner.
- Choose the photos or videos you want to recover.
- Tap “Recover” at the bottom of the screen.
3. Restoring Photos from iCloud Backup: A Detailed Walkthrough
If you’ve been backing up your device to iCloud, you can restore an entire backup to recover your photos. Keep in mind that this will revert your device to the state it was in at the time of the backup.
3.1. Preparing for the Restore:
- Ensure you have a recent backup: Go to Settings > [Your Name] > iCloud > iCloud Backup. Check the date of your last successful backup.
- Erase your device: This is necessary to restore from an iCloud backup. Go to Settings > General > Transfer or Reset iPhone > Erase All Content and Settings. Follow the on-screen instructions.
3.2. Restoring from iCloud Backup:
- After your device restarts, follow the setup assistant until you reach the “Apps & Data” screen.
- Choose “Restore from iCloud Backup.”
- Sign in with your Apple ID.
- Select the most relevant backup from the list.
- Wait for the restore process to complete. This can take some time, depending on the size of the backup and your internet speed.
4. Downloading Photos Directly from iCloud.com: A Targeted Approach
If you only need a few specific photos, downloading them directly from iCloud.com is a quick and easy solution.
4.1. Steps to Download Photos from iCloud.com:
- Visit iCloud.com in your web browser and sign in with your Apple ID.
- Click on “Photos.”
- Select the photos you want to download. You can select multiple photos by holding down the Command (Mac) or Control (Windows) key while clicking.
- Click the download icon (a cloud with a downward arrow) in the top right corner.
- Choose whether to download the “Unmodified Originals” or the “Most Compatible” version.
5. Recovering Photos from iCloud Drive: An Alternative Storage Location
If you’ve ever manually uploaded photos to iCloud Drive, you can easily retrieve them.
5.1. Steps to Download Photos from iCloud Drive:
- Visit iCloud.com in your web browser and sign in with your Apple ID.
- Click on “iCloud Drive.”
- Navigate to the folder where you saved your photos.
- Select the photos you want to download.
- Click the download icon (a cloud with a downward arrow) at the top of the page.
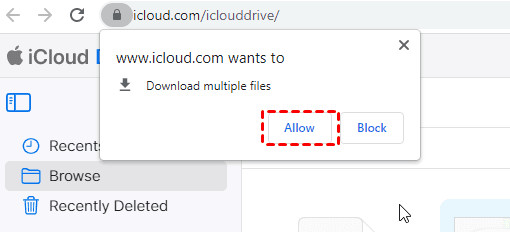 Allow iCloud Drive to Download
6. What Happens After 30 Days? Exploring Advanced Recovery Options
After 30 days, photos are permanently deleted from the Recently Deleted album. While Apple doesn’t offer official methods for recovery beyond this point, there are some third-party options to consider, though their success isn’t guaranteed.
6.1. Data Recovery Software:
Several data recovery software programs claim to be able to recover deleted files from iOS devices. These programs work by scanning your device’s storage for traces of deleted data. However, success rates can vary greatly, and these programs can be expensive.
6.2. Consulting with a Data Recovery Specialist:
If the photos are extremely important, you might consider contacting a professional data recovery service. These specialists have advanced tools and techniques for recovering data from damaged or inaccessible storage devices. This is the most expensive option, but it may be the only way to recover photos that have been overwritten or severely damaged.
7. Best Practices for Preventing Photo Loss: Proactive Measures for Safeguarding Memories
Prevention is always better than cure. Here are some best practices to avoid losing your photos in the first place.
- Regular Backups: Make sure iCloud Backup is enabled and that your device is regularly backing up to iCloud. You can also back up your device to your computer using iTunes or Finder.
- Multiple Backups: Consider using multiple backup methods for added security. For example, you could back up your photos to iCloud, Google Photos, and an external hard drive.
- Careful Deletion: Before deleting any photos, make sure you really want to get rid of them. Double-check the photos you’ve selected and be aware of the 30-day window for recovery from the Recently Deleted album.
- Understand iCloud Syncing: Be aware of how iCloud Photos syncs across your devices. Deleting a photo on one device will delete it on all devices connected to the same iCloud account.
- Check iCloud Storage: Regularly check your iCloud storage to make sure you have enough space for new photos and videos. If you’re running out of space, you can upgrade your iCloud storage plan or free up space by deleting unnecessary files.
8. iCloud Photo Settings: Optimizing for Storage and Accessibility
Understanding your iCloud Photo settings can help you manage your storage and ensure your photos are readily available.
- Optimize iPhone Storage: This setting stores smaller, optimized versions of your photos on your device while keeping the full-resolution originals in iCloud. This can save space on your device, but it requires an internet connection to view the full-resolution versions.
- Download and Keep Originals: This setting downloads and stores the full-resolution versions of your photos on your device. This takes up more space on your device, but it allows you to view your photos offline.
To adjust these settings, go to Settings > [Your Name] > iCloud > Photos.
9. The Role of Third-Party Cloud Services: Expanding Your Backup Options
While iCloud is a convenient option for Apple users, it’s not the only cloud storage service available. Consider using other cloud services like Google Photos, Dropbox, or Amazon Photos as additional backup locations.
- Google Photos: Offers unlimited storage for “high quality” photos and videos (slightly compressed) or 15 GB of free storage for original quality.
- Dropbox: A versatile cloud storage service that allows you to sync files across devices and share them with others.
- Amazon Photos: Offers unlimited storage for photos for Amazon Prime members, plus 5 GB of storage for videos.
10. Understanding Image File Formats: Preserving Photo Quality
The file format in which your photos are stored can impact their quality and compatibility.
- JPEG: The most common image format, known for its good compression and compatibility. However, JPEG uses lossy compression, which means some image data is lost each time the file is saved.
- PNG: A lossless image format that preserves all image data. PNG is often used for graphics and images with text, but it can result in larger file sizes than JPEG.
- HEIC: Apple’s preferred image format, offering better compression than JPEG while maintaining similar image quality. However, HEIC files may not be compatible with all devices and software.
You can choose to transfer your photos from your iPhone or iPad in the “Most Compatible” (JPEG) format by going to Settings > Photos and scrolling down to the “Transfer to Mac or PC” section.
11. Troubleshooting Common iCloud Photo Issues: Addressing Technical Challenges
Sometimes, you may encounter issues with iCloud Photos, such as photos not syncing or downloading. Here are some common troubleshooting steps:
- Check your internet connection: iCloud Photos requires a stable internet connection to sync and download photos.
- Make sure you’re signed in to iCloud: Verify that you’re signed in to iCloud with the correct Apple ID on all your devices.
- Check your iCloud storage: Ensure you have enough available storage in your iCloud account.
- Restart your device: Sometimes, a simple restart can resolve syncing issues.
- Update your software: Make sure your iPhone, iPad, Mac, and other devices are running the latest version of iOS, iPadOS, or macOS.
- Reset iCloud Photos: In some cases, you may need to reset iCloud Photos by turning it off and then back on. Go to Settings > [Your Name] > iCloud > Photos and toggle the “iCloud Photos” switch.
12. The Importance of Metadata: Preserving Photo Information
Metadata is data about your photos, such as the date, time, location, and camera settings. This information can be valuable for organizing and searching your photos.
- Preserving Metadata: When downloading photos from iCloud, make sure to choose the “Unmodified Originals” option to preserve the original metadata.
- Using Metadata for Organization: Use photo management software like Photos, Adobe Lightroom, or Capture One to organize your photos using metadata. You can create albums, add keywords, and search for photos based on specific criteria.
- Editing Metadata: You can also edit metadata to correct errors or add additional information. For example, you might want to add location data to photos that were taken without GPS.
13. Exploring Photo Editing Software: Enhancing Recovered Images
Once you’ve recovered your photos, you may want to enhance them using photo editing software.
- Apple Photos: A basic photo editor included with macOS and iOS. It offers a range of editing tools, including adjustments for exposure, color, and sharpness.
- Adobe Lightroom: A professional-grade photo editor with advanced features for color correction, retouching, and organization.
- Capture One: Another professional photo editor known for its excellent color handling and tethered shooting capabilities.
- Mobile Photo Editing Apps: Many excellent photo editing apps are available for iPhone and iPad, such as Snapseed, VSCO, and Adobe Lightroom Mobile.
14. Printing and Displaying Your Recovered Photos: Bringing Memories to Life
After recovering and editing your photos, you can bring them to life by printing them or displaying them digitally.
- Printing Options: You can print your photos at home using a photo printer, or you can use a professional printing service like AdoramaPix, Mpix, or Shutterfly.
- Creating Photo Books: Photo books are a great way to preserve and share your memories. Many online services allow you to create custom photo books with your own photos and text.
- Digital Displays: You can display your photos on a digital photo frame, a smart TV, or a tablet.
15. Leveraging dfphoto.net for Photography Inspiration and Education
At dfphoto.net, we’re passionate about photography and dedicated to helping you improve your skills and explore your creativity. We offer a wide range of resources, including:
- Detailed Photography Tutorials: Learn about various photography techniques, such as exposure, composition, and lighting.
- Gear Reviews: Get expert reviews and recommendations on cameras, lenses, and other photography equipment.
- Inspirational Photo Galleries: Discover stunning images from talented photographers around the world.
- A Vibrant Photography Community: Connect with other photographers, share your work, and get feedback.
Address: 1600 St Michael’s Dr, Santa Fe, NM 87505, United States
Phone: +1 (505) 471-6001
Website: dfphoto.net
16. Staying Updated with Photography Trends and Technology
The world of photography is constantly evolving, with new technologies and trends emerging all the time. Stay informed by:
- Following Photography Blogs and Websites: Stay up-to-date on the latest news, reviews, and tutorials.
- Attending Photography Workshops and Events: Learn from experienced photographers and network with other enthusiasts.
- Experimenting with New Techniques and Equipment: Don’t be afraid to try new things and push your creative boundaries.
According to research from the Santa Fe University of Art and Design’s Photography Department, in July 2025, continuous learning and adaptation are essential for success in the ever-changing field of photography.
17. Understanding Copyright and Usage Rights: Protecting Your Work
As a photographer, it’s important to understand copyright law and how to protect your work.
- Copyright Ownership: As the creator of your photos, you automatically own the copyright to them. This gives you the exclusive right to control how your photos are used.
- Copyright Registration: You can register your copyrights with the U.S. Copyright Office to strengthen your legal protection.
- Usage Rights: You can grant others permission to use your photos through licensing agreements.
- Watermarking: Add a watermark to your photos to deter unauthorized use.
18. Building a Photography Portfolio: Showcasing Your Best Work
A strong portfolio is essential for attracting clients, getting jobs, and showcasing your talent.
- Curating Your Best Work: Select your strongest and most representative images for your portfolio.
- Creating a Website: A professional website is the best way to showcase your portfolio online.
- Using Social Media: Social media platforms like Instagram and Facebook can be valuable tools for promoting your work.
- Networking: Attend photography events and connect with other professionals in the industry.
19. Monetizing Your Photography: Turning Passion into Profit
There are many ways to make money as a photographer, including:
- Selling Prints: Sell your photos as prints online or at art fairs.
- Stock Photography: License your photos through stock photography agencies.
- Freelance Photography: Offer your services for events, portraits, weddings, and other occasions.
- Teaching Photography: Share your knowledge and passion by teaching photography workshops or online courses.
20. Embracing the Art of Photography: Finding Your Unique Vision
Photography is more than just taking pictures; it’s about expressing your unique vision and sharing your perspective with the world.
- Experiment with Different Styles: Explore various genres of photography, such as landscape, portrait, street, and documentary.
- Develop Your Own Style: Find your unique voice and develop a style that reflects your personality and interests.
- Tell Stories: Use your photos to tell stories and evoke emotions.
- Connect with Your Audience: Share your work with others and engage in meaningful conversations.
Unlock your photographic potential and embark on a journey of discovery at dfphoto.net. We invite you to explore our comprehensive tutorials, browse our stunning image galleries, and connect with a community of passionate photographers. Visit us today and let your creativity soar.
FAQ: Frequently Asked Questions About Recovering Old Photos from iCloud
Q1: How far back can I recover photos from iCloud?
Generally, you can recover photos deleted within the last 30 days from the “Recently Deleted” album. Beyond that, recovery becomes more challenging.
Q2: Can I recover photos from iCloud without my iPhone?
Yes, you can access and download your photos from iCloud.com using any web browser on a computer.
Q3: What if I accidentally deleted photos from iCloud more than 30 days ago?
While not guaranteed, you can try using data recovery software or consulting a professional data recovery service.
Q4: Will restoring from an iCloud backup erase my current data?
Yes, restoring from an iCloud backup will replace the current data on your device with the data from the backup.
Q5: How can I prevent losing photos from iCloud in the future?
Enable iCloud Backup, consider multiple backup methods, and be careful when deleting photos.
Q6: Does optimizing iPhone storage affect photo quality when downloading from iCloud?
No, optimizing storage only affects the versions stored on your device. The full-resolution originals are still stored in iCloud.
Q7: Is there a way to recover permanently deleted photos from iCloud?
Once photos are permanently deleted (after 30 days in the Recently Deleted album), recovery is extremely difficult and not guaranteed.
Q8: How do I check my iCloud storage?
Go to Settings > [Your Name] > iCloud > Manage Storage.
Q9: What are the best third-party cloud services for backing up photos?
Google Photos, Dropbox, and Amazon Photos are popular options.
Q10: How does dfphoto.net help with photography-related questions?
dfphoto.net provides detailed tutorials, gear reviews, inspirational photo galleries, and a vibrant photography community to support photographers of all levels.
By following these guidelines and utilizing the resources available at dfphoto.net, you can confidently navigate the world of iCloud photo recovery and ensure your precious memories are always within reach.
Call to Action: Ready to elevate your photography skills and safeguard your cherished memories? Visit dfphoto.net today and discover a world of inspiration, education, and community. Let us help you unlock your creative potential and preserve your photographic legacy.