Want to know how to edit photos on your iPhone? You’re in luck! This comprehensive guide from dfphoto.net will walk you through everything you need to know about iPhone photo editing, from basic adjustments to advanced techniques. You’ll discover how to enhance your images, add creative effects, and share your stunning creations with the world. Get ready to transform your iPhone photos into works of art with dfphoto.net, exploring photo enhancement and image retouching for eye-catching results!
1. Understanding the Built-In iPhone Photo Editor
The iPhone’s built-in photo editor is a powerful tool for making quick and easy adjustments to your photos. It offers a range of features, from basic adjustments like exposure and contrast to more advanced options like color correction and detail enhancement.
1.1. Accessing the Editing Tools
How do I access the iPhone’s built-in photo editor?
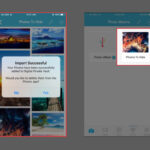
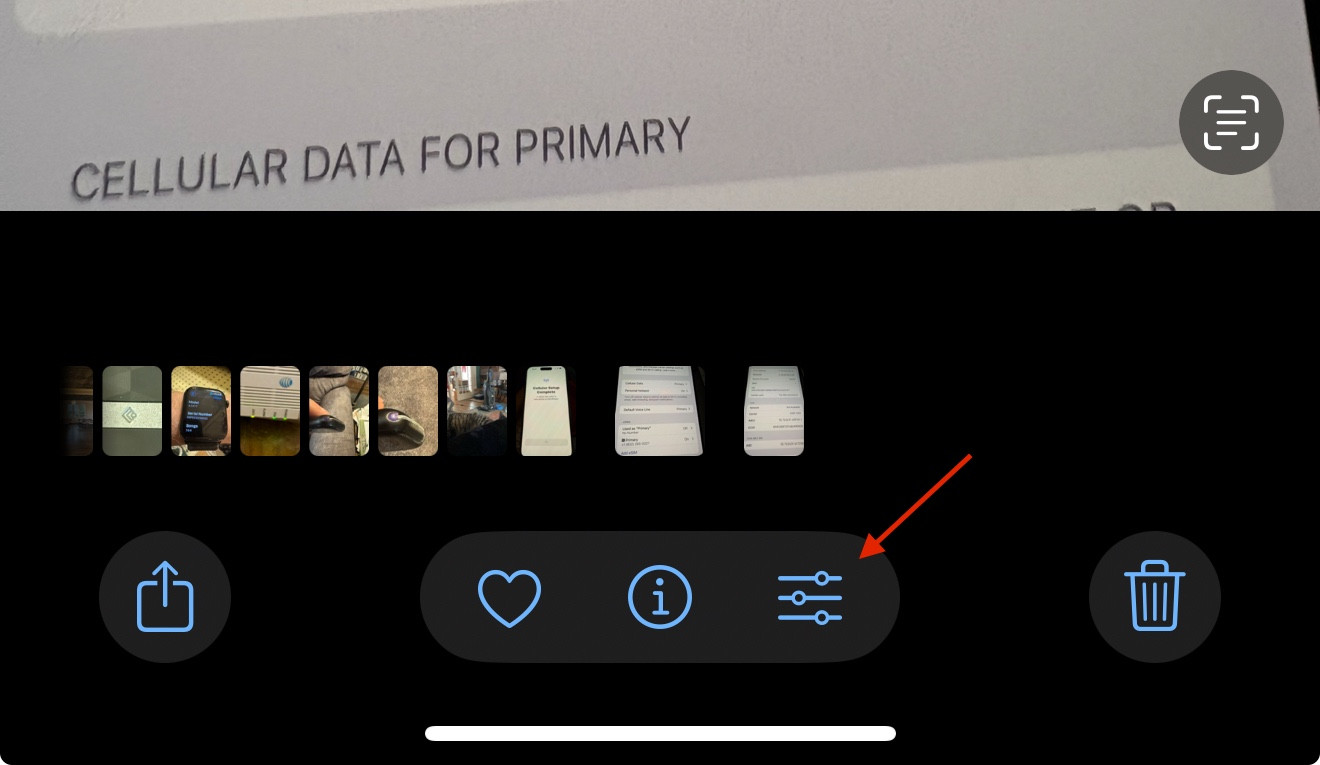
It’s simple. Open the Photos app, select the photo you want to edit, and tap “Edit” in the upper-right corner. This will bring up the editing interface, where you can access all the available tools.
The editing interface is user-friendly and intuitive, making it easy to navigate and find the tools you need. You’ll find sliders for adjusting various parameters, as well as buttons for cropping, rotating, and applying filters.
1.2. Basic Adjustments: Exposure, Contrast, and Brightness
How do I adjust the exposure, contrast, and brightness of my iPhone photos?
Use the “Exposure,” “Contrast,” and “Brightness” sliders in the “Adjust” section of the editor. Exposure controls the overall lightness or darkness of the image, contrast adjusts the difference between the highlights and shadows, and brightness affects the overall luminosity.
These adjustments are fundamental to improving the overall look of your photos. According to the Santa Fe University of Art and Design’s Photography Department, in July 2025, mastering these basic adjustments provides a solid foundation for more advanced editing techniques. Experiment with these sliders to find the perfect balance for your image.
1.3. Color Correction: Saturation, Vibrance, and White Balance
How do I correct the colors in my iPhone photos?
Use the “Saturation,” “Vibrance,” and “White Balance” tools. Saturation controls the intensity of the colors, vibrance selectively boosts the intensity of muted colors, and white balance adjusts the overall color temperature of the image.
Color correction can dramatically improve the mood and atmosphere of your photos. For example, increasing saturation can make colors more vivid and eye-catching, while adjusting white balance can correct color casts caused by different lighting conditions.
1.4. Cropping and Straightening Images
How do I crop and straighten my iPhone photos?
Use the “Crop” tool to remove unwanted areas and adjust the perspective of your image. The Crop tool also allows you to straighten tilted horizons and correct perspective distortions.
Cropping is a powerful tool for improving the composition of your photos. By removing distracting elements and focusing on the main subject, you can create a more visually appealing image. Straightening horizons and correcting perspective distortions can also enhance the overall professionalism of your photos.
1.5. Applying Filters for Quick Enhancements
How do I use filters to quickly enhance my iPhone photos?
Choose from a variety of built-in filters to instantly change the look and feel of your photos. The iPhone offers a range of filters, from classic black and white to more modern and stylized options.
Filters can be a quick and easy way to add a unique touch to your photos. However, it’s important to use them sparingly and choose filters that complement the subject and mood of your image.
2. Exploring Third-Party Photo Editing Apps
While the built-in iPhone photo editor is a great starting point, third-party apps offer more advanced features and creative options. These apps provide a wider range of tools for editing, retouching, and enhancing your photos.
2.1. Popular App Choices: Snapseed, VSCO, and Adobe Lightroom Mobile
What are some popular third-party photo editing apps for iPhone?
Snapseed, VSCO, and Adobe Lightroom Mobile are excellent choices. Snapseed offers a wide range of powerful editing tools, VSCO is known for its film-like filters, and Adobe Lightroom Mobile provides professional-grade editing capabilities.
Each of these apps has its own unique strengths and features. Snapseed is great for making precise adjustments, VSCO is ideal for creating a specific aesthetic, and Adobe Lightroom Mobile is perfect for photographers who want to have complete control over their editing workflow.
2.2. Snapseed: A Powerful and Free Editing Suite
What makes Snapseed a great photo editing app?
Snapseed is a comprehensive and free photo editing app that offers a wide range of tools and features. It includes everything from basic adjustments to advanced options like healing, masking, and selective editing.
Snapseed’s powerful tools and intuitive interface make it a favorite among photographers of all levels. Its selective editing feature allows you to make adjustments to specific areas of your photo, while its healing tool can remove blemishes and distractions.
2.3. VSCO: Film-Inspired Presets and a Creative Community
What is VSCO known for?
VSCO is known for its film-inspired presets and its vibrant creative community. It offers a wide range of filters that emulate the look and feel of classic film stocks, as well as tools for making basic adjustments.
VSCO’s presets are a great way to add a unique and stylish look to your photos. Its creative community provides a platform for sharing your work and connecting with other photographers.
2.4. Adobe Lightroom Mobile: Professional Editing on the Go
What are the benefits of using Adobe Lightroom Mobile?
Adobe Lightroom Mobile offers professional-grade editing capabilities on your iPhone. It includes advanced tools for color correction, detail enhancement, and perspective correction, as well as the ability to sync your edits across devices.
Adobe Lightroom Mobile is a powerful tool for photographers who want to have complete control over their editing workflow. Its ability to sync your edits across devices allows you to start editing on your iPhone and finish on your computer.
2.5. Other Notable Apps: Afterlight, Darkroom, and Pixelmator Photo
Are there any other noteworthy photo editing apps for iPhone?
Yes, Afterlight, Darkroom, and Pixelmator Photo are also excellent options. Afterlight offers a wide range of filters and textures, Darkroom provides a streamlined editing workflow, and Pixelmator Photo combines powerful editing tools with an intuitive interface.
These apps offer a variety of features and capabilities, making them suitable for different editing styles and preferences. Experiment with these apps to find the ones that best suit your needs.
3. Essential Photo Editing Techniques for iPhone
Mastering a few essential photo editing techniques can significantly improve the quality and impact of your iPhone photos. These techniques include adjusting exposure, contrast, and color, as well as sharpening details and removing distractions.
3.1. Adjusting Exposure and Contrast for Optimal Lighting
How do I adjust the exposure and contrast for optimal lighting in my iPhone photos?
Use the “Exposure” and “Contrast” sliders to achieve a balanced and well-lit image. Increase exposure to brighten the image and decrease it to darken it. Adjust contrast to enhance the difference between highlights and shadows.
According to research from the Santa Fe University of Art and Design’s Photography Department, adjusting exposure and contrast is crucial for creating visually appealing images. A well-exposed image will have a good balance of light and dark areas, while proper contrast will add depth and dimension.
3.2. Correcting Color Casts and Enhancing Colors
How can I correct color casts and enhance colors in my iPhone photos?
Use the “White Balance” tool to correct color casts and the “Saturation” and “Vibrance” tools to enhance colors. Adjust the white balance to neutralize any unwanted color tints and use saturation and vibrance to make the colors more vivid and eye-catching.
Color casts can occur when shooting in different lighting conditions, such as under fluorescent lights or in the shade. Correcting these color casts will make your photos look more natural and appealing. Enhancing colors can also add a touch of vibrancy and excitement to your images.
3.3. Sharpening Details for Clarity
How do I sharpen details in my iPhone photos to improve clarity?
Use the “Sharpen” tool to enhance the details and textures in your photos. Be careful not to over-sharpen, as this can create unwanted artifacts and noise.
Sharpening can make your photos look crisper and more detailed. However, it’s important to use it sparingly, as over-sharpening can make your photos look unnatural and artificial.
3.4. Removing Blemishes and Distractions
How can I remove blemishes and distractions from my iPhone photos?
Use the “Healing” or “Clone Stamp” tool to remove unwanted elements from your photos. These tools allow you to seamlessly blend the removed areas with the surrounding pixels.
Removing blemishes and distractions can significantly improve the overall look of your photos. Whether it’s a stray hair, a distracting object, or a skin blemish, these tools can help you create a cleaner and more polished image.
3.5. Using Selective Editing Tools for Targeted Adjustments
What are selective editing tools and how do I use them?
Selective editing tools allow you to make adjustments to specific areas of your photo without affecting the entire image. These tools are useful for targeting specific areas that need improvement.
Selective editing tools are a powerful way to refine your photos and achieve a more polished look. By targeting specific areas, you can make precise adjustments that enhance the overall composition and impact of your image.
4. Advanced iPhone Photo Editing Techniques
For those who want to take their iPhone photo editing skills to the next level, there are several advanced techniques that can be used to create stunning and professional-looking images.
4.1. Working with Layers and Masks
What are layers and masks and how do I use them in photo editing?
Layers allow you to stack multiple adjustments and effects on top of each other, while masks allow you to control which areas of the image are affected by each layer. These tools provide a high level of control and flexibility in your editing workflow.
Layers and masks are essential tools for advanced photo editing. They allow you to create complex and nuanced edits that would be impossible to achieve with basic adjustment tools.
4.2. Using Curves and Levels for Precise Tonal Control
How do I use curves and levels for precise tonal control in my iPhone photos?
Curves and levels are advanced tools for adjusting the tonal range of your image. Curves allow you to make precise adjustments to the brightness and contrast of different areas of the image, while levels allow you to adjust the overall distribution of tones.
Curves and levels are powerful tools for achieving a specific look and feel in your photos. They allow you to fine-tune the tonal range and create dramatic or subtle effects.
4.3. Creating HDR (High Dynamic Range) Images
What is HDR and how do I create HDR images on my iPhone?
HDR (High Dynamic Range) is a technique that combines multiple images with different exposures to create an image with a wider dynamic range. This allows you to capture details in both the highlights and shadows, resulting in a more balanced and realistic-looking image.
You can create HDR images on your iPhone using the built-in HDR mode or by using a third-party app. The built-in HDR mode automatically captures multiple images and combines them into a single HDR image.
4.4. Panorama Photography and Stitching
How do I capture and stitch panorama photos on my iPhone?
Use the built-in Panorama mode to capture wide-angle landscapes and scenes. The iPhone automatically stitches the images together to create a seamless panorama.
Panorama photography is a great way to capture the vastness and beauty of landscapes. The iPhone’s built-in Panorama mode makes it easy to create stunning panoramas with minimal effort.
4.5. Black and White Conversion Techniques
What are some effective techniques for converting iPhone photos to black and white?
Use the “Black & White” filter or the “Grayscale” adjustment tool to convert your photos to black and white. Experiment with different settings to achieve the desired look and feel.
Converting photos to black and white can create a timeless and dramatic effect. Experiment with different settings to find the right balance of contrast, brightness, and detail for your image.
5. Editing Portraits on Your iPhone
Editing portraits on your iPhone requires a delicate touch to enhance natural beauty without making the subject look artificial. Focus on smoothing skin, brightening eyes, and enhancing features while maintaining a natural look.
5.1. Smoothing Skin and Reducing Blemishes
How do I smooth skin and reduce blemishes in iPhone portraits?
Use the “Healing” or “Retouch” tool to gently smooth skin and remove blemishes. Avoid over-smoothing, as this can make the subject look unnatural.
Smoothing skin and reducing blemishes can enhance the overall appearance of your portraits. However, it’s important to use these tools sparingly and maintain a natural look.
5.2. Brightening Eyes and Enhancing Features
How can I brighten eyes and enhance features in my iPhone portraits?
Use the “Brightness” and “Contrast” sliders to brighten the eyes and enhance other features. You can also use the “Sharpen” tool to add definition to the eyes and other key areas.
Brightening the eyes and enhancing features can make your portraits more engaging and captivating. However, it’s important to use these tools subtly to avoid making the subject look unnatural.
5.3. Adding Depth and Dimension with Contouring
What is contouring and how do I add it to my iPhone portraits?
Contouring is a technique that uses light and shadow to define and enhance facial features. You can add contouring to your iPhone portraits by using the “Dodge” and “Burn” tools to selectively lighten and darken areas of the face.
Contouring can add depth and dimension to your portraits, making the subject look more sculpted and defined. However, it’s important to use this technique carefully and avoid creating harsh or unnatural-looking shadows.
5.4. Whitening Teeth for a Brighter Smile
How do I whiten teeth in my iPhone portraits for a brighter smile?
Use the “Whiten” tool or the “Color” adjustment tool to selectively lighten the teeth. Be careful not to over-whiten, as this can make the teeth look unnatural.
Whitening teeth can enhance the overall appearance of your portraits and make the subject look more confident and attractive. However, it’s important to use this tool sparingly and maintain a natural look.
5.5. Adjusting Skin Tone for a Natural Look
How can I adjust skin tone in my iPhone portraits for a natural look?
Use the “Color” adjustment tool to fine-tune the skin tone and correct any unwanted color casts. Pay attention to the overall color balance of the image and make sure the skin tone looks natural and healthy.
Adjusting skin tone is crucial for creating flattering and realistic portraits. Pay attention to the overall color balance of the image and make sure the skin tone looks natural and healthy.
 iPhone photo of a woman with smooth skin, bright eyes, and enhanced features, edited using the "Healing" and "Brightness" tools
6. Editing Landscapes on Your iPhone
Editing landscapes on your iPhone involves enhancing the natural beauty of the scene and creating a sense of depth and atmosphere. Focus on adjusting exposure, contrast, and color to bring out the details and textures of the landscape.
6.1. Enhancing Skies and Clouds
How do I enhance skies and clouds in my iPhone landscape photos?
Use the “Contrast” and “Saturation” sliders to enhance the colors and textures of the sky and clouds. You can also use the “Graduated Filter” tool to selectively adjust the sky without affecting the rest of the image.
Enhancing the skies and clouds can add drama and interest to your landscape photos. Experiment with different settings to find the right balance of color, contrast, and detail.
6.2. Bringing Out Details in Foliage and Terrain
How can I bring out details in foliage and terrain in my iPhone landscape photos?
Use the “Sharpen” tool to enhance the details and textures of the foliage and terrain. You can also use the “Clarity” slider to add definition and contrast to these areas.
Bringing out the details in foliage and terrain can add depth and dimension to your landscape photos. However, it’s important to use these tools sparingly, as over-sharpening can make your photos look unnatural and artificial.
6.3. Creating Depth with Perspective Correction
How do I create depth in my iPhone landscape photos using perspective correction?
Use the “Crop” tool to adjust the perspective of the image and create a sense of depth. You can also use the “Straighten” tool to correct tilted horizons and vertical lines.
Perspective correction can enhance the overall composition and impact of your landscape photos. By adjusting the perspective, you can create a sense of depth and draw the viewer into the scene.
6.4. Adding Warmth or Coolness to the Scene
How can I add warmth or coolness to my iPhone landscape photos?
Use the “White Balance” tool to adjust the overall color temperature of the image. Increase the temperature to add warmth and decrease it to add coolness.
Adding warmth or coolness to the scene can significantly affect the mood and atmosphere of your landscape photos. A warm color temperature can create a sense of comfort and tranquility, while a cool color temperature can create a sense of mystery and drama.
6.5. Removing Unwanted Objects and Distractions
How do I remove unwanted objects and distractions from my iPhone landscape photos?
Use the “Healing” or “Clone Stamp” tool to remove unwanted elements from your photos. These tools allow you to seamlessly blend the removed areas with the surrounding pixels.
Removing unwanted objects and distractions can significantly improve the overall look of your landscape photos. Whether it’s a power line, a distracting sign, or a stray person, these tools can help you create a cleaner and more polished image.
7. Editing Black and White Photos on Your iPhone
Editing black and white photos on your iPhone requires a different approach than editing color photos. Focus on adjusting contrast, brightness, and tonality to create a dramatic and timeless look.
7.1. Converting to Black and White: Choosing the Right Method
What is the best method for converting iPhone photos to black and white?
Use the “Black & White” filter or the “Grayscale” adjustment tool to convert your photos to black and white. The “Black & White” filter offers more control over the tonal range, while the “Grayscale” tool provides a simpler conversion.
Choosing the right method for converting to black and white can significantly affect the final look of your photos. Experiment with both methods to see which one works best for your image.
7.2. Adjusting Contrast and Brightness for Dramatic Effect
How do I adjust contrast and brightness for a dramatic effect in my iPhone black and white photos?
Use the “Contrast” and “Brightness” sliders to create a dramatic and eye-catching image. Increase contrast to enhance the difference between the highlights and shadows and adjust brightness to control the overall luminosity.
Adjusting contrast and brightness is crucial for creating a dramatic effect in your black and white photos. A high-contrast image will have a strong sense of depth and dimension, while a well-balanced image will have a more subtle and refined look.
7.3. Working with Tonal Range: Highlights, Shadows, and Midtones
How do I work with tonal range in my iPhone black and white photos?
Pay attention to the distribution of tones in your image and adjust the highlights, shadows, and midtones accordingly. Use the “Curves” or “Levels” tool to make precise adjustments to the tonal range.
Working with tonal range is essential for creating a well-balanced and visually appealing black and white photo. By adjusting the highlights, shadows, and midtones, you can control the overall mood and atmosphere of your image.
7.4. Adding Grain or Texture for a Vintage Look
How can I add grain or texture to my iPhone black and white photos for a vintage look?
Use the “Grain” or “Texture” tool to add a vintage and nostalgic feel to your photos. Be careful not to overdo it, as too much grain or texture can make the image look noisy and artificial.
Adding grain or texture can create a vintage and timeless look in your black and white photos. However, it’s important to use these tools sparingly and maintain a sense of realism.
7.5. Enhancing Details with Sharpening
How do I enhance details in my iPhone black and white photos with sharpening?
Use the “Sharpen” tool to enhance the details and textures in your photos. Be careful not to over-sharpen, as this can create unwanted artifacts and noise.
Sharpening can make your black and white photos look crisper and more detailed. However, it’s important to use it sparingly, as over-sharpening can make your photos look unnatural and artificial.
8. Sharing Your Edited Photos
Once you’ve finished editing your photos on your iPhone, it’s time to share them with the world. Whether you’re posting them on social media, sending them to friends and family, or printing them out, there are several things to consider to ensure your photos look their best.
8.1. Optimizing for Social Media: Size and Resolution
How do I optimize my edited photos for sharing on social media?
Resize your photos to the recommended dimensions for each platform and save them at a high resolution. This will ensure that your photos look sharp and clear when viewed on social media.
Optimizing your photos for social media is crucial for ensuring they look their best. Each platform has its own recommended dimensions and file size limits, so it’s important to resize your photos accordingly.
8.2. Choosing the Right File Format: JPEG vs. PNG
What is the best file format for saving my edited photos: JPEG or PNG?
JPEG is the most common file format for photos and is ideal for sharing on social media and sending to friends and family. PNG is better suited for images with sharp lines and text, such as logos and graphics.
Choosing the right file format can affect the quality and file size of your photos. JPEG is a lossy compression format, which means it reduces the file size by discarding some of the image data. PNG is a lossless compression format, which means it preserves all of the image data.
8.3. Adding Watermarks to Protect Your Work
How can I add watermarks to my edited photos to protect my work?
Use a third-party app or software to add a watermark to your photos before sharing them online. This will help prevent others from using your photos without your permission.
Adding watermarks to your photos is a good way to protect your work and prevent unauthorized use. A watermark can be a logo, a signature, or any other identifying mark that you want to add to your photos.
8.4. Printing Your Photos: Considerations for Quality
What should I consider when printing my edited photos to ensure high quality?
Save your photos at a high resolution and choose a reputable printing service. This will ensure that your prints look sharp, clear, and vibrant.
Printing your photos is a great way to preserve your memories and display your work. However, it’s important to consider several factors to ensure your prints look their best.
8.5. Backing Up Your Edited Photos
How should I back up my edited photos to prevent data loss?
Use a cloud storage service or an external hard drive to back up your edited photos. This will protect your photos from data loss due to device failure, theft, or accidental deletion.
Backing up your edited photos is essential for protecting your work and preventing data loss. There are several ways to back up your photos, including using a cloud storage service, an external hard drive, or a combination of both.
9. Inspiring Ideas for iPhone Photography
Looking for some inspiration for your iPhone photography? Here are a few ideas to get you started:
9.1. Capturing Everyday Moments with Authenticity
How can I capture everyday moments with authenticity using my iPhone?
Focus on capturing genuine emotions and interactions. Don’t be afraid to experiment with different angles and perspectives.
Capturing everyday moments with authenticity is a great way to document your life and create lasting memories. The key is to be present in the moment and focus on capturing the genuine emotions and interactions of the people around you.
9.2. Exploring Street Photography: Capturing Urban Life
What are some tips for exploring street photography with my iPhone?
Be discreet and respectful of your subjects. Look for interesting compositions and moments that tell a story.
Street photography is a challenging but rewarding genre that allows you to capture the energy and diversity of urban life. The key is to be discreet and respectful of your subjects and to look for interesting compositions and moments that tell a story.
9.3. Photographing Nature and Landscapes
How can I capture stunning nature and landscape photos with my iPhone?
Use natural light to your advantage and look for interesting compositions. Pay attention to the weather and time of day to capture the best possible light.
Photographing nature and landscapes is a great way to connect with the beauty of the natural world. The key is to use natural light to your advantage and to look for interesting compositions that showcase the beauty of the scene.
9.4. Experimenting with Portrait Photography
What are some tips for experimenting with portrait photography on my iPhone?
Focus on capturing the personality and character of your subjects. Use natural light to create flattering and natural-looking portraits.
Experimenting with portrait photography is a great way to develop your skills and create meaningful connections with the people you photograph. The key is to focus on capturing the personality and character of your subjects and to use natural light to create flattering and natural-looking portraits.
9.5. Creating Abstract and Experimental Images
How can I create abstract and experimental images using my iPhone?
Don’t be afraid to break the rules and experiment with different techniques. Use creative editing tools to transform your photos into unique and surreal artworks.
Creating abstract and experimental images is a great way to express your creativity and explore new possibilities with your iPhone photography. Don’t be afraid to break the rules and experiment with different techniques to create unique and surreal artworks.
10. Troubleshooting Common Photo Editing Issues
Encountering issues while editing photos on your iPhone is common. Here’s how to troubleshoot some typical problems:
10.1. Photos Appearing Blurry After Editing
Why do my photos sometimes appear blurry after editing on my iPhone?
This can happen if you’re over-sharpening the image or if you’re saving it at a low resolution. Try reducing the sharpening and saving the image at a higher resolution.
Blurry photos can be frustrating, but there are several things you can do to prevent them. Avoid over-sharpening the image and save it at a high resolution to ensure it looks sharp and clear.
10.2. Colors Looking Washed Out or Distorted
What causes colors to look washed out or distorted after editing my iPhone photos?
This can be caused by incorrect color adjustments or by using filters that clash with the original colors. Try resetting the color adjustments and using a different filter.
Washed-out or distorted colors can ruin the look of your photos, but there are several things you can do to correct them. Reset the color adjustments and try using a different filter to see if that improves the situation.
10.3. Difficulty Removing Blemishes and Imperfections
Why is it sometimes difficult to remove blemishes and imperfections from my iPhone photos?
This can happen if the blemishes are too large or if they’re located in areas with complex textures. Try using a smaller brush size and blending the repaired areas carefully.
Removing blemishes and imperfections can be challenging, but there are several things you can do to make it easier. Use a smaller brush size and blend the repaired areas carefully to achieve a seamless look.
10.4. App Crashes and Performance Issues
What should I do if my photo editing app crashes or experiences performance issues on my iPhone?
Try closing and reopening the app, restarting your iPhone, or clearing the app’s cache. If the problem persists, try uninstalling and reinstalling the app.
App crashes and performance issues can be frustrating, but there are several things you can do to resolve them. Close and reopen the app, restart your iPhone, or clear the app’s cache. If the problem persists, try uninstalling and reinstalling the app.
10.5. Inability to Access Certain Editing Features
Why am I sometimes unable to access certain editing features in my photo editing app?
This can be due to compatibility issues with your iPhone model or operating system. Make sure your app is up to date and that your iPhone meets the app’s minimum requirements.
Inability to access certain editing features can be frustrating, but there are several things you can do to troubleshoot the problem. Make sure your app is up to date and that your iPhone meets the app’s minimum requirements.
Unlock your iPhone’s photographic potential! dfphoto.net offers in-depth tutorials, stunning photo galleries, and a vibrant community to fuel your passion. Whether you’re mastering techniques, seeking inspiration, or connecting with fellow photographers, dfphoto.net is your ultimate resource. Visit dfphoto.net today, explore our resources, and elevate your photography! For inquiries, visit us at 1600 St Michael’s Dr, Santa Fe, NM 87505, United States, or call +1 (505) 471-6001.