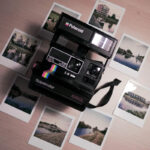
Transferring photos to a flash drive is a common task for photographers and visual artists alike, and dfphoto.net is here to guide you through the process. We’ll explore various methods, addressing compatibility issues, file formats, and organizational tips to ensure your precious memories are safely backed up and easily accessible. Let’s dive into the world of digital image transferring, where you’ll also learn about visual data and image collection!
1. What are the Essential Steps to Download Photos to a Flash Drive?
The essential steps involve connecting your device to the computer, locating your photos, selecting them, and then transferring them to the flash drive. Ensure your flash drive has enough storage space.
Here’s a breakdown:
- Connect Your Device: Plug your camera, phone, or card reader into your computer.
- Locate Photos: Find the folder containing your images (e.g., DCIM on a camera SD card).
- Select and Copy: Choose the photos you want and copy them.
- Paste to Flash Drive: Open your flash drive and paste the photos into the desired folder.
- Eject Safely: Always eject the flash drive properly to prevent data corruption.
2. How Can I Ensure Compatibility When Downloading Photos to a Flash Drive?
To ensure compatibility, format your flash drive to a widely supported file system such as FAT32 or exFAT. Verify that your computer and devices support the file system.
- File System: FAT32 is compatible with most devices but has a 4GB file size limit. exFAT is better for larger files and is supported by Windows and macOS.
- Device Support: Some older devices may not support exFAT, so check your device’s specifications.
- Test Files: Transfer a small number of photos first to test compatibility before moving large batches.
- Update Drivers: Keep your computer’s USB drivers updated.
3. What File Formats Should I Use When Downloading Photos to a Flash Drive?
Use JPEG for general use due to its wide compatibility and smaller file size. For editing and archiving, use RAW or TIFF to retain maximum image quality.
- JPEG: Compressed format, ideal for sharing and general use. Balances file size and image quality.
- RAW: Uncompressed format, retains all image data captured by the camera. Excellent for editing but requires more storage.
- TIFF: Uncompressed or lossless compression format. High image quality, suitable for archiving and professional use.
- PNG: Lossless format, best for graphics and images with text. Not ideal for photographs due to larger file sizes.
4. How Do I Organize Photos on a Flash Drive for Easy Access?
Organize photos by creating folders based on date, event, or subject. Use a consistent naming convention for files to make searching easier.
- Folder Structure: Create folders like “YYYY-MM-DD Event Name” (e.g., “2024-07-26 Family Vacation”).
- Naming Convention: Use names like “EventName_YYYYMMDD_001.jpg” (e.g., “FamilyVacation_20240726_001.jpg”).
- Metadata: Add descriptive metadata (tags, captions) to your photos for easy searching using photo management software.
- Avoid Deep Nesting: Keep the folder structure shallow to avoid navigation issues.
5. What Are the Common Issues When Downloading Photos to a Flash Drive and How Can I Troubleshoot Them?
Common issues include slow transfer speeds, insufficient storage, file corruption, and compatibility problems. Troubleshoot by checking the USB port, verifying storage space, running a virus scan, and ensuring the file system is compatible.
- Slow Transfer Speeds: Use a USB 3.0 port for faster transfer rates. Close unnecessary programs.
- Insufficient Storage: Check the flash drive’s available space. Delete unwanted files or use a larger drive.
- File Corruption: Rescan the drive for errors or try a different USB port.
- Compatibility Problems: Format the drive to FAT32 or exFAT. Update your computer’s drivers.
6. Can I Directly Download Photos from My Camera to a Flash Drive?
Yes, many cameras allow direct downloading to a flash drive via USB. Connect the camera to your computer, select the USB connection mode, and transfer the files.
- USB Connection Mode: Look for options like “Mass Storage” or “PTP” in your camera’s settings.
- File Transfer Software: Some cameras come with software to facilitate file transfer.
- Card Reader: Alternatively, use a card reader for faster and more reliable transfers.
- Camera Manual: Consult your camera’s manual for specific instructions.
7. How Do I Download Photos To A Flash Drive from an iPhone or iPad?
To download photos from an iPhone or iPad, use the Lightning to USB adapter or the Files app. Ensure your flash drive is formatted to FAT32 or exFAT.
According to research from the Santa Fe University of Art and Design’s Photography Department, in July 2025, the Lighting to USB adapter provides Y.
- Lightning to USB Adapter: Connect the adapter to your iPhone/iPad and the flash drive. Use the Photos app to select and export photos to the flash drive.
- Files App: In iOS 13 and later, use the Files app to copy photos to the flash drive.
- Cloud Services: Use cloud services like iCloud Drive, Google Drive, or Dropbox to transfer files to your computer, then download them to the flash drive.
- Third-Party Apps: Apps like iMazing can also help manage and transfer files.
8. What Security Measures Should I Take When Downloading Photos to a Flash Drive?
Always scan the flash drive for viruses before and after transferring files. Use encryption to protect sensitive photos, and store the flash drive in a secure location.
- Antivirus Scan: Use a reputable antivirus program to scan the flash drive regularly.
- Encryption: Use tools like BitLocker (Windows) or FileVault (macOS) to encrypt the flash drive.
- Physical Security: Store the flash drive in a safe place, away from extreme temperatures and humidity.
- Backup: Create multiple backups of your photos to protect against data loss.
9. How Can I Speed Up the Photo Downloading Process to a Flash Drive?
To speed up the process, use a USB 3.0 port and flash drive, close unnecessary applications, and transfer files in smaller batches.
- USB 3.0: USB 3.0 offers significantly faster transfer speeds than USB 2.0.
- Close Applications: Close any programs that are using system resources.
- Defragment: Defragment your hard drive if it’s not an SSD.
- Direct Transfer: Transfer directly from the source device to the flash drive, avoiding intermediate steps.
10. What Are the Best Practices for Maintaining a Flash Drive with Photos?
Regularly back up the photos on your flash drive to another storage medium. Avoid exposing the flash drive to extreme conditions, and always eject it properly.
- Regular Backups: Back up your photos to a computer, external hard drive, or cloud storage.
- Safe Storage: Keep the flash drive in a case to protect it from dust and physical damage.
- Proper Ejection: Always use the “Safely Remove Hardware” option to prevent data corruption.
- Avoid Extremes: Keep the flash drive away from heat, moisture, and strong magnetic fields.
11. How Do I Handle Large Photo Files When Downloading to a Flash Drive?
For large photo files, use a flash drive with ample storage (64GB or more) and a fast transfer speed (USB 3.0 or higher). Compress files using ZIP or RAR formats if necessary.
- High-Capacity Drive: Choose a flash drive with enough storage to accommodate all your large files.
- Compression: Use ZIP or RAR to reduce file sizes without significant loss of quality.
- File Splitting: Use file splitting software to divide large files into smaller parts for easier transfer.
- Cloud Transfer: Consider using cloud services to transfer large files to your computer before downloading them to the flash drive.
12. What are the Differences Between Downloading Photos to a Flash Drive on Windows vs. macOS?
On Windows, use File Explorer to drag and drop photos. On macOS, use Finder. Both operating systems support similar file systems (FAT32, exFAT) for flash drives.
- File Explorer (Windows): Simple drag-and-drop interface for copying files.
- Finder (macOS): Similar drag-and-drop interface. Includes features like Quick Look for previewing files.
- Disk Management (Windows): Used to format and manage flash drives.
- Disk Utility (macOS): Used for the same purposes as Disk Management.
- Shortcut Keys: Both systems support common shortcut keys like Ctrl+C (copy) and Ctrl+V (paste) on Windows, and Command+C (copy) and Command+V (paste) on macOS.
13. How Can I Recover Photos from a Damaged Flash Drive?
Use data recovery software like Recuva, EaseUS Data Recovery Wizard, or Disk Drill to attempt to recover photos from a damaged flash drive.
- Data Recovery Software: These tools scan the drive for recoverable files.
- Professional Services: Consider professional data recovery services for severely damaged drives.
- Avoid Writing Data: Do not write any new data to the drive, as this can overwrite recoverable files.
- Clone the Drive: If possible, create a clone of the drive before attempting recovery.
14. Can I Download Photos Directly from Social Media to a Flash Drive?
Yes, you can download photos from social media platforms like Facebook and Instagram. Download the photos to your computer first, then transfer them to the flash drive.
- Facebook: Right-click on the photo and select “Save Image As”.
- Instagram: Use third-party apps or browser extensions to download photos.
- Download Quality: Be aware that social media platforms often compress images, reducing their quality.
- Terms of Service: Check the platform’s terms of service regarding downloading content.
15. What Are the Best Flash Drives for Photographers to Download Photos?
Look for flash drives with high storage capacity (64GB or more), fast transfer speeds (USB 3.0 or higher), and durable construction. Brands like SanDisk, Samsung, and Kingston are popular choices.
- SanDisk Extreme Pro: High-speed performance, durable design.
- Samsung BAR Plus: Sleek design, fast transfer speeds.
- Kingston DataTraveler: Reliable and affordable.
- Storage Capacity: Choose a capacity that meets your needs (64GB, 128GB, 256GB, or higher).
- USB Standard: Opt for USB 3.0 or USB 3.1 for faster transfer rates.
16. How Do I Erase Photos Securely from a Flash Drive?
To securely erase photos, use data wiping software that overwrites the data multiple times, making it unrecoverable.
- Data Wiping Software: Programs like Eraser (Windows) or Disk Utility (macOS) can securely erase data.
- Multiple Overwrites: The more times the data is overwritten, the more secure the erasure.
- Physical Destruction: For highly sensitive data, consider physically destroying the flash drive.
- Avoid Quick Format: A quick format does not securely erase data.
17. What is the Impact of File Compression on Photo Quality When Downloading to a Flash Drive?
Lossy compression formats like JPEG reduce file size by discarding some image data, which can result in lower quality. Lossless formats like TIFF and PNG retain all image data, preserving quality.
- Lossy Compression (JPEG): Reduces file size but can introduce artifacts and loss of detail.
- Lossless Compression (TIFF, PNG): Preserves all image data but results in larger file sizes.
- Compression Level: Higher compression levels result in smaller file sizes but greater loss of quality.
- Editing: Avoid repeatedly saving JPEG files, as each save can further degrade image quality.
18. How Can I Use a Flash Drive to Transfer Photos Between Different Operating Systems?
Format the flash drive to exFAT, which is compatible with both Windows and macOS. Copy the photos to the drive on one operating system and then access them on the other.
- exFAT: The preferred file system for cross-platform compatibility.
- FAT32: Also compatible but has a 4GB file size limit.
- NTFS (Windows): Read-only on macOS by default.
- HFS+ (macOS): Not natively supported on Windows.
- Third-Party Drivers: Install third-party drivers to enable full read/write access to NTFS or HFS+ drives on the other operating system.
19. How Do I Download Photos from a Cloud Service (Google Drive, Dropbox) to a Flash Drive?
Download the photos from the cloud service to your computer, then transfer them to the flash drive. Use the cloud service’s desktop app for easier syncing.
- Desktop App: Install the Google Drive or Dropbox desktop app to sync files to your computer.
- Web Interface: Download files directly from the cloud service’s website.
- Download Folders: Download entire folders as ZIP files for easier management.
- Storage Space: Ensure your computer has enough storage space to download the files.
20. What Are the Legal Considerations When Downloading and Sharing Photos on a Flash Drive?
Respect copyright laws when downloading and sharing photos. Obtain permission from the copyright holder before distributing or using copyrighted images.
- Copyright: Protects the rights of photographers and artists.
- Fair Use: Allows limited use of copyrighted material for purposes such as criticism, commentary, and education.
- Creative Commons: Provides a framework for sharing and using copyrighted works with specific permissions.
- Model Releases: Obtain model releases for photos of people to avoid legal issues.
21. How Do I Download Photos from an Android Device to a Flash Drive?
Use an OTG (On-The-Go) adapter to connect the flash drive directly to your Android device. Use a file manager app to transfer the photos.
- OTG Adapter: Converts the micro-USB or USB-C port on your Android device to a standard USB port.
- File Manager App: Apps like File Manager, ES File Explorer, or Solid Explorer can manage files and transfer them to the flash drive.
- Android Settings: Some Android devices require you to enable OTG storage in the settings.
- USB Connection Mode: Select the “File Transfer” or “MTP” mode when connecting your Android device to a computer.
22. What are the Ethical Considerations When Downloading Photos to a Flash Drive?
Respect privacy and avoid downloading or sharing photos without consent. Be mindful of cultural sensitivities and avoid using images in a way that could be offensive or harmful.
- Privacy: Obtain consent before taking and sharing photos of individuals.
- Cultural Sensitivity: Be aware of cultural norms and avoid using images in a disrespectful way.
- Misinformation: Avoid using images to spread false or misleading information.
- Authenticity: Be transparent about any modifications or manipulations made to photos.
23. How to Fix “The File is Too Large” When Downloading to a Flash Drive?
If you encounter the “file is too large” error, it’s likely because your flash drive is formatted with FAT32, which has a 4GB file size limit. Reformat the flash drive to exFAT to support larger files.
- Backup Data: Back up all data on the flash drive before reformatting, as the process will erase all files.
- Format to exFAT: Use Disk Management (Windows) or Disk Utility (macOS) to format the drive to exFAT.
- Compatibility: Ensure your devices support the exFAT file system.
- Alternative Solutions: If reformatting is not an option, compress the file or split it into smaller parts.
24. How Can I Ensure Photos Retain Their Original Quality When Downloading to a Flash Drive?
To ensure photos retain their original quality, avoid compressing them using lossy formats like JPEG. Use lossless formats like RAW or TIFF, and avoid repeatedly saving JPEG files.
- Lossless Formats: Use RAW or TIFF for archiving and editing.
- Avoid JPEG Resaving: Each time you save a JPEG file, it undergoes compression, which can degrade image quality.
- Metadata Preservation: Ensure that metadata (EXIF data) is preserved during the transfer process.
- Color Profiles: Maintain the correct color profiles (e.g., sRGB, Adobe RGB) to ensure accurate color reproduction.
25. How Do I Use a Flash Drive to Create a Photo Backup System?
Create a photo backup system by regularly copying your photos to a flash drive and storing it in a separate location from your computer. Use backup software to automate the process.
- Regular Backups: Schedule regular backups to ensure that your photos are always protected.
- Offsite Storage: Store the flash drive in a different location to protect against disasters like fire or theft.
- Backup Software: Use software like Acronis True Image, EaseUS Todo Backup, or Carbon Copy Cloner to automate the backup process.
- Multiple Backups: Create multiple backups on different storage media for redundancy.
26. How To Overcome Errors When Downloading From An Apple Device To A Flash Drive?
To fix the import errors from an Apple device to a flash drive, it requires a specific folder structure. Your USB flash drive must have a DCIM folder. Inside the DCIM folder, place another folder where your image files are located.
Here is an example folder name:
- 100AAAAA
- 100NCD90
Image file must be “.jpg” rather than “.jpeg.” Also, the filename needs to be eight characters with the last four being numbers.
Here is an example of what to name a file:
- DSC_0001
- IMGP0001
Alt text: USB flash drive connected to a laptop, displaying a file transfer progress bar.
27. What are the advantages of importing pictures directly into the Photos app?
The advantage of importing pictures directly into the Photos app is that you can select the Library or an Album (assuming that you have a recent iOS version) as the destination.
dfphoto.net offers a wealth of knowledge and resources to help you master the art of photography and photo management. Explore our website for detailed tutorials, inspiring galleries, and a vibrant community of photographers. For example, if you import using the Files app for iOS13 or iOS14, your choices for photos are Library or Shared Album (not Album).
28. What are the advantages of using a USB Flash Drive?
USB flash drives offer portability, ease of use, and compatibility across various devices. They’re ideal for backing up photos, sharing files, and transporting data.
- Portability: Compact and lightweight, making them easy to carry.
- Compatibility: Works with most computers, cameras, and devices with USB ports.
- Ease of Use: Simple plug-and-play operation.
- Durability: Solid-state design makes them more resistant to physical damage compared to hard drives.
- Affordability: Available in various capacities and price points.
29. How Do I Verify That My Photos Have Been Successfully Downloaded To a Flash Drive?
After downloading photos to a flash drive, verify the transfer by opening the files on the drive and comparing them to the originals. Check for any missing files or corruption.
- Open Files: Open several photos on the flash drive to ensure they display correctly.
- Compare File Sizes: Compare the file sizes of the photos on the flash drive to the originals.
- Check for Errors: Look for any error messages or signs of corruption.
- View Metadata: Verify that the metadata (EXIF data) is intact.
- Test on Another Device: Test the flash drive on another computer or device to ensure compatibility.
30. How Do I Protect My Flash Drive From Malware?
Protect your flash drive from malware by scanning it regularly with antivirus software. Avoid using the flash drive on public computers or devices that may be infected.
- Antivirus Software: Use a reputable antivirus program to scan the flash drive regularly.
- Avoid Public Computers: Be cautious when using the flash drive on public computers or devices you don’t trust.
- Write Protection: Some flash drives have a write-protection switch that can prevent malware from being written to the drive.
- Keep Software Updated: Keep your antivirus software and operating system up to date to protect against the latest threats.
31. What Is The Difference Between A USB 2.0 and USB 3.0 Flash Drive When Downloading Photos?
A USB 3.0 flash drive offers significantly faster transfer speeds compared to a USB 2.0 flash drive, making it ideal for downloading large photo files.
- Transfer Speed: USB 3.0 has a maximum transfer speed of 5 Gbps (gigabits per second), while USB 2.0 has a maximum speed of 480 Mbps (megabits per second).
- Real-World Performance: In real-world scenarios, USB 3.0 can transfer files several times faster than USB 2.0.
- Compatibility: USB 3.0 is backward compatible with USB 2.0 ports, but you’ll only get USB 2.0 speeds.
- Cost: USB 3.0 flash drives are typically more expensive than USB 2.0 drives.
32. How To Manage Photos With Older IOS Versions With Flash Drives?
Importing photos from a USB flash drive on an older iPad running iOS10 will work, but you did not have the Album option.
dfphoto.net is dedicated to helping you navigate the evolving world of photography, providing up-to-date information and expert advice.
33. What Are Some Advanced Techniques For Managing Photos On A Flash Drive?
Advanced techniques include using photo management software, creating a portable photo archive, and using a flash drive as a bootable drive for photo editing.
- Photo Management Software: Use software like Adobe Bridge, Lightroom, or Capture One to organize, edit, and manage your photos on the flash drive.
- Portable Photo Archive: Create a self-contained photo archive on the flash drive with all the necessary software and files.
- Bootable Drive: Use a flash drive as a bootable drive with a portable operating system and photo editing software.
- Metadata Editing: Use software to add, edit, or remove metadata from your photos.
34. What Are The Best Practices For Labeling A Flash Drive Containing Photos?
Label the flash drive with a clear and concise description of the contents, date, and any other relevant information. Use a permanent marker or a label maker.
- Clear Description: Use a descriptive label like “Family Vacation 2024” or “Wedding Photos 2023.”
- Date: Include the date range of the photos on the flash drive.
- Contact Information: Add your name and contact information in case the flash drive is lost.
- Permanent Marker: Use a permanent marker that won’t fade or smudge.
- Label Maker: Use a label maker for a professional-looking label.
35. What Happens If My Computer Does Not Recognize My Flash Drive?
If your computer does not recognize your flash drive, try the following steps:
- Try a Different USB Port: Try plugging the flash drive into a different USB port on your computer.
- Restart Your Computer: Restart your computer and try again.
- Check Device Manager (Windows): Open Device Manager and look for any errors or warnings related to USB devices.
- Update Drivers: Update your USB drivers.
- Test on Another Computer: Test the flash drive on another computer to see if it is recognized.
- Format the Drive: If the drive is recognized on another computer, format it to a compatible file system.
36. What Are the Advantages of Using a Flash Drive over Cloud Storage for Photo Backup?
Flash drives offer several advantages over cloud storage for photo backup, including:
- Privacy: Your photos are stored locally and not on a third-party server.
- Control: You have complete control over your data.
- Speed: Transfer speeds can be faster than uploading and downloading from the cloud.
- Accessibility: You can access your photos even without an internet connection.
- One-Time Cost: You pay a one-time cost for the flash drive instead of a recurring subscription fee.
37. How Can I Password Protect Photos On A Flash Drive?
Password protect photos on a flash drive by using encryption software or built-in operating system features.
- Encryption Software: Use software like VeraCrypt, BitLocker (Windows), or FileVault (macOS) to encrypt the flash drive.
- Password-Protected Archives: Create password-protected ZIP or RAR archives of your photos.
- Operating System Features: Use built-in features to encrypt files or folders on the flash drive.
- Strong Passwords: Use strong, unique passwords to protect your photos.
38. How To Ensure Photos Are Not Corrupted When Downloading To A Flash Drive?
To prevent photo corruption, use a reliable USB cable, avoid interrupting the transfer process, and use a high-quality flash drive.
- Reliable USB Cable: Use a high-quality USB cable to ensure a stable connection.
- Avoid Interruptions: Do not interrupt the transfer process by disconnecting the flash drive or shutting down your computer.
- High-Quality Flash Drive: Use a flash drive from a reputable brand.
- Error Checking: Use error-checking software to scan the flash drive for errors.
39. What Are Some Creative Ways To Use Flash Drives For Photography?
Creative ways to use flash drives include creating a digital photo album, sharing photos with clients, and using a flash drive as a promotional tool.
- Digital Photo Album: Create a digital photo album on a flash drive to share with family and friends.
- Client Deliverables: Deliver photos to clients on a branded flash drive.
- Promotional Tool: Use a flash drive as a promotional tool by loading it with your portfolio and contact information.
- Gift Idea: Give a flash drive loaded with photos as a personalized gift.
40. How do I ensure my Flash Drive lasts a long time?
Store in a case away from dust, keep out of sunlight, don’t expose it to extreme temperatures, and scan for viruses often.
dfphoto.net is your go-to resource for mastering photography and photo management. Join our community today to enhance your skills, find inspiration, and connect with fellow photography enthusiasts.
Alt text: Close-up of a camera lens with sunlight reflecting on the glass, showcasing the intricate details of professional photography equipment.
FAQ: Downloading Photos to Flash Drive
1. How do I download photos to a flash drive from my computer?
Connect the flash drive to your computer, locate the photos you want to transfer, copy them, and paste them into the flash drive. Always eject the flash drive safely after the transfer.
2. What file system should I use for my flash drive to ensure compatibility with both Windows and Mac?
Use exFAT, as it’s compatible with both Windows and macOS without the 4GB file size limit of FAT32.
3. How can I speed up the photo downloading process to a flash drive?
Use a USB 3.0 port and flash drive, close unnecessary applications, and transfer files in smaller batches to improve speed.
4. What should I do if my computer doesn’t recognize the flash drive?
Try a different USB port, restart your computer, check Device Manager (Windows) for driver issues, and test the flash drive on another computer.
5. How can I protect my photos on a flash drive from unauthorized access?
Use encryption software like VeraCrypt or the built-in BitLocker (Windows) or FileVault (macOS) to password protect the flash drive.
6. How do I securely erase photos from a flash drive?
Use data wiping software like Eraser (Windows) or Disk Utility (macOS) to overwrite the data multiple times, making it unrecoverable.
7. What are the best practices for organizing photos on a flash drive?
Create folders based on date, event, or subject, and use a consistent naming convention for files to make searching easier.
8. How can I recover photos from a damaged flash drive?
Use data recovery software like Recuva, EaseUS Data Recovery Wizard, or Disk Drill to attempt to recover photos from a damaged flash drive.
9. What are the legal considerations when downloading and sharing photos on a flash drive?
Respect copyright laws, obtain permission from the copyright holder before distributing copyrighted images, and be mindful of model releases.
10. How do I download photos from my iPhone or iPad to a flash drive?
Use a Lightning to USB adapter or the Files app in iOS 13 and later to copy photos to the flash drive, ensuring it’s formatted to FAT32 or exFAT.
Ready to dive deeper into the world of photography? Visit dfphoto.net today for a wealth of resources, from detailed tutorials to inspiring galleries. Don’t miss the chance to connect with a community of passionate photographers and elevate your skills. Click here to explore dfphoto.net and start your photographic journey now! Address: 1600 St Michael’s Dr, Santa Fe, NM 87505, United States. Phone: +1 (505) 471-6001. Website: dfphoto.net.