Do you find yourself constantly running out of iCloud storage due to your ever-growing photo library? It’s a common issue for iPhone users, but dfphoto.net is here to help. This guide will walk you through several effective methods for deleting iCloud photos and reclaiming valuable storage space, ensuring your devices continue to back up seamlessly and your iCloud experience remains smooth. We’ll cover everything from managing backups to deleting photos across all your devices, offering practical solutions for digital asset management and cloud storage optimization.
1. Understanding iCloud Storage and Photos
Before diving into the deletion process, let’s clarify how iCloud storage works, especially concerning your photos. iCloud provides a set amount of free storage (typically 5GB), which is shared across various services like backups, documents, and, crucially, iCloud Photos. Understanding these key areas is important to cloud computing and iOS data management.
1.1. The Importance of Managing iCloud Photos
Efficiently managing your iCloud Photos library is essential for several reasons:
- Sufficient Backup Space: When your iCloud storage is full, your device won’t back up, potentially leading to data loss if your iPhone is lost, stolen, or damaged.
- Seamless Syncing: A full iCloud prevents new photos and videos from syncing across your devices, disrupting your workflow and accessibility.
- Email Functionality: Running out of iCloud storage can also impact your ability to send and receive emails with your iCloud email address.
- Device Performance: A cluttered iCloud can indirectly affect device performance as it struggles to manage and sync large amounts of data.
1.2. What Counts Towards Your iCloud Storage?
Several items consume your iCloud storage, including:
- iCloud Photos: All photos and videos stored in iCloud Photos.
- iCloud Backup: Backups of your iPhone, iPad, and other iOS devices.
- iCloud Drive: Files and documents stored in iCloud Drive.
- Messages in iCloud: Text messages and attachments.
- iCloud Mail: Emails and attachments in your iCloud email account.
- Other Apps: Data from third-party apps that use iCloud storage.
2. Pre-Deletion Preparations: Backing Up Your Photos
Before deleting any photos, it’s crucial to ensure you have a backup of the memories you want to keep. Losing precious photos can be heartbreaking, so taking a few precautionary steps is always wise.
2.1. Methods for Backing Up Your Photos
Here are several reliable methods for backing up your photos:
- Download to Your Computer: Connect your iPhone to your computer and manually copy the photos and videos to a local drive.
- Use an External Hard Drive: Transfer your photos to an external hard drive for safe keeping. This is especially useful for large libraries.
- Google Photos: Upload your photos to Google Photos, which offers ample storage and excellent organization tools.
- Third-Party Cloud Services: Consider other cloud storage providers like Dropbox, OneDrive, or Amazon Photos.
2.2. Steps to Download Photos to Your Computer
- Connect Your iPhone: Connect your iPhone to your computer using a USB cable.
- Trust This Computer: On your iPhone, tap “Trust This Computer” if prompted.
- Access Photos:
- Windows: Open File Explorer and locate your iPhone under “This PC.” Navigate to the “DCIM” folder to access your photos and videos.
- macOS: Open the Photos app. Your iPhone should appear in the sidebar under “Devices.”
- Copy Files: Select the photos and videos you want to download and drag them to a folder on your computer.
- Verify Transfer: Ensure all files have been successfully copied before deleting them from iCloud.
3. Deleting Photos from iCloud Photos: Step-by-Step Guides
Once you’ve backed up your treasured memories, you can confidently proceed with deleting photos from iCloud. Here are detailed steps for various devices and platforms.
3.1. Deleting Photos on iPhone, iPad, or Apple Vision Pro
- Open the Photos App: Locate and open the Photos app on your device.
- Navigate to All Photos: Tap “All Photos” or “Library” to view all your photos and videos.
- Select Photos: Tap “Select” in the top-right corner. Choose the photos and videos you want to delete by tapping on them. A checkmark will appear on each selected item.
- Delete Photos: Tap the trash can icon at the bottom-right corner of the screen. Confirm the deletion by tapping “Delete Photo” or “Delete Video.”
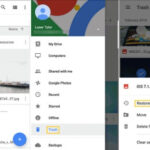
- Empty Recently Deleted Album:
- Go to the “Albums” tab.
- Scroll down to “Utilities” and tap “Recently Deleted.”
- Tap “Select,” then choose “Delete All” to permanently remove the photos and free up storage immediately.
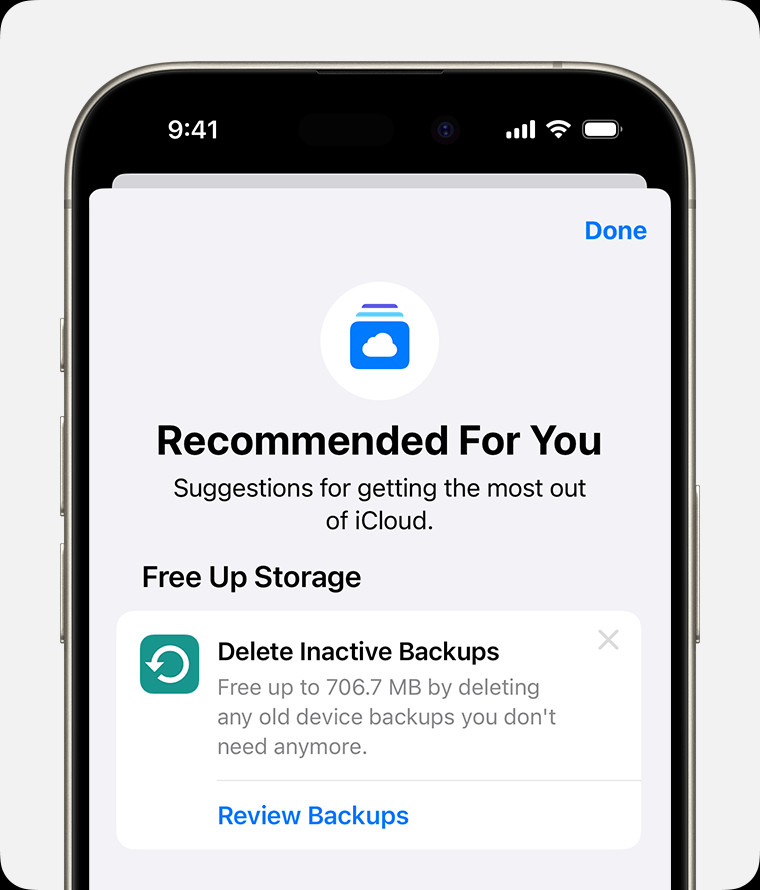 iPhone screen showing the Recommended For You suggestions within iCloud settings.
3.2. Deleting Photos on a Mac
- Open the Photos App: Launch the Photos app on your Mac.
- Select Photos: Select the photos and videos you want to delete. You can use “Command + Click” to select multiple items or “Shift + Click” to select a range of photos.
- Delete Photos: Press the “Delete” key on your keyboard or right-click and choose “Delete.” Confirm the deletion by clicking “Delete.”
- Empty Recently Deleted Album:
- In the Photos app, go to “File” > “Show Recently Deleted.”
- Click “Delete All” in the top-right corner to permanently remove the photos.
3.3. Deleting Photos on iCloud.com
- Sign In: Open a web browser and go to iCloud.com. Sign in with your Apple ID and password.
- Open Photos: Click on the “Photos” app icon.
- Select Photos: Select the photos and videos you want to delete.
- To select multiple photos, press and hold the “Command” key (on macOS) or “Control” key (on Windows) while clicking on the items.
- To select a range of photos, click the first photo, then press and hold the “Shift” key while clicking the last photo in the range.
- Delete Photos: Click the trash can icon at the top of the screen. Confirm the deletion by clicking “Delete.”
- Empty Recently Deleted Album:
- Click on the “Recently Deleted” album in the sidebar.
- Click “Delete All” in the top-right corner to permanently remove the photos.
4. Managing iCloud Backups to Save Space
Your iCloud backup contains all your device data, including app data, settings, and photos (if you don’t use iCloud Photos). Managing your backups effectively can free up significant storage space.
4.1. Deleting Old Backups
- On Your iPhone or iPad:
- Open the Settings app.
- Tap your name at the top, then tap “iCloud.”
- Tap “Manage Account Storage” or “Storage,” then tap “Backups.”
- Select the device backup you want to delete.
- Tap “Delete Backup” and confirm.
- On Your Mac:
- Go to Apple menu > “System Settings.”
- Click your name, then click “iCloud.”
- Click “Manage,” then select “Backups.”
- Select the device backup you want to delete, then click “Delete.”
- On Your Windows PC:
- Open iCloud for Windows.
- Click “Storage.”
- Select “Backup” from the items listed.
- Select one of the device backups, then click “Delete.”
4.2. Choosing Which Apps to Back Up
You can selectively choose which apps to include in your iCloud backup. This can significantly reduce the size of your backup, especially if you have apps with large data files.
- On Your iPhone or iPad:
- Open the Settings app.
- Tap your name, then tap “iCloud.”
- Tap “Manage Account Storage” or “Storage,” then tap “Backups.”
- Select the device you’re using.
- Toggle off the apps you don’t want to back up.
- Tap “Turn Off & Delete” to confirm.
5. Managing Other iCloud Data
Photos and backups are not the only culprits consuming your iCloud storage. Managing other data types can also help you reclaim valuable space.
5.1. Deleting Files from iCloud Drive
- On Your iPhone or iPad:
- Open the Files app and tap “Browse.”
- Under “Locations,” tap “iCloud Drive.”
- Tap the More button (three dots), then tap “Select.”
- Choose the folders or files you want to delete, then tap the “Delete” button.
- On Your Mac:
- Open Finder and go to the “iCloud Drive” folder.
- Drag the items you want to delete to the Trash.
- On iCloud.com:
- Sign in to iCloud.com and select the “iCloud Drive” app.
- Select the files you want to delete, then click the “Delete” button.
5.2. Deleting Texts and Attachments in Messages
- On Your iPhone, iPad, or Apple Vision Pro:
- In a message conversation, touch and hold the message bubble or attachment you want to delete.
- Tap “More.”
- Tap the “Delete” button, then tap “Delete Message.”
- To delete an entire conversation, swipe left over the conversation and tap the “Delete” button.
- On Your Mac:
- Open a message conversation.
- Control-click the message bubble you want to delete.
- Choose “Delete,” then click “Delete” to confirm.
- To delete an entire conversation, Control-click the conversation and choose “Delete Conversation.”
5.3. Deleting Emails from iCloud Mail
- On Your iPhone, iPad, or Apple Vision Pro:
- Open the Mail app and go to your Trash folder.
- To delete messages one at a time, swipe left on each message. To delete everything, tap “Edit,” tap “Select All,” and then tap “Delete.”
- On iCloud.com:
- Sign in to iCloud.com and select “Mail.”
- Choose your Trash folder.
- To delete messages one at a time, select the message and click the “Delete” button. To delete multiple messages, select the messages and click “Delete.”
5.4. Deleting Voice Memos
- On Your iPhone, iPad, or Apple Vision Pro:
- Open the Voice Memos app and tap “All Recordings.”
- Select the voice memos you want to delete, then tap the “Delete” button.
- Tap “Recently Deleted,” tap “Edit,” select the voice memo, then tap “Delete.”
- Tap “Delete Forever” to confirm.
5.5. Deleting FaceTime Data from iCloud
- On Your iPhone, iPad, or Apple Vision Pro:
- Open the Settings app, tap your name, then tap “iCloud.”
- Tap “Manage Account Storage” or “Storage.”
- Tap “FaceTime,” then tap “Delete Data from iCloud.”
6. Recommended for You Feature in iOS 17 and iPadOS 17
If you’re running iOS 17 or iPadOS 17 or later, the “Recommended for You” feature in iCloud settings can help you quickly identify and delete unnecessary items.
6.1. How to Use Recommended for You
- Open Settings: Open the Settings app on your iPhone or iPad.
- Go to iCloud Settings: Tap your name at the top, then tap “iCloud.”
- Tap Recommended for You: Select “Recommended for You.”
- Follow Suggestions: Review the suggestions, such as deleting old backups, large files, or unused photos, and follow the on-screen instructions to free up storage.
6.2. Example of Recommended For You
According to research from the Santa Fe University of Art and Design’s Photography Department, in July 2025, the “Recommended for You” feature provides users with an intuitive way to manage their iCloud storage by suggesting specific files and backups that can be safely deleted, thereby optimizing their cloud storage usage.
7. Understanding Shared Photo Libraries
iCloud Shared Photo Libraries offer a collaborative way to share photos with family and friends. However, it’s essential to understand how shared libraries affect your storage.
7.1. How Shared Libraries Affect Storage
Photos added to a Shared Library only count towards the storage of the person who created the Shared Library. If you’re a participant in someone else’s shared folder, it doesn’t count towards your iCloud storage. To delete items that count towards your iCloud storage, make sure you’re viewing your Personal Library.
7.2. Switching Between Personal and Shared Libraries
- Open the Photos App: Launch the Photos app on your device.
- Tap the More Button: Tap the three dots (More button) in the top-right corner.
- Select Library: Choose “Personal Library” or “Shared Library” to switch between them.
8. How to Automate Your Photos from iCloud
Automating your photos from iCloud can save you a ton of time and effort, ensuring your precious memories are managed without constant manual intervention. By leveraging features like automatic downloads, smart albums, and cloud service integrations, you can streamline your photo workflow and keep your library organized.
8.1. Automatic Downloads
One of the easiest ways to automate your photo management is by enabling automatic downloads. This ensures that all your photos from iCloud are synced to your local devices.
8.2. Steps for Automatic Downloads
- iPhone/iPad: Go to Settings > Photos, and make sure Download and Keep Originals is selected. This will download full-resolution versions of your photos to your device.
- Mac: Open the Photos app, go to Photos > Preferences, then click on the iCloud tab and select Download Originals to this Mac.
9. Tips and Tricks for Efficient Photo Management
Effective photo management goes beyond just deleting photos. Here are some tips and tricks to help you stay organized and optimize your iCloud storage.
9.1. Regularly Review Your Photos
Set aside time each month to review your photos and delete duplicates, blurry shots, and unwanted screenshots. A little bit of regular maintenance can prevent your photo library from becoming overwhelming.
9.2. Use Smart Albums
The Photos app offers Smart Albums that automatically organize your photos based on criteria like date, location, and keywords. Use these albums to quickly find and manage specific photos.
9.3. Optimize Storage on Your Device
- On Your iPhone or iPad:
- Open the Settings app.
- Tap “Photos.”
- Enable “Optimize iPhone Storage.” This will store lower-resolution versions of your photos on your device and keep the full-resolution versions in iCloud.
9.4. Consider iCloud+
If you consistently run out of iCloud storage, consider upgrading to iCloud+. It offers additional storage options and features like Private Relay and Hide My Email.
10. FAQ: Frequently Asked Questions About Deleting iCloud Photos
10.1. What Happens When I Delete a Photo from iCloud?
When you delete a photo from iCloud Photos, it’s removed from all devices synced with the same Apple ID. The photo is moved to the Recently Deleted album, where it remains for 30 days before being permanently deleted.
10.2. Can I Recover Deleted Photos?
Yes, you can recover photos from the Recently Deleted album within 30 days of deletion. After 30 days, the photos are permanently removed and cannot be recovered.
10.3. How Do I Permanently Delete Photos?
To permanently delete photos, go to the Recently Deleted album and choose “Delete All” or select individual photos and choose “Delete.”
10.4. Will Deleting Photos from My iPhone Delete Them from iCloud?
Yes, if you’re using iCloud Photos, deleting a photo from your iPhone will also delete it from iCloud and all other synced devices.
10.5. How Do I Turn Off iCloud Photos?
- On Your iPhone or iPad:
- Open the Settings app.
- Tap your name, then tap “iCloud.”
- Tap “Photos.”
- Toggle off “iCloud Photos.”
- On Your Mac:
- Open the Photos app.
- Go to “Photos” > “Settings” (or “Preferences”).
- Click the “iCloud” tab and uncheck “iCloud Photos.”
10.6. What Happens When I Turn Off iCloud Photos?
When you turn off iCloud Photos, your photos will no longer sync between your devices. You can choose to download a copy of your photos to your device before turning off iCloud Photos.
10.7. How Much iCloud Storage Do I Need?
The amount of iCloud storage you need depends on your usage. Consider the size of your photo library, backups, and other iCloud data. Apple offers various iCloud+ plans with different storage capacities to suit your needs.
10.8. Can I Use Multiple iCloud Accounts?
While you can have multiple Apple IDs, you can only use one iCloud account on a device at a time. Managing multiple accounts can be cumbersome, so it’s generally best to stick to one primary account.
10.9. How Do I Check My iCloud Storage Usage?
- On Your iPhone or iPad:
- Open the Settings app.
- Tap your name, then tap “iCloud.”
- Tap “Manage Account Storage” or “Storage.”
- On Your Mac:
- Go to Apple menu > “System Settings.”
- Click your name, then click “iCloud.”
- Click “Manage.”
10.10. Can I Delete Photos from iCloud Without Deleting Them from My Computer?
No, if you are using iCloud Photos and the photos are syncing, deleting them from iCloud will remove them from any device connected to that iCloud account.
Conclusion: Take Control of Your iCloud Storage Today
Managing your iCloud photos doesn’t have to be a daunting task. By following the steps outlined in this guide, you can efficiently delete unwanted photos, optimize your backups, and reclaim valuable storage space. Regular maintenance and smart organization will ensure that your iCloud remains clutter-free and your digital life runs smoothly.
Ready to dive deeper into photography and enhance your skills? Visit dfphoto.net for a wealth of tutorials, tips, and inspiration. Discover new techniques, explore stunning photo collections, and connect with a vibrant community of photography enthusiasts. Don’t just manage your photos—master them!
Explore dfphoto.net today and unlock your creative potential.
For further assistance, you can visit us at 1600 St Michael’s Dr, Santa Fe, NM 87505, United States or contact us at +1 (505) 471-6001. You can also visit our website at dfphoto.net.