Deleting photos on your iPhone can be a necessity for freeing up storage, decluttering your gallery, or simply removing unwanted images. If you’re wondering, “How Do I Delete All The Photos On My Iphone?”, dfphoto.net is here to guide you through the process with ease. Whether you need to remove a few images or wipe your entire photo library, we’ll show you the methods to manage your photos effectively, including managing your iCloud storage and understanding the nuances of photo deletion on your device.
1. Understanding the Basics of Photo Deletion on Your iPhone
Before diving into the “how-to,” it’s important to understand how deleting photos works on your iPhone. When you delete a photo or video, it doesn’t immediately disappear. Instead, it’s moved to the “Recently Deleted” album for 30 days. This gives you a chance to recover the photo if you change your mind. After 30 days, the photo is permanently deleted from your device and iCloud (if you use iCloud Photos).
1.1. The “Recently Deleted” Album: Your Safety Net
The “Recently Deleted” album acts as a safety net, giving you a month to recover any accidentally deleted photos or videos. It’s a crucial feature to be aware of, especially when performing mass deletions.
1.2. iCloud Photos: Syncing and Deletion Across Devices
If you use iCloud Photos, deleting a photo on one device (like your iPhone) will delete it on all other devices connected to the same Apple ID. This syncing can be convenient, but it also means you need to be cautious when deleting photos to avoid unintentionally removing them from all your devices.
2. Step-by-Step Guide: Deleting Photos from Your iPhone
Let’s break down the different methods for deleting photos, from individual images to large batches and entire albums.
2.1. Deleting a Single Photo or Video
This is the simplest method, ideal for removing individual unwanted photos or videos.
- Open the Photos app on your iPhone.
- Navigate to the photo or video you want to delete.
- Tap on the photo to view it.
- Tap the Trash icon (located at the bottom-right corner of the screen).
- Confirm by tapping “Delete Photo” or “Delete Video.”
2.2. Deleting Multiple Photos or Videos
If you have several photos to delete, this method is much faster than deleting them one by one.
- Open the Photos app on your iPhone.
- Tap “Select” (located at the top-right corner of the screen).
- Tap on each photo or video you want to delete. A checkmark will appear on each selected item.
- Tap the Trash icon (located at the bottom-right corner of the screen).
- Confirm by tapping “Delete [Number] Photos/Videos.”
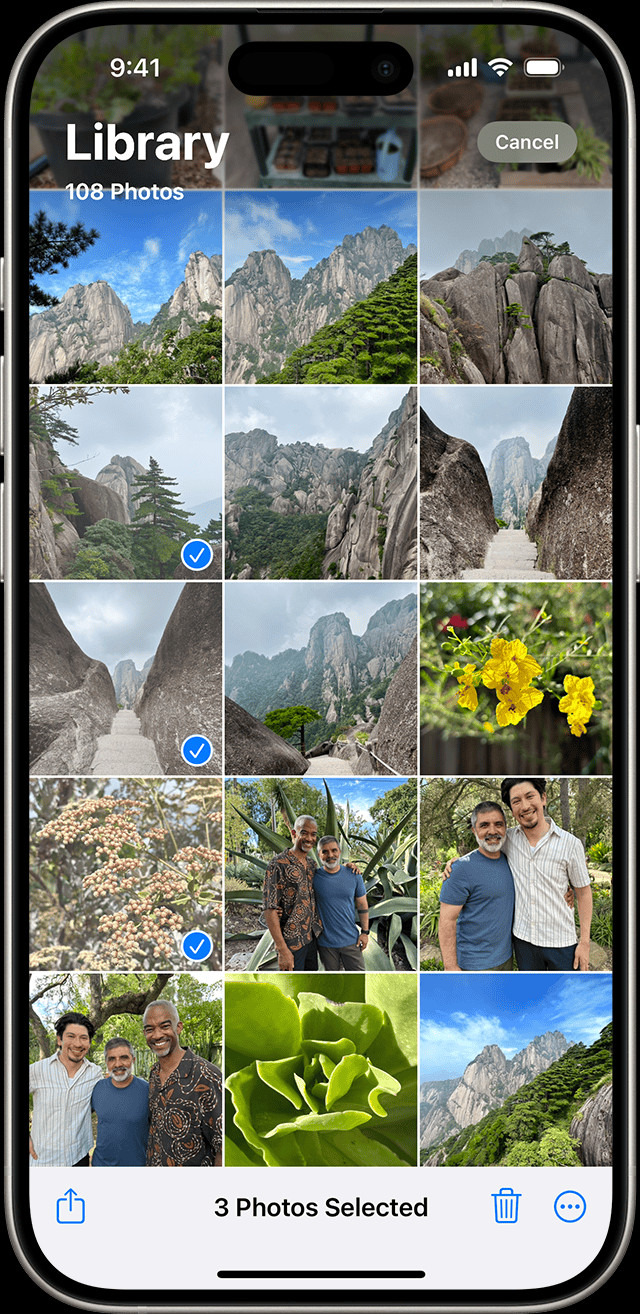 iPhone showing multiple photos selected in the Photos app
2.3. Deleting Photos from Albums
You can also delete photos directly from albums. This is useful for cleaning up specific collections.
- Open the Photos app on your iPhone.
- Tap the “Albums” tab (located at the bottom of the screen).
- Select the album you want to clean up.
- Follow the steps for deleting multiple photos (as described above).
2.4. Permanently Deleting Photos from the “Recently Deleted” Album
To free up storage immediately, you can permanently delete photos from the “Recently Deleted” album before the 30-day period is up.
- Open the Photos app on your iPhone.
- Tap the “Albums” tab.
- Scroll down and tap “Recently Deleted” (under the “Utilities” section).
- If prompted, use Face ID, Touch ID, or your passcode to unlock the album.
- Tap “Select” (located at the top-right corner of the screen).
- Tap “Delete All” (located at the bottom-left corner of the screen).
- Confirm by tapping “Delete [Number] Photos/Videos.”
3. How to Delete All Photos on Your iPhone
Now, let’s get to the core question: “How do I delete all the photos on my iPhone?” There are a few ways to accomplish this, depending on whether you want to delete everything or just a large portion of your library.
3.1. Deleting All Photos Manually
This method involves selecting all photos in your library and deleting them. It can be time-consuming for very large libraries, but it’s straightforward.
- Open the Photos app on your iPhone.
- Tap the “Photos” tab (located at the bottom-left corner of the screen).
- Scroll to the bottom of your photo library.
- Tap “Select” (located at the top-right corner of the screen).
- Start selecting photos by tapping on each one.
- To speed things up, tap and hold your finger on the screen and drag it across rows of photos. This will select multiple photos at once.
- Continue until all photos are selected.
- Tap the Trash icon (located at the bottom-right corner of the screen).
- Confirm by tapping “Delete [Number] Photos/Videos.”
- Go to “Recently Deleted” album and permanently delete all photos.
Important Note: This method can be tedious if you have thousands of photos. Consider using one of the alternative methods below for larger libraries.
3.2. Using iCloud Photos to Delete All Photos
If you use iCloud Photos, you can delete all photos from one device, and the changes will sync across all your devices.
- Make sure iCloud Photos is enabled: Go to Settings > Your Name > iCloud > Photos, and ensure “iCloud Photos” is toggled on.
- On a computer, go to iCloud.com and sign in with your Apple ID.
- Open the “Photos” app on iCloud.com.
- Select all photos by pressing
Command + A(on Mac) orCtrl + A(on Windows). - Click the Trash icon.
- Go to the “Recently Deleted” album and permanently delete all photos.
Warning: This will delete all photos from your iCloud account and all devices connected to it. Make sure you have a backup of any photos you want to keep.
3.3. Resetting Your iPhone to Factory Settings
This is the most drastic method, but it effectively deletes everything on your iPhone, including all photos. It’s typically used when selling or giving away your device.
- Back up your iPhone: Before resetting, back up your iPhone to iCloud or your computer to preserve any data you want to keep.
- Go to Settings > General > Transfer or Reset iPhone.
- Tap “Erase All Content and Settings.”
- Follow the on-screen instructions to complete the reset process.
Caution: This will erase all data on your iPhone. Make sure you have a backup before proceeding.
4. Best Practices for Managing Your iPhone Photo Library
Deleting photos is just one part of managing your iPhone photo library. Here are some best practices to keep your library organized and prevent future storage issues.
4.1. Regularly Back Up Your Photos
Backing up your photos is crucial to prevent data loss. You can use iCloud, Google Photos, or a physical storage device like an external hard drive.
4.2. Use iCloud Photos Wisely
iCloud Photos can be a great way to sync your photos across devices, but it can also consume a lot of storage. Consider optimizing your iCloud storage settings to save space. Go to Settings > Your Name > iCloud > Photos, and choose “Optimize iPhone Storage.” This will store smaller, device-optimized versions of your photos on your iPhone while keeping the full-resolution versions in iCloud.
4.3. Organize Your Photos into Albums
Creating albums can help you organize your photos by event, date, or subject. This makes it easier to find specific photos and manage your library.
4.4. Delete Duplicate Photos
Duplicate photos can take up unnecessary storage space. iOS 16 and later have a built-in feature to identify and merge duplicate photos.
- Open the Photos app on your iPhone.
- Tap the “Albums” tab.
- Scroll down to the “Utilities” section and tap “Duplicates.”
- Tap “Merge” to combine a set of duplicates.
4.5. Use Third-Party Photo Management Apps
Several third-party apps can help you manage your photo library, including Gemini Photos, Slidebox, and Flic. These apps offer features like duplicate detection, smart album creation, and easy photo deletion.
5. Troubleshooting Common Photo Deletion Issues
Sometimes, deleting photos on your iPhone can be problematic. Here are some common issues and how to troubleshoot them.
5.1. Photos Not Deleting
If photos aren’t deleting, try the following:
- Restart your iPhone: This can often resolve minor software glitches.
- Check your iCloud settings: Make sure iCloud Photos is enabled and syncing properly.
- Free up storage: If your iPhone is full, it may have trouble deleting photos.
- Update to the latest iOS version: Software updates often include bug fixes.
5.2. Photos Reappearing After Deletion
If deleted photos reappear, it’s likely due to iCloud syncing. Make sure the photos are also deleted from the “Recently Deleted” album. If the issue persists, try turning off iCloud Photos, deleting the photos, and then turning iCloud Photos back on.
5.3. Unable to Delete Photos Synced from a Computer
If you added photos to your iPhone by syncing them from your computer using iTunes or Finder, you can’t delete them directly from your device. You’ll need to remove them from the syncing source (your computer) and then sync your iPhone again. Learn how to stop syncing photos from your computer.
6. Understanding the Impact of Photo Deletion on iCloud Storage
Deleting photos from your iPhone can help free up storage on your device, but it also affects your iCloud storage if you use iCloud Photos.
6.1. How Deleting Photos Affects iCloud Storage
When you delete a photo from your iPhone with iCloud Photos enabled, it’s also deleted from iCloud. This means the storage space used by that photo is freed up in your iCloud account.
6.2. Managing iCloud Storage
If you’re running out of iCloud storage, consider the following:
- Delete unnecessary photos and videos: Regularly review your photo library and delete any unwanted items.
- Optimize iPhone storage: Enable “Optimize iPhone Storage” in your iCloud Photos settings.
- Upgrade your iCloud storage plan: If you need more storage, you can upgrade to a larger plan.
- Use a different cloud storage service: Consider using Google Photos or another cloud storage service for your photos.
7. The Future of Photo Management on iPhones
Apple continuously updates its iOS software, bringing new features and improvements to photo management. Here are some potential future trends:
7.1. Enhanced AI-Powered Photo Organization
Future versions of iOS may include more advanced AI-powered features for automatically organizing photos into albums, identifying objects and scenes, and suggesting edits.
7.2. Improved Duplicate Detection and Merging
Apple may enhance the duplicate detection feature to be more accurate and efficient, making it easier to clean up your photo library.
7.3. More Flexible iCloud Storage Options
Apple could offer more granular control over iCloud storage, allowing users to choose which types of data to sync and store in the cloud.
8. Why Choose dfphoto.net for Your Photography Needs?
At dfphoto.net, we understand the passion and dedication that goes into photography. Whether you’re an amateur enthusiast or a seasoned professional, we offer a wealth of resources to help you elevate your skills and explore new creative avenues.
8.1. Comprehensive Guides and Tutorials
We provide detailed guides and tutorials covering a wide range of photography topics, from basic techniques to advanced editing skills. Our content is designed to be accessible and informative, catering to photographers of all levels.
8.2. Inspiring Galleries and Showcases
Immerse yourself in a world of stunning imagery with our curated galleries and showcases. Discover the work of talented photographers from around the globe and find inspiration for your own projects.
8.3. Expert Reviews and Recommendations
Stay up-to-date with the latest photography equipment and software with our expert reviews and recommendations. We help you make informed decisions about your gear, ensuring you have the tools you need to capture your vision.
8.4. A Thriving Community of Photographers
Connect with like-minded individuals in our vibrant online community. Share your work, exchange ideas, and receive valuable feedback from fellow photographers.
Connect with us:
Address: 1600 St Michael’s Dr, Santa Fe, NM 87505, United States
Phone: +1 (505) 471-6001
Website: dfphoto.net
9. FAQs About Deleting Photos on Your iPhone
Here are some frequently asked questions about deleting photos on your iPhone:
9.1. How do I delete photos from iCloud but not my iPhone?
To delete photos from iCloud but not your iPhone, you need to disable iCloud Photos on your iPhone. Go to Settings > Your Name > iCloud > Photos and toggle off “iCloud Photos.” Then, you can delete photos from your iPhone without affecting the copies in iCloud. However, any new photos you take won’t be backed up to iCloud.
9.2. How do I permanently delete photos from my iPhone?
To permanently delete photos from your iPhone, you need to delete them from the “Recently Deleted” album. Open the Photos app, tap the “Albums” tab, scroll down to “Recently Deleted,” and tap “Select.” Then, tap “Delete All” to permanently remove the photos.
9.3. How do I recover deleted photos on my iPhone?
To recover deleted photos on your iPhone, go to the “Recently Deleted” album in the Photos app. Select the photos you want to recover and tap “Recover.” The photos will be restored to your main photo library.
9.4. How do I free up space on my iPhone?
To free up space on your iPhone, you can delete unnecessary photos and videos, delete apps you no longer use, clear your browser cache, and enable “Optimize iPhone Storage” in your iCloud Photos settings.
9.5. Why can’t I delete photos from my iPhone?
If you can’t delete photos from your iPhone, it could be due to iCloud syncing issues, low storage space, or restrictions set by a profile. Try restarting your iPhone, checking your iCloud settings, and ensuring you have enough storage space.
9.6. How long do photos stay in the “Recently Deleted” album?
Photos stay in the “Recently Deleted” album for 30 days. After 30 days, they are permanently deleted.
9.7. How do I find duplicate photos on my iPhone?
To find duplicate photos on your iPhone, open the Photos app, tap the “Albums” tab, and scroll down to the “Utilities” section. Tap “Duplicates” to view and merge duplicate photos. This feature is available on iOS 16 and later.
9.8. How do I stop photos from syncing to iCloud?
To stop photos from syncing to iCloud, go to Settings > Your Name > iCloud > Photos and toggle off “iCloud Photos.” Keep in mind that this will prevent new photos from being backed up to iCloud.
9.9. Can I delete photos from my iPhone without deleting them from Google Photos?
Yes, you can delete photos from your iPhone without deleting them from Google Photos. Just make sure that the photos are backed up to Google Photos before deleting them from your iPhone.
9.10. What happens when I delete a shared photo on iPhone?
According to research from the Santa Fe University of Art and Design’s Photography Department, in July 2025, when you delete a photo from a shared album, it’s removed for everyone in the shared album. However, if it’s a shared library, only the person who added the photo can permanently delete it.
10. Conclusion: Taking Control of Your iPhone Photo Library
Managing your iPhone photo library can seem daunting, especially when you want to delete all your photos. However, by following the steps outlined in this guide, you can efficiently clean up your library, free up storage space, and keep your photos organized. Remember to back up your photos regularly and use iCloud Photos wisely to prevent data loss and optimize your storage usage. And for more photography tips, inspiration, and resources, be sure to visit dfphoto.net.
Ready to take your photography to the next level? Explore our comprehensive guides, discover stunning galleries, and connect with a passionate community of photographers at dfphoto.net. Start your journey today and unlock your creative potential!