Instagram is a vibrant platform, filled with inspiring visuals, from breathtaking travel snaps to mouth-watering food photography. It’s natural to come across images you’d love to keep, whether for inspiration, reference, or simply to revisit later. If you’ve ever wondered, “How Do I Copy An Instagram Photo?” you’re not alone. Many users seek simple ways to save these images.
While Instagram doesn’t offer a straightforward “download” button for every photo you see, there are several legitimate and easy methods to save Instagram photos for your personal use. This guide will walk you through the most effective ways to save Instagram photos, ensuring you can keep the content you love.
We’ll explore three primary methods:
- Leveraging Instagram’s built-in Save to Collection Feature
- Using Screenshots to Capture Photos
- Downloading Photos Using Third-Party Tools (with caution)
- Saving Your Own Instagram Camera Photos
Let’s dive into each method to help you find the best way to save Instagram photos for your needs.
Method 1: Utilize Instagram Collections to Save Photos Within the App
Instagram Collections is a fantastic, often underutilized feature that allows you to save posts directly within the app. Think of it as creating your own visual bookmarks. This method is perfect for organizing and revisiting content you find interesting without needing to download anything to your device.
Let’s imagine you’re planning a home renovation and you’re browsing Instagram for design inspiration using hashtags like #homedesign or #interiordecor. You stumble upon a stunning living room design from a home decor influencer. You know you’ll want to refer back to it later for ideas. Saving it to a collection is the ideal solution.
Here’s how to save an Instagram photo to your collections:
-
Find the Photo You Want to Save: Navigate to the Instagram photo you wish to save. It could be on your feed, the Explore page, or a profile.
-
Tap the Bookmark Icon: Look for the bookmark icon located at the bottom right corner of the post, directly underneath the image and to the right of the comment and share icons. Tap this icon.
 Tapping the bookmark icon to save an Instagram photo to a collection
That’s it! The photo is now saved. The account owner is not notified when you save their post, so feel free to save as many as you like!
Now, let’s say you want to revisit that saved living room inspiration photo. Here’s how to access your saved collections:
-
Go to Your Profile: Tap your profile picture in the bottom right corner to go to your Instagram profile.
-
Tap the Menu Icon: In the top right corner of your profile page, tap the three horizontal lines (the menu icon).
-
Select “Saved”: In the menu that slides out, tap the “Saved” option (it also has the bookmark icon). This will take you to your saved posts. You’ll see that only you can view your saved photos, ensuring your saved collections are private.
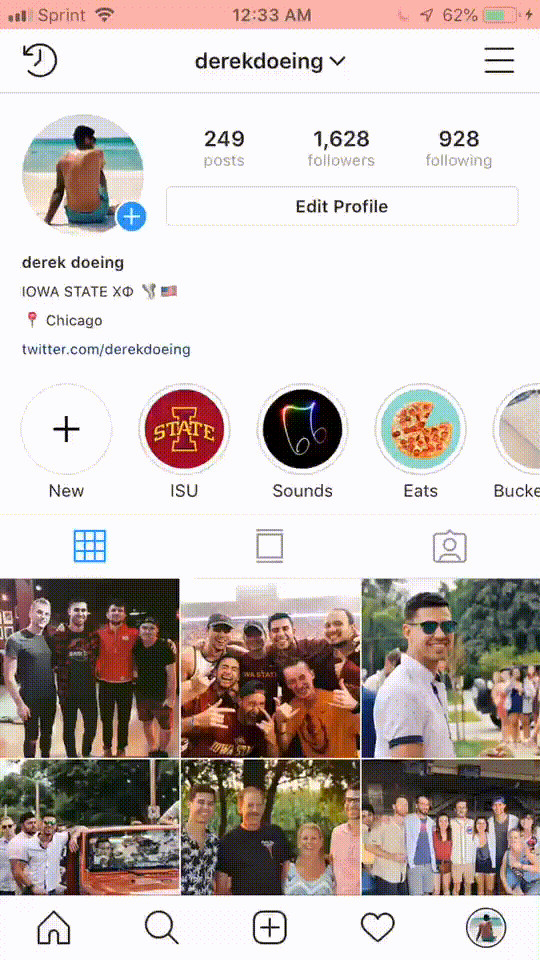 Accessing Instagram collections to view saved photos
If you’re managing an Instagram business profile, collections are incredibly useful for monitoring competitor content, gathering industry inspiration, or even curating user-generated content for potential features.
Organizing Your Saved Photos with Instagram Collections
Taking collections a step further allows for even better organization. You can create named collections to categorize your saved photos, making it easier to find exactly what you’re looking for.
Continuing with our home renovation example, you might want to create collections for “Living Room Ideas,” “Kitchen Designs,” and “Bathroom Inspiration.”
Here’s how to create and use Instagram Collections:
-
Access Your Saved Photos: Follow the steps above to go to your “Saved” section in your profile.
-
Create a New Collection: In the “Saved” section, you’ll see “Collections” at the top. Tap “Collections” and then tap “Create Collection” or the “+” icon in the top right corner.
-
Name Your Collection: Enter a name for your collection, for example, “Living Room Ideas,” and tap “Done.”
-
Add to Collection: After creating a collection, when you save a photo using the bookmark icon, a prompt will appear at the bottom of the photo asking if you want to “Save to Collection.” Tap this prompt, and a list of your collections will appear. Select the relevant collection to add the photo. You can also add previously saved photos to collections by going to your “All Posts” saved section, tapping the bookmark icon again on a saved post and choosing a collection.
 Saving an Instagram photo to a specific collection
By using Instagram Collections, you create a visually organized library of inspiration and saved content directly within the Instagram app.
Method 2: Screenshot Instagram Photos for a Quick Save
Screenshotting is the quickest and most straightforward way to “copy” an Instagram photo and save it to your device’s photo gallery or camera roll. It’s a universal method that works on any smartphone.
However, it’s important to note that screenshots save images at screen resolution, which can be lower quality than the original photo. Also, screenshots capture everything visible on your screen, including interface elements like usernames, captions, and icons, which you may need to crop out later.
If you need a quick visual reference and image quality isn’t paramount, screenshotting is a convenient option.
The process for taking a screenshot varies slightly depending on your phone:
- For iPhones: Typically, you press the side button (power button) and the volume up button simultaneously.
- For Android Phones: Usually, you press the power button and the volume down button at the same time.
Refer to specific guides for your phone model if needed, such as “how to screenshot for iPhone” or “how to screenshot for Android.”
While screenshots are fast, for marketing or professional use where image quality matters, downloading is generally recommended.
Method 3: Downloading Instagram Photos Using Third-Party Tools
For those seeking to save Instagram photos in higher quality, downloading is the preferred method. Several third-party websites and apps are designed to facilitate downloading Instagram photos.
Important Note: Always be mindful of copyright and usage rights when downloading Instagram photos. Just because you can download a photo doesn’t mean you have the right to reuse it for commercial purposes without permission from the copyright holder. It’s crucial to respect creators’ content and seek permission before repurposing downloaded photos.
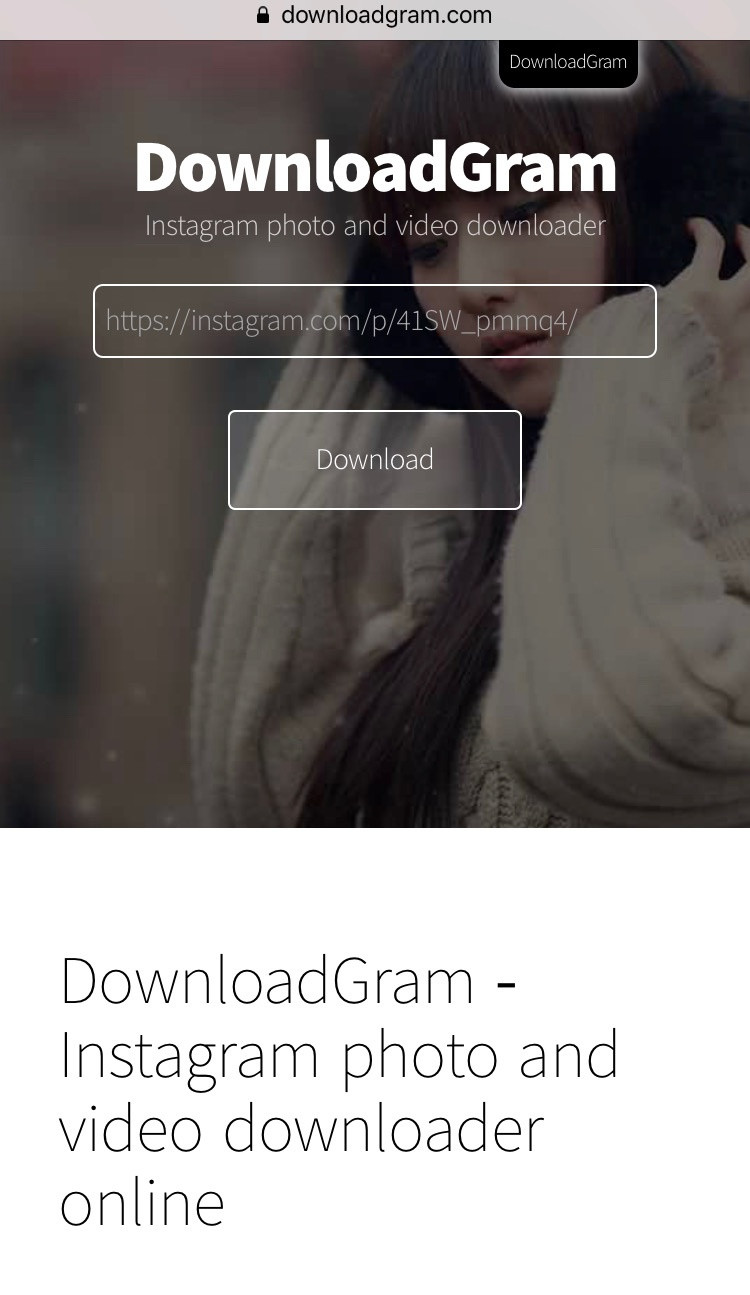
One popular and user-friendly website for downloading Instagram photos is DownloadGram. It’s a web-based tool, meaning you don’t need to install any software.
Here’s how to download an Instagram photo using DownloadGram on mobile (the process is similar on desktop):
- Copy the Photo Link: In the Instagram app, find the photo you want to download. Tap the three dots (more options menu) in the top right corner of the post. Select “Copy Link” from the menu.
 Copying the link of an Instagram photo to download it
-
Go to DownloadGram: Open your mobile web browser (like Chrome or Safari) and go to DownloadGram.com.
-
Paste the Link and Download: Paste the copied Instagram photo link into the input box on the DownloadGram website. Tap the “Download” button.
-
Save the Image: A new tab will open displaying the image. Tap and hold on the image. A menu will appear with options like “Save Image” or “Download Image.” Select “Save Image” to save the photo to your phone’s photo gallery or camera roll.
While DownloadGram is a convenient option, be cautious when using third-party downloaders and ensure they are reputable. Some less trustworthy services may contain excessive ads or pose security risks.
Method 4: Saving Photos You Take with the Instagram Camera
What about photos you create yourself using the Instagram camera? By default, Instagram might not save a copy of the photos you take within the app to your phone’s gallery. However, you can easily enable this feature in your Instagram settings.
Here’s how to ensure your Instagram camera photos are saved to your device:
-
Go to Your Profile Menu: Go to your Instagram profile and tap the three horizontal lines in the top right corner to open the menu.
-
Open Settings: Tap “Settings” at the bottom of the menu.
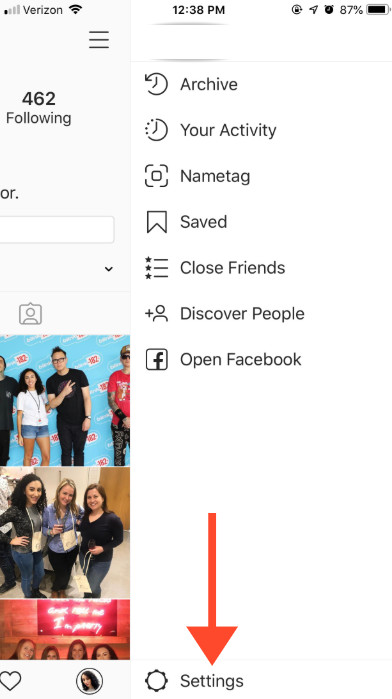 Accessing settings from the Instagram profile menu
-
Go to Account Settings: Tap “Account.”
-
Select “Original Photos” (or “Original Posts”): Tap “Original Photos” (or it might be labeled “Original Posts” on some versions).
-
Enable Saving Original Photos: Toggle the switch next to “Save Original Photos” (or “Save Original Posts”) to the “on” position.
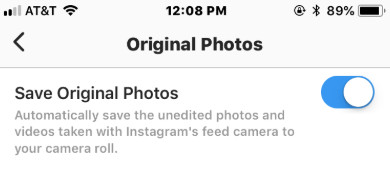 Enabling the "Save Original Photos" setting in Instagram
With this setting enabled, any photos you take using the Instagram camera will automatically be saved to your phone’s camera roll in addition to being uploaded to Instagram (if you choose to post them). This provides you with a local backup of your Instagram creations.
Save Smart and Respect Copyright
Having the ability to save Instagram photos is useful for various reasons, from personal inspiration to professional content gathering. Whether you choose to use Instagram’s built-in save feature, screenshots, or downloading tools, it’s important to be mindful of both security and copyright.
Always prioritize using secure methods and respect content creators by seeking permission before reusing downloaded photos, particularly for commercial purposes.
Choose the method that best suits your needs and start saving your favorite Instagram moments and inspirations!