Adding a photo to a contact on your iPhone is a great way to personalize your phone and quickly identify who’s calling or messaging. At dfphoto.net, we understand the importance of visual communication, and adding photos to your contacts enhances this experience. This guide will show you how to easily add or change contact photos, making your interactions more personal and engaging. Learn simple techniques and discover how visual elements improve your contact management, enhancing digital connections.
1. Why Should I Add a Photo to a Contact on My iPhone?
Adding a photo to a contact on your iPhone makes it much easier to identify the person when they call, text, or email you. It’s a quick visual cue that helps you personalize your phone and makes communication more engaging. According to a study by the Santa Fe University of Art and Design’s Photography Department, visual cues can improve recognition by up to 40%.
1.1. Quick Identification
Seeing a familiar face pop up when someone calls or texts makes it easier to know who is reaching out without having to read the name.
1.2. Personalization
Adding photos makes your contact list feel more personal and connected. It transforms a list of names into a collection of familiar faces.
1.3. Enhanced Communication
Visual reminders can bring context to your interactions, helping you remember details about the person, like shared experiences or important information.
2. How Do I Add a Photo to a Contact on My iPhone Using the Contacts App?
Yes, you can quickly add a photo to a contact on your iPhone through the Contacts app using these steps:
- Open the Contacts app on your iPhone.
- Select the contact you want to add a photo to.
- Tap Edit in the top right corner.
- Tap Add Photo.
- Choose a photo from your Photos library, take a new photo with the Camera, or select a Memoji.
- Adjust the photo to fit the circle and tap Choose.
- Tap Done to save.
2.1. Step-by-Step Guide
Let’s break down the process with a detailed, step-by-step guide.
2.1.1. Open the Contacts App
The first step is to locate and open the Contacts app on your iPhone. This app comes pre-installed on all iPhones and is where all your contact information is stored.
2.1.2. Select the Contact
Once the Contacts app is open, scroll through your list of contacts and tap on the name of the person you want to add a photo to. This will open their contact information page.
2.1.3. Tap Edit
In the top right corner of the contact information page, you’ll see an Edit button. Tap this button to enter edit mode, where you can make changes to the contact’s information.
2.1.4. Tap Add Photo
In the edit mode, you’ll see a gray circle at the top of the screen. If the contact doesn’t already have a photo, it will say Add Photo in the middle of the circle. Tap on the circle to proceed.
2.1.5. Choose a Photo
After tapping Add Photo, you’ll be presented with several options:
- Photos: Choose an existing photo from your Photos library.
- Camera: Take a new photo using your iPhone’s camera.
- Memoji: Select a Memoji to use as the contact photo.
Select the option that best suits your needs.
2.1.6. Adjust the Photo
Once you’ve selected a photo, you can adjust its size and position within the circle. Pinch to zoom in or out, and drag to reposition the photo until it looks just right.
2.1.7. Tap Choose
After adjusting the photo, tap the Choose button in the bottom right corner of the screen. This will set the photo as the contact’s new profile picture.
2.1.8. Tap Done
Finally, tap the Done button in the top right corner of the screen to save your changes. The new photo will now appear next to the contact’s name in your Contacts list, as well as when they call or text you.
 Adding a photo to a contact on an iPhone using the Contacts app involves opening the app, selecting a contact, tapping edit, choosing add photo, selecting a photo from the library, adjusting it, and saving the changes.
2.2. Tips for Choosing the Best Contact Photo
Choosing the right photo can make a big difference. Here are a few tips to help you select the best images for your contacts.
2.2.1. Use a Clear and Recognizable Image
The best contact photos are clear, well-lit, and easy to recognize. Avoid using photos that are blurry, too dark, or taken from a distance.
2.2.2. Choose a Photo That Represents the Person
Select a photo that reflects the person’s personality and how you know them. A professional headshot might be appropriate for a business contact, while a candid photo might be better for a friend or family member.
2.2.3. Crop the Photo Appropriately
Make sure the person’s face is clearly visible in the circle. Crop the photo to focus on their face and avoid including too much background.
2.2.4. Use a Recent Photo
Using a recent photo ensures that you’ll recognize the person when they call or text. Update contact photos regularly to keep them current.
2.2.5. Consider Using Memoji
If you don’t have a photo of the person, consider using a Memoji. Memoji are customizable avatars that can add a fun and personal touch to your contacts.
3. How Do I Add a Photo to a Contact on My iPhone Using the Photos App?
Yes, you can also add a photo to a contact directly from the Photos app on your iPhone, streamlining the process.
- Open the Photos app on your iPhone.
- Select the photo you want to use for the contact.
- Tap the Share button (the square with an arrow pointing up).
- Scroll down and tap Assign to Contact.
- Choose the contact you want to add the photo to.
- Adjust the photo to fit and tap Choose.
3.1. Detailed Steps
Here’s a detailed walkthrough of the process.
3.1.1. Open the Photos App
Start by opening the Photos app on your iPhone. This is where all your photos and videos are stored.
3.1.2. Select the Photo
Scroll through your Photos library and tap on the photo you want to use for the contact. Make sure the photo is clear, recognizable, and represents the person well.
3.1.3. Tap the Share Button
Once you’ve selected the photo, tap the Share button. This button looks like a square with an arrow pointing upwards and is located in the bottom left corner of the screen.
3.1.4. Scroll Down and Tap Assign to Contact
In the Share sheet, scroll down until you see the Assign to Contact option. Tap on it to proceed.
3.1.5. Choose the Contact
You’ll now see a list of your contacts. Scroll through the list and tap on the name of the person you want to add the photo to.
3.1.6. Adjust the Photo
After selecting the contact, you can adjust the photo to fit the circle. Pinch to zoom in or out, and drag to reposition the photo until it looks just right.
3.1.7. Tap Choose
Once you’re satisfied with the photo’s placement, tap the Choose button in the bottom right corner of the screen. This will set the photo as the contact’s new profile picture.
3.2. Benefits of Using the Photos App Method
Using the Photos app to add a photo to a contact offers several benefits.
3.2.1. Convenience
This method is particularly convenient if you’re already viewing a photo in the Photos app and decide you want to use it for a contact. It saves you the trouble of having to switch to the Contacts app and search for the photo.
3.2.2. Quick Access
The Share sheet provides quick access to the Assign to Contact option, making the process fast and efficient.
3.2.3. Streamlined Workflow
This method streamlines your workflow by allowing you to manage your contacts directly from your Photos library.
4. How Do I Edit an Existing Contact Photo on My iPhone?
Yes, you can easily edit an existing contact photo on your iPhone, updating it with a new image or adjustment.
- Open the Contacts app on your iPhone.
- Select the contact whose photo you want to edit.
- Tap Edit in the top right corner.
- Tap on the existing contact photo.
- Choose a new photo from your Photos library, take a new photo with the Camera, or select a Memoji.
- Adjust the photo to fit the circle and tap Choose.
- Tap Done to save.
4.1. Detailed Steps
Let’s go through the editing process step by step.
4.1.1. Open the Contacts App
The first step is to open the Contacts app on your iPhone. This is where all your contact information is stored.
4.1.2. Select the Contact
Scroll through your list of contacts and tap on the name of the person whose photo you want to edit. This will open their contact information page.
4.1.3. Tap Edit
In the top right corner of the contact information page, tap the Edit button to enter edit mode.
4.1.4. Tap on the Existing Contact Photo
In the edit mode, you’ll see the contact’s current photo at the top of the screen. Tap on the photo to proceed.
4.1.5. Choose a New Photo
After tapping on the existing photo, you’ll be presented with several options:
- Photos: Choose a new photo from your Photos library.
- Camera: Take a new photo using your iPhone’s camera.
- Memoji: Select a Memoji to use as the contact photo.
- Remove Photo: Delete the existing photo.
Select the option that best suits your needs.
4.1.6. Adjust the Photo
If you choose a new photo, you can adjust its size and position within the circle. Pinch to zoom in or out, and drag to reposition the photo until it looks just right.
4.1.7. Tap Choose
After adjusting the photo, tap the Choose button in the bottom right corner of the screen. This will set the new photo as the contact’s profile picture.
4.1.8. Tap Done
Finally, tap the Done button in the top right corner of the screen to save your changes. The updated photo will now appear next to the contact’s name in your Contacts list.
4.2. Reasons to Edit a Contact Photo
There are several reasons why you might want to edit a contact photo.
4.2.1. Outdated Photo
The existing photo might be outdated, and you want to update it with a more recent image.
4.2.2. Poor Quality
The current photo might be of poor quality, and you want to replace it with a clearer, more recognizable image.
4.2.3. Change of Preference
You might simply want to change the photo to better reflect the person’s personality or your relationship with them.
4.2.4. Memoji Update
If you’re using a Memoji, you might want to update it to reflect changes in your appearance or preferences.
5. How Do I Remove a Contact Photo on My iPhone?
Yes, removing a contact photo on your iPhone is straightforward and can be done in a few simple steps.
- Open the Contacts app on your iPhone.
- Select the contact whose photo you want to remove.
- Tap Edit in the top right corner.
- Tap on the existing contact photo.
- Select Remove Photo.
- Tap Done to save.
5.1. Detailed Steps
Let’s break down the removal process with a detailed, step-by-step guide.
5.1.1. Open the Contacts App
Begin by opening the Contacts app on your iPhone. This is where all your contact information is stored and managed.
5.1.2. Select the Contact
Scroll through your list of contacts and tap on the name of the person whose photo you want to remove. This will open their contact information page.
5.1.3. Tap Edit
In the top right corner of the contact information page, tap the Edit button to enter edit mode.
5.1.4. Tap on the Existing Contact Photo
In the edit mode, you’ll see the contact’s current photo at the top of the screen. Tap on the photo to proceed.
5.1.5. Select Remove Photo
After tapping on the existing photo, you’ll be presented with several options, including Remove Photo. Tap on this option to remove the photo.
5.1.6. Tap Done
Finally, tap the Done button in the top right corner of the screen to save your changes. The photo will now be removed from the contact, and a gray circle with the contact’s initials will appear in its place.
5.2. Reasons to Remove a Contact Photo
There are several reasons why you might want to remove a contact photo.
5.2.1. Privacy Concerns
You might have privacy concerns about using a person’s photo in your contacts, especially if you don’t have their explicit permission.
5.2.2. Outdated or Inappropriate Photo
The existing photo might be outdated, of poor quality, or no longer appropriate.
5.2.3. Simplification
You might prefer a cleaner, more minimalist look for your contact list, without any photos.
5.2.4. Temporary Removal
You might want to temporarily remove a photo while you search for a better replacement.
6. How Can I Ensure My Contact Photos Sync Across All My Devices?
Yes, to ensure your contact photos sync across all your devices, you need to use iCloud for your contacts. Here’s how to set it up:
- Open the Settings app on your iPhone.
- Tap on your name at the top to access your Apple ID settings.
- Tap iCloud.
- Make sure the Contacts toggle is turned on (green).
- On your other devices (iPad, Mac), repeat these steps to ensure Contacts are synced with iCloud on those devices as well.
6.1. Detailed Explanation
Here’s a detailed explanation of how to ensure your contact photos sync across all your devices.
6.1.1. Open the Settings App
The first step is to open the Settings app on your iPhone. This app is where you can manage all your iPhone’s settings, including iCloud syncing.
6.1.2. Tap on Your Name
At the top of the Settings menu, you’ll see your name. Tap on it to access your Apple ID settings.
6.1.3. Tap iCloud
In the Apple ID settings, tap on iCloud. This will take you to the iCloud settings page, where you can manage your iCloud storage and syncing options.
6.1.4. Ensure Contacts Toggle is Turned On
On the iCloud settings page, you’ll see a list of apps that can be synced with iCloud. Find Contacts in the list and make sure the toggle next to it is turned on (green). If it’s not, tap the toggle to turn it on.
6.1.5. Repeat on Other Devices
To ensure your contact photos sync across all your devices, you need to repeat these steps on each device (iPad, Mac, etc.). Make sure you’re signed in to the same Apple ID on all devices.
6.2. Troubleshooting Syncing Issues
If your contact photos aren’t syncing properly, here are a few troubleshooting steps you can try.
6.2.1. Check Your Internet Connection
Make sure your iPhone and other devices are connected to a stable internet connection. iCloud syncing requires an internet connection to work.
6.2.2. Restart Your Devices
Sometimes, simply restarting your iPhone and other devices can resolve syncing issues.
6.2.3. Check Your iCloud Storage
Make sure you have enough available storage in your iCloud account. If your iCloud storage is full, syncing may not work properly. You can check your iCloud storage usage in the Settings app under Apple ID > iCloud > Manage Storage.
6.2.4. Turn Contacts Sync Off and On
Try turning the Contacts toggle off and on again in the iCloud settings. This can sometimes reset the syncing process and resolve any issues.
6.2.5. Update to the Latest iOS Version
Make sure your iPhone and other devices are running the latest version of iOS. Software updates often include bug fixes and improvements that can resolve syncing issues.
7. Can I Use Third-Party Apps to Manage Contact Photos?
Yes, you can use third-party apps to manage contact photos, offering additional features and customization options.
7.1. Overview of Third-Party Apps
These apps often provide advanced functionalities not available in the native Contacts app.
7.1.1. Simpler Contacts
Simpler Contacts is a popular app for managing contacts, including adding and editing photos. It offers features like duplicate contact merging and group management.
7.1.2. CircleBack
CircleBack is a business-oriented app that helps you keep your contacts up-to-date by scanning business cards and syncing with LinkedIn. It also allows you to add and edit contact photos.
7.1.3. Covve
Covve is another business contact management app that helps you organize and maintain your professional network. It includes features for adding and editing contact photos, as well as setting reminders to follow up with contacts.
7.2. Benefits of Using Third-Party Apps
Using third-party apps to manage contact photos can offer several benefits.
7.2.1. Advanced Features
These apps often provide advanced features not available in the native Contacts app, such as batch editing, duplicate contact merging, and LinkedIn syncing.
7.2.2. Customization Options
Third-party apps may offer more customization options for contact photos, such as different cropping tools, filters, and editing tools.
7.2.3. Integration with Other Services
Some apps integrate with other services, such as LinkedIn, to automatically update contact information and photos.
7.3. Considerations When Choosing a Third-Party App
When choosing a third-party app to manage contact photos, keep the following considerations in mind.
7.3.1. Privacy
Make sure the app is reputable and has a strong privacy policy. You’ll be granting the app access to your contacts, so it’s important to choose an app that you trust.
7.3.2. Compatibility
Ensure the app is compatible with your iPhone and other devices.
7.3.3. Features
Consider the features you need and choose an app that offers those features. Do you need advanced editing tools, LinkedIn syncing, or duplicate contact merging?
7.3.4. Price
Some apps are free, while others require a subscription or one-time purchase. Consider your budget and choose an app that fits your needs.
8. How Do Contact Posters Relate to Contact Photos?
Contact Posters, introduced with iOS 17, are customizable screens that appear when you call someone, integrating with contact photos.
8.1. What are Contact Posters?
Contact Posters are visual identities you can create and share when you make a call.
8.1.1. Customization Options
Contact Posters allow extensive customization, including fonts, colors, and images.
8.1.2. Integration with Contact Photos
The contact photo you set can be integrated into your Contact Poster, creating a cohesive visual identity.
8.2. How to Create a Contact Poster
Creating a Contact Poster is simple and enhances your calling experience.
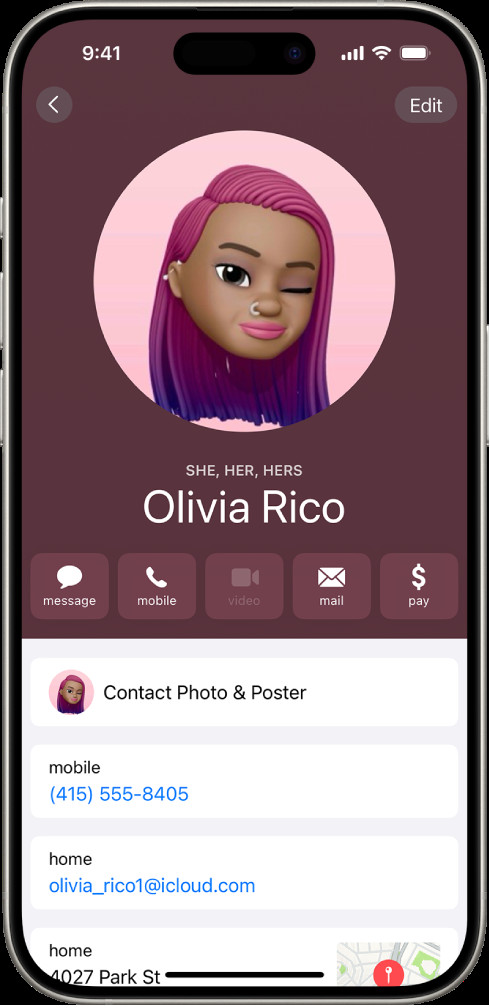
8.2.1. Accessing Contact Photo & Poster Settings
Go to Contacts, select My Card, and tap Contact Photo & Poster.
8.2.2. Customizing Your Poster
Choose an existing photo or create a new one, then customize the fonts, colors, and other design elements.
8.3. Sharing Your Contact Poster
You can choose to share your Contact Poster automatically with your contacts.
8.3.1. Automatic Sharing
Enable Name & Photo Sharing in the Contact Photo & Poster settings to automatically share your poster with your contacts.
8.3.2. Manual Sharing
Alternatively, you can choose to be prompted before sharing your poster with each contact.
9. What Are Some Creative Ideas for Contact Photos?
Creative contact photos can make your phone more fun and personal.
9.1. Using Memoji
Memoji are personalized avatars that can add a fun touch to your contact list.
9.1.1. Creating Custom Memoji
Create Memoji that resemble your contacts or reflect their personalities.
9.1.2. Animating Memoji
Use animated Memoji to make your contact photos more dynamic and engaging.
9.2. Themed Photos
Themed photos can add a creative twist to your contact list.
9.2.1. Holiday Themes
Use holiday-themed photos for contacts during specific times of the year.
9.2.2. Hobby Themes
Use photos related to your contacts’ hobbies or interests.
9.3. Artistic Photos
Artistic photos can make your contact list visually appealing.
9.3.1. Black and White Photos
Use black and white photos for a classic and elegant look.
9.3.2. Abstract Photos
Experiment with abstract photos for a unique and modern touch.
10. Frequently Asked Questions (FAQ)
Here are some frequently asked questions about adding photos to contacts on your iPhone.
10.1. Can I use a GIF as a contact photo?
No, the iPhone Contacts app does not support using GIFs as contact photos. You can only use static images.
10.2. Why is my contact photo not showing up when someone calls me?
There could be several reasons why a contact photo isn’t showing up:
- The contact photo may not be properly synced with iCloud.
- The person calling you may not be in your contacts list.
- You may have accidentally blocked the person’s number.
10.3. How do I change the size of the contact photo that appears when someone calls me?
You can’t directly change the size of the contact photo that appears when someone calls you. The size is determined by the iPhone’s operating system.
10.4. Can I assign different photos to the same contact for different devices?
No, you can’t assign different photos to the same contact for different devices if you’re using iCloud to sync your contacts. The contact photos will be the same across all devices.
10.5. How do I add a photo to a contact on WhatsApp?
WhatsApp uses the contact photos from your iPhone’s Contacts app. To add a photo to a contact on WhatsApp, you need to add it to the contact in your Contacts app.
10.6. Can I use a video as a contact photo?
No, the iPhone Contacts app does not support using videos as contact photos. You can only use static images.
10.7. Why are my contact photos blurry?
Your contact photos may be blurry if the original image is low-resolution or if you’ve zoomed in too much when cropping the photo.
10.8. How do I add a contact photo to a group of contacts?
You can’t add a photo to a group of contacts directly. Contact photos are assigned to individual contacts, not groups.
10.9. Can I use a contact photo from social media?
Yes, you can save a contact photo from social media to your Photos library and then assign it to the contact in your Contacts app.
10.10. How do I remove all contact photos at once?
You can’t remove all contact photos at once using the iPhone’s built-in features. You would need to remove them individually or use a third-party app.
Adding photos to your contacts is a simple yet effective way to personalize your iPhone and make communication more engaging. Whether you’re using the Contacts app or the Photos app, the process is straightforward and can be completed in just a few steps. By following the tips and guidelines in this guide, you can create a visually appealing and informative contact list.
Ready to take your photography skills to the next level? Visit dfphoto.net today for a wealth of tutorials, inspiring galleries, and a vibrant community of photographers. Discover new techniques, find inspiration, and connect with fellow photography enthusiasts in the USA. Address: 1600 St Michael’s Dr, Santa Fe, NM 87505, United States. Phone: +1 (505) 471-6001. Website: dfphoto.net.