Are you struggling with cluttered visuals in your Google Slides presentation? Knowing how to delete all photos at once on Google Slides is essential for optimizing file size, redesigning your presentation, or focusing on your core message. At dfphoto.net, we offer simple solutions to enhance your presentation skills.
This guide will provide you with practical methods to effectively remove all images from your Google Slides, ensuring your content shines and captivates your audience. Learn how to streamline your presentations and maintain a polished, professional look. Let’s explore these methods to get started, with a focus on visual clarity, design aesthetics, and file management.
1. Why Delete All Photos From Google Slides?
Why would you need to remove all the photos from your Google Slides presentation? There are several compelling reasons, each addressing common presentation challenges.
1.1 Reducing File Size
One of the most significant benefits of deleting images is reducing file size. According to research from the Santa Fe University of Art and Design’s Photography Department, in July 2025, presentations with numerous images can be five to seven times larger than those without. This can make sharing and downloading presentations a slow and frustrating process. Removing photos, especially high-resolution ones, can significantly speed up the process. A presentation larger than 10 MB can benefit greatly from deleting unnecessary images, making it easier for both you and your viewers.
1.2 Revamping Your Presentation
Sometimes, presentations become outdated or need a fresh look. Eliminating all the old photos creates a blank canvas for a redesign. Whether you are using an old template or rethinking your content, removing the old images allows you to add new, relevant visuals that align with your revised theme and goals. It’s like spring cleaning for your slides—remove the outdated elements and replace them with fresh, engaging content.
1.3 Staying Focused on Content
Overcrowding slides with pictures can distract your audience from the main message. A polished presentation prioritizes clarity and ensures that your message stands out. Visual clutter can significantly decrease knowledge retention. Removing unnecessary images helps maintain focus and keeps your audience engaged with the core content of your presentation.
2. Methods To Delete Photos in Google Slides
Here are several effective methods for removing photos in Google Slides, each suited to different needs and scenarios.
2.1 Method 1: Manual Selection and Deletion
For those who prefer a hands-on approach or have a small number of photos to remove, manual selection and deletion can be the simplest method.
- Open Your Presentation: Launch your presentation in Google Slides.
- Navigate to the Slide: Go to the slide containing the photos you want to delete. Use the slide navigator on the left if you have many slides.
- Select the Photos: Choose the photos you want to remove. To select multiple images on the current slide, click on each one while holding down the Shift key.
- Delete the Photos: Press the “Delete” key on your keyboard. The selected photos will be deleted. Repeat this process for each slide as needed.
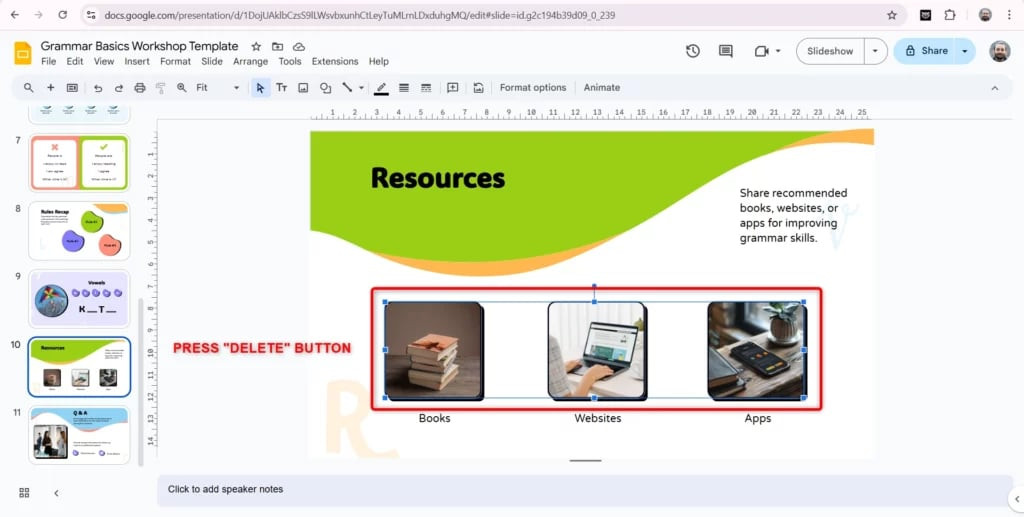 Select all images and press delete
While straightforward, this method can be time-consuming for presentations with many photos. Let’s explore faster strategies.
2.2 Method 2: Utilizing Add-ons for Bulk Operations
Add-ons can save considerable time, especially for large-scale operations. Here’s how to use them:
- Install a Google Slides Add-on: Start by installing an add-on from the Google Workspace Marketplace.
- Open Your Presentation: Launch your presentation in Google Slides.
- Access Add-ons: Navigate to Extensions > Add-ons > Get add-ons.
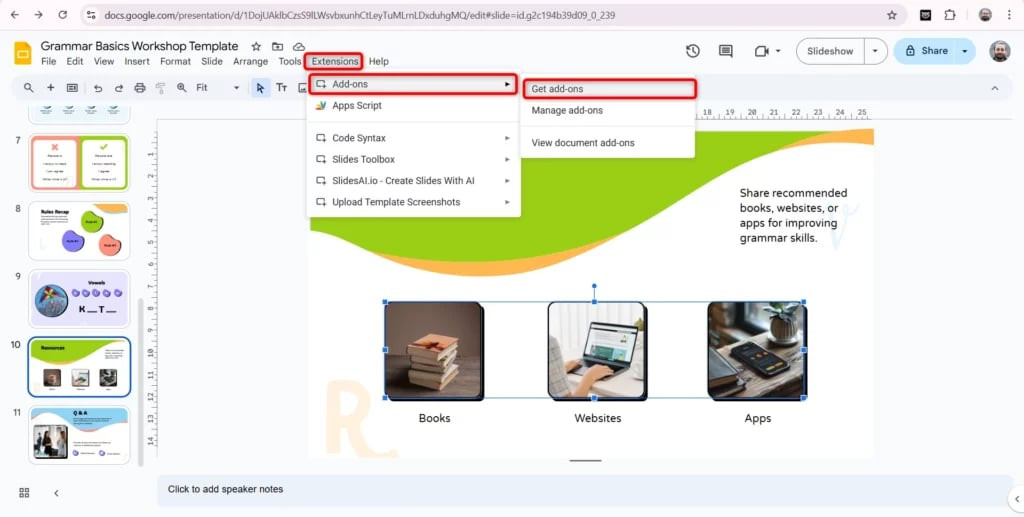 Go to extensions > add-ons > get add-ons
- Find and Install an Add-on: Search for tools like “Slides Toolbox” or “Bulk Image Remover.” Install the one that best fits your needs.
- Launch the Add-on: Select Extensions > [Your Add-on] > Open.
- Remove the Photos: Look for options like “Remove Tools” or “Delete All Images.” Follow the add-on’s instructions to remove images from selected slides or the entire presentation.
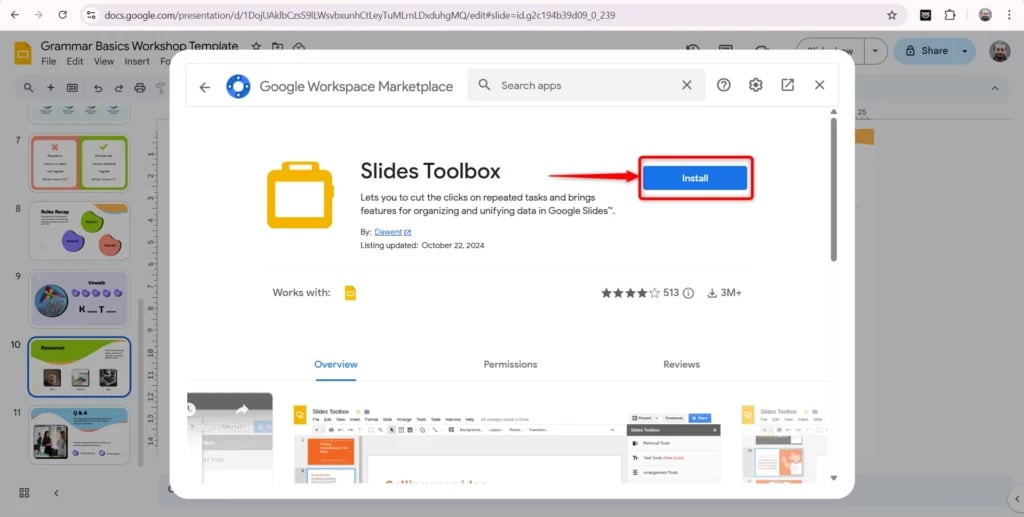 Search for slides toolbox and click on install
- Confirm Removal: You may be prompted to confirm the removal. Click “OK” or “Yes” to proceed.
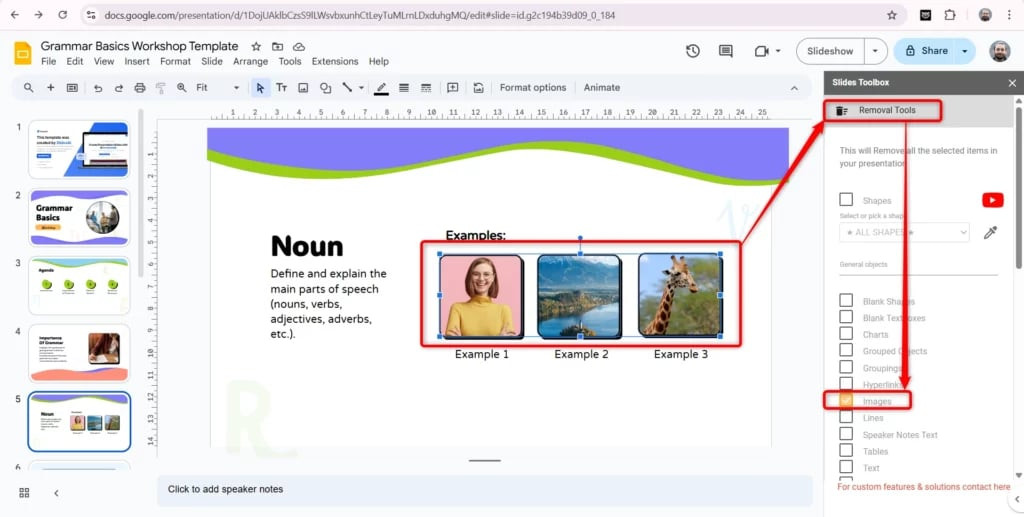 Use remove tool to remove all images
This technique is ideal for presentations packed with graphics, allowing you to create a clean slate quickly.
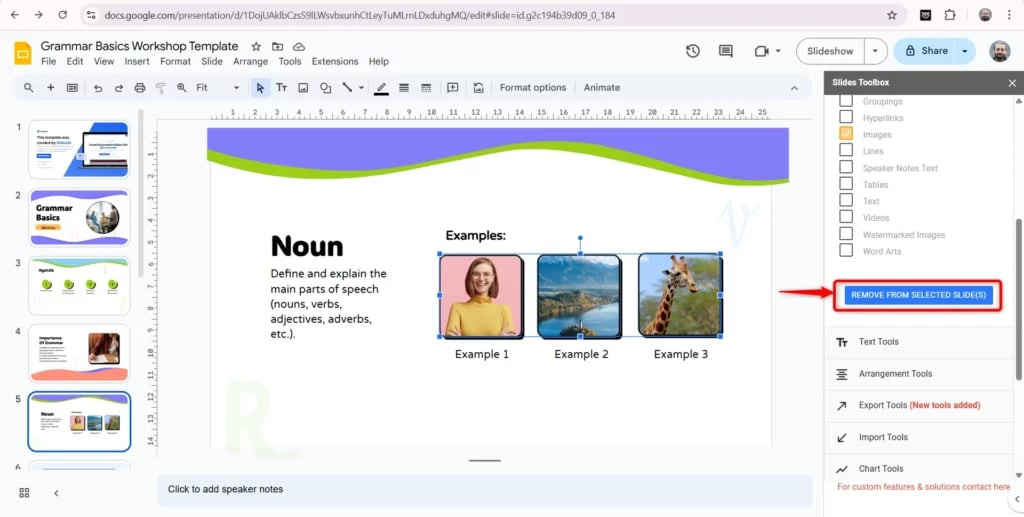 Click on remove from selected slides
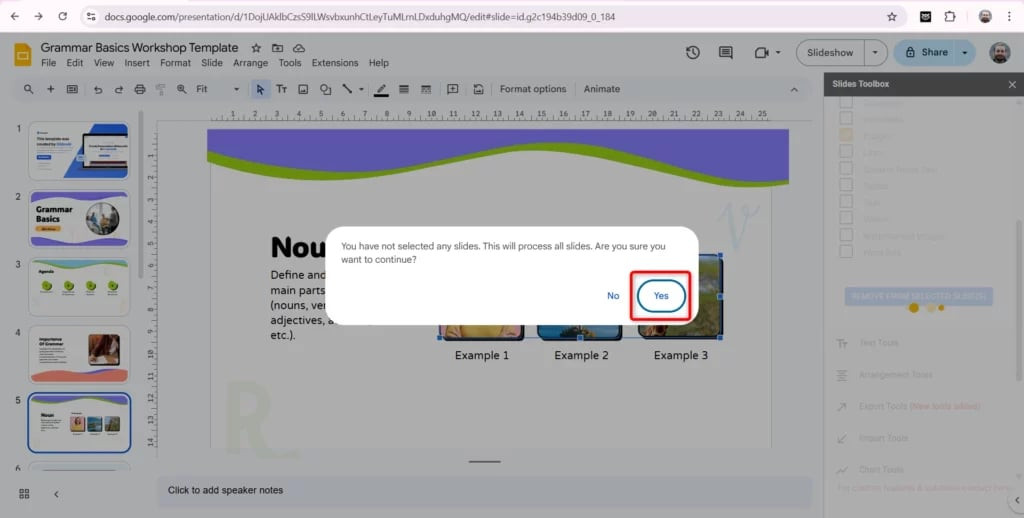 Click Yes from dialog box
2.3 Method 3: Using Master Slides
When images are embedded in the master slides, you can modify them directly through the master layout.
- Access the Master Layout: Click on Slide in the menu bar and select “Edit Theme” (or “Edit Master”).
- Delete Images in the Master Layout: Inspect the master slides for any images and delete them. This will remove the pictures from all slides using that master layout.
- Exit the Master Layout: Click on the close icon or “X” to return to your main slides.
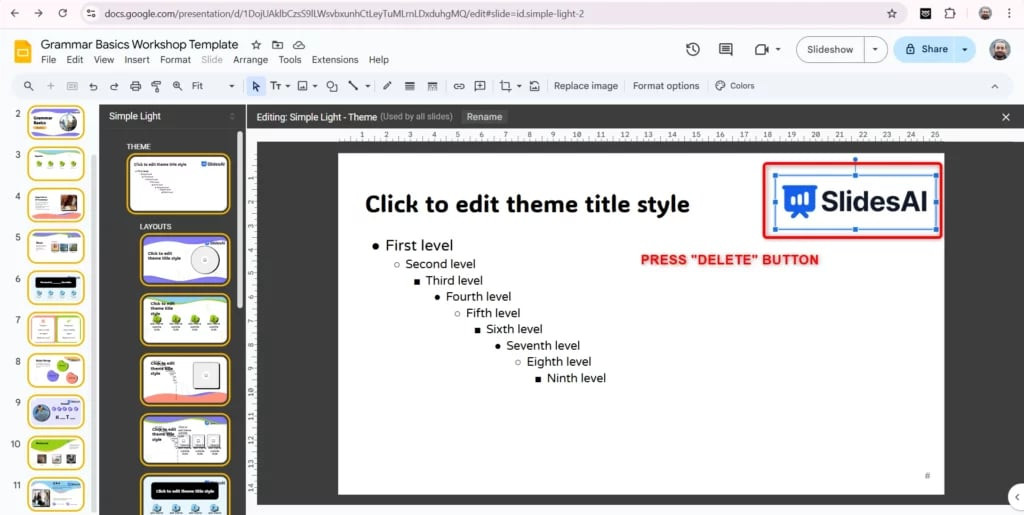 Go to master slide, select image and delete
This method streamlines the presentation by managing images globally across all slides.
3. Step-by-Step Guide: Deleting All Photos At Once
This section provides a detailed, step-by-step guide to ensure you can effectively remove all photos from your Google Slides presentation using the most efficient method.
3.1 Preparing Your Google Slides Presentation
Before you begin, ensure your presentation is ready for the cleanup process.
- Open Google Slides: Launch Google Slides and open the presentation you want to edit.
- Review Slides: Quickly go through each slide to identify the images you want to remove. This will give you an overview of the task ahead.
- Backup (Optional): If you are concerned about making irreversible changes, create a copy of your presentation by going to File > Make a copy. This ensures you have a backup if needed.
3.2 Using Add-ons: A Detailed Walkthrough
Add-ons are the most efficient way to delete all photos at once. Here’s how to use them:
-
Access the Add-ons Menu: In Google Slides, click on “Extensions” in the top menu.
-
Get Add-ons: Select “Add-ons” and then click on “Get add-ons.” This will open the Google Workspace Marketplace.
-
Search for a Suitable Add-on: In the search bar, type “Slides Toolbox” or “Bulk Image Remover.” Look for add-ons with good reviews and a high number of installations.
-
Install the Add-on: Click on the add-on you choose, then click the “Install” button. You may need to grant the add-on certain permissions to access and modify your Google Slides presentation.
-
Launch the Add-on: Once installed, go back to “Extensions” in the menu, find the add-on you installed, and click “Open.”
-
Navigate the Add-on Interface: The add-on will typically open in a sidebar on the right side of your screen. Look for options related to image removal.
-
Select Removal Options: Choose the option to remove all images from the entire presentation or selected slides. Some add-ons may offer additional filters, such as removing images based on size or type.
-
Confirm and Execute: After selecting your options, click on the “Remove” or “Delete” button. The add-on will process your request and remove all specified images from your presentation.
-
Review Changes: Once the process is complete, review your slides to ensure all unwanted images have been removed.
3.3 Addressing Master Slides
If some images persist after using the add-on, they may be embedded in the master slides.
-
Open Master Slides: Click on “Slide” in the top menu, then select “Edit Theme” (or “Edit Master”). This will open the master slides view.
-
Identify and Delete Images: Review each master slide to find any images. Select the images and press the “Delete” key.
-
Exit Master Slides: Click on the “X” or “Close” button to return to your regular slides.
-
Final Review: Review your presentation to ensure all images have been removed.
3.4 Tips for Efficient Image Management
- Use High-Quality Images: When adding new images, ensure they are high quality but optimized for web use to avoid increasing file size unnecessarily.
- Organize Images: Keep your images organized in a separate folder so you can easily access and replace them if needed.
- Regularly Review Slides: Make it a habit to review your slides periodically to remove any outdated or unnecessary images.
By following these steps and tips, you can efficiently manage and remove all photos from your Google Slides presentation, ensuring it remains clean, focused, and visually appealing.
4. Enhancing Presentation Aesthetics After Removing Images
Once you’ve cleared out the unnecessary images, it’s time to focus on enhancing the overall aesthetics of your Google Slides presentation. Here are several strategies to make your presentation visually appealing and engaging.
4.1 Choosing the Right Visuals
Selecting appropriate visuals is crucial for maintaining audience interest and reinforcing your message.
- Relevance: Ensure that every image you add is directly relevant to the content on the slide. Irrelevant images can distract and confuse your audience.
- Quality: Use high-resolution images that are clear and visually appealing. Avoid pixelated or blurry images, as they can detract from the professionalism of your presentation.
- Consistency: Maintain a consistent visual style throughout your presentation. Use similar color palettes, image styles, and layouts to create a cohesive look.
4.2 Optimizing Slide Layouts
A well-organized slide layout can significantly improve the readability and visual appeal of your presentation.
- Balance: Strive for a balance between text and visuals. Avoid overcrowding your slides with too much information.
- White Space: Use white space (or negative space) effectively to create visual breathing room. This helps to highlight key elements and prevent your slides from feeling cluttered.
- Alignment: Ensure that all elements on your slide are properly aligned. Consistent alignment creates a sense of order and professionalism.
4.3 Using Color Effectively
Color can evoke emotions and draw attention to key information. Use color strategically to enhance your presentation.
- Color Palette: Choose a color palette that complements your brand or the theme of your presentation. Use a limited number of colors (2-3 main colors) to maintain consistency.
- Contrast: Ensure there is sufficient contrast between your text and background colors to make your text easy to read.
- Highlighting: Use color to highlight important information or call attention to key points.
4.4 Incorporating Charts and Graphs
Charts and graphs can be powerful tools for presenting data in a visually appealing and easy-to-understand format.
- Clarity: Choose the right type of chart or graph for your data. Ensure that your charts are clear, labeled, and easy to interpret.
- Simplicity: Avoid overly complex charts with too much information. Simplify your charts to focus on the key takeaways.
- Visual Appeal: Use color and formatting to make your charts visually appealing. Ensure that your charts are consistent with the overall visual style of your presentation.
4.5 Adding Animations and Transitions
Animations and transitions can add visual interest to your presentation and help to guide your audience through your content.
- Subtlety: Use animations and transitions sparingly. Overuse can be distracting and detract from your message.
- Consistency: Use the same animations and transitions throughout your presentation to maintain a consistent look and feel.
- Purpose: Ensure that your animations and transitions serve a purpose. Use them to highlight key points or to create a smooth flow between slides.
By following these strategies, you can enhance the aesthetics of your Google Slides presentation, creating a visually appealing and engaging experience for your audience.
5. SEO Optimization and Google Discovery
To ensure your Google Slides presentation reaches a wider audience, it’s important to optimize it for search engines and Google Discovery. Here are some key strategies to implement.
5.1 Keyword Research and Implementation
Effective keyword research is the foundation of any SEO strategy.
- Identify Relevant Keywords: Use tools like Google Keyword Planner, Ahrefs, or SEMrush to identify keywords related to your presentation’s topic. Focus on keywords with high search volume and low competition.
- Incorporate Keywords Naturally: Integrate your keywords naturally into your presentation’s title, headings, and body text. Avoid keyword stuffing, as this can negatively impact your SEO.
- Use Long-Tail Keywords: Target long-tail keywords (longer, more specific phrases) to attract a more targeted audience.
5.2 Optimizing Slide Titles and Descriptions
Slide titles and descriptions play a crucial role in helping search engines understand the content of your presentation.
- Descriptive Titles: Use clear and descriptive titles for each slide. Include relevant keywords in your titles whenever possible.
- Detailed Descriptions: Add detailed descriptions to each slide using the “Notes” section in Google Slides. This provides additional context for search engines.
5.3 Enhancing Accessibility
Making your presentation accessible to everyone can improve its SEO and reach a wider audience.
- Alternative Text for Images: Add alternative text (alt text) to all images in your presentation. This helps search engines understand the content of your images and improves accessibility for users with visual impairments.
Go to master slide, select image and delete
- Captions and Transcripts: Provide captions for any videos included in your presentation. Transcripts can also be helpful for users who prefer to read the content.
- Readable Fonts and Colors: Use readable fonts and ensure sufficient contrast between text and background colors. This makes your presentation easier to read for everyone.
5.4 Leveraging Google Discovery
Google Discovery can help your presentation reach a wider audience based on their interests.
- High-Quality Content: Create high-quality, engaging content that provides value to your audience.
- Visual Appeal: Use visually appealing images, charts, and graphs to capture attention.
- Mobile Optimization: Ensure your presentation is optimized for mobile devices.
- Shareable Content: Make it easy for users to share your presentation on social media and other platforms.
5.5 Promoting Your Presentation
Promoting your presentation can help it reach a wider audience and improve its SEO.
- Social Media: Share your presentation on social media platforms like LinkedIn, Twitter, and Facebook.
- Email Marketing: Send an email to your subscribers with a link to your presentation.
- Website Integration: Embed your presentation on your website or blog.
- Guest Blogging: Write a guest blog post on a related topic and include a link to your presentation.
By implementing these SEO and Google Discovery strategies, you can increase the visibility of your Google Slides presentation and reach a wider audience.
6. Best Practices for Image Use in Presentations
Using images effectively in presentations requires careful consideration of several factors. Here are some best practices to follow.
6.1 Image Selection
- Relevance: Choose images that directly support your message and enhance understanding.
- Quality: Use high-resolution images that are clear and visually appealing.
- Copyright: Ensure you have the right to use the images you select. Use Creative Commons images or purchase images from stock photo websites.
6.2 Image Optimization
- File Size: Optimize images for web use to reduce file size without sacrificing quality.
- File Format: Use JPEG for photographs and PNG for graphics with transparency.
- Compression: Compress images to reduce file size.
6.3 Image Placement
- Balance: Balance images with text and other elements on the slide.
- Alignment: Align images with other elements on the slide.
- Consistency: Maintain a consistent style of image placement throughout your presentation.
6.4 Accessibility
- Alt Text: Add descriptive alt text to all images for users with visual impairments.
- Contrast: Ensure sufficient contrast between images and text.
6.5 Ethical Considerations
- Attribution: Give credit to the original source of images when required.
- Respectful Use: Use images in a respectful and appropriate manner.
By following these best practices, you can use images effectively in your presentations to enhance understanding, engage your audience, and support your message.
7. Troubleshooting Common Issues
Even with careful planning, you may encounter issues when deleting or managing images in Google Slides. Here are some common problems and how to troubleshoot them.
7.1 Images Not Deleting
- Check Master Slides: Ensure the images are not embedded in the master slides.
- Unlock Images: Make sure the images are not locked.
- Refresh: Try refreshing your browser or reopening the presentation.
7.2 Add-ons Not Working
- Permissions: Check that the add-on has the necessary permissions.
- Updates: Ensure the add-on is up to date.
- Compatibility: Verify that the add-on is compatible with your version of Google Slides.
7.3 File Size Still Large
- Hidden Images: Check for hidden images or elements that may be increasing file size.
- Image Compression: Ensure all images are properly compressed.
- Unnecessary Elements: Remove any unnecessary elements from your presentation.
7.4 Images Displaying Incorrectly
- Resolution: Ensure the images are high resolution but not excessively large.
- File Format: Use the correct file format for each image type.
- Cache: Clear your browser cache and try again.
7.5 Images Distorted
- Aspect Ratio: Maintain the original aspect ratio of images to avoid distortion.
- Resizing: Resize images proportionally.
- Image Editor: Use an image editor to correct any distortions before inserting the image into your presentation.
By troubleshooting these common issues, you can ensure a smooth and efficient image management process in Google Slides.
8. Advanced Tips and Tricks
To further enhance your skills in managing images within Google Slides, consider these advanced tips and tricks that can help you optimize your workflow and presentation quality.
8.1 Using Google Apps Script for Automation
Google Apps Script allows you to automate repetitive tasks in Google Slides, including image management.
- Access Script Editor: Open your Google Slide, then go to “Extensions” > “Apps Script” to open the script editor.
- Write Custom Scripts: You can write scripts to perform tasks such as deleting all images on specific slides or replacing images automatically.
- Example Script: Here is an example script to delete all images from the current slide:
function deleteAllImages() {
  var slide = SlidesApp.getActivePresentation().getSlides()[0];
  var shapes = slide.getShapes();
  for (var i = 0; i < shapes.length; i++) {
    if (shapes[i].getType() == SlidesApp.ShapeType.IMAGE) {
      shapes[i].remove();
    }
  }
}- Run the Script: Save the script and run it. You may need to authorize the script to access your Google Slides.
8.2 Leveraging the Explore Tool
Google Slides’ Explore tool can help you find and insert relevant images quickly.
- Open Explore: Click on “Tools” > “Explore” to open the Explore sidebar.
- Search Images: Type your search query in the Explore bar to find images related to your topic.
- Insert Images: Drag and drop images directly from the Explore sidebar onto your slide.
8.3 Creating Custom Image Placeholders
Custom image placeholders can help you maintain consistency in your presentation.
- Create a Shape: Insert a shape onto your slide where you want the image placeholder to be.
- Format the Shape: Customize the shape with the desired size, color, and border.
- Duplicate: Duplicate the shape to create multiple image placeholders on different slides.
8.4 Using Animated GIFs
Animated GIFs can add visual interest to your presentation, but they should be used sparingly.
- Find GIFs: Search for animated GIFs on websites like Giphy or Tenor.
- Insert GIFs: Insert the GIF into your slide using the “Insert” > “Image” option.
- Optimize GIFs: Optimize the GIF file size to prevent slowing down your presentation.
8.5 Linking to External Images
Linking to external images can help reduce the file size of your presentation, but it requires an internet connection to display the images.
- Upload Images: Upload your images to a cloud storage service like Google Drive or Dropbox.
- Get Shareable Link: Get a shareable link for each image.
- Insert Image by URL: In Google Slides, select “Insert” > “Image” > “By URL” and paste the shareable link.
By incorporating these advanced tips and tricks, you can take your image management skills in Google Slides to the next level and create visually stunning and effective presentations.
9. Future Trends in Presentation Design
As technology evolves, so do the trends in presentation design. Here are some future trends to watch for.
9.1 AI-Powered Design Tools
AI-powered tools will help automate the design process, suggesting optimal layouts, color schemes, and image selections.
9.2 Immersive Presentations
Virtual reality (VR) and augmented reality (AR) will create immersive presentation experiences.
9.3 Interactive Elements
Presentations will include more interactive elements, such as quizzes, polls, and games.
9.4 Data Visualization
Advanced data visualization techniques will make complex data easier to understand.
9.5 Personalized Content
Presentations will be tailored to individual audience members based on their interests and needs.
9.6 Accessibility Features
Increased focus on accessibility will ensure that presentations are usable by everyone.
By staying informed about these future trends, you can create presentations that are not only visually appealing but also innovative and effective.
10. Conclusion: Mastering Image Management in Google Slides
Mastering image management in Google Slides is crucial for creating effective and engaging presentations. Whether you’re optimizing file size, revamping your design, or focusing on content, knowing how to delete all photos at once can save you time and effort.
By following the methods outlined in this guide—manual selection, add-ons, and master slides—you can efficiently remove unwanted images and enhance the visual appeal of your presentations. Remember to optimize your images for SEO, leverage Google Discovery, and stay informed about future trends in presentation design.
Visit dfphoto.net for more tips and resources on photography and visual design. Explore our collection of stunning images and connect with a community of passionate photographers and designers.
Ready to take your presentations to the next level? Discover dfphoto.net today and unlock your creative potential. Address: 1600 St Michael’s Dr, Santa Fe, NM 87505, United States. Phone: +1 (505) 471-6001. Website: dfphoto.net.
FAQ: Deleting All Photos At Once On Google Slides
1. How do I quickly remove all images from a Google Slides presentation?
Use add-ons like Slides Toolbox to efficiently remove all images from your Google Slides presentation with just a few clicks.
2. Can I delete all photos from specific slides only?
Yes, add-ons allow you to select specific slides and remove all images from those slides only.
3. What if the images are embedded in the master slides?
Access the master slides by clicking “Slide” > “Edit Theme” and delete the images directly from the master layout to remove them from all slides using that layout.
4. Is there a way to undo the deletion of all photos?
Yes, immediately after deleting the photos, press Ctrl+Z (or Cmd+Z on Mac) or click the “Undo” button to restore the images.
5. How can I reduce the file size of my presentation after removing images?
Ensure all remaining images are optimized for web use and remove any unnecessary elements to further reduce the file size.
6. What are the best practices for using images in Google Slides?
Use high-resolution images, ensure they are relevant to your content, and provide alt text for accessibility.
7. Are there any free add-ons for deleting all photos at once?
Yes, many free add-ons like Slides Toolbox offer this functionality. Check the Google Workspace Marketplace for available options.
8. How do I ensure the images I use are copyright-free?
Use images from Creative Commons or purchase images from stock photo websites to ensure you have the right to use them.
9. Can I automate the process of deleting images using Google Apps Script?
Yes, you can write custom Google Apps Scripts to automate image deletion and other tasks in Google Slides.
10. What should I do if an add-on is not working correctly?
Check the add-on’s permissions, ensure it is up to date, and verify its compatibility with your version of Google Slides.