iCloud Shared Photo Library offers a fantastic way to seamlessly share your cherished photo and video memories with up to five other individuals. This collaborative space allows everyone to contribute, edit, and enjoy a more complete collection of life’s moments together. If you’re wondering, “How Can I Share Photos With Icloud?”, this guide will walk you through setting up and effectively using a Shared Library.
Understanding iCloud Shared Photo Library
When you add photos and videos to an iCloud Shared Photo Library, they are moved from your Personal Library into this shared space. You can participate in only one Shared Library at a time. You have the flexibility to choose specific content to share or set up automatic sharing directly from your device’s camera.
Importantly, all members of a Shared Library have equal rights to add, edit, and even delete content within it. The person who initially creates the Shared Library takes on the role of the library creator and provides the iCloud storage for all the content housed within. Other participants gain access to the entire Shared Library without it impacting their personal iCloud storage limits.
Setting Up Your Own Shared Library
To create a Shared Library, ensure you have a device running iOS 16.1, iPadOS 16.1, or macOS Ventura or later, and that iCloud Photos is enabled. For users under 13 years old, creating or joining a Shared Library is restricted to members within their Family Sharing group.*
Creating a Shared Library on iPhone or iPad
- Navigate to Settings > Photos, and then select Shared Library.
- Choose up to five individuals to invite to your Shared Library. You also have the option to invite participants at a later stage.
- Select the existing photos and videos you wish to move to your Shared Library. Alternatively, you can choose to add photos later.
- Follow the on-screen prompts to preview your Shared Library setup, confirm the content you intend to share, and send out invitations to your chosen participants.
 Preview your Shared Library settings during setup on your iPhone.
Creating a Shared Library on Mac
- Open the Photos app, then go to Photos in the menu bar > Settings, and click on iCloud.
- Verify that iCloud Photos is turned on. If it isn’t, select the checkbox next to iCloud Photos to enable it.
- Click on Shared Library, and then click Get Started.
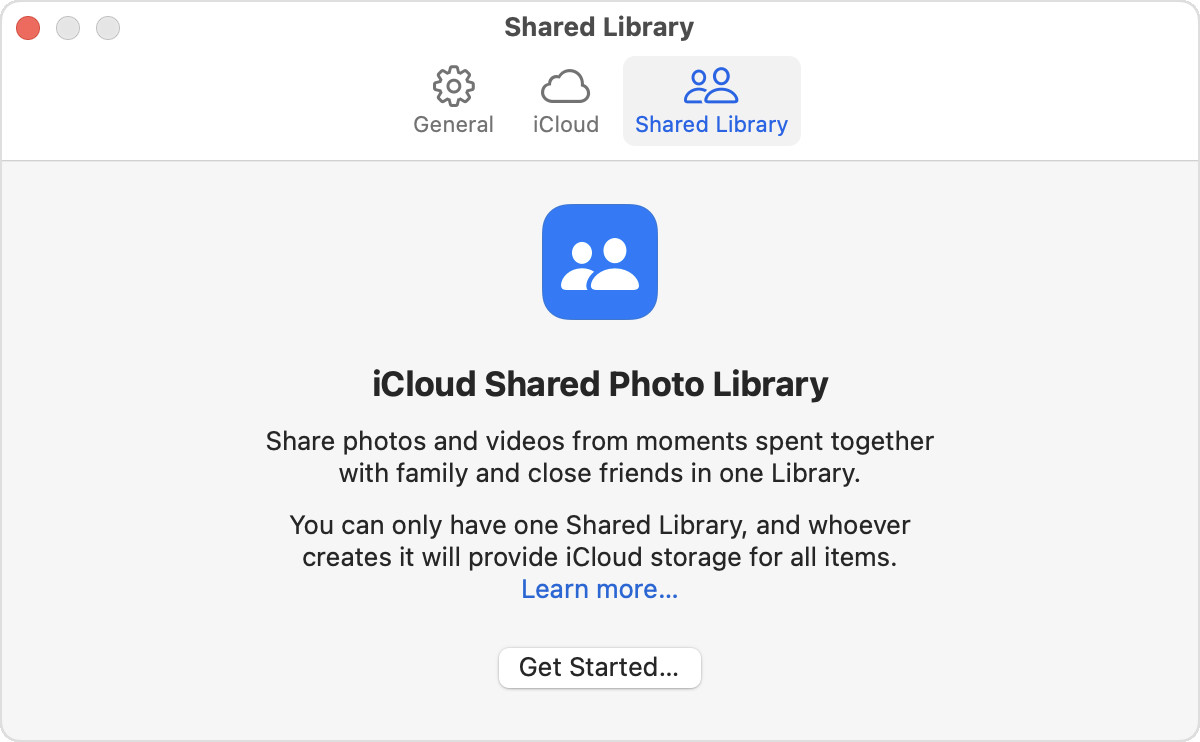 Locate the Shared Library tab next to the iCloud tab in Photos settings on Mac.4. Follow the instructions displayed on your screen to invite participants and add your initial photos and videos to the Shared Library.
Joining an Existing Shared Library
To join an iCloud Shared Photo Library, your device must also be running iOS 16.1, iPadOS 16.1, or macOS Ventura or later with iCloud Photos enabled. Similar to creating a library, users under 13 can only join Shared Libraries with members of their Family Sharing group.*
Joining a Shared Library on iPhone or iPad
- Open the invitation you received from the Shared Library creator. Alternatively, go to Settings > Photos.
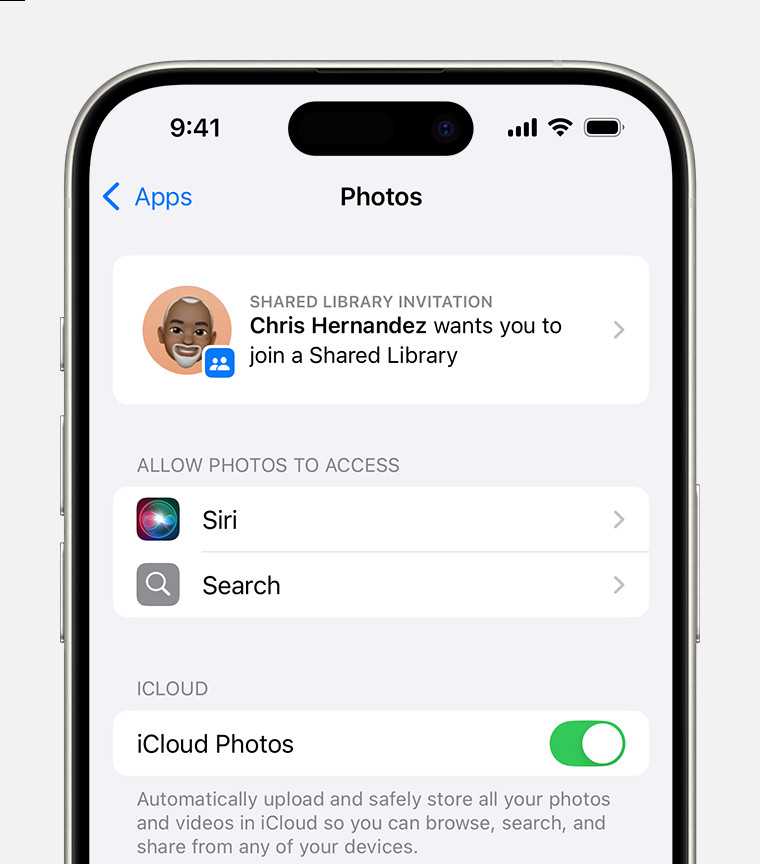 Find your Shared Library invitation within the Photos settings on your iPhone.2. Tap Accept & Continue.
3. Follow the on-screen steps to select photos and videos you want to move to the Shared Library, or choose to move photos later.
4. Preview your Shared Library content and confirm your sharing preferences as guided by the on-screen instructions.
Joining a Shared Library on Mac
- Access the invitation from the library creator, or navigate to Photos > Settings, and click View Invitation.
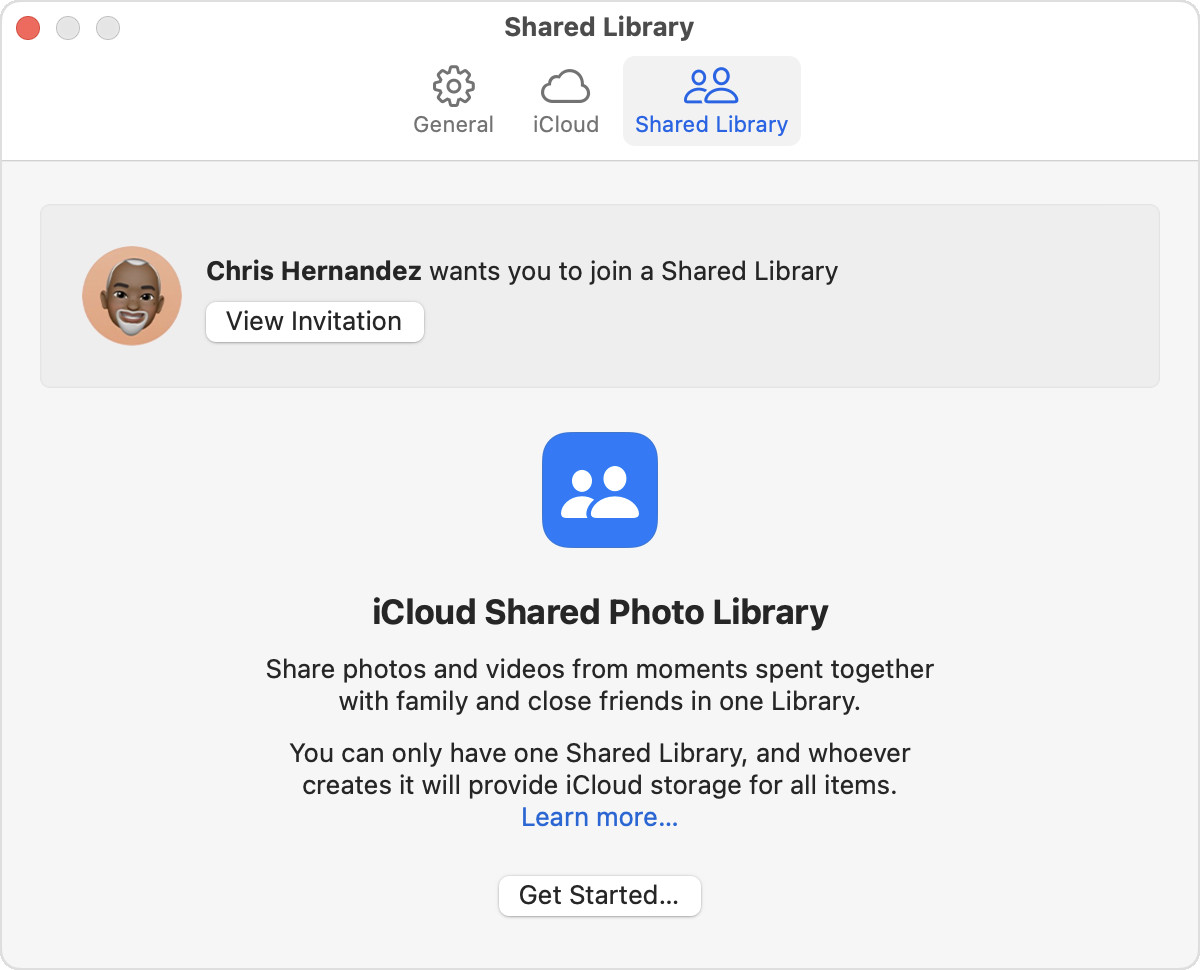 Access your Shared Library invitation through the Settings in the Photos app on Mac.2. Click Get Started, then follow the on-screen prompts to choose photos and videos to contribute to the Shared Library, or opt to add them at a later time.
3. Preview the Shared Library content and confirm your sharing selections by following the remaining on-screen instructions.
Effectively Using Your Shared Library
Once you’ve set up or joined a Shared Library, understanding how to use it efficiently is key. You can share photos directly from your camera to the Shared Library and easily switch between viewing your Personal Library, the Shared Library, or both combined within the Photos app. Furthermore, you can discover photos contributed by other participants and manage sharing suggestions. For more in-depth instructions, consult Apple’s guides for iPhone, iPad, or Mac.
Sharing Photos Directly from Your Camera on iPhone or iPad
- Go to Settings > Photos, and then tap Shared Library.
- Tap Sharing from Camera and ensure it is toggled on.
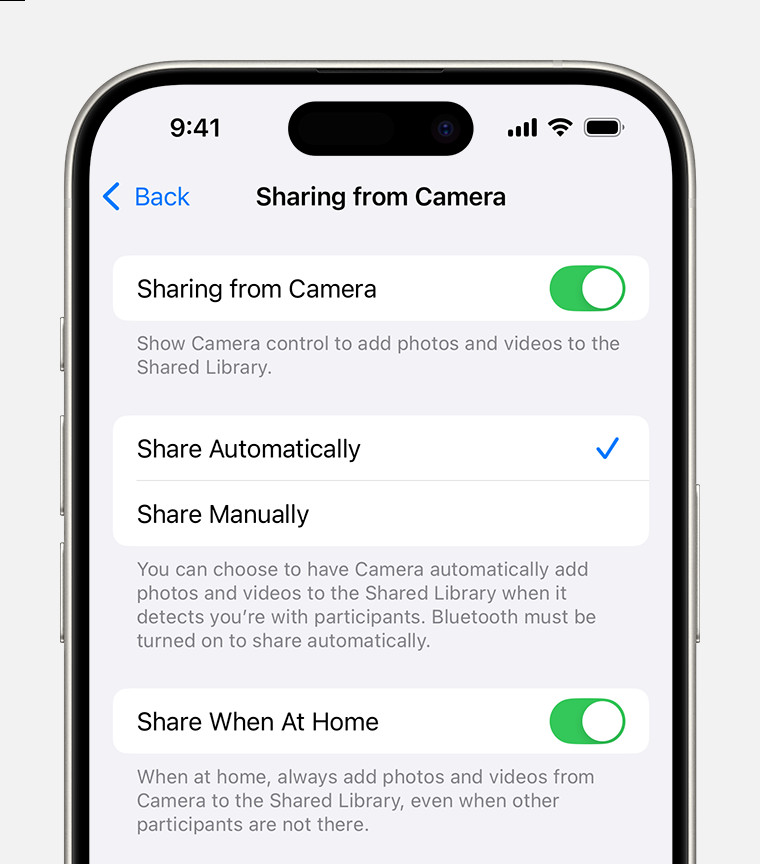 Enable Sharing from Camera to add a button in the Camera app for direct sharing to your Shared Library.
- For automatic sharing to the Shared Library when you are near other participants, select Share Automatically.
- To manually choose when photos are added to the Shared Library, select Share Manually.
- To automatically share photos taken at home to the Shared Library, choose Share When At Home.
- In the Camera app, ensure the Shared Library button is active to send photos and videos directly to your Shared Library. Tap the button to deactivate it and send content to your Personal Library instead.
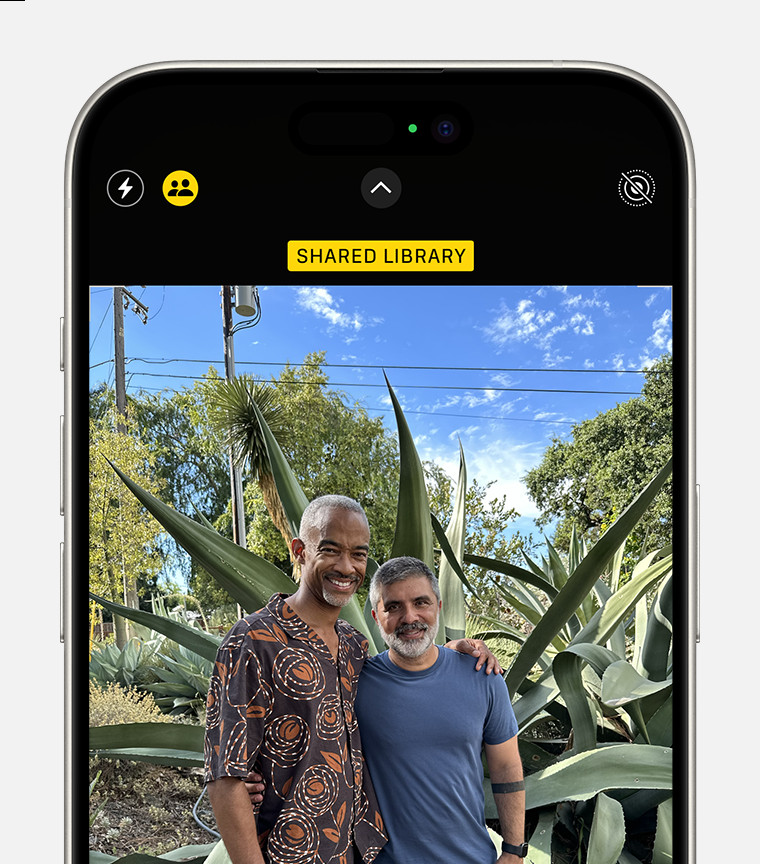 The Shared Library button located at the top of the Camera app screen.
Switching Between Personal and Shared Library Views on iPhone or iPad
- Open the Photos app.
- Tap the profile button in the upper corner and scroll down to Library View Options.
- Choose between Personal Library, Shared Library, or Both Libraries to customize your view.
 An iPhone screen displaying options to switch between Both Libraries, Personal Library, and Shared Library under Library View Options.
When viewing Both Libraries or just the Shared Library, photos within the Shared Library are marked with a badge icon. You can disable this badge by toggling off Shared Library Indicator.
Switching Between Personal and Shared Library Views on Mac
- Open the Photos app.
- At the top of the window, select Personal Library, Shared Library, or Both Libraries to change your view.
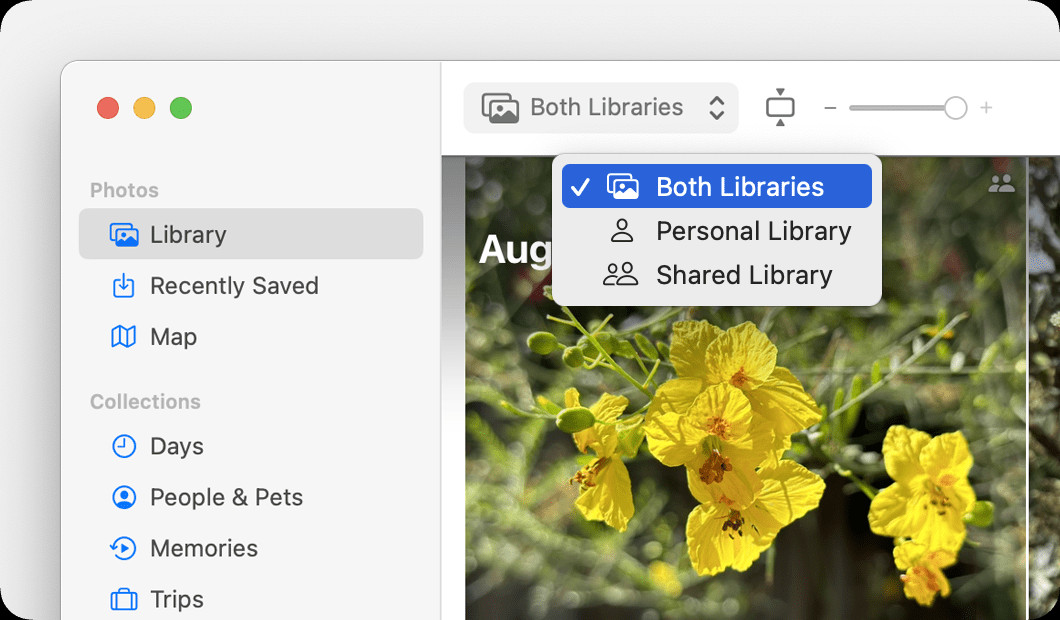 A Mac screen showing the toggle options to switch between Both Libraries, Personal Library, and Shared Library.
Similar to iOS, photos in the Shared Library are badged when viewing Both Libraries or Shared Library on Mac. To hide these badges, go to View > Metadata and deselect In Shared Library.
Leaving a Shared Library
If you are the creator of an iCloud Shared Photo Library, you have the authority to remove participants or delete the entire Shared Library at any point. When a Shared Library is deleted, all participants receive a notification. Participants who have been in the Shared Library for more than seven days will automatically receive all content from the Shared Library in their Personal Library. Those who have been participants for less than seven days will only receive the photos and videos they personally contributed.
As a participant, you can choose to leave a Shared Library whenever you wish. Upon leaving, you can opt to receive a copy of everything from the Shared Library in your Personal Library, or just the content you contributed.
Learn more about leaving a Shared Library
Getting Help with Shared Library
* Age restrictions may vary depending on your country or region.