iCloud, Apple’s cloud storage and service, seamlessly integrates with your Apple devices, allowing you to store and access your precious photos and videos across your ecosystem. If you’re wondering, How Can I Access Photos On My Icloud?, you’ve come to the right place. This guide from dfphoto.net will provide you with a detailed walkthrough on viewing your iCloud photos on various devices, ensuring you can relive your memories anytime, anywhere.
In this comprehensive guide, we’ll explore step-by-step methods to access your iCloud Photo Library on iPhones, iPads, iPod Touches, Macs, Windows PCs, Android devices, and even online through a web browser. We will also address common questions and issues users face, such as dealing with blurry photos and managing your iCloud storage. Let’s dive in and unlock your photo memories!
Turning on iCloud Photos: Your First Step
Before you can access your photos on iCloud, you need to ensure iCloud Photos is enabled on your Apple devices. This feature automatically uploads and syncs your photos and videos to iCloud, making them accessible across all your devices. Here’s how to turn it on:
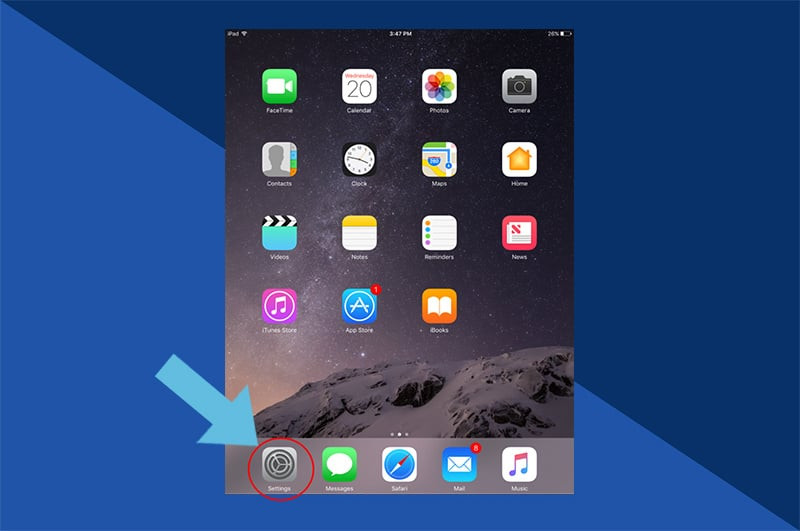
1. Navigate to Settings
Locate the “Settings” app on your iPhone or iPad home screen. It’s represented by a grey cog icon. Tap to open it.
 Opening Settings app on iPhone to turn on iCloud Photos
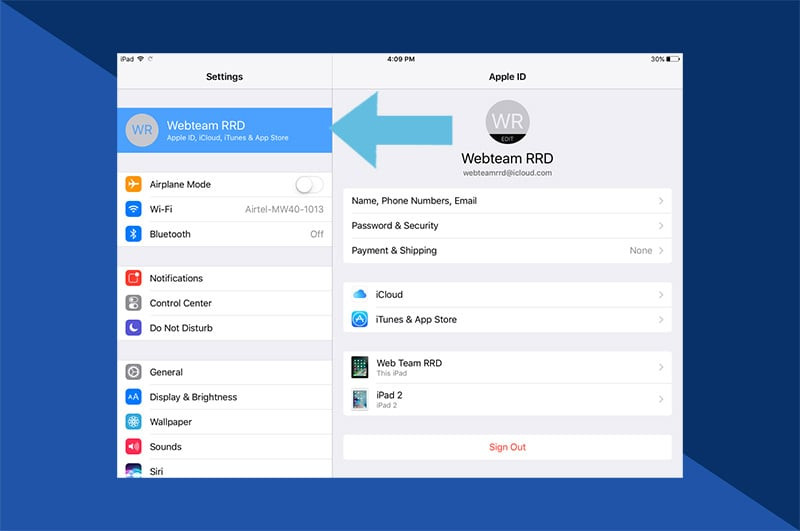
2. Access Your Apple ID Profile
At the top of the Settings menu, you’ll see your name and Apple ID profile. Tap on it to access your Apple ID settings.
 Tapping on Apple ID profile in Settings to manage iCloud Photos
3. Select iCloud Settings
Within your Apple ID settings, find and tap on “iCloud”. This will take you to the settings related to your iCloud account.
 Selecting iCloud option in Apple ID settings to access photo settings
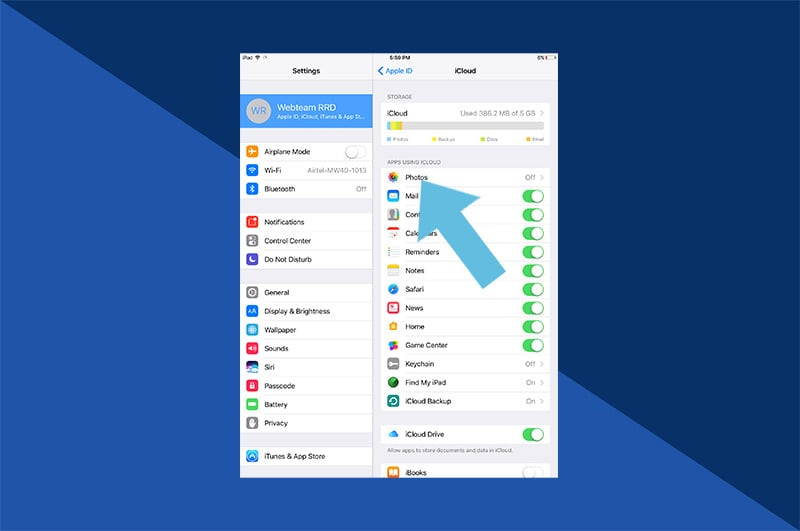
4. Go to Photos in iCloud
In the iCloud settings menu, locate and tap on “Photos”. This section manages your iCloud Photos settings.
 Navigating to Photos section within iCloud settings to enable photo syncing
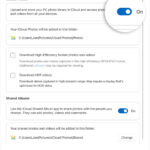
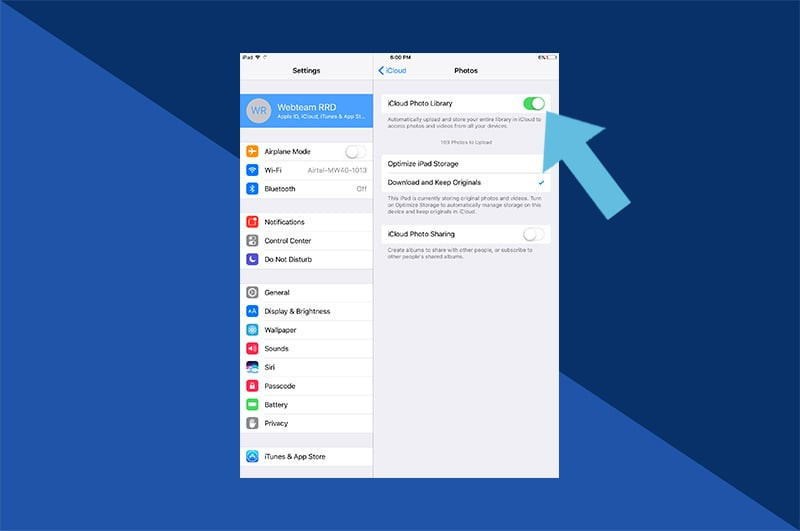
5. Activate iCloud Photos Sync
Finally, you’ll see the “iCloud Photos” toggle. If it’s green, iCloud Photos is already active. If it’s grey, tap the toggle to turn it on. Once activated, your photos and videos will start syncing to iCloud.
 Enabling iCloud Photos toggle to start syncing photos to iCloud
Accessing iCloud Photos Across Devices
With iCloud Photos enabled, your visual memories are consolidated into a single, unified library accessible across your devices. Here’s how to access them on different platforms:
Accessing iCloud Photos on iPhone, iPad, and iPod Touch
For iPhones, iPads, and iPod Touches, accessing your iCloud photos is incredibly intuitive as they are integrated directly into the Photos app you already use.
1. Launch the Photos App
Simply tap on the “Photos” app icon on your home screen. It’s the same icon you always use to view photos on your Apple mobile device.
 Opening Photos app on iPhone to view iCloud photos
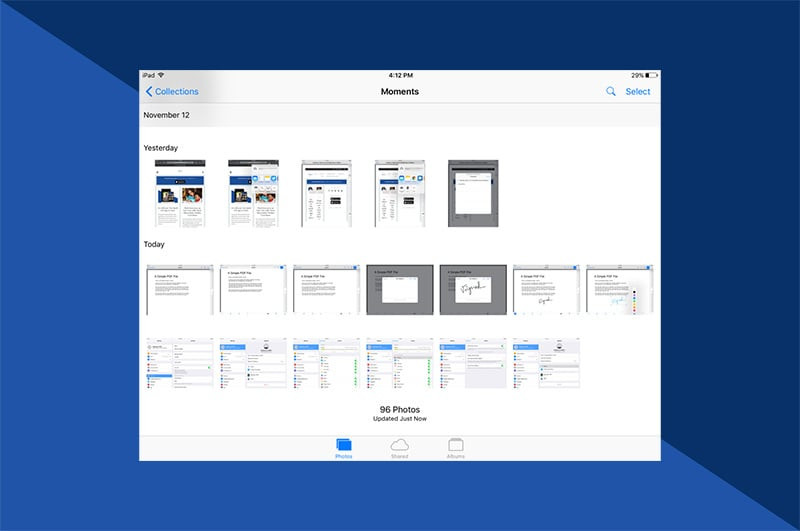
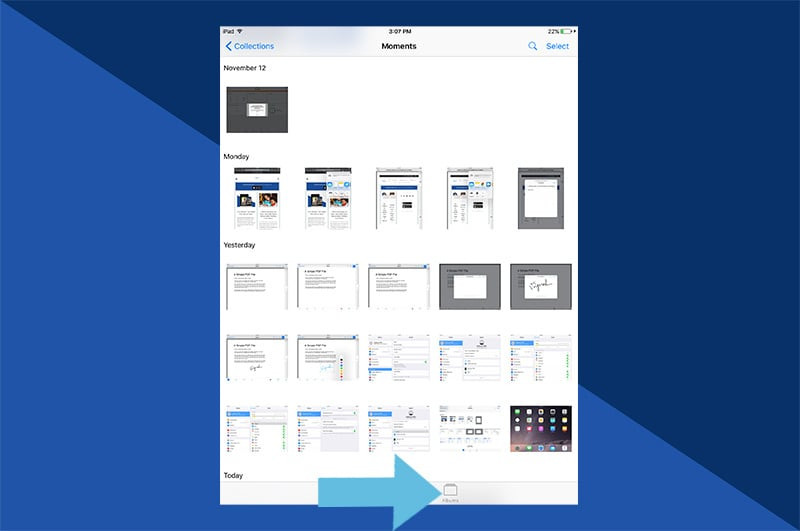
2. Explore Photos Tabs
Within the Photos app, you will find your iCloud Photos in the familiar “Photos” and “Albums” tabs at the bottom. The “Photos” tab displays all your photos chronologically. The “Albums” tab organizes your photos into various categories like “My Albums,” “Shared Albums,” “People & Places,” and “Media Types,” providing different ways to browse your iCloud Photo Library.
 Browsing Photos and Albums tabs in Photos app to find iCloud photos on iPad
Accessing iCloud Photos on Your Mac
Similar to iPhones and iPads, accessing iCloud Photos on a Mac is seamless. Your photos are integrated into the built-in “Photos” application.
Simply open the “Photos” app on your Mac from your Applications folder or Launchpad. If iCloud Photos is enabled with the same Apple ID on your Mac, your iCloud Photo Library will automatically sync and appear within the app. You can browse your photos in the “Photos,” “Albums,” and “Projects” tabs, just like on your iOS devices.
Accessing iCloud Photos on a Windows PC
While iCloud is an Apple service, accessing your photos on a Windows PC is straightforward with Apple’s “iCloud for Windows” application.
1. Download iCloud for Windows
First, you need to download and install the “iCloud for Windows” application from Apple’s support website. Visit Apple Support and download the application. Follow the installation prompts to install it on your PC.
 Downloading iCloud for Windows application from Apple Support website
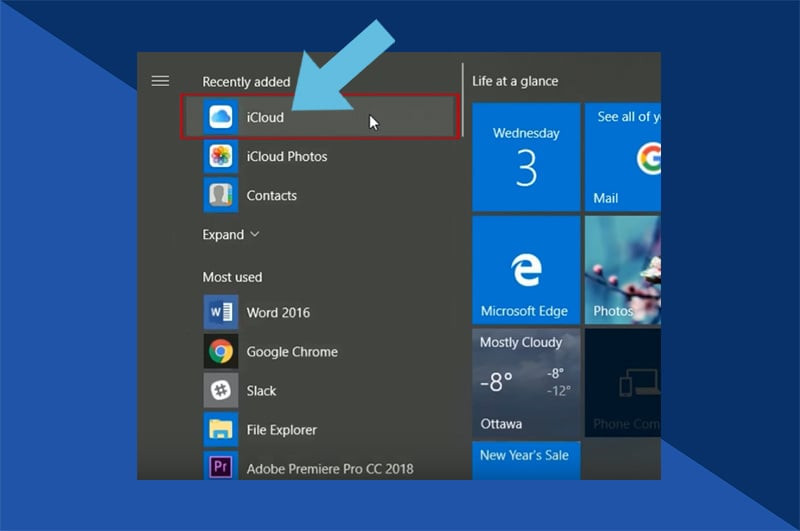
2. Launch iCloud for Windows and Sign In
Once installed, open the “iCloud for Windows” application. You might find it in your Start Menu or desktop. Sign in with your Apple ID and password – the same credentials you use for iCloud.
 Signing into iCloud for Windows application with Apple ID
3. Access Your iCloud Photos
After signing in, ensure that “Photos” is checked in the iCloud for Windows settings. iCloud Photos will create a dedicated “iCloud Photos” folder in your File Explorer. You can access and browse all your iCloud photos directly from this folder on your Windows PC.
 Browsing iCloud photos within iCloud Photos folder in Windows File Explorer
Accessing iCloud Photos Online
If you are on a device where you cannot install applications, or simply prefer accessing your photos through a browser, iCloud provides a web interface at iCloud.com.
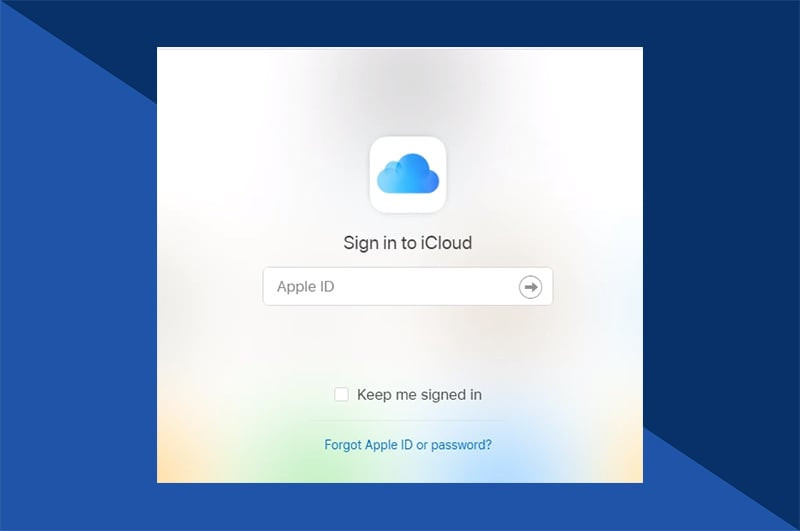
1. Go to iCloud.com and Sign In
Open any web browser and navigate to www.icloud.com. Enter your Apple ID and password to sign in to your iCloud account.
 Signing into iCloud website using a web browser
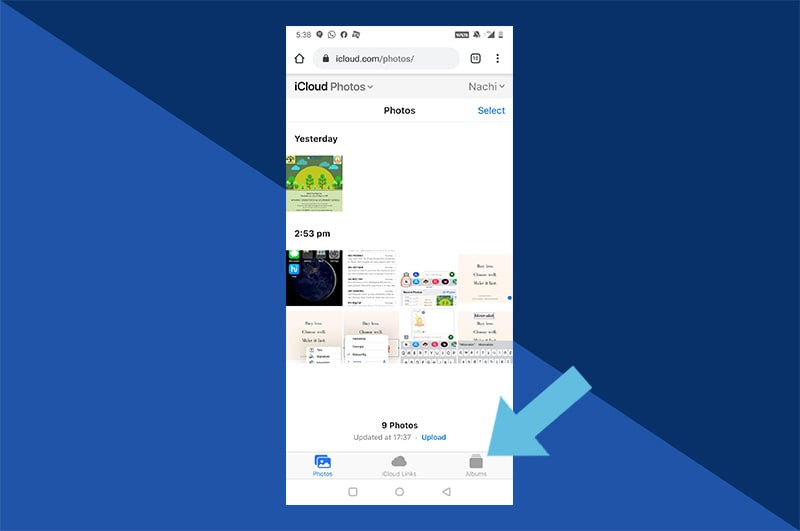
2. Open the Photos Web App
Once logged in, you will see a dashboard similar to the interface on your iPhone or iPad. Click on the “Photos” icon to launch the web-based iCloud Photos application.
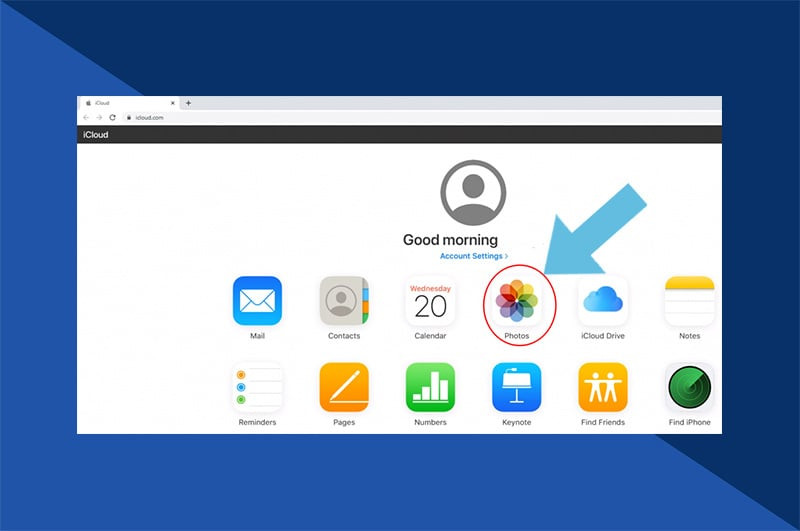 Clicking on Photos icon on iCloud.com to access photos online
3. View Your iCloud Photo Library
Within the Photos web app, you can view your entire iCloud Photo Library, organized by “Photos,” “Albums,” and other categories, allowing you to access, download, and even manage your photos directly from your web browser.
 Viewing iCloud photos within the Photos web app on iCloud.com
Accessing iCloud Photos on Android Devices
While there isn’t a dedicated iCloud Photos app for Android, you can still access your photos using a web browser. Here’s a workaround:
1. Open Chrome and Visit iCloud.com
On your Android device, open the Chrome browser (or any web browser) and go to www.icloud.com. You might initially see an error message or a mobile-optimized version of the site. This is normal.
 Opening iCloud.com in Chrome browser on Android device
2. Request Desktop Site
To get the full iCloud website experience, tap the three-dot menu icon in the top right corner of Chrome and select “Desktop site”. This will reload the page in desktop mode.
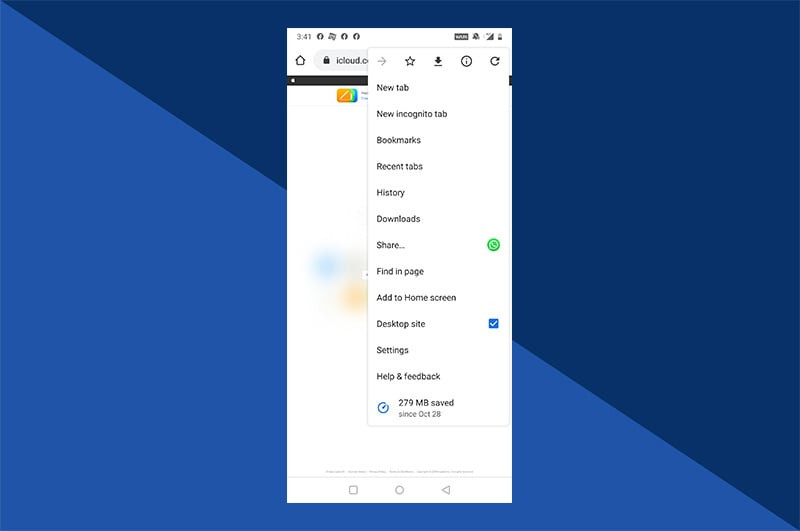 Requesting Desktop site option in Chrome browser on Android to access full iCloud website
3. Sign In to iCloud
Once the desktop site loads, you should see the standard iCloud login page. Enter your Apple ID and password to sign in.
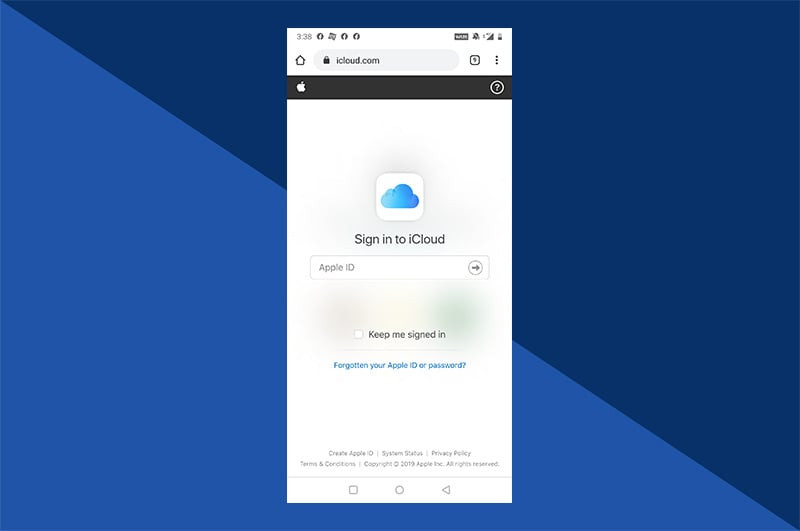 Signing into iCloud website in Desktop mode on Android browser
4. Access Photos (with potential limitations)
Tap the “Photos” icon to access your iCloud Photo Library. While you can view your photos, scrolling might be limited on some Android devices due to browser compatibility. The number of photos you can view at once may depend on your specific Android device and browser.
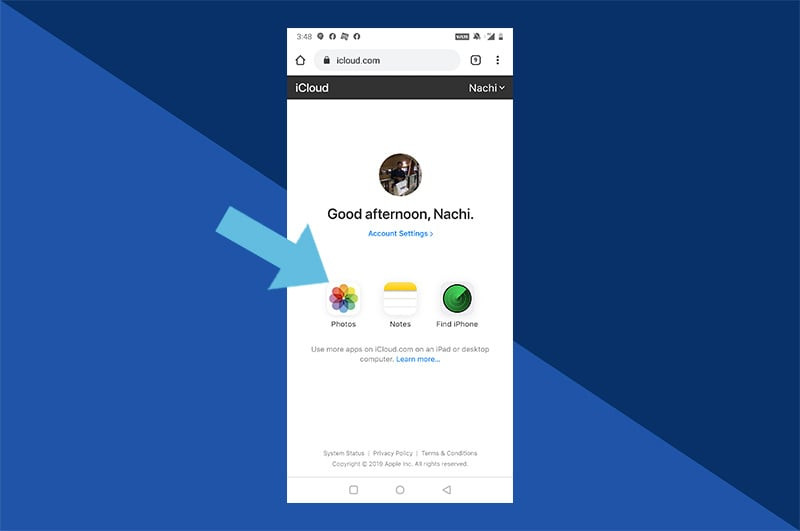 Accessing Photos icon on iCloud website in Desktop mode on Android, with potential scrolling limitations
5. Create Albums for Easier Access (Optional)
If you need to access specific photos frequently on your Android device, consider creating a new album on your Apple device and moving those photos into it. This can make it easier to find and access those specific photos on Android without extensive scrolling.
 Creating a new album in iCloud Photos to easily access specific photos on Android
Recovering Recently Deleted Photos
Accidentally deleted a precious photo? iCloud has you covered. You can recover photos you’ve deleted within the last 30 days.
1. Open Photos App and Go to Albums
Launch the “Photos” app on your iPhone, iPad, iPod Touch, or access the Photos web app on iCloud.com. Navigate to the “Albums” tab.
 Opening Albums tab in Photos app to find Recently Deleted album
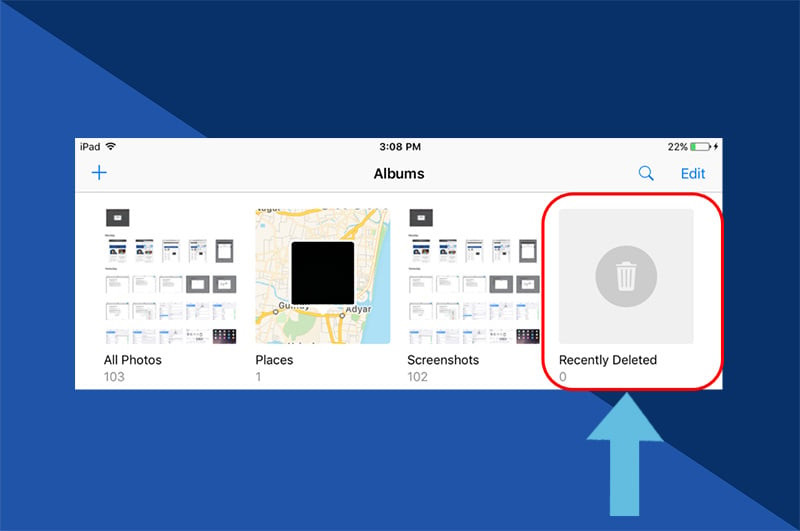
2. Find the “Recently Deleted” Album
Scroll down to the bottom of the Albums list. You’ll find the “Recently Deleted” album. Tap to open it. This album contains all the photos and videos you’ve deleted in the last 30 days.
 Locating Recently Deleted album at the bottom of Albums list in Photos app
3. Recover or Permanently Delete Photos
Browse the photos in the “Recently Deleted” album. Tap on any photo you want to recover, and then tap “Recover”. The photo will be restored to your main Photos album. If you want to permanently remove a photo and free up storage, you can also choose to “Delete” it from this album.
 Recovering a deleted photo from Recently Deleted album in Photos app
Addressing Blurry iCloud Photos
Encountering blurry photos in your iCloud Photo Library can be frustrating. Often, this is due to a feature called “Optimize iPhone Storage.”
iCloud Photo Library can be large, and to save space on your iPhone, the “Optimize iPhone Storage” setting might store lower-resolution versions of your photos on your device. The full-resolution versions are safely stored in iCloud.
When you view a photo, especially with a good internet connection, your iPhone will download the high-resolution version from iCloud, and it will remain on your device for a while. However, if you are offline or have a slow connection, you might see the lower-resolution, potentially blurry, version.
If you prefer to always have high-resolution images on your device, you can turn off “Optimize iPhone Storage.” To do this, go to Settings > Your Name > iCloud > Photos, and select “Download and Keep Originals” instead of “Optimize iPhone Storage.” Be mindful that this will require more storage space on your device.
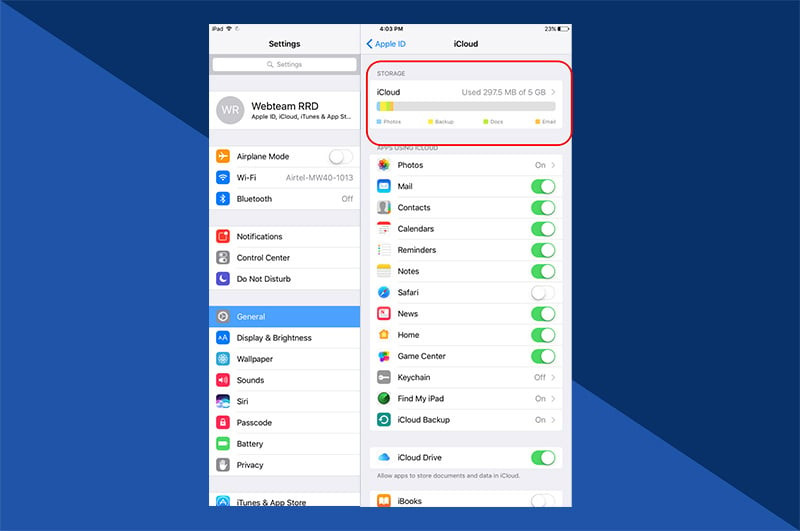
Checking Your iCloud Storage
iCloud storage is used for more than just photos; it also backs up device data, documents, and more. To see how your storage is being used:
1. Open Settings
Go to the “Settings” app on your iPhone or iPad.
 Opening Settings app on iPhone to check iCloud storage
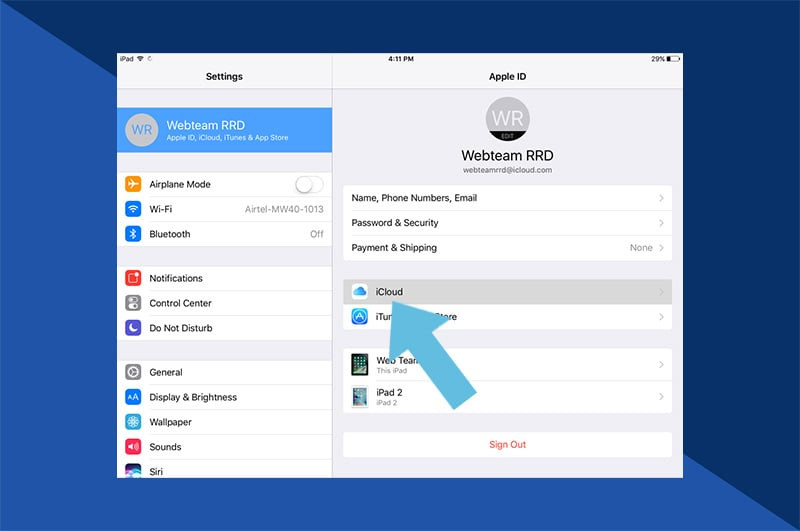
2. Select iCloud
Tap on your Apple ID profile at the top, and then select “iCloud”.
 Selecting iCloud option in Apple ID settings to manage storage
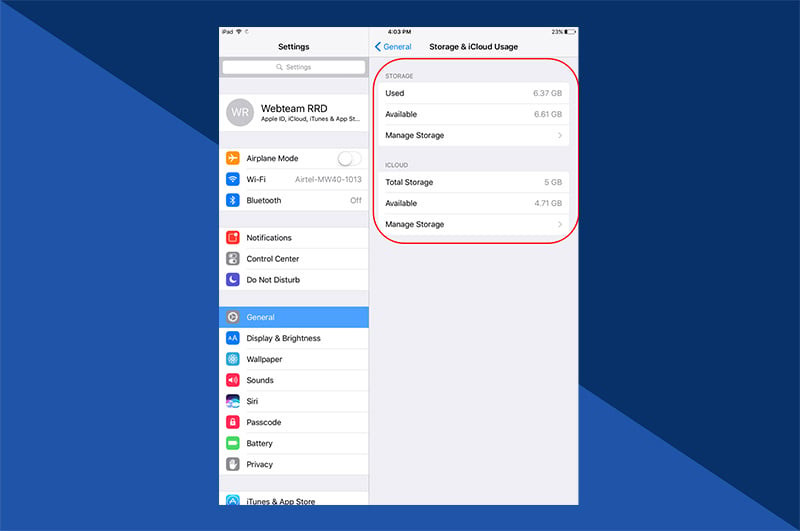
3. Access Storage Management
Tap on “Manage Account Storage” (or simply “Storage” on some iOS versions). You’ll see a visual breakdown of your iCloud storage usage and how much space is remaining.
 Accessing Manage Storage option in iCloud settings to view storage details
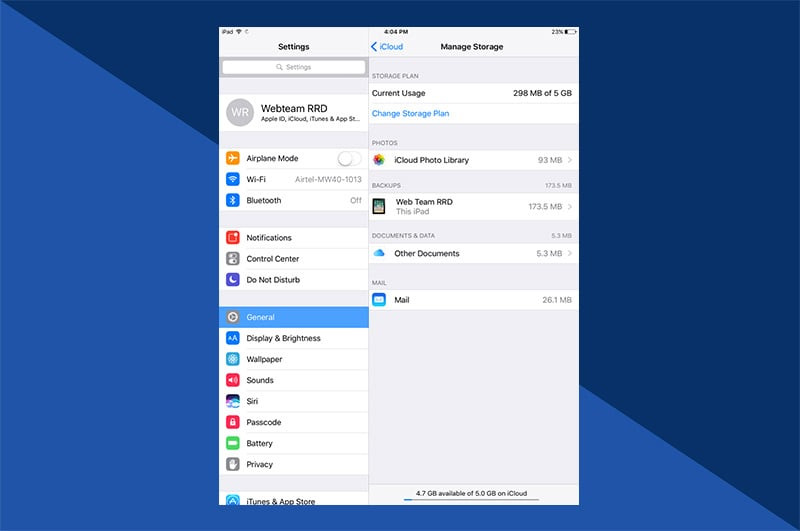
4. Manage Storage Details
Tap “Manage Storage” for a detailed view of what’s taking up your iCloud space.
 Tapping Manage Storage to see detailed iCloud storage usage breakdown
5. Review Documents & Data
Scroll down to “Documents & Data” to see a list of apps storing data in iCloud. You can tap on individual apps and choose to delete data to free up space if needed.
 Reviewing Documents & Data section to manage app data stored in iCloud
Sharing Your Photo Memories with Motif
Now that you’ve mastered accessing your iCloud photos, you can easily find and relive your cherished memories. Once you’ve found that perfect photo, consider turning it into something tangible and special with Motif. Motif offers a range of customizable photo products, including beautiful photo books, personalized cards, and custom calendars. Whether it’s a thoughtful gift for someone special or a personal keepsake for yourself, Motif helps you transform your digital memories into lasting treasures.