Does Itunes Backup My Photos? Yes, iTunes can back up your photos, but it’s essential to understand how this process works and what it includes to ensure your precious memories are safe. This comprehensive guide on dfphoto.net explores the ins and outs of iTunes backups, offering photographers and visual artists a clear understanding of how to protect their valuable work. Discover alternative methods for safeguarding your images and optimizing your photo management workflow.
1. Understanding iTunes Backups for Photos
iTunes backups are a way to create a copy of the data on your iPhone, iPad, or iPod touch, including photos, on your computer. Let’s delve into the specifics of how iTunes handles photo backups:
1.1. What Types of Photos Does iTunes Back Up?
iTunes backups typically include photos stored in your device’s Camera Roll or photo library. According to Apple Support, the backup encompasses photos you’ve taken with your device’s camera and images you’ve saved from other sources, such as websites or emails. However, there are exceptions.
1.2. Photos Not Backed Up by iTunes
Photos synced from your computer to your device using iTunes are generally not included in the backup. These photos are assumed to already exist on your computer, so iTunes doesn’t create a redundant copy. Also, if you use iCloud Photos, your photos are stored in the cloud and are not part of the iTunes backup.
1.3. How to Check if Your Photos are Backed Up
To check if your photos are being backed up by iTunes, you can verify your iTunes settings. Connect your device to your computer, open iTunes, and navigate to the “Summary” tab for your device. Here, you can see the options for backups, including whether you’re backing up to iCloud or your computer. If you’re backing up to your computer, your photos should be included in the backup (unless you use iCloud Photos).
2. Step-by-Step Guide to Backing Up Photos with iTunes
If you’ve determined that iTunes is the right backup solution for you, here’s a step-by-step guide to backing up your photos:
2.1. Connect Your Device to Your Computer
Use a USB cable to connect your iPhone, iPad, or iPod touch to your computer. Ensure that your computer recognizes the device.
2.2. Open iTunes and Select Your Device
Launch iTunes on your computer. Once your device is connected, you should see it appear in the upper-left corner of the iTunes window. Click on the device icon to select it.
2.3. Navigate to the Summary Tab
In the left sidebar, under “Settings,” click on “Summary.” This will display information about your device and its backup settings.
2.4. Choose “This Computer” for Backups
In the “Backups” section, select “This computer” to back up your device to your computer’s hard drive. If you prefer to encrypt your backup, you can select the “Encrypt local backup” option and create a password.
2.5. Initiate the Backup Process
Click the “Back Up Now” button to start the backup process. iTunes will begin backing up your device, including your photos, to your computer. The backup time will depend on the amount of data on your device.
2.6. Verify the Backup
Once the backup is complete, you can verify it by checking the “Latest Backup” date and time in the “Backups” section. This ensures that your backup was successful.
3. Understanding the Limitations of iTunes Photo Backups
While iTunes backups can be a convenient way to protect your photos, it’s essential to understand their limitations:
3.1. Backup Size and Storage Space
iTunes backups can be quite large, especially if you have a lot of photos and videos on your device. Ensure that you have enough free storage space on your computer’s hard drive to accommodate the backup.
3.2. Backup Speed
The backup process can be time-consuming, depending on the amount of data on your device and the speed of your computer. Be patient and allow the backup to complete without interruption.
3.3. Restore Process
Restoring your device from an iTunes backup will overwrite all the existing data on your device with the data from the backup. This means that any new photos or data created since the last backup will be lost.
3.4. Lack of Granular Control
iTunes backups are an all-or-nothing affair. You can’t choose to back up only your photos or specific albums. The entire device is backed up as a single unit.
4. Exploring Alternative Photo Backup Solutions
Given the limitations of iTunes backups, it’s wise to explore alternative photo backup solutions to ensure your photos are safe and accessible:
4.1. iCloud Photos
iCloud Photos is Apple’s cloud-based photo storage and syncing service. It automatically uploads and stores your photos in the cloud, making them accessible on all your Apple devices. According to Apple Support, iCloud Photos keeps your photos safe and up to date across your devices.
4.2. Google Photos
Google Photos is another popular cloud-based photo storage service. It offers unlimited storage for photos (with some compression) and provides features like automatic organization and search.
4.3. Third-Party Cloud Storage Services
Several third-party cloud storage services, such as Dropbox, OneDrive, and Amazon Photos, offer photo backup and storage options. These services often provide additional features and storage plans.
4.4. External Hard Drives
External hard drives are a traditional and reliable way to back up your photos. You can connect an external hard drive to your computer and manually copy your photo library to the drive.
4.5. Network-Attached Storage (NAS) Devices
NAS devices are like personal cloud servers that you can set up in your home or office. They provide a centralized location to store and back up your photos and other files.
5. Choosing the Right Photo Backup Solution for You
The best photo backup solution for you will depend on your individual needs and preferences. Consider the following factors when making your decision:
5.1. Storage Capacity
How much storage space do you need for your photos? Cloud-based services offer varying storage plans, while external hard drives and NAS devices allow you to choose the storage capacity that suits your needs.
5.2. Cost
Cloud-based services typically charge a monthly or annual fee for storage, while external hard drives and NAS devices require an upfront investment.
5.3. Ease of Use
How easy is the backup solution to use? Some solutions offer automatic backups, while others require manual intervention.
5.4. Accessibility
How easily can you access your photos from different devices and locations? Cloud-based services offer the most convenient accessibility, while external hard drives and NAS devices require you to be connected to the network.
5.5. Security
How secure is your photo backup solution? Choose a solution that offers encryption and other security measures to protect your photos from unauthorized access.
6. Best Practices for Photo Backup and Management
To ensure that your photos are safe and well-organized, follow these best practices:
6.1. Implement a Multi-Layered Backup Strategy
Don’t rely on a single backup solution. Implement a multi-layered backup strategy that includes both local and cloud-based backups.
6.2. Organize Your Photo Library
Organize your photos into folders and albums to make them easier to find and manage. Use descriptive names for your folders and albums.
6.3. Regularly Back Up Your Photos
Make it a habit to regularly back up your photos. Schedule automatic backups or set reminders to manually back up your photos on a regular basis.
6.4. Verify Your Backups
Periodically verify your backups to ensure that they are working correctly. Restore a few photos from your backup to make sure they are intact.
6.5. Store Your Backups in a Safe Place
Store your external hard drives and NAS devices in a safe place, away from potential hazards like fire, water, and theft.
7. Optimizing Your Photo Workflow for Backup Efficiency
To streamline your photo workflow and make backups more efficient, consider these tips:
7.1. Use a Photo Management Software
Photo management software like Adobe Lightroom or Capture One can help you organize, edit, and back up your photos. These programs offer advanced features for managing your photo library and creating backups.
7.2. Cull Your Photos Regularly
Delete unwanted or duplicate photos from your library to reduce the amount of data you need to back up.
7.3. Compress Your Photos
Compress your photos to reduce their file size without sacrificing too much quality. This can save storage space and make backups faster.
7.4. Use a Fast Internet Connection
If you’re using a cloud-based backup solution, use a fast internet connection to speed up the backup process.
7.5. Back Up During Off-Peak Hours
Schedule your backups during off-peak hours when your internet connection is less congested.
8. Troubleshooting Common iTunes Photo Backup Issues
If you encounter problems while backing up your photos with iTunes, here are some troubleshooting tips:
8.1. iTunes Doesn’t Recognize Your Device
Ensure that your device is properly connected to your computer. Try using a different USB cable or port. Restart your device and computer.
8.2. Backup Process is Stuck or Slow
Close any unnecessary programs on your computer. Ensure that you have enough free storage space on your hard drive. Restart your device and computer.
8.3. Backup Fails with an Error Message
Check the error message for clues about the cause of the problem. Search online for solutions to the specific error message. Contact Apple Support for assistance.
8.4. Photos are Missing from the Backup
Ensure that your photos are stored in your device’s Camera Roll or photo library. Check your iTunes settings to make sure that you’re backing up the correct data.
8.5. Restore Process Fails
Ensure that you have the latest version of iTunes installed on your computer. Try restoring from a different backup. Contact Apple Support for assistance.
9. The Future of Photo Backup and Storage
The future of photo backup and storage is likely to be dominated by cloud-based solutions, with advancements in AI and machine learning making photo management easier and more efficient. According to research from the Santa Fe University of Art and Design’s Photography Department, in July 2025, AI-powered photo management tools will automatically organize and tag your photos, making them easier to find and share.
10. dfphoto.net: Your Resource for Photo Backup and Management
At dfphoto.net, we’re committed to providing you with the information and resources you need to protect and manage your precious photos. Whether you’re a professional photographer or an amateur enthusiast, our website offers a wealth of articles, tutorials, and reviews to help you master the art of photo backup and management. Visit dfphoto.net today to explore our collection of articles on photo backup solutions, photo management software, and best practices for protecting your photos. Join our community of photographers and share your tips and experiences.
In conclusion, while iTunes can back up your photos, it’s important to understand its limitations and explore alternative solutions to ensure your photos are safe and accessible. By implementing a multi-layered backup strategy and following best practices for photo management, you can protect your precious memories for years to come. Visit dfphoto.net to discover more tips and resources for mastering the art of photography.
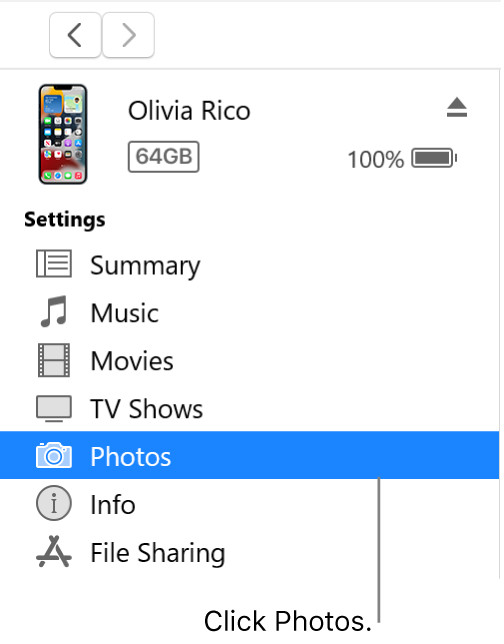 The Device window, with Photos selected in the sidebar.
FAQ: iTunes Photo Backups
1. Does iTunes back up all the photos on my iPhone?
iTunes generally backs up photos in your Camera Roll. Photos synced from your computer or stored in iCloud Photos might not be included.
2. How do I know if my photos are being backed up by iTunes?
Connect your device to iTunes and check the “Summary” tab. If you’re backing up to “This computer,” your photos are likely included, unless you use iCloud Photos.
3. What are the limitations of using iTunes to back up photos?
iTunes backups can be large, slow, and lack granular control. Restoring from a backup overwrites all existing data on your device.
4. What are the alternatives to iTunes for backing up photos?
Alternatives include iCloud Photos, Google Photos, third-party cloud storage services, external hard drives, and NAS devices.
5. How often should I back up my photos?
Regular backups are crucial. Aim for at least weekly backups, or even daily if you frequently take new photos.
6. Can I back up specific albums or folders with iTunes?
No, iTunes backs up the entire device. You can’t select specific albums or folders to back up.
7. What should I do if iTunes doesn’t recognize my device?
Ensure your device is properly connected, try a different USB cable, restart your device and computer, and update iTunes.
8. Is it safe to store my photos in iCloud Photos?
iCloud Photos offers encryption and security measures to protect your photos. However, it’s still wise to have a secondary backup.
9. How can I speed up the iTunes backup process?
Close unnecessary programs, ensure enough free storage, and use a fast internet connection if backing up to the cloud.
10. What should I do if my iTunes backup fails?
Check the error message, search online for solutions, and contact Apple Support for assistance.
Visit dfphoto.net to explore detailed tutorials and connect with a community of photographers. Address: 1600 St Michael’s Dr, Santa Fe, NM 87505, United States. Phone: +1 (505) 471-6001. Website: dfphoto.net.