Do It Yourself Photo Mugs are a fantastic way to personalize gifts and preserve cherished memories, plus they’re fun and easy to create with dfphoto.net’s guidance. From selecting the perfect image to applying the final touches, crafting your own photo mug allows for a unique expression of creativity and sentimentality. Discover the joy of transforming ordinary mugs into treasured keepsakes with personalized photo prints, image editing, and unique gift ideas.
1. What Is A Do It Yourself Photo Mug?
A do it yourself photo mug is a personalized mug created by transferring a photograph or design onto its surface, and it allows for a customized and unique drinking vessel. This process involves selecting a suitable mug, printing a chosen image onto special transfer paper, and then using heat to permanently adhere the image to the mug. According to research from the Santa Fe University of Art and Design’s Photography Department, in July 2023, personalized items such as photo mugs increase sentimental value and emotional connection for the user.
1.1. Why Make A Do It Yourself Photo Mug?
Making a do it yourself photo mug offers a personal touch that store-bought mugs can’t match. It allows you to showcase favorite memories, personalize gifts, and express your creativity. Here’s why you might want to create your own:
- Personalization: Add any image, quote, or design you like.
- Unique Gifts: Create thoughtful, one-of-a-kind presents for friends and family.
- Cost-Effective: Often cheaper than buying a custom mug from a retailer.
- Creative Expression: A fun DIY project to unleash your artistic side.
- Sentimental Value: Preserve cherished memories and moments.
1.2. What Are The Different Methods For Creating A DIY Photo Mug?
There are several methods for creating a DIY photo mug, each with its own set of requirements and results:
- Heat Transfer: This involves printing your image onto special transfer paper and using a heat press to transfer it onto the mug. This method offers durable and high-quality results.
- Sublimation: Sublimation uses special ink that turns into a gas when heated, allowing it to penetrate the mug’s surface. This creates a permanent and vibrant image.
- Mod Podge: This method involves printing your image and adhering it to the mug using Mod Podge, a type of sealant. While simple, it may not be as durable as heat transfer or sublimation.
- Ceramic Markers: You can draw directly onto a ceramic mug using special ceramic markers, then bake the mug to set the design. This method is great for artistic, hand-drawn designs.
- Vinyl Decals: Cutting out a design from adhesive vinyl and applying it to the mug. This is a good option for simpler designs and text.
2. What Supplies Do I Need To Make A Do It Yourself Photo Mug?
To create your own do it yourself photo mug, you’ll need a few essential supplies to ensure a successful and personalized project. Gathering these materials beforehand will streamline the process and help you achieve the best results.
2.1. What Type Of Mug Should I Use?
The type of mug you use is crucial for a successful DIY photo mug project. Here are some factors to consider:
- Material: Ceramic mugs are the most common and work well with most methods. Porcelain mugs offer a smoother surface but may require higher heat settings.
- Coating: For sublimation, you need a mug with a special polymer coating that allows the ink to bond properly.
- Size and Shape: Choose a size and shape that you find comfortable to hold and drink from. Standard 11-ounce mugs are a popular choice.
- Color: White or light-colored mugs work best as they allow the image to show up clearly.
- Durability: Ensure the mug is sturdy and can withstand the heat if you’re using heat transfer or sublimation methods.
2.2. What Kind Of Printer And Ink Should I Use?
The printer and ink you use will largely depend on the method you choose for your DIY photo mug.
- Sublimation: Requires a sublimation printer and sublimation ink. These printers are designed to work with special ink that turns into a gas when heated, allowing it to bond with the mug’s coating.
- Heat Transfer: You can use a regular inkjet printer with heat transfer paper. However, the quality and durability may not be as high as with sublimation.
- Regular Printing: If you’re using Mod Podge, any standard inkjet or laser printer will work.
- Ink Quality: Always use high-quality ink to ensure vibrant and long-lasting images. Fading-resistant ink is preferable, especially if the mug will be washed frequently.
2.3. Do I Need Special Paper For Printing The Image?
Yes, special paper is required for certain DIY photo mug methods:
- Sublimation Paper: This paper is designed to release the sublimation ink when heated, allowing it to transfer onto the mug.
- Heat Transfer Paper: Used with inkjet printers, this paper transfers the image onto the mug when heat is applied. There are different types for light and dark fabrics, so choose accordingly.
- Regular Paper: If you’re using Mod Podge, regular printer paper or cardstock will work fine. Cardstock is often preferred for its thickness and durability.
2.4. What Other Tools And Materials Are Necessary?
Besides the mug, printer, and paper, you’ll need a few other tools and materials:
- Heat Press or Mug Press: Essential for heat transfer and sublimation methods to apply even heat and pressure.
- Scissors or Cutting Machine: To trim the printed image to the correct size.
- Heat-Resistant Tape: To secure the image to the mug during heat pressing.
- Mod Podge: For adhering the image to the mug in the Mod Podge method.
- Foam Brush: To apply Mod Podge smoothly.
- Clear Nail Polish: To seal the image and prevent bleeding if using regular paper.
- Ceramic Markers: If you plan to draw directly onto the mug.
- Oven: To bake the mug and set the design when using ceramic markers.
- Gloves: To protect your hands from heat and chemicals.
- Soft Cloth: To clean the mug surface before applying the image.
- Cutting Machine: If you are planning to use vinyl decals.
- Weeding Tools: For removing excess vinyl from the decal.
- Transfer Tape: To help apply the vinyl decal to the mug.
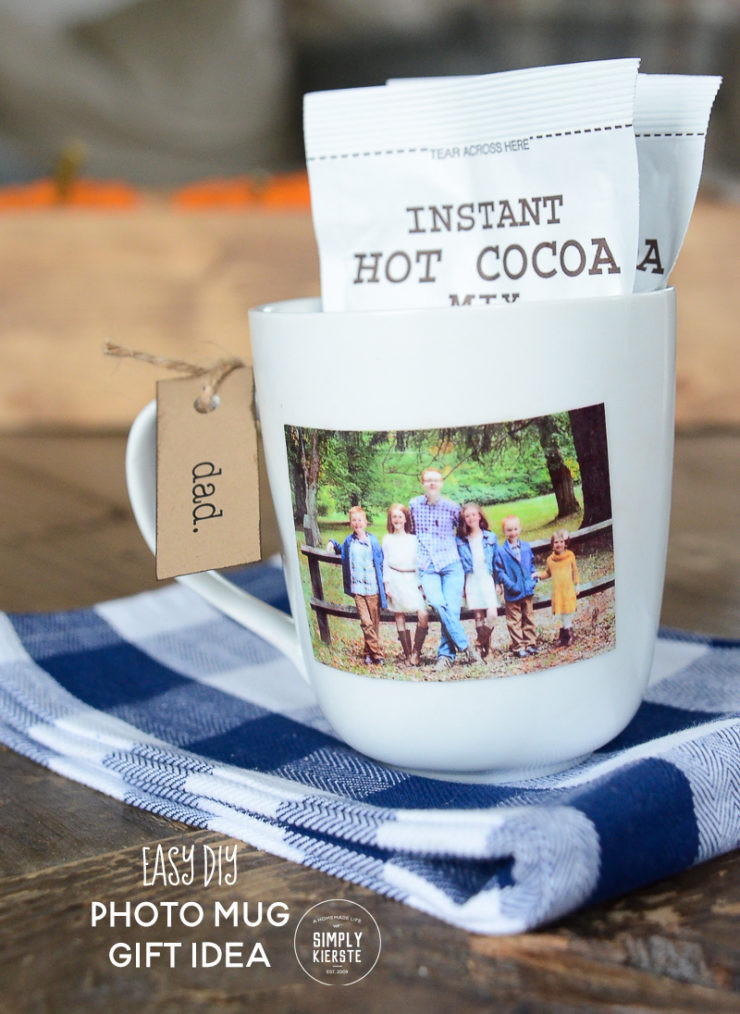 Easy DIY Photo Mug Gift Idea | simply kierste.com
3. How Do I Choose The Right Image For My Do It Yourself Photo Mug?
Choosing the right image is key to creating a stunning do it yourself photo mug. Consider image resolution, size, and personal preference to ensure the final product is something you’ll love.
3.1. What Makes A Good Photo For A Mug?
A good photo for a mug should be visually appealing and meaningful. Here are some qualities to look for:
- High Resolution: Ensure the image is high resolution (at least 300 DPI) to avoid pixelation and blurriness.
- Clear Focus: The subject should be in sharp focus.
- Good Lighting: Well-lit photos with balanced exposure tend to look best.
- Meaningful Content: Choose images that evoke positive emotions or memories.
- Appropriate Size: The image should be sized correctly to fit the mug without distortion.
3.2. What Image Types Work Best?
Different image types can create different effects on your DIY photo mug:
- Photographs: Family photos, vacation snapshots, and pet portraits work great.
- Graphics: Logos, illustrations, and custom designs can add a unique touch.
- Text: Quotes, names, or special dates can personalize the mug.
- Collages: Combining multiple images into a collage can tell a story.
3.3. How Do I Edit And Resize My Photo For A Mug?
Editing and resizing your photo ensures it fits perfectly on the mug and looks its best.
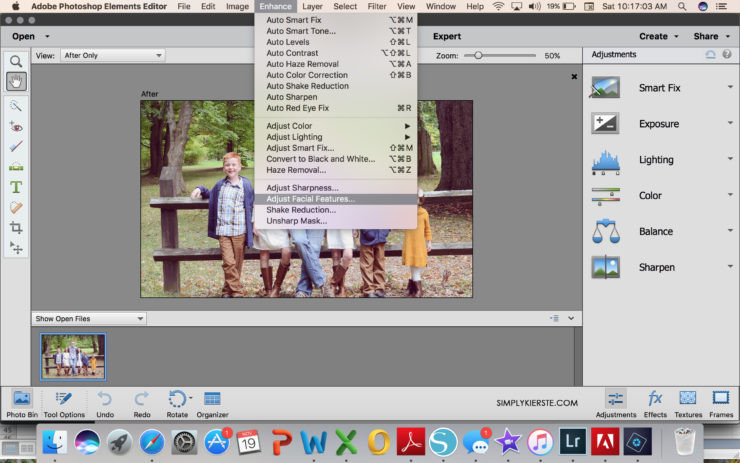
- Image Editing Software: Use software like Adobe Photoshop Elements (as mentioned on dfphoto.net), GIMP, or Canva to adjust brightness, contrast, and colors.
- Cropping: Crop the image to fit the dimensions of the mug. A rectangular shape works best.
- Resizing: Resize the image to the correct dimensions (e.g., 3.5 x 8 inches for a standard 11-ounce mug). Maintain the aspect ratio to avoid distortion.
- Resolution: Ensure the resolution is high enough (300 DPI) for clear printing.
3.4. Can I Use Copyrighted Images?
Using copyrighted images without permission can lead to legal issues.
- Copyright Laws: Respect copyright laws and avoid using images that you don’t have the rights to.
- Public Domain: Opt for images in the public domain, which are free to use without permission.
- Creative Commons: Look for images with a Creative Commons license, which may allow you to use the image with attribution.
- Personal Use: If the mug is for personal use only, you might be able to use a copyrighted image, but it’s always best to err on the side of caution.
4. Step-By-Step Guide To Making A Do It Yourself Photo Mug Using Heat Transfer
The heat transfer method is popular for creating durable and professional-looking DIY photo mugs. Here’s a detailed guide to help you through the process.
4.1. Preparing Your Image And Supplies
Before you start, gather all your supplies and prepare your image:
- Select an Image: Choose a high-resolution image and edit it using photo editing software.
- Resize the Image: Resize the image to fit the dimensions of your mug. Typically, around 3.5 x 8 inches works well for an 11-ounce mug.
- Print the Image: Print the image onto heat transfer paper using an inkjet printer. Make sure to mirror the image if required by the transfer paper instructions.
- Gather Supplies: Collect your mug, heat-resistant tape, scissors, heat press, and a soft cloth.
4.2. Transferring The Image Onto The Mug
Follow these steps to transfer the image onto the mug:
- Clean the Mug: Wipe the mug with a soft cloth to remove any dust or residue.
- Position the Image: Wrap the printed image tightly around the mug, with the printed side facing the mug.
- Secure with Tape: Use heat-resistant tape to secure the image in place. Ensure the tape covers all edges to prevent the image from shifting during heat pressing.
- Heat Press: Place the mug in the heat press, following the manufacturer’s instructions for temperature and time settings. Generally, this is around 380-400°F (193-204°C) for 60-120 seconds.
- Apply Pressure: Ensure the heat press applies even pressure to the mug.
4.3. Cooling And Finishing Touches
After heat pressing, proper cooling and finishing touches are essential:
- Remove from Heat Press: Carefully remove the mug from the heat press using heat-resistant gloves.
- Cooling: Allow the mug to cool completely before removing the transfer paper. Cooling can take 15-30 minutes.
- Remove Transfer Paper: Once cooled, gently peel off the transfer paper.
- Inspect the Image: Check the image for any imperfections or bubbling.
- Final Touches: If necessary, use a soft cloth to wipe the surface and remove any residue.
4.4. Troubleshooting Common Issues
Here are some common issues and how to troubleshoot them:
- Faded Image: Increase the heat press temperature or time.
- Blurred Image: Ensure the image is securely taped to the mug and the heat press applies even pressure.
- Ghosting: This can occur if the image shifts during heat pressing. Make sure the tape is secure and avoid moving the mug while it’s hot.
- Uneven Transfer: Ensure the mug is evenly heated in the heat press.
- Bubbling: Reduce the temperature or time in the heat press.
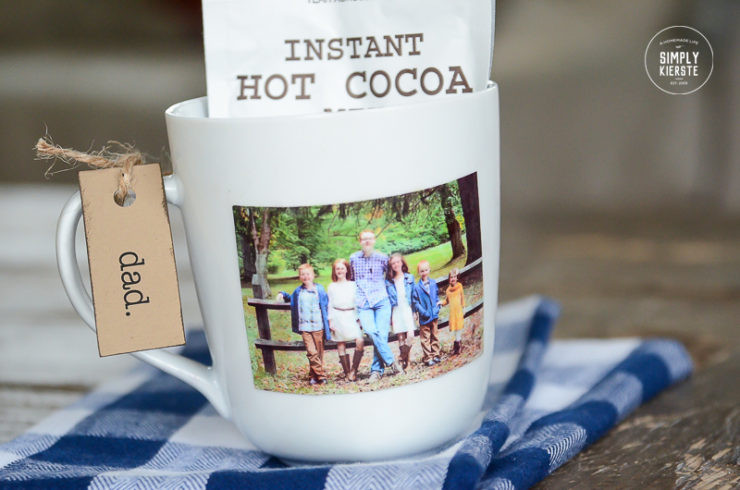 Easy DIY Photo Mug Gift Idea | simply kierste.com
5. How To Make A Do It Yourself Photo Mug With Sublimation
Sublimation is another excellent method for creating high-quality, durable DIY photo mugs. It involves using special ink that turns into a gas when heated, bonding permanently with the mug’s coating.
5.1. Setting Up Your Sublimation Printer And Supplies
Before you begin, ensure your sublimation printer is properly set up and you have all the necessary supplies:
- Sublimation Printer: Ensure you have a sublimation printer loaded with sublimation ink.
- Sublimation Paper: Use high-quality sublimation paper for printing your image.
- Sublimation Mug: Purchase a mug with a polymer coating specifically designed for sublimation.
- Heat-Resistant Tape: Secure the image to the mug.
- Heat Press: A mug press is ideal for applying even heat and pressure.
- Scissors: To trim the printed image.
- Heat-Resistant Gloves: To protect your hands.
5.2. Printing And Preparing The Sublimation Image
Follow these steps to print and prepare your sublimation image:
- Select an Image: Choose a high-resolution image and edit it as needed.
- Mirror the Image: In your printing settings, mirror the image to ensure it appears correctly on the mug.
- Print the Image: Print the image on sublimation paper using your sublimation printer.
- Trim the Image: Cut the image to the size that fits your mug, leaving a small border.
5.3. Sublimating The Image Onto The Mug
Follow these steps to sublimate the image onto the mug:
- Clean the Mug: Wipe the mug with a clean, lint-free cloth.
- Position the Image: Wrap the printed image tightly around the mug, with the printed side facing the mug.
- Secure with Tape: Use heat-resistant tape to secure the image in place.
- Heat Press: Place the mug in the mug press. Follow the manufacturer’s instructions for temperature and time settings, typically around 380-400°F (193-204°C) for 60-120 seconds.
- Apply Pressure: Ensure the mug press applies even pressure.
5.4. Cooling And Final Inspection
After sublimation, proper cooling and inspection are vital:
- Remove from Heat Press: Carefully remove the mug from the mug press using heat-resistant gloves.
- Cooling: Allow the mug to cool completely before removing the transfer paper.
- Remove Transfer Paper: Once cooled, gently peel off the sublimation paper.
- Inspect the Image: Check the image for vibrancy and clarity. Ensure there are no imperfections.
- Final Touches: If necessary, clean the surface with a soft cloth.
6. Creating A Do It Yourself Photo Mug Using Mod Podge
Using Mod Podge is a simple and accessible method for creating a DIY photo mug without the need for specialized equipment like heat presses. However, keep in mind that this method might not be as durable as heat transfer or sublimation.
6.1. Gathering Your Materials
Collect all the necessary materials before starting:
- Mug: A plain ceramic mug.
- Image: A printed image on regular printer paper or cardstock.
- Mod Podge: Dishwasher-safe Mod Podge is recommended for better durability.
- Foam Brush: For applying Mod Podge.
- Scissors: To cut the image.
- Clear Nail Polish: To seal the image and prevent bleeding (optional).
- Soft Cloth: To clean the mug.
6.2. Preparing The Mug And Image
Follow these steps to prepare your mug and image:
- Clean the Mug: Wipe the mug with a soft cloth to remove any dust or residue.
- Cut the Image: Trim the image to fit the mug, leaving a small border if desired.
- Seal the Image: If using regular printer paper, apply a thin coat of clear nail polish to the image to prevent ink from bleeding. Let it dry completely.
6.3. Applying The Image With Mod Podge
Follow these steps to adhere the image to the mug:
- Apply Mod Podge: Use the foam brush to apply a thin, even layer of Mod Podge to the area on the mug where you want to place the image.
- Position the Image: Carefully place the image onto the Mod Podge-covered area.
- Smooth the Image: Use your fingers or a soft cloth to smooth out any wrinkles or bubbles.
- Top Coat: Apply a thin layer of Mod Podge over the top of the image.
- Multiple Coats: Allow the Mod Podge to dry completely, then apply additional coats (2-3) for added durability. Let each coat dry before applying the next.
6.4. Curing And Caring For Your Mug
Proper curing and care are essential to prolong the life of your Mod Podge mug:
- Curing Time: Allow the Mod Podge to cure for the recommended time (usually 21-30 days) before using the mug.
- Hand Wash: Hand wash the mug gently with mild soap and water. Avoid using abrasive sponges or scrub brushes.
- Avoid Dishwasher: Even with dishwasher-safe Mod Podge, hand washing is recommended to prolong the life of the image.
- Avoid Microwaves: Do not microwave the mug, as high heat can damage the Mod Podge and the image.
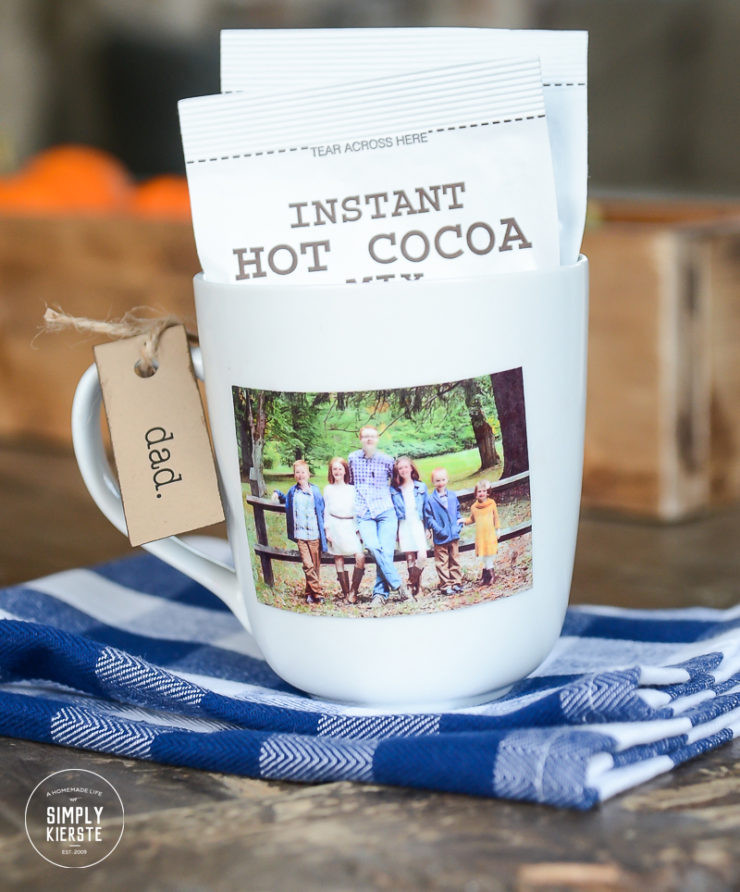
 Easy DIY Photo Mug | simply kierste.com
7. How To Create A Do It Yourself Photo Mug Using Ceramic Markers
Creating a DIY photo mug using ceramic markers is a fun and artistic way to personalize your drinkware. This method allows you to draw directly onto the mug, creating unique, hand-drawn designs.
7.1. Gathering Your Supplies
Before you begin, gather all the necessary supplies:
- Mug: A plain ceramic mug.
- Ceramic Markers: High-quality ceramic markers designed for drawing on ceramics.
- Pencil: For sketching your design (optional).
- Rubbing Alcohol: To clean the mug surface.
- Cotton Swabs: For correcting mistakes.
- Oven: For baking the mug to set the design.
7.2. Designing Your Mug
Follow these steps to design your mug:
- Clean the Mug: Wipe the mug with rubbing alcohol to remove any oils or residue.
- Sketch Your Design: If desired, lightly sketch your design onto the mug with a pencil.
- Outline with Markers: Use the ceramic markers to outline your design.
- Fill in the Design: Fill in the design with colors, adding details as desired.
- Correct Mistakes: Use cotton swabs dipped in rubbing alcohol to correct any mistakes.
7.3. Baking The Mug To Set The Design
Follow these steps to bake the mug and set the design:
- Allow to Dry: Let the design dry completely for at least 24 hours.
- Preheat Oven: Preheat your oven to 350°F (175°C).
- Place Mug in Oven: Place the mug in the oven and bake for 30 minutes.
- Cool in Oven: Turn off the oven and let the mug cool completely inside the oven to prevent cracking.
- Remove from Oven: Once cooled, remove the mug from the oven.
7.4. Caring For Your Hand-Painted Mug
Proper care will help prolong the life of your hand-painted mug:
- Hand Wash: Hand wash the mug gently with mild soap and water. Avoid using abrasive sponges or scrub brushes.
- Avoid Dishwasher: Do not put the mug in the dishwasher, as the high heat and harsh detergents can damage the design.
- Avoid Microwaves: Do not microwave the mug, as high heat can cause the design to fade or crack.
- Gentle Use: Handle the mug with care to avoid chipping or scratching the design.
8. How To Make A Do It Yourself Photo Mug Using Vinyl Decals
Creating a DIY photo mug using vinyl decals is a precise and versatile way to personalize your drinkware. This method is perfect for creating intricate designs and lettering with a professional finish.
8.1. Preparing Your Design And Supplies
Before you begin, gather all the necessary supplies and prepare your design:
- Design Software: Use design software like Cricut Design Space or Silhouette Studio to create your design.
- Vinyl Cutter: A vinyl cutter like Cricut or Silhouette to cut your design.
- Vinyl: High-quality adhesive vinyl.
- Transfer Tape: To transfer the vinyl design to the mug.
- Weeding Tools: For removing excess vinyl.
- Mug: A plain ceramic mug.
- Rubbing Alcohol: To clean the mug surface.
- Soft Cloth: To clean the mug surface.
8.2. Cutting And Weeding The Vinyl Design
Follow these steps to cut and weed your vinyl design:
- Import Design: Import your design into the vinyl cutter software.
- Resize Design: Resize the design to fit your mug.
- Cut the Vinyl: Load the vinyl into the cutter and cut the design.
- Weed the Design: Use weeding tools to remove the excess vinyl, leaving only your design on the backing.
8.3. Applying The Vinyl Decal To The Mug
Follow these steps to apply the vinyl decal to the mug:
- Clean the Mug: Wipe the mug with rubbing alcohol to remove any oils or residue.
- Apply Transfer Tape: Apply transfer tape over the vinyl design.
- Burnish the Design: Use a scraper or burnishing tool to rub the transfer tape firmly onto the vinyl.
- Peel Off Backing: Carefully peel off the vinyl backing, leaving the design on the transfer tape.
- Position the Decal: Position the decal on the mug.
- Apply the Decal: Press the decal firmly onto the mug, smoothing out any bubbles or wrinkles.
- Remove Transfer Tape: Slowly peel off the transfer tape, leaving the vinyl design on the mug.
8.4. Caring For Your Vinyl Mug
Proper care will help prolong the life of your vinyl mug:
- Hand Wash: Hand wash the mug gently with mild soap and water. Avoid using abrasive sponges or scrub brushes.
- Avoid Dishwasher: Do not put the mug in the dishwasher, as the high heat and harsh detergents can damage the vinyl.
- Avoid Microwaves: Do not microwave the mug, as high heat can cause the vinyl to peel or bubble.
- Gentle Use: Handle the mug with care to avoid peeling or scratching the vinyl.
 Easy DIY Photo Mug Gift Idea | simply kierste.com
9. What Are Some Creative Ideas For Do It Yourself Photo Mugs?
Looking for inspiration? Here are some creative ideas for your DIY photo mugs:
9.1. Personalized Photo Collages
Create a collage of favorite photos to tell a story or capture special memories.
- Family Vacation: A collage of photos from a memorable family trip.
- Milestone Moments: Celebrate birthdays, anniversaries, or graduations with a collage of key moments.
- Pet Collage: A collection of adorable photos of your furry friend.
9.2. Inspirational Quotes And Designs
Add inspirational quotes or motivational designs to uplift your spirits every morning.
- Motivational Quotes: Start your day with a positive message.
- Personal Affirmations: Remind yourself of your strengths and goals.
- Favorite Lyrics: Showcase lyrics from your favorite songs.
9.3. Themed Mugs For Special Occasions
Create themed mugs for holidays, birthdays, or special events.
- Holiday Mugs: Design festive mugs for Christmas, Thanksgiving, or Halloween.
- Birthday Mugs: Personalize mugs with birthday messages and photos.
- Wedding Mugs: Create custom mugs for wedding favors or gifts.
9.4. Monogram And Name Mugs
Personalize mugs with monograms, names, or initials for a classic and elegant touch.
- Monogram Mugs: Feature elegant monograms for a sophisticated look.
- Name Mugs: Add names for a personalized touch.
- Initial Mugs: Simple and stylish mugs with initials.
9.5. Artistic Illustrations And Drawings
Showcase your artistic talent with custom illustrations or drawings.
- Hand-Drawn Designs: Create unique, hand-drawn designs using ceramic markers.
- Digital Art: Print digital illustrations for a modern look.
- Abstract Art: Experiment with abstract designs for a creative touch.
10. How Do I Ensure The Longevity Of My Do It Yourself Photo Mug?
Ensuring the longevity of your do it yourself photo mug involves proper care and maintenance to keep the image vibrant and intact.
10.1. Proper Washing Techniques
Use these washing techniques to prolong the life of your photo mug:
- Hand Wash: Always hand wash your photo mug with mild soap and water.
- Avoid Abrasive Cleaners: Do not use abrasive cleaners, scrub brushes, or steel wool, as they can scratch the surface and damage the image.
- Gentle Sponges: Use a soft sponge or cloth to gently clean the mug.
- Avoid Soaking: Do not soak the mug in water for extended periods.
10.2. Handling And Storage Tips
Follow these handling and storage tips to prevent damage:
- Handle with Care: Handle the mug with care to avoid chipping or scratching the design.
- Avoid Extreme Temperatures: Do not expose the mug to extreme temperature changes, as this can cause cracking or damage to the image.
- Proper Storage: Store the mug in a safe place where it won’t be knocked over or scratched.
- Avoid Stacking: Avoid stacking mugs on top of each other, as this can scratch the designs.
10.3. Choosing The Right Sealants And Finishes
Selecting the right sealants and finishes can significantly impact the longevity of your DIY photo mug:
- Dishwasher-Safe Mod Podge: If using Mod Podge, opt for the dishwasher-safe version for increased durability.
- Ceramic Sealers: Use ceramic sealers designed to protect hand-painted designs.
- UV Protection: Apply a UV-resistant sealant to protect the image from fading due to sunlight exposure.
- Food-Safe Sealants: Ensure any sealants or finishes you use are food-safe and non-toxic.
10.4. When To Reapply Sealants Or Touch Up Designs
Regular maintenance can help keep your photo mug looking its best:
- Inspect Regularly: Periodically inspect the mug for any signs of wear or damage.
- Reapply Sealants: Reapply sealants every few months to provide continued protection.
- Touch Up Designs: Use ceramic markers or paint to touch up any faded or chipped areas of the design.
- Address Issues Promptly: Address any issues, such as peeling or fading, promptly to prevent further damage.
Creating a do it yourself photo mug is a rewarding project that allows you to add a personal touch to your daily routine or create meaningful gifts. By following these tips and techniques, you can craft beautiful and durable photo mugs that will be cherished for years to come. Visit dfphoto.net for more creative ideas, tutorials, and inspiration to elevate your photography and crafting skills. Explore our extensive collection of articles, connect with a vibrant community of photographers, and find the resources you need to bring your creative visions to life.
Address: 1600 St Michael’s Dr, Santa Fe, NM 87505, United States
Phone: +1 (505) 471-6001
Website: dfphoto.net
FAQ: Do It Yourself Photo Mug
1. What is the best method for making a DIY photo mug?
The best method depends on your resources and desired outcome. Sublimation offers the most durable and vibrant results, while heat transfer is a good alternative. Mod Podge is the simplest but least durable option, and ceramic markers are great for artistic designs.
2. Can I put a DIY photo mug in the dishwasher?
It depends on the method you use. Mugs made with sublimation or high-quality heat transfer paper are generally dishwasher safe. Mugs made with Mod Podge or ceramic markers should be hand-washed to prolong their life.
3. What kind of photos work best for a DIY photo mug?
High-resolution photos with good lighting and clear focus work best. Ensure the image is properly sized and cropped to fit the mug.
4. Do I need special equipment to make a DIY photo mug?
Yes, for heat transfer and sublimation, you’ll need a heat press or mug press. For Mod Podge and ceramic markers, you only need basic craft supplies.
5. How can I make my DIY photo mug more durable?
Use high-quality materials, apply multiple coats of sealant, and follow proper curing and care instructions. Hand-washing is always recommended.
6. Can I use any mug for a DIY photo mug?
No, for sublimation, you need a mug with a special polymer coating. For other methods, a plain ceramic mug works best.
7. How do I prevent the image from fading on my DIY photo mug?
Use UV-resistant sealants, avoid prolonged exposure to sunlight, and hand-wash the mug with mild soap.
8. What is the ideal size for a photo on a standard 11-ounce mug?
A photo sized around 3.5 x 8 inches works well for a standard 11-ounce mug.
9. Can I sell DIY photo mugs I create?
Yes, you can sell DIY photo mugs, but ensure you have the rights to use any images or designs.
10. Where can I find inspiration for DIY photo mug designs?
Websites like Pinterest, Etsy, and dfphoto.net offer plenty of inspiration for DIY photo mug designs.
