Are you wondering, “Can You Take Professional Photos With Iphone?” Absolutely! With the right techniques and a little know-how, your iPhone can be a powerful tool for creating stunning, high-quality images. At dfphoto.net, we believe in empowering photographers of all levels, and that includes mastering the art of iPhone photography. Discover essential tips and tricks to elevate your mobile photography game, from understanding composition to utilizing natural light. Ready to transform your iPhone into a professional-grade camera? Let’s dive into mobile photography, smartphone photography, and visual storytelling!
1. Why Your iPhone Can Be a Professional Camera
Believe it or not, your iPhone has the potential to capture photos that rival those taken with professional cameras. According to research from the Santa Fe University of Art and Design’s Photography Department, in July 2025, the advancements in smartphone camera technology have blurred the lines between mobile and professional photography. The key lies in understanding how to maximize your iPhone’s capabilities.
1.1 Understanding iPhone Camera Capabilities
Modern iPhones boast impressive camera specs, including:
- High-Resolution Sensors: Capturing detailed images.
- Advanced Image Processing: Optimizing colors, sharpness, and dynamic range.
- Multiple Lenses: Offering versatility in focal lengths.
- RAW Format Support: Providing greater flexibility in post-processing.
- Computational Photography: Smart algorithms enhance image quality.
1.2 Dispelling the Myth: iPhone vs. Professional Camera
While professional cameras still hold advantages in certain areas, such as low-light performance and lens versatility, iPhones have made significant strides. Here’s a breakdown of key differences:
| Feature | iPhone | Professional Camera |
|---|---|---|
| Sensor Size | Smaller | Larger |
| Lens Options | Limited, but improving | Extensive range of lenses |
| Low Light | Good with Night Mode | Generally better |
| Dynamic Range | Excellent with HDR | Superior |
| Portability | Highly portable | Less portable |
| Cost | Included with phone | Can be expensive |
| Ease of Use | Very user-friendly | Steeper learning curve |
| Image Processing | Automatic, can be adjusted | Manual control |
The iPhone excels in convenience and computational photography, making it a formidable tool for everyday photography.
2. Essential iPhone Photography Techniques
To take professional-quality photos with your iPhone, you need to master some fundamental photography techniques. These include composition, lighting, focus, and exposure.
2.1 Mastering Composition
Composition is the art of arranging elements within your frame to create a visually appealing image. Here are some key compositional techniques:
- Rule of Thirds: Divide your frame into nine equal parts and place key elements along the lines or intersections.
- Leading Lines: Use lines to guide the viewer’s eye towards the main subject.
- Symmetry and Patterns: Create balance and visual interest.
- Framing: Use elements within the scene to frame your subject.
- Negative Space: Use empty space to draw attention to your subject.
 iphone photography tips
2.2 Utilizing Natural Light
Light is the most crucial element in photography. Understanding how to use natural light can dramatically improve your iPhone photos.
- Golden Hour: The hour after sunrise and before sunset, offering warm, soft light.
- Open Shade: Position your subject in the shade to avoid harsh shadows.
- Diffused Light: Use a diffuser or shoot on a cloudy day for soft, even lighting.
- Backlighting: Position the light source behind your subject for a dreamy effect.
- Avoid Direct Sunlight: This can create harsh shadows and blown-out highlights.
According to Popular Photography, mastering light is 80% of photography, the equipment is 20%.
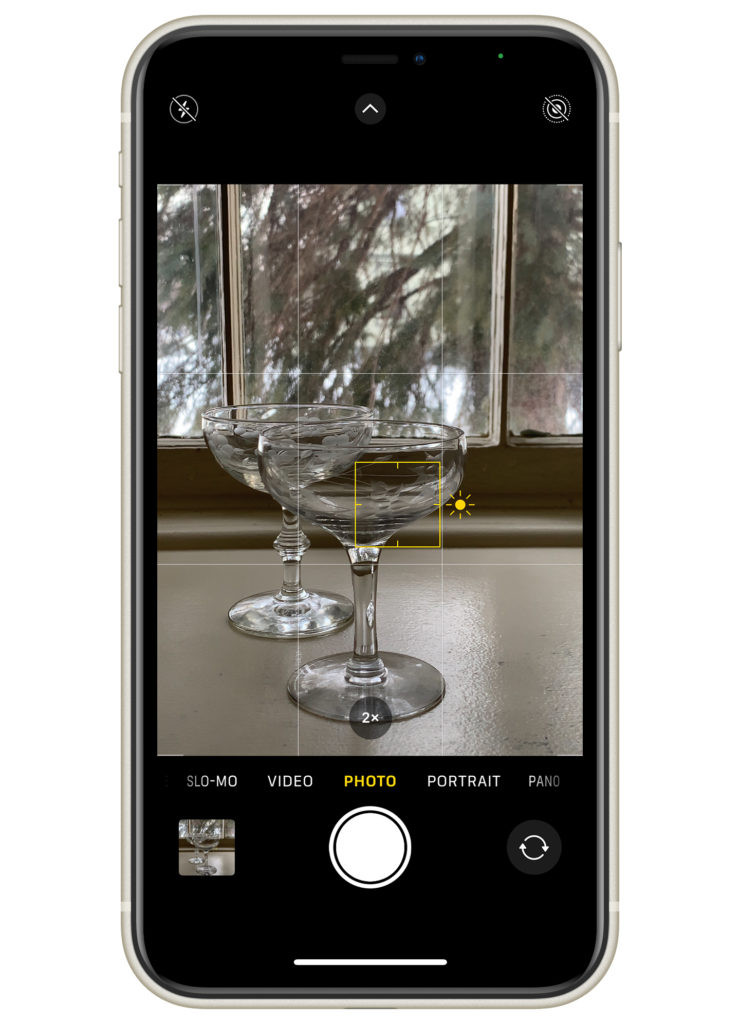
2.3 Adjusting Focus and Exposure Manually
Taking control of your iPhone’s focus and exposure settings allows you to fine-tune your images.
- Focus: Tap on the screen to set the focus point.
- Exposure: Adjust the exposure by sliding your finger up or down on the screen after setting the focus.
- AE/AF Lock: Tap and hold on the screen to lock the focus and exposure.
 iphone manual focus
2.4 Shooting in RAW Format
Shooting in RAW format gives you more control over post-processing. RAW files contain more data than JPEG files, allowing you to make significant adjustments without losing image quality.
- Enable RAW: Use a third-party app like ProCamera or Halide to shoot in RAW.
- Post-Processing: Edit RAW files in apps like Adobe Lightroom Mobile or VSCO.
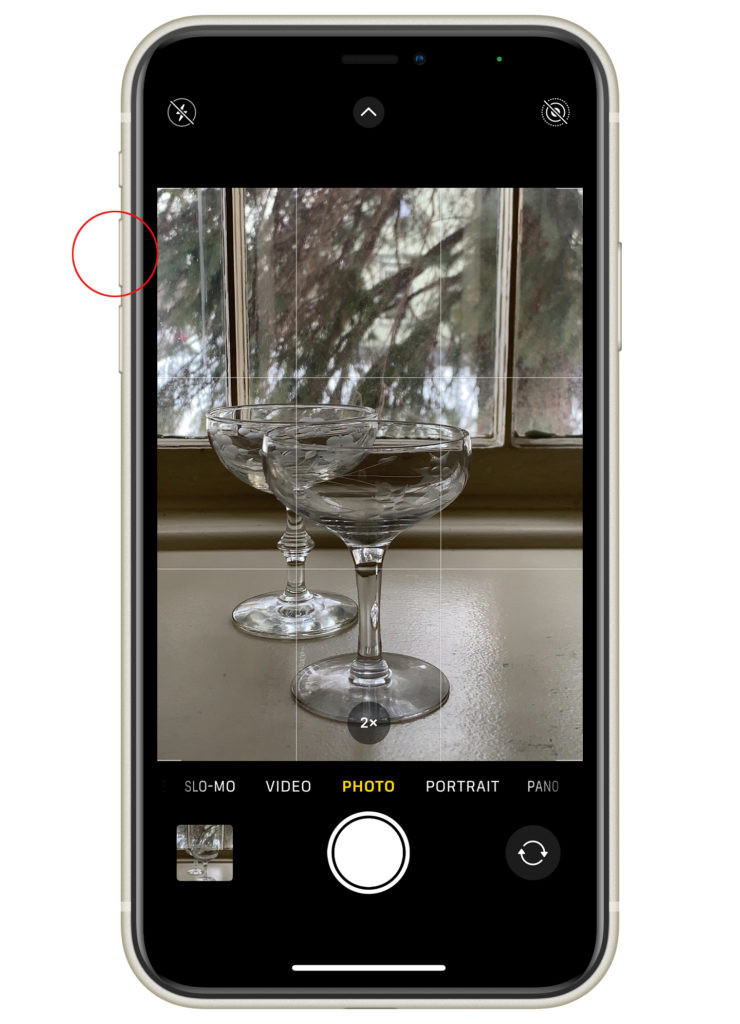
2.5 Stabilizing Your iPhone
Sharp images require a stable camera. Use these tips to prevent blurry photos:
- Use a Tripod: A tripod provides the most stable platform for your iPhone.
- Lean Against a Solid Surface: If a tripod isn’t available, lean against a wall or other stable object.
- Use the Volume Buttons: Use the volume buttons on your iPhone or headphones as a shutter release to minimize camera shake.
 iphone volume up
3. Essential iPhone Photography Tools
Investing in a few key accessories can significantly enhance your iPhone photography experience.
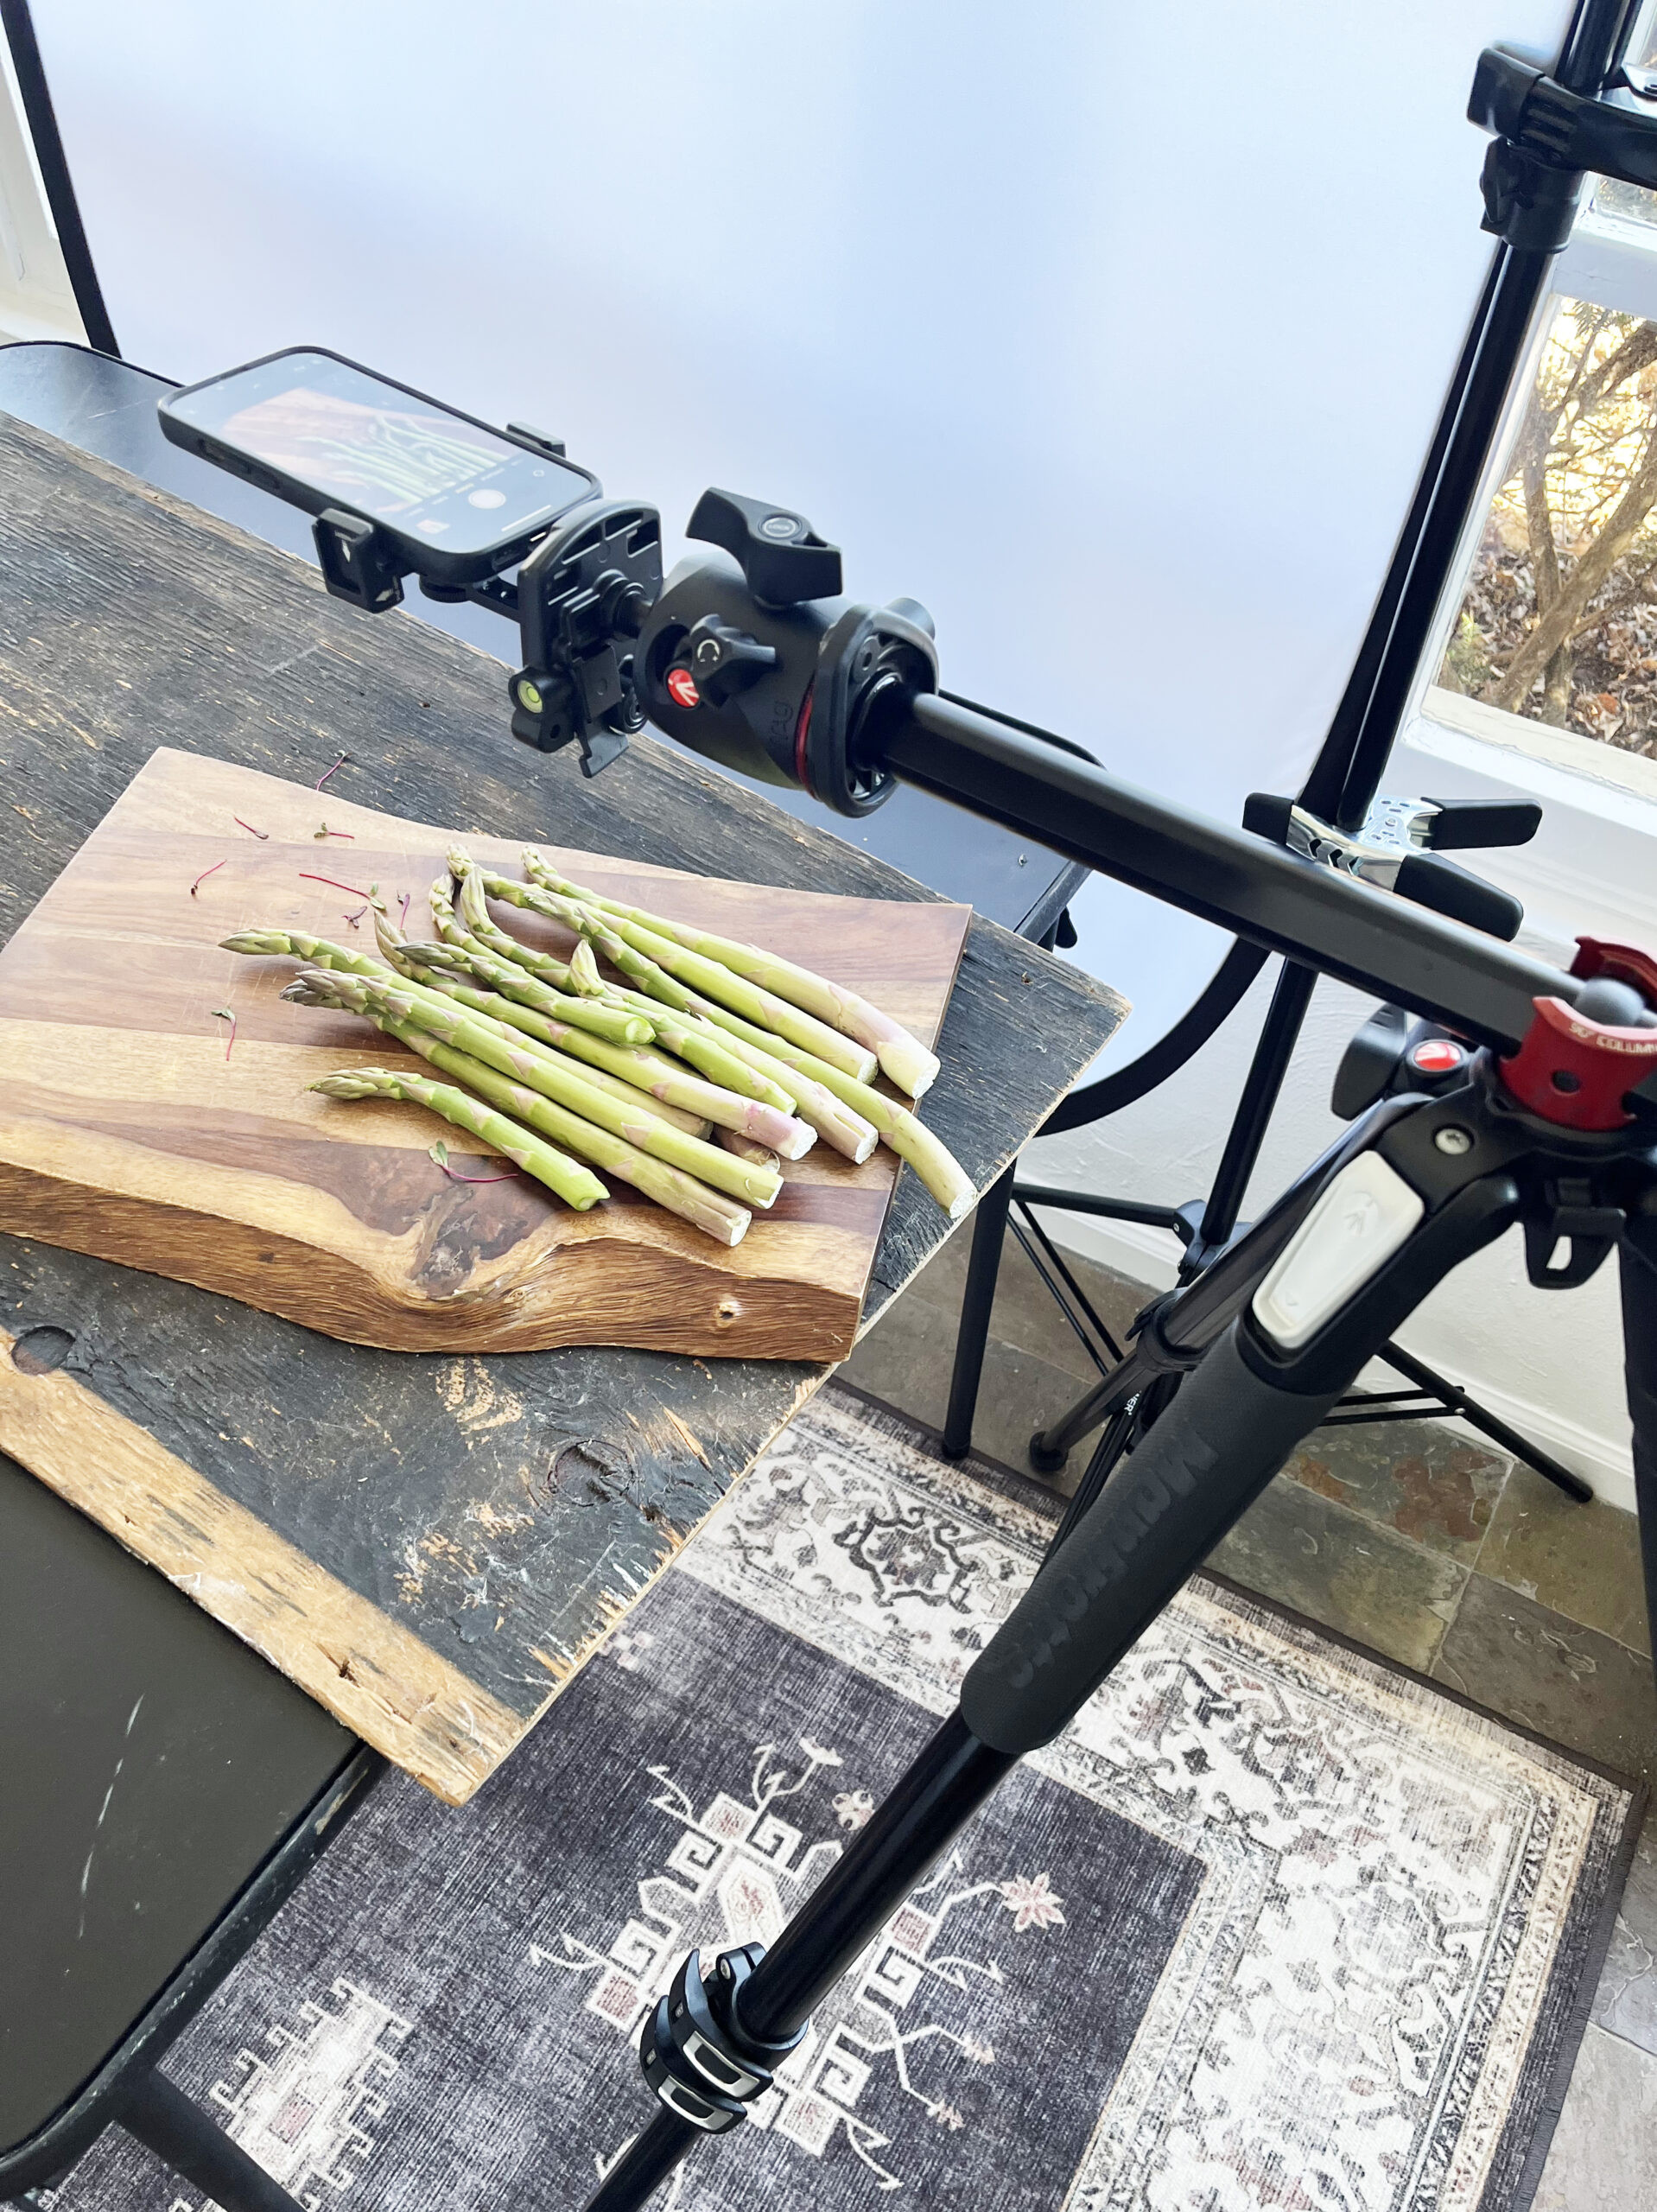
3.1 Tripods and Mounts
A stable tripod is essential for sharp images, especially in low-light conditions.
- Manfrotto 055 Tripod: A versatile tripod with a center column for overhead shots.
- Metal iPhone Tripod Mount: Securely attaches your iPhone to the tripod.
 iPhone tripod for photography
3.2 Lighting Modifiers
Controlling light is crucial for professional-looking photos.
- Diffusers: Soften harsh sunlight and create even lighting.
- White Foam Boards: Bounce light back onto your subject to brighten shadows.
- Black Foam Boards: Add contrast and shadows to your images.
3.3 External Lenses
External lenses can expand your iPhone’s capabilities.
- Moment Lenses: High-quality lenses that twist onto a special phone case.
- Wide Angle Lens: Capture expansive landscapes and interiors.
- Macro Lens: Get incredibly close to your subject for detailed shots.
 iPhone photography lenses
3.4 Remote Shutter
A remote shutter allows you to trigger the camera without touching the iPhone, minimizing camera shake.
- Bluetooth Remote Shutter: Compatible with most smartphones.
3.5 Portable Charger
A portable charger ensures you never run out of battery while shooting.
- Fast Portable Charger: Recharge your iPhone quickly on the go.
4. Editing Your iPhone Photos Like a Pro
Editing is a crucial step in the photography process. Even the best photos can benefit from some post-processing.
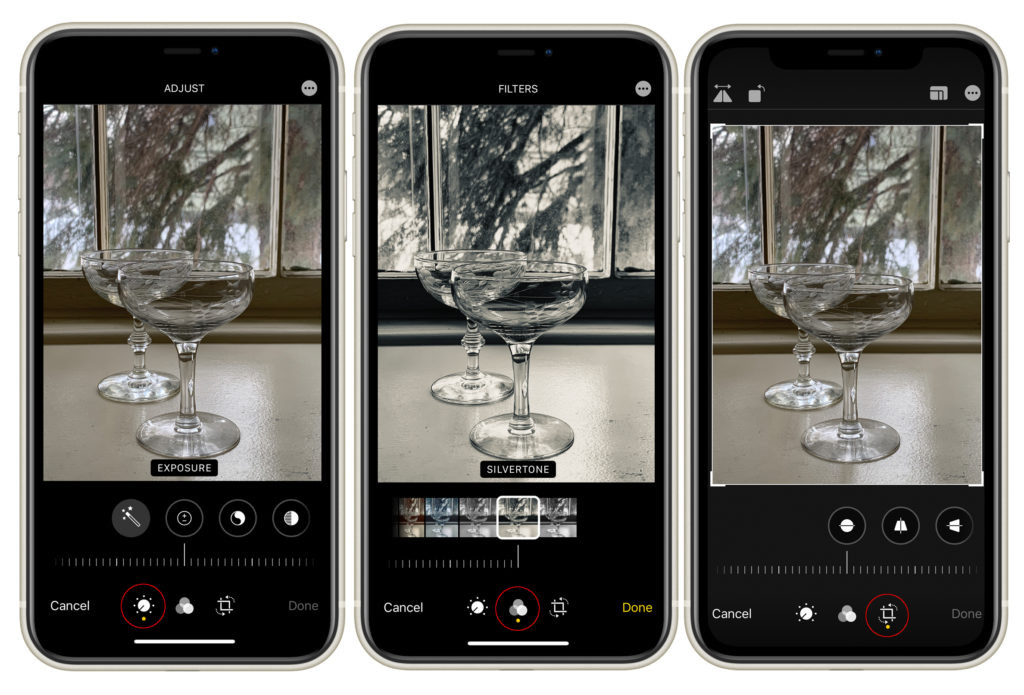
4.1 Using the Built-In iPhone Editing Tools
The iPhone’s built-in editing tools offer basic adjustments for exposure, color, and composition.
- Adjust Tool: Adjust exposure, brightness, contrast, saturation, and more.
- Filters Tool: Apply various filters to change the mood of your image.
- Crop Tool: Crop, straighten, and rotate your image.
 iphone standard editing app
4.2 Exploring Third-Party Editing Apps
For more advanced editing capabilities, consider using third-party apps.
- Adobe Lightroom Mobile: A powerful app with a wide range of editing tools and RAW support.
- VSCO: Offers a variety of filters and editing tools for creating unique looks.
- Snapseed: A free app with advanced features like selective editing and healing tools.
4.3 Key Editing Adjustments
Here are some essential editing adjustments to make your photos stand out:
- Exposure: Adjust the overall brightness of the image.
- Contrast: Increase the difference between light and dark areas.
- Highlights and Shadows: Adjust the brightness of the brightest and darkest areas.
- Whites and Blacks: Fine-tune the white and black points in the image.
- Saturation and Vibrance: Adjust the intensity of colors.
- Sharpening: Increase the sharpness of details in the image.
- Noise Reduction: Reduce graininess in the image.
5. Specific Photography Genres on iPhone
Your iPhone’s versatility allows you to explore various photography genres.
5.1 Food Photography
Capture mouthwatering food photos with your iPhone.
- Mastering iPhone Food Photography Course: A comprehensive course to improve your food photography skills.
- Natural Light: Use natural light to illuminate your subjects.
- Composition: Use techniques like the rule of thirds and leading lines to create visually appealing compositions.
- Styling: Pay attention to styling and presentation to make your food look its best.
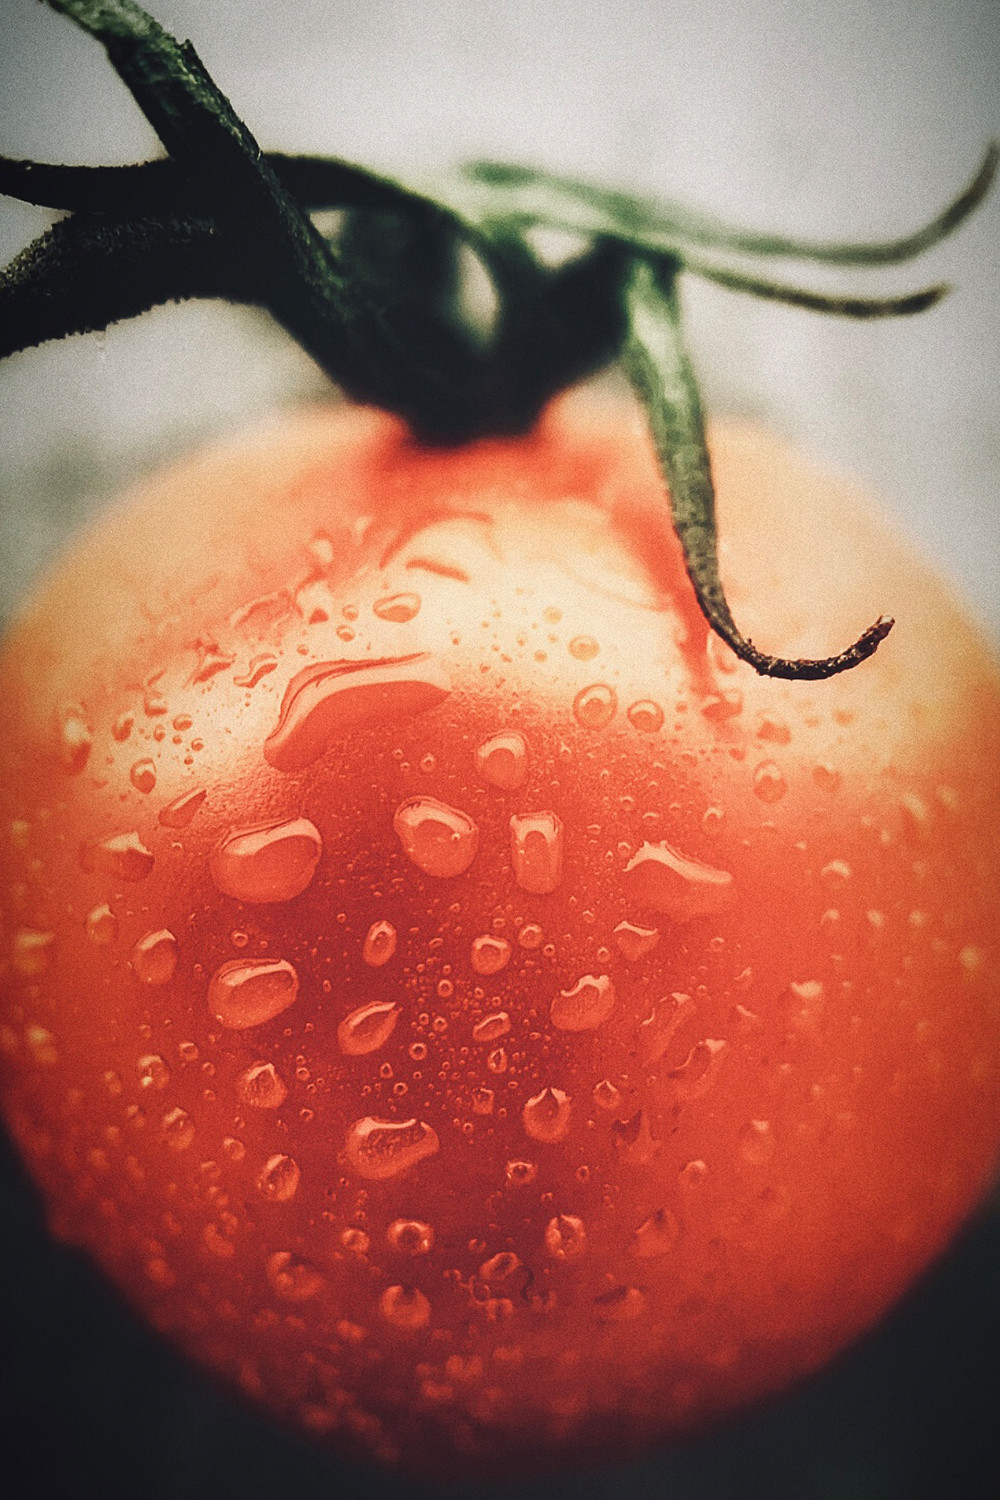 up close image of a tomato
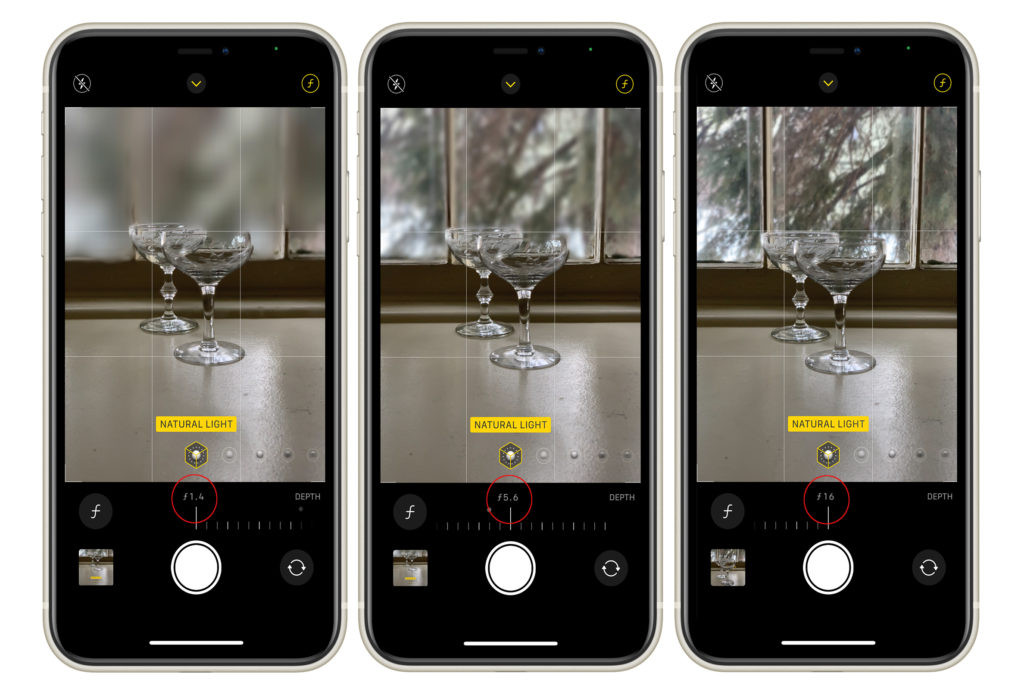
5.2 Portrait Photography
Create stunning portraits with your iPhone’s portrait mode.
- Portrait Mode: Use portrait mode to create a shallow depth of field and blur the background.
- Adjust Depth of Field: Adjust the f-stop setting to control the amount of background blur.
- Lighting: Use soft, diffused light to flatter your subject’s features.
 iphone portrait mode for photography
5.3 Landscape Photography
Capture breathtaking landscapes with your iPhone’s wide-angle lens.
- Wide Angle Lens: Use a wide-angle lens to capture expansive views.
- Composition: Use techniques like leading lines and the rule of thirds to create engaging compositions.
- Golden Hour: Shoot during the golden hour for warm, soft light.
5.4 Street Photography
Capture the essence of urban life with your iPhone’s discreet camera.
- Be Discreet: Use your iPhone’s small size to blend in and capture candid moments.
- Look for Interesting Light and Shadows: Use light and shadow to create dramatic and compelling images.
- Capture Moments: Focus on capturing unique and interesting moments in everyday life.
6. The Importance of Practice and Experimentation
The key to mastering iPhone photography is practice and experimentation. Don’t be afraid to try new techniques, explore different genres, and experiment with editing styles.
6.1 Take Advantage of Online Resources
There are numerous online resources available to help you improve your iPhone photography skills.
- dfphoto.net: Explore our website for tutorials, tips, and inspiration.
- Online Courses: Take online courses to learn from experienced photographers.
- Photography Blogs and Forums: Read photography blogs and participate in online forums to learn from other photographers.
- YouTube Tutorials: Watch YouTube tutorials to learn specific techniques and editing tips.
6.2 Join a Photography Community
Joining a photography community can provide you with valuable feedback, support, and inspiration.
- Online Photography Forums: Participate in online photography forums to share your work and get feedback from other photographers.
- Local Photography Clubs: Join a local photography club to meet other photographers in your area and participate in photo walks and workshops.
- Social Media Groups: Join photography groups on social media platforms like Facebook and Instagram.
7. Intentions Behind Search Queries
When people search for “Can you take professional photos with iPhone,” they typically have one of the following intentions:
- Information: They want to know if it’s even possible to take professional-quality photos with an iPhone.
- Techniques: They’re looking for tips and techniques to improve their iPhone photography skills.
- Equipment: They want to know what accessories and equipment can enhance their iPhone photography.
- Inspiration: They’re looking for examples of professional photos taken with an iPhone.
- Comparison: They want to compare the quality of iPhone photos to those taken with professional cameras.
8. Answering Frequently Asked Questions (FAQs)
Here are some frequently asked questions about taking professional photos with an iPhone:
8.1 Is it really possible to take professional photos with an iPhone?
Yes, with the right techniques, equipment, and editing, you can achieve professional-quality results.
8.2 What are the limitations of iPhone photography?
The main limitations are sensor size, lens versatility, and low-light performance compared to professional cameras.
8.3 What accessories do I need to take professional photos with my iPhone?
Essential accessories include a tripod, lighting modifiers, and external lenses.
8.4 What are the best editing apps for iPhone photography?
Popular editing apps include Adobe Lightroom Mobile, VSCO, and Snapseed.
8.5 How can I improve the composition of my iPhone photos?
Use techniques like the rule of thirds, leading lines, and framing to create visually appealing compositions.
8.6 How important is lighting in iPhone photography?
Lighting is crucial. Use natural light whenever possible and consider investing in lighting modifiers.
8.7 Can I shoot in RAW format with my iPhone?
Yes, use a third-party app like ProCamera or Halide to shoot in RAW.
8.8 How do I stabilize my iPhone for sharp photos?
Use a tripod or lean against a solid surface to minimize camera shake.
8.9 What are some tips for taking great portraits with my iPhone?
Use portrait mode, adjust the depth of field, and use soft, diffused light.
8.10 Where can I find inspiration for iPhone photography?
Explore dfphoto.net, online photography communities, and social media platforms like Instagram.
9. Call to Action: Elevate Your iPhone Photography Today!
Ready to transform your iPhone into a professional-grade camera? Visit dfphoto.net today to discover a wealth of resources, including in-depth tutorials, stunning photo collections, and a vibrant photography community. Unleash your creative potential and capture breathtaking images with your iPhone. Join us at dfphoto.net and embark on a journey of photographic excellence! For more information, visit our address at 1600 St Michael’s Dr, Santa Fe, NM 87505, United States or call us at +1 (505) 471-6001.
At dfphoto.net, we’re passionate about helping you unlock the full potential of your iPhone photography. Explore the art of mobile photography, smartphone photography, and visual storytelling with us!