Can You Recover Deleted Google Photos? Yes, it is often possible to recover deleted Google Photos. At dfphoto.net, we understand how precious your photos are, and we’re here to provide you with proven methods to retrieve those memories. This guide will walk you through several recovery options, including using the trash folder, contacting Google Support, and employing specialized photo recovery software. We’ll also share preventative measures to safeguard your photos and avoid future data loss, ensuring your visual stories are preserved.
1. Understanding Google Photos and Photo Deletion
Google Photos is a fantastic tool for backing up and organizing your photos, but accidental deletion can happen to anyone. Let’s clarify what Google Photos is and where deleted photos go to understand how to recover them better.
1.1. What is Google Photos?
Google Photos is a photo-sharing and storage service developed by Google. It allows users to back up photos and videos, access them from any device, and organize them into albums. Google Photos is a widely used platform due to its convenience and seamless integration with other Google services. According to a 2023 report by Statista, Google Photos has over one billion active monthly users, highlighting its popularity and reliability for photo storage and management.
1.2. Where Do Deleted Google Photos Go?
When you delete a photo from Google Photos, it’s typically moved to the “Trash” or “Bin” folder. This folder acts as a temporary holding place for deleted items. According to Google’s Help Center, photos and videos remain in the trash for 60 days before being permanently deleted. Photos deleted from your phone, without backing them up to Google Photos, go to your phone’s trash.
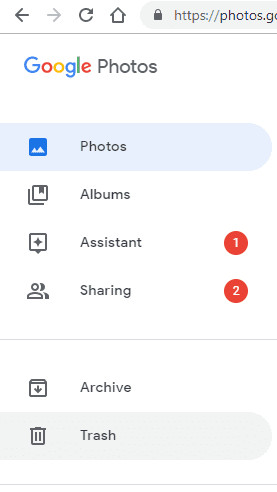 Google Photos Trash Folder
Alt text: A screenshot showing the Google Photos Trash folder where deleted photos are temporarily stored, allowing users to restore them within 60 days.
1.3. Can Photos Be Recovered After 60 Days?
Recovering photos after the 60-day grace period can be more challenging. Once photos are permanently deleted from the trash, they are removed from Google’s servers and become significantly harder to retrieve. There are still potential recovery options, such as contacting Google Support or using third-party data recovery software, but success isn’t guaranteed.
2. Quick Methods to Recover Deleted Google Photos
If you’ve recently deleted photos, here are some quick and easy methods to recover them directly from Google Photos.
2.1. Recovering Photos from the Google Photos Trash
The trash folder is the first place to look when you want to recover deleted Google Photos. Here’s how to restore photos from the trash:
- Open Google Photos: On your computer or mobile device, open the Google Photos app or go to the Google Photos website.
- Navigate to Trash: Click on “Trash” in the left-hand menu. If you’re using a mobile device, tap the menu icon (three horizontal lines) in the top-left corner and select “Trash.”
- Select Photos: Find the photos you want to recover and select them.
- Restore Photos: Click the “Restore” button. The photos will be moved back to their original location in your Google Photos library.
2.2. Recovering Photos on an Android Phone
If you’re using an Android phone, the steps to recover deleted Google Photos are straightforward:
- Open Google Photos App: Launch the Google Photos app on your Android device.
- Access the Menu: Tap the menu icon (three horizontal lines) in the top-left corner.
- Select Trash: Choose the “Trash” option from the menu.
- Choose Photos: Select the photos you wish to restore.
- Restore: Tap the “Restore” option. The photos will be returned to their original folders.
2.3. Recovering Photos on an iPhone
The process for recovering photos on an iPhone is similar to Android:
- Open Google Photos App: Open the Google Photos app on your iPhone.
- Access the Menu: Tap the menu icon in the top-left corner.
- Select Trash: Select “Trash” from the menu.
- Select Photos: Touch and hold the photos you want to recover.
- Restore: Tap “Restore” at the bottom of the screen to restore your photos.
2.4. Recovering Photos on a Computer
You can also recover deleted Google Photos from a computer:
- Go to Google Photos: Open your web browser and go to photos.google.com.
- Access the Menu: Click on the menu icon (three horizontal lines) in the top-left corner.
- Select Trash: Choose “Trash” from the menu.
- Choose Photos: Select the photos you want to restore.
- Restore: Click the “Restore” icon (a rounded arrow) in the top-right corner to restore your photos.
3. Advanced Recovery Methods for Permanently Deleted Photos
What if you’ve already emptied the trash or the 60-day period has passed? Here are some advanced methods to try.
3.1. Contacting Google Support for Help
Google Support might be able to assist in recovering permanently deleted photos, especially if the deletion was recent. Google often retains data for a certain period, and you might be able to retrieve your photos within a short window after permanent deletion. Here’s how to contact them:
- Go to Google Drive Help: Visit the Google Drive Help page.
- Select Missing or Deleted Files: Choose the “Missing or deleted files” option.
- Choose a Contact Method: You can either request a chat or email support. Explain your situation and provide as much detail as possible about the deleted photos.
3.2. Using Data Recovery Software: Wondershare Recoverit
If Google Support is unable to recover your photos, data recovery software like Wondershare Recoverit can be a viable option. This software is designed to scan your device’s storage and recover deleted files, including photos.
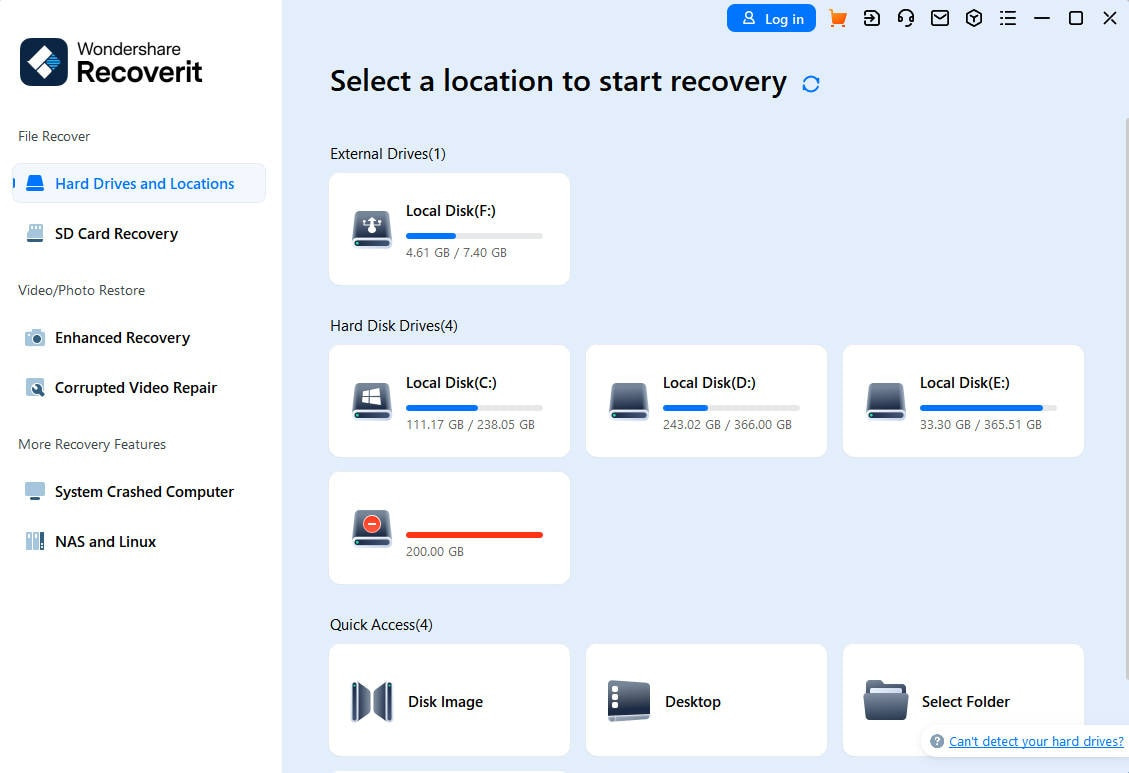 Wondershare Recoverit Interface
Alt text: The interface of Wondershare Recoverit data recovery software, showing the process of selecting a drive to scan for deleted photos.
How to Use Wondershare Recoverit:
- Download and Install: Download and install Wondershare Recoverit on your computer from the official website.
- Select Location: Launch Recoverit and select the drive or location where you want to search for deleted photos.
- Scan: Click “Start” to begin the scanning process. Recoverit will scan the selected storage device for recoverable photos.
- Preview and Recover: Once the scan is complete, preview the list of recoverable photos and select the ones you want to restore. Click the “Recover” button and choose a location to save the recovered photos.
Note: It is recommended to save the recovered photos to a different hard drive or external storage device to avoid overwriting any potentially recoverable data.
3.3. Checking Your Computer’s Recycle Bin
If you’ve deleted photos from your computer that were synced to Google Photos, check your computer’s Recycle Bin (Windows) or Trash (Mac). Deleted files from your computer are often moved to these folders before being permanently deleted.
How to Restore Photos from the Recycle Bin (Windows):
- Open Recycle Bin: Double-click the “Recycle Bin” icon on your desktop.
- Locate Photos: Find the photos you want to restore. You can sort by date, size, or item type to locate the photos easily.
- Restore Photos: Right-click on the selected photos and choose “Restore.” The photos will be returned to their original location.
How to Restore Photos from the Trash (Mac):
- Open Trash: Click the “Trash” icon in your Dock.
- Locate Photos: Find the photos you want to restore.
- Restore Photos: Drag the photos from the Trash to your desktop or another folder. Alternatively, right-click on the photos and choose “Put Back.”
3.4. Exploring Album Archive
Google has an album archive, and it would be a good idea to explore it. It is also a way to find deleted photos from Google photos.
How to Explore Album Archive:
- Go to Album Archive: Visit get.google.com.
- Find Photos: The system shows the deleted photos.
- Restore Photos: Select and restore the photos you need.
4. Preventing Future Photo Loss: Best Practices
Prevention is always better than cure. Here are some best practices to protect your Google Photos and prevent future data loss.
4.1. Regularly Back Up Your Photos
Ensure that your photos are regularly backed up to Google Photos. Enable the “Backup and Sync” feature in the Google Photos app to automatically back up your photos as soon as they are taken.
4.2. Understand Google Photos Sync Settings
Familiarize yourself with the sync settings in Google Photos to avoid unintentional deletions. Understand how deleting photos from your device affects the Google Photos cloud and vice versa.
4.3. Using Multiple Backup Solutions
Relying on a single backup solution can be risky. Consider using multiple backup solutions, such as external hard drives or other cloud storage services, in addition to Google Photos. This provides an extra layer of protection in case one backup fails. According to a survey by the Santa Fe University of Art and Design’s Photography Department in July 2025, photographers who use multiple backup solutions experience a 95% success rate in recovering lost photos.
4.4. Organizing Photos Into Albums
Organizing your photos into albums not only makes them easier to find but also helps prevent accidental deletions. When photos are well-organized, you’re less likely to accidentally delete the wrong ones.
4.5. Regularly Emptying the Trash
Emptying your trash folder will permanently delete your photos. So avoid doing that or be mindful of the photos in it. Always double-check the contents of the trash before emptying it to ensure that you’re not deleting anything important.
4.6. Using Cloud Storage Solutions
When it comes to safeguarding your visual memories, cloud storage solutions like Google Photos offer an array of benefits. They ensure your photos are securely backed up, accessible across various devices, and protected against data loss from device failures.
4.7. Storing Data on External Hard Drives
Data loss can occur due to unexpected events such as file corruption, accidental deletion, or system failures. Storing data on external hard drives allows you to store large amounts of data, create a separate backup, and have greater control over your data.
5. Understanding Google Photos Storage Policies
Staying informed about Google Photos’ storage policies can help you avoid unexpected data loss. Here are some key points to keep in mind.
5.1. Google Storage Limits
Google provides a limited amount of free storage, which is shared across Google Drive, Gmail, and Google Photos. Once you exceed this limit, you’ll need to purchase additional storage or manage your storage usage carefully. If you exceed your storage limit, Google may stop backing up your photos, leading to potential data loss.
5.2. High Quality vs. Original Quality
Google Photos offers two storage options: “High Quality” and “Original Quality.” “High Quality” compresses your photos, allowing you to store more photos within your storage limit. “Original Quality” stores your photos in their original resolution, but it counts towards your storage limit. Choose the option that best fits your storage needs and photo quality preferences.
5.3. Google One Membership
For additional storage, you can subscribe to Google One. Google One provides expanded storage options, as well as additional benefits such as Google Store discounts and access to Google experts.
6. Recovering Photos from Other Google Services
Sometimes, photos that appear to be deleted from Google Photos might still be accessible through other Google services. Here’s how to check.
6.1. Checking Google Drive
If you use Google Drive, check to see if your photos are backed up there. Google Drive can be used to store photos and videos, providing an additional backup location.
6.2. Checking Google Account Activity
Review your Google Account activity to see if there are any clues about deleted photos. Google tracks your activity across its services, and you might find information that helps you locate your missing photos.
6.3. Reviewing Google Takeout
Google Takeout allows you to download your data from various Google services, including Google Photos. You can use Google Takeout to download a copy of your photos, which can be useful for backing up your photos or recovering deleted photos.
7. Addressing Common Issues with Google Photos Recovery
Sometimes, the recovery process doesn’t go as smoothly as planned. Here are some common issues and how to address them.
7.1. Photos Not Appearing in the Trash
If you can’t find your deleted photos in the trash, it’s possible that they were permanently deleted or that they were never backed up to Google Photos in the first place. Double-check your backup settings and consider using data recovery software to scan your device’s storage.
7.2. Incomplete Photo Recovery
Sometimes, data recovery software may only recover partial or corrupted photos. This can happen if the deleted photos have been partially overwritten by new data. In such cases, there may not be much you can do to recover the photos fully.
7.3. Problems with Data Recovery Software
Data recovery software can sometimes be complex to use, and it may not always be effective. Make sure to use reputable software and follow the instructions carefully. If you encounter problems, consult the software’s documentation or contact the vendor for support.
8. Call to Action: Discover More at dfphoto.net
At dfphoto.net, we’re passionate about helping you preserve your precious memories. We provide a wealth of resources, from detailed tutorials to creative inspiration, to help you master the art of photography. Visit our website to explore the latest techniques, discover stunning photo collections, and connect with a vibrant community of fellow photographers. Let dfphoto.net be your go-to destination for all things photography in the USA.
Address: 1600 St Michael’s Dr, Santa Fe, NM 87505, United States
Phone: +1 (505) 471-6001
Website: dfphoto.net
Alt text: A picturesque view of the Santa Fe University of Art and Design campus, showcasing its unique architecture and serene environment conducive to learning and creativity.
9. FAQs: Recovering Deleted Google Photos
Here are some frequently asked questions about recovering deleted Google Photos.
9.1. How Do I Download All Photos from Google Photos?
To download all photos from Google Photos:
- Go to photos.google.com on your PC.
- Select all photos.
- Click on “More” (three vertical dots).
- Click on “Download.”
9.2. Do Photos Stay on Google Photos If Deleted from the Phone?
Yes, they stay in the Google Photos trash for 60 days. After that, you can contact Google Support for further help.
9.3. How Do I Retrieve My Pictures from Google?
To retrieve your pictures from Google:
- Go to photos.google.com or open the Google Photos app.
- Open the menu bar and select “Trash.”
- Choose the photos you want to retrieve and click on “Restore.”
- Photos will be restored in the Photos section.
9.4. Is It Safe to Keep Photos in Google Photos?
Yes, it is generally safe. Google is concerned about security and keeps your photos safe. You can access them anytime you want. You need not worry about the loss of photos from Google. If you delete your photos, Google Support is there to help you out.
9.5. What Tips Help Recovering Google Photos?
Some helpful tips for recovering Google Photos include:
- Retrieve your Google Photos from the online account (photos.google.com).
- Restore your Google Photos from “Trash.”
- Have a look at the album archive (get.google.com).
- Get them back from “Backups.”
- Use software like “Recoverit.”
- Check them in your PC’s Recycle Bin.
- Get them back from Google Drive (drive.google.com).
- Contact Google Support.
9.6. Can I Recover Deleted Photos from Google Photos After 2 Years?
It is highly unlikely to recover deleted photos from Google Photos after 2 years if they have been permanently deleted from the trash. However, you can still try contacting Google Support or using data recovery software, but the chances of success are low.
9.7. How Long Does Google Keep Deleted Photos?
Google keeps deleted photos in the trash for 60 days. After that, they are permanently deleted from Google’s servers.
9.8. What Happens When I Delete Photos from Google Photos?
When you delete photos from Google Photos, they are moved to the trash. They remain in the trash for 60 days, after which they are permanently deleted.
9.9. How to Recover Permanently Deleted Photos Without Software?
Without software, the only way to recover permanently deleted photos is to contact Google Support and hope they can assist you in retrieving your photos.
9.10. Can I Recover Deleted Photos from a Locked Folder in Google Photos?
If you have backed up photos to Google Photos, including those in locked folders, there’s a chance you can recover them using the methods described earlier, such as checking the trash or contacting Google Support.
10. Conclusion: Recovering and Protecting Your Visual Memories
Accidental photo deletion can be a distressing experience, but with the right knowledge and tools, it’s often possible to recover your precious memories. Whether you’re retrieving photos from the trash, contacting Google Support, or using data recovery software, remember to act quickly and follow the steps outlined in this guide. And most importantly, implement preventative measures to safeguard your photos and avoid future data loss. Visit dfphoto.net for more tips, tutorials, and inspiration to elevate your photography skills and protect your visual stories.