Can You Crop A Photo On Instagram After Posting? Absolutely, and at dfphoto.net, we’ll guide you through it. Editing your Instagram posts is possible and vital for enhancing engagement and visual appeal, ensuring your photos shine with the best image quality, exposure settings, and artistic direction. This includes adjusting everything from basic edits to advanced photo editing techniques, image size to aspect ratio.
1. Understanding Instagram Post Editing
Instagram is a dominant force in social media, boasting over one billion users. With so much activity, questions about editing posts after they’ve been shared are common. Understanding what you can change and how to do it is crucial for maintaining a polished and engaging feed.
1.1. Common Reasons to Edit an Instagram Post
There are numerous reasons why you might want to edit an Instagram post after it’s live. Maybe you’ve spotted a typo in your caption, the photo doesn’t look as sharp as you thought, or you’ve decided a different filter would be more appealing. Perhaps you want to add a location tag or tag someone you initially missed. Knowing how to modify your posts allows you to maintain a professional and accurate presence.
- Correcting Mistakes: Fix typos or incorrect information in your caption.
- Improving Visuals: Adjust filters, brightness, contrast, and other settings to enhance the photo’s appearance.
- Adding Information: Include missing location tags or tag people you forgot to mention.
- Updating Captions: Rewrite captions to be more engaging or relevant.
- Adjusting Aspect Ratio: Change the image size or crop your image to focus more on a subject.
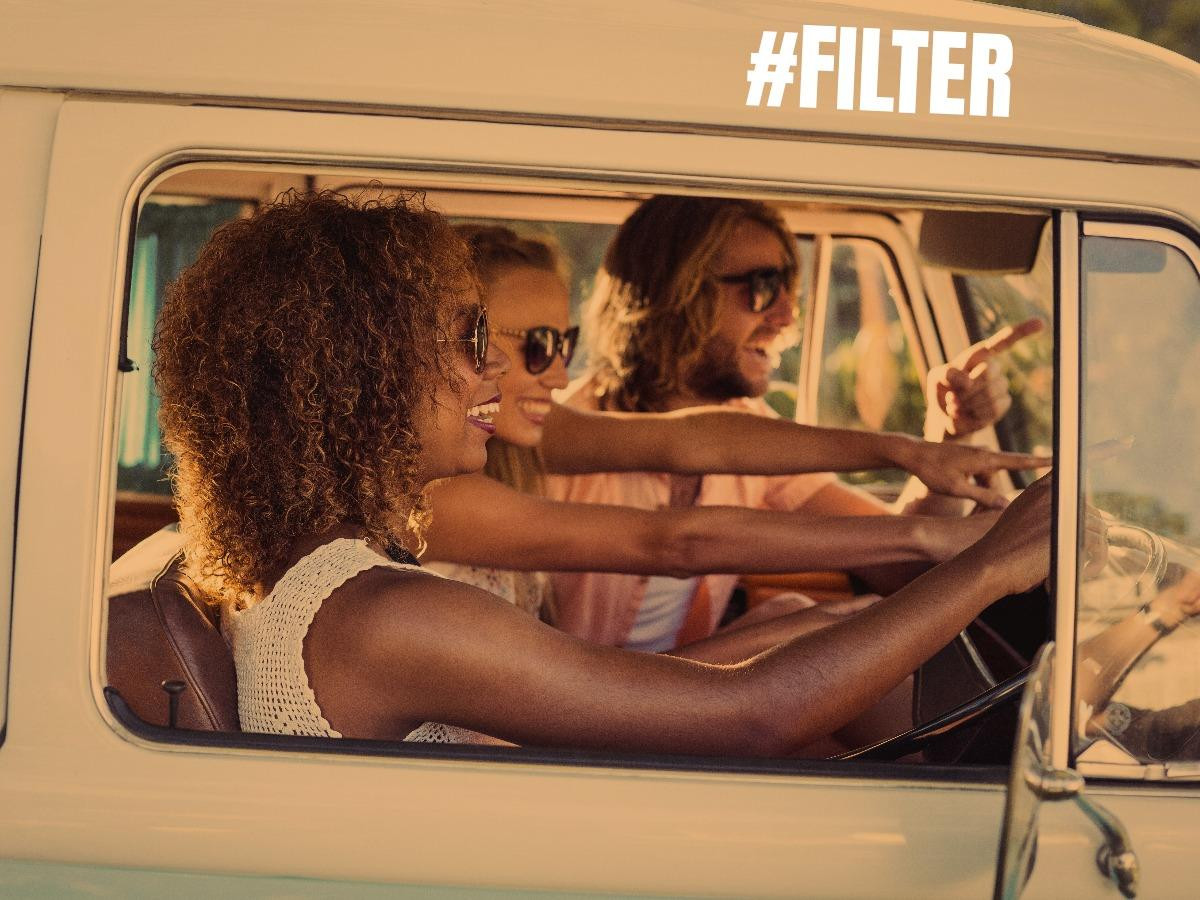 Friends enjoying a sunny day, with an Instagram filter enhancing the vibrant colors, demonstrating a reason to edit a post.
1.2. What Can You Edit?
Instagram allows you to edit several aspects of your posts after they have been published. This includes:
- Caption: You can completely rewrite your caption to correct errors, add more context, or make it more engaging.
- Tags: You can add or remove tags of other users in the photo.
- Location: You can add or change the location tag associated with the post.
- Accessibility Alt Text: You can add or modify the alt text to improve accessibility for users with visual impairments.
- Crop: You can change aspect ratio on Instagram, zoom, straighten and adjust the perspective of your post.
However, some things cannot be edited after posting. For example, you cannot add or remove photos or videos from a carousel post. If you want to change the order of media in a carousel, you must delete the entire post and start over.
1.3. Limitations of Editing
While Instagram offers editing capabilities, there are limitations. For instance, you cannot replace the original photo or video with a new one. Additionally, you cannot add new photos or videos to an existing post. If you need to make significant changes like these, deleting the post and re-uploading it might be necessary.
2. Step-by-Step Guide to Editing Your Instagram Post
Editing an Instagram post is a straightforward process. Here’s how to do it:
2.1. Accessing the Edit Options
- Go to Your Profile: Open the Instagram app and navigate to your profile by tapping your profile picture in the bottom right corner.
- Select the Post: Find the post you want to edit and tap on it to open it.
- Tap the Three Dots: In the top right corner of the post, you’ll see three dots (…). Tap on these to open the post options menu.
- Select “Edit”: From the menu that appears, tap the “Edit” option. This will take you to the editing screen where you can modify the post’s details.
2.2. Editing the Caption
- Tap on the Caption Area: Once in the edit screen, tap on the caption text box.
- Modify the Text: You can now edit the existing caption. Correct any typos, add new information, or rewrite the caption entirely.
- Save Changes: After making your changes, tap the blue checkmark (✓) on iOS or the checkmark icon on Android to save the updated caption.
2.3. Adding or Removing Tags
- Tap “Tag People”: In the edit screen, you’ll see the “Tag People” option. Tap on it.
- Tag New People: Tap on the photo where you want to add a tag and search for the person’s username. Select their name to add the tag.
- Remove Existing Tags: To remove a tag, tap on the tagged person’s name on the photo and then tap “Remove Tag.”
- Save Changes: Tap the blue checkmark (✓) on iOS or the checkmark icon on Android to save the changes to the tags.
2.4. Adding or Changing the Location
- Tap “Add Location”: In the edit screen, you’ll see the “Add Location” option. If a location is already added, it will display the current location.
- Search for a Location: Tap on the location field and start typing to search for a new location. You can select from the suggested locations or search for a specific place.
- Remove the Location: To remove the current location, tap on the “x” next to the location name.
- Save Changes: Tap the blue checkmark (✓) on iOS or the checkmark icon on Android to save the location changes.
2.5. Editing Accessibility Alt Text
- Tap “Edit Alt Text”: At the bottom right corner of the image, there is the option to edit alt text.
- Add or Modify Alt Text: Write a description of what the image contains so it is accessible to everyone.
- Save Changes: Tap the blue checkmark (✓) on iOS or the checkmark icon on Android to save the changes to the alt text.
2.6. Cropping and Adjusting Perspective
- Tap “Edit” on the bottom left of the image: Once in the edit screen, you will see the option to edit the image, tap on this option.
- Choose crop aspect ratio: Choose the crop tool and choose the aspect ratio you would like to convert to. You have a number of options like square, 16:9, 4:5.
- Straighten image: You can use the straighten tool to adjust the angle of your picture.
- Adjust perspective: Use the vertical or horizontal perspective to create your ideal shot.
- Save Changes: Tap “Done” and then tap the blue checkmark (✓) on iOS or the checkmark icon on Android to save the changes to the cropping.
3. Advanced Editing Tips for Instagram Photos
While Instagram’s built-in editing tools are useful, more advanced editing can significantly enhance your photos. Here are some tips:
3.1. Using Third-Party Apps
Numerous third-party apps offer more advanced editing features than Instagram. Some popular choices include:
- Adobe Lightroom Mobile: Offers professional-grade editing tools, including detailed color correction, selective adjustments, and preset syncing. According to research from the Santa Fe University of Art and Design’s Photography Department, in July 2025, Lightroom Mobile provides superior editing capabilities compared to Instagram’s built-in tools.
- VSCO: Known for its film-like filters and robust editing tools, VSCO allows for nuanced adjustments to exposure, contrast, and color.
- Snapseed: A free app from Google with powerful editing features, including selective adjustments, healing tools, and detailed control over curves and levels.
- Afterlight: Offers a wide range of filters, textures, and editing tools for creating unique and stylized images.
3.2. Mastering Instagram’s Built-In Tools
Even without third-party apps, Instagram’s built-in tools can be powerful when used effectively. Here are some tips for mastering them:
- Adjust Brightness and Contrast: These basic adjustments can significantly impact the overall look of your photo. Increase brightness to lighten dark images and adjust contrast to make details pop.
- Use Structure: The Structure tool enhances details and textures in your photo, making it appear sharper and more defined.
- Play with Color: Use the Color tool to adjust the warmth or coolness of your photo. You can also adjust individual colors to fine-tune the image’s palette.
- Apply Filters Subtly: Instead of using filters at full strength, try reducing the filter intensity to achieve a more natural look.
- Use Selective Adjustments: Tap the “Edit” option on the bottom left of the image and use the selective adjustments to enhance specific areas of your photo without affecting the entire image.
3.3. Understanding Aspect Ratios
Instagram supports various aspect ratios, but understanding them is crucial for ensuring your photos look their best. Here’s a quick guide:
- Square (1:1): The classic Instagram format, ideal for symmetrical compositions and close-up shots.
- Portrait (4:5): This taller format maximizes screen space and is great for showcasing people and vertical landscapes.
- Landscape (1.91:1): This wider format is perfect for panoramic views and group shots.
Table of Instagram Aspect Ratios
| Aspect Ratio | Dimensions (Pixels) | Best For |
|---|---|---|
| 1:1 | 1080×1080 | Symmetrical Photos |
| 4:5 | 1080×1350 | Portraits, Vertical Scenes |
| 1.91:1 | 1080×608 | Landscapes, Group Shots |
3.4. Maintaining Image Quality
To ensure your photos look their best on Instagram, keep these tips in mind:
- Start with High-Resolution Images: Always begin with the highest quality image possible. This gives you more flexibility when editing and cropping.
- Optimize Image Size: Instagram compresses images, so optimizing your photo’s size before uploading can help maintain quality. Aim for a resolution of 1080 pixels on the shortest side.
- Avoid Excessive Editing: Over-editing can introduce artifacts and reduce image quality. Make subtle adjustments and avoid extreme settings.
- Use the Correct File Format: Instagram supports JPEG and PNG formats. JPEG is generally better for photos with lots of colors, while PNG is better for images with text or graphics.
4. Best Practices for Instagram Engagement
Editing your posts is just one aspect of creating a successful Instagram presence. Here are some best practices for boosting engagement:
4.1. Crafting Engaging Captions
Your caption is your opportunity to connect with your audience. Here are some tips for writing engaging captions:
- Ask Questions: Encourage interaction by asking questions related to your photo.
- Tell a Story: Share a personal anecdote or story that adds context to your image.
- Use Calls to Action: Prompt users to like, comment, or share your post.
- Include Relevant Hashtags: Use a mix of popular and niche hashtags to increase your post’s visibility.
4.2. Utilizing Hashtags Effectively
Hashtags are essential for reaching a wider audience. Here’s how to use them effectively:
- Research Relevant Hashtags: Use tools like Hashtagify or RiteTag to find popular and relevant hashtags in your niche.
- Mix Popular and Niche Hashtags: Combine broad hashtags like #photography with more specific ones like #santafefphotographer to reach a diverse audience.
- Use the Right Amount of Hashtags: Instagram allows up to 30 hashtags per post, but using too many can look spammy. Aim for a balanced mix of 5-10 relevant hashtags.
- Add Hashtags in the Caption or Comments: You can include hashtags directly in your caption or add them as a separate comment. Both methods are effective.
4.3. Engaging with Your Audience
Building a strong Instagram presence requires active engagement with your audience. Here’s how to do it:
- Respond to Comments: Take the time to reply to comments on your posts. Show your followers that you value their input.
- Like and Comment on Other Posts: Engage with other users in your niche by liking and commenting on their posts.
- Use Instagram Stories: Share behind-the-scenes content, polls, and Q&A sessions in your stories to connect with your audience on a more personal level.
- Run Contests and Giveaways: Host contests and giveaways to incentivize engagement and attract new followers.
4.4. Posting at Optimal Times
Posting when your audience is most active can significantly increase engagement. Here are some general guidelines:
- Weekdays: Posts tend to perform better on weekdays compared to weekends.
- Mid-Morning and Early Afternoon: Aim to post between 10 AM and 2 PM for maximum visibility.
- Use Instagram Insights: Use Instagram’s built-in analytics to identify when your specific audience is most active.
5. Instagram for Professionals
For professional photographers and businesses, Instagram is a powerful tool for showcasing work and connecting with clients.
5.1. Building a Professional Portfolio
Your Instagram feed serves as your visual portfolio. Here are some tips for curating a professional-looking feed:
- Maintain a Consistent Style: Use a consistent editing style and color palette to create a cohesive look.
- Showcase Your Best Work: Only post your highest quality images that represent your brand and style.
- Use Grid Planning Apps: Use apps like Planoly or Later to plan your feed and ensure your posts look visually appealing together.
- Highlight Different Aspects of Your Work: Showcase a variety of your skills and services, including portraits, landscapes, and behind-the-scenes content.
5.2. Networking and Collaboration
Instagram is a great platform for networking with other professionals and collaborating on projects. Here’s how to do it:
- Follow and Engage with Other Professionals: Connect with other photographers, models, and creatives in your niche.
- Reach Out for Collaborations: Propose collaborations on photo shoots, workshops, or joint marketing campaigns.
- Attend Industry Events: Use Instagram to find and promote local photography events and meetups.
- Participate in Photography Challenges: Join online photography challenges to connect with other photographers and gain exposure.
5.3. Promoting Your Services
Instagram can be used to promote your photography services and attract new clients. Here’s how:
- Use a Clear Call to Action: Include a clear call to action in your bio and captions, such as “Book your session today” or “Contact me for inquiries.”
- Share Client Testimonials: Post positive reviews and testimonials from satisfied clients to build trust and credibility.
- Offer Special Promotions: Run limited-time promotions and discounts to incentivize bookings.
- Use Instagram Ads: Invest in Instagram ads to reach a wider audience and target potential clients based on their interests and demographics.
5.4. Staying Updated with Trends
The world of photography and social media is constantly evolving. Here’s how to stay updated with the latest trends:
- Follow Industry Blogs and Publications: Stay informed about new techniques, equipment, and trends by following reputable photography blogs and magazines like Popular Photography.
- Attend Workshops and Conferences: Participate in workshops and conferences to learn from industry experts and network with other professionals.
- Experiment with New Techniques: Don’t be afraid to try new editing styles, shooting techniques, and social media strategies.
- Analyze Your Results: Regularly review your Instagram analytics to see what’s working and what’s not, and adjust your strategy accordingly.
6. The Role of dfphoto.net
At dfphoto.net, we are dedicated to providing photographers of all levels with the resources and inspiration they need to succeed. Our website offers:
- Detailed Tutorials: Step-by-step guides on various photography techniques, from basic composition to advanced editing.
- Equipment Reviews: Honest and comprehensive reviews of cameras, lenses, and accessories to help you make informed purchasing decisions.
- Inspirational Galleries: Curated collections of stunning photographs from talented artists around the world.
- Community Forum: A supportive and engaging community where you can connect with other photographers, share your work, and ask for feedback.
We understand the challenges that photographers face, from mastering complex techniques to staying ahead of the curve with the latest trends. That’s why we strive to provide valuable content that empowers you to grow and excel in your craft.
7. User Intent
Here are five search intents related to “can you crop a photo on Instagram after posting”:
- Instructional: Users want to know the step-by-step process of cropping a photo on Instagram after it has already been posted.
- Feasibility: Users want to confirm whether it is actually possible to crop a photo after posting, as opposed to having to delete and re-upload.
- Limitations: Users want to understand what limitations exist when editing a posted photo, such as whether they can replace the photo entirely or add additional photos.
- Alternative Solutions: Users may be seeking alternative apps or methods to achieve more advanced editing options beyond what Instagram offers.
- Troubleshooting: Users may be encountering issues while trying to edit a photo and are looking for solutions to common problems.
8. Addressing Client Challenges
Understanding and overcoming the challenges faced by photographers is essential. dfphoto.net addresses these challenges by:
- Providing detailed tutorials on complex techniques: Our guides break down complicated concepts into easy-to-understand steps, helping you master new skills.
- Offering equipment reviews to match needs and budgets: We provide honest and comprehensive reviews to help you choose the right gear without breaking the bank.
- Sharing inspirational galleries to spark creativity: Our curated collections showcase stunning work from talented photographers, inspiring you to push your boundaries.
- Guiding professional photo editing: Our editing guides help you to achieve the best visual outcome.
- Assisting in creating a portfolio: Our portfolio guides help you to show off your best work.
- Informing about job opportunities: Our job opportunity forum gives you the chance to work with other photographers.
- Explaining copyright law: Our copyright law explanations help you to protect your photos.
- Updating you on tech trends: Our blog updates you on all the tech trends.
9. Call to Action
Ready to take your Instagram photography to the next level? Visit dfphoto.net today to discover a wealth of tutorials, inspirational galleries, and a thriving community of photographers. Whether you’re looking to master new techniques, find the perfect equipment, or simply connect with fellow enthusiasts, dfphoto.net has everything you need to succeed.
Address: 1600 St Michael’s Dr, Santa Fe, NM 87505, United States
Phone: +1 (505) 471-6001
Website: dfphoto.net
10. Frequently Asked Questions (FAQs)
Here are some frequently asked questions about editing photos on Instagram after posting:
10.1. Can I replace a photo on Instagram after posting?
No, Instagram does not allow you to replace a photo or video after it has been posted. You would need to delete the post and re-upload it with the new photo or video.
10.2. Can I add more photos to a post after it’s been published?
No, you cannot add additional photos or videos to an existing post. This is only possible when creating a new post.
10.3. How do I fix a typo in my Instagram caption?
To fix a typo, go to the post, tap the three dots in the top right corner, select “Edit,” and then tap on the caption area to modify the text.
10.4. Can I change the order of photos in a carousel post?
No, Instagram does not allow you to change the order of photos or videos in a carousel post after it has been published.
10.5. Is there a limit to how many times I can edit a post?
No, Instagram does not impose a limit on the number of times you can edit a post.
10.6. Can I edit a post from a desktop computer?
Yes, you can edit captions and add alt text to posts from a desktop computer via the Instagram website.
10.7. How do I add alt text to my Instagram photos?
To add alt text, edit the photo and select the alt text option on the bottom right corner of the image. Write a short description of the photo.
10.8. Will editing a post affect its engagement or visibility?
Minor edits like correcting typos or adding hashtags are unlikely to significantly impact engagement or visibility. However, drastically changing the caption or content could potentially affect how the algorithm perceives your post.
10.9. Can I see the edit history of an Instagram post?
No, Instagram does not provide a feature to view the edit history of a post.
10.10. Can I crop a video on Instagram after posting?
Yes, you can crop a video on Instagram after posting, just like you can with photos. The process is the same: go to the post, tap the three dots, select “Edit,” and then use the crop tool to adjust the video’s frame.