Taking passport photos on your phone is absolutely possible, offering a convenient and cost-effective alternative to professional services. This guide from dfphoto.net will walk you through the requirements and best practices for capturing passport-compliant photos using your smartphone, ensuring a smooth application process. Master the art of mobile photography and create perfect passport pictures with ease.
1. Can You Really Take Passport Photos with Your Phone?
Yes, you certainly can take passport photos using your phone! The key is understanding and adhering to the official guidelines. Your phone’s camera is likely more than capable of capturing a high-quality image that meets the necessary standards. This offers a blend of convenience and accessibility, especially valuable for those with tight schedules or limited access to professional photography services. Remember, mastering the art of mobile photography for official documents can be incredibly rewarding.
1.1. What Are the Advantages of Using a Phone for Passport Photos?
Using your phone to take passport photos boasts several advantages:
- Cost-Effective: Avoid professional studio fees.
- Convenient: Take photos at your own pace, anytime, anywhere.
- Control: You have full control over the process, ensuring satisfaction.
- Accessibility: Most people already own a smartphone with a suitable camera.
- Retakes: Easily retake photos until you achieve the perfect shot.
1.2. Are There Any Disadvantages to Consider?
While convenient, there are potential downsides:
- Technical Skill: Requires attention to detail regarding lighting and composition.
- Equipment: May need a tripod or assistant for stable, well-framed shots.
- Software: Might need photo editing software to meet size and format requirements.
- Rejection Risk: Failure to adhere to guidelines can lead to rejection.
- Print Quality: Printing at home might not meet professional standards.
2. Understanding the Official Passport Photo Requirements
To ensure your phone-taken passport photo is accepted, you must meticulously follow the official requirements. These guidelines are in place to guarantee clear identification and prevent fraud. Paying close attention to these details is crucial for a successful passport application. Remember, a little effort in preparation can save you significant time and hassle later.
2.1. Key Requirements for U.S. Passport Photos
The U.S. Department of State has specific guidelines:
- Size: 2×2 inches (51×51 mm).
- Color: Must be in color.
- Background: Plain white or off-white, free of shadows.
- Expression: Neutral facial expression, eyes open and visible.
- Clothing: Everyday attire, no uniforms.
- Accessories: No hats or head coverings (unless for religious reasons). No eyeglasses.
- Recency: Taken within the last six months.
2.2. Common Mistakes to Avoid
Avoid these common errors to prevent rejection:
- Shadows: Ensure even lighting to eliminate shadows on the face or background.
- Glare: Remove eyeglasses to prevent glare.
- Red Eye: Disable red-eye reduction or correct it in editing.
- Blurriness: Use a tripod or steady hand to ensure sharpness.
- Incorrect Size: Carefully crop and resize the photo to meet the 2×2 inch requirement.
- Filters: Avoid using filters or editing software that alter your appearance.
 People passport photo wrong gettyimages 97557059 universal within usage period 100262 300×300
2.3. How to Ensure Compliance with the Official Guidelines
- Review the Guidelines: Thoroughly read the U.S. Department of State’s passport photo guidelines.
- Use a Checklist: Create a checklist to ensure you meet each requirement.
- Utilize Online Tools: Use online passport photo tools to verify compliance.
- Seek Feedback: Ask a friend or family member to review the photo before submission.
- Consult dfphoto.net: Check dfphoto.net for updated tips and advice on passport photography.
3. Step-by-Step Guide to Taking Passport Photos on Your Phone
Follow these steps to capture passport-compliant photos with your phone:
3.1. Preparation: Setting the Stage for Success
Proper preparation is critical:
- Choose the Right Location: A well-lit room with a plain white or off-white wall.
- Gather Your Equipment: Phone, tripod (optional), and a friend or family member for assistance.
- Dress Appropriately: Wear everyday attire, avoiding uniforms or clothing that blends with the background.
- Prepare Your Appearance: Ensure your hair is neatly styled and does not obscure your face. Remove eyeglasses and any unnecessary accessories.
- Check Lighting: Ensure even lighting to avoid shadows. Natural light is best, but avoid direct sunlight.
3.2. Capturing the Perfect Shot
Follow these tips for capturing a compliant photo:
- Positioning: Stand or sit directly facing the camera.
- Distance: Position yourself far enough from the background to avoid shadows.
- Facial Expression: Maintain a neutral expression with your mouth closed.
- Eyes: Keep your eyes open and visible.
- Focus: Ensure the photo is sharp and in focus.
- Multiple Shots: Take multiple photos to choose the best one.
- Use a Timer or Remote Shutter: This avoids camera shake and ensures a clear picture.
3.3. Editing and Formatting Your Photo
After capturing the photo, you’ll need to edit and format it:
- Crop: Crop the photo to the correct 2×2 inch size.
- Resize: Resize the photo to meet the required dimensions.
- Adjust Lighting: Adjust brightness and contrast if necessary.
- Remove Blemishes: Remove any minor blemishes, but avoid altering your appearance.
- Background Adjustment: Ensure the background is plain white or off-white.
- Resolution: Maintain a high resolution (at least 300 dpi) for printing.
 People passport photo wrong gettyimages 1398204337 universal within usage period 100267 300×300
3.4. Recommended Apps and Software
Several apps and software can help you edit your passport photo:
- Smartphone Apps:
- Passport Photo ID Studio
- ID PhotoPrint
- Biometric Passport Photo
- Online Tools:
- Fotor Online Passport Photo Maker
- IDPhoto4You
- PhotoAid
- Desktop Software:
- Adobe Photoshop
- GIMP (free alternative to Photoshop)
4. Tips for Achieving Professional-Quality Results
To achieve the best results, consider these additional tips:
4.1. Mastering Lighting Techniques
Proper lighting is essential for a professional-quality passport photo. Natural light is ideal, but artificial lighting can also work if done correctly.
- Natural Light: Position yourself near a window, but avoid direct sunlight, which can cause harsh shadows.
- Artificial Light: Use two softbox lights placed at a 45-degree angle to your face to provide even lighting.
- Avoid Shadows: Ensure there are no shadows on your face or the background.
- Color Temperature: Use a neutral color temperature (around 5500K) to ensure accurate skin tones.
4.2. Optimizing Camera Settings
Adjust your camera settings for optimal results:
- Resolution: Set your camera to the highest resolution.
- Focus: Ensure the photo is sharp and in focus. Use autofocus or manual focus.
- ISO: Keep the ISO as low as possible (ISO 100-400) to minimize noise.
- White Balance: Set the white balance to “Auto” or “Daylight” for accurate colors.
- Flash: Avoid using the flash, as it can cause harsh shadows and red-eye.
4.3. Posing and Expression Tips
Your pose and expression are crucial for a compliant passport photo:
- Neutral Expression: Maintain a neutral expression with your mouth closed.
- Eyes: Keep your eyes open and visible.
- Posture: Sit or stand up straight.
- Head Position: Keep your head level and facing the camera directly.
- Avoid Tilting: Do not tilt your head to the side.
4.4. Printing Your Passport Photo
Once you’ve edited your photo, you’ll need to print it. You have several options:
- Home Printing: Print your photo at home using a high-quality color printer and photo paper.
- Local Photo Lab: Take your digital photo to a local photo lab, such as CVS or Walgreens.
- Online Printing Services: Use online printing services like Shutterfly or Snapfish.
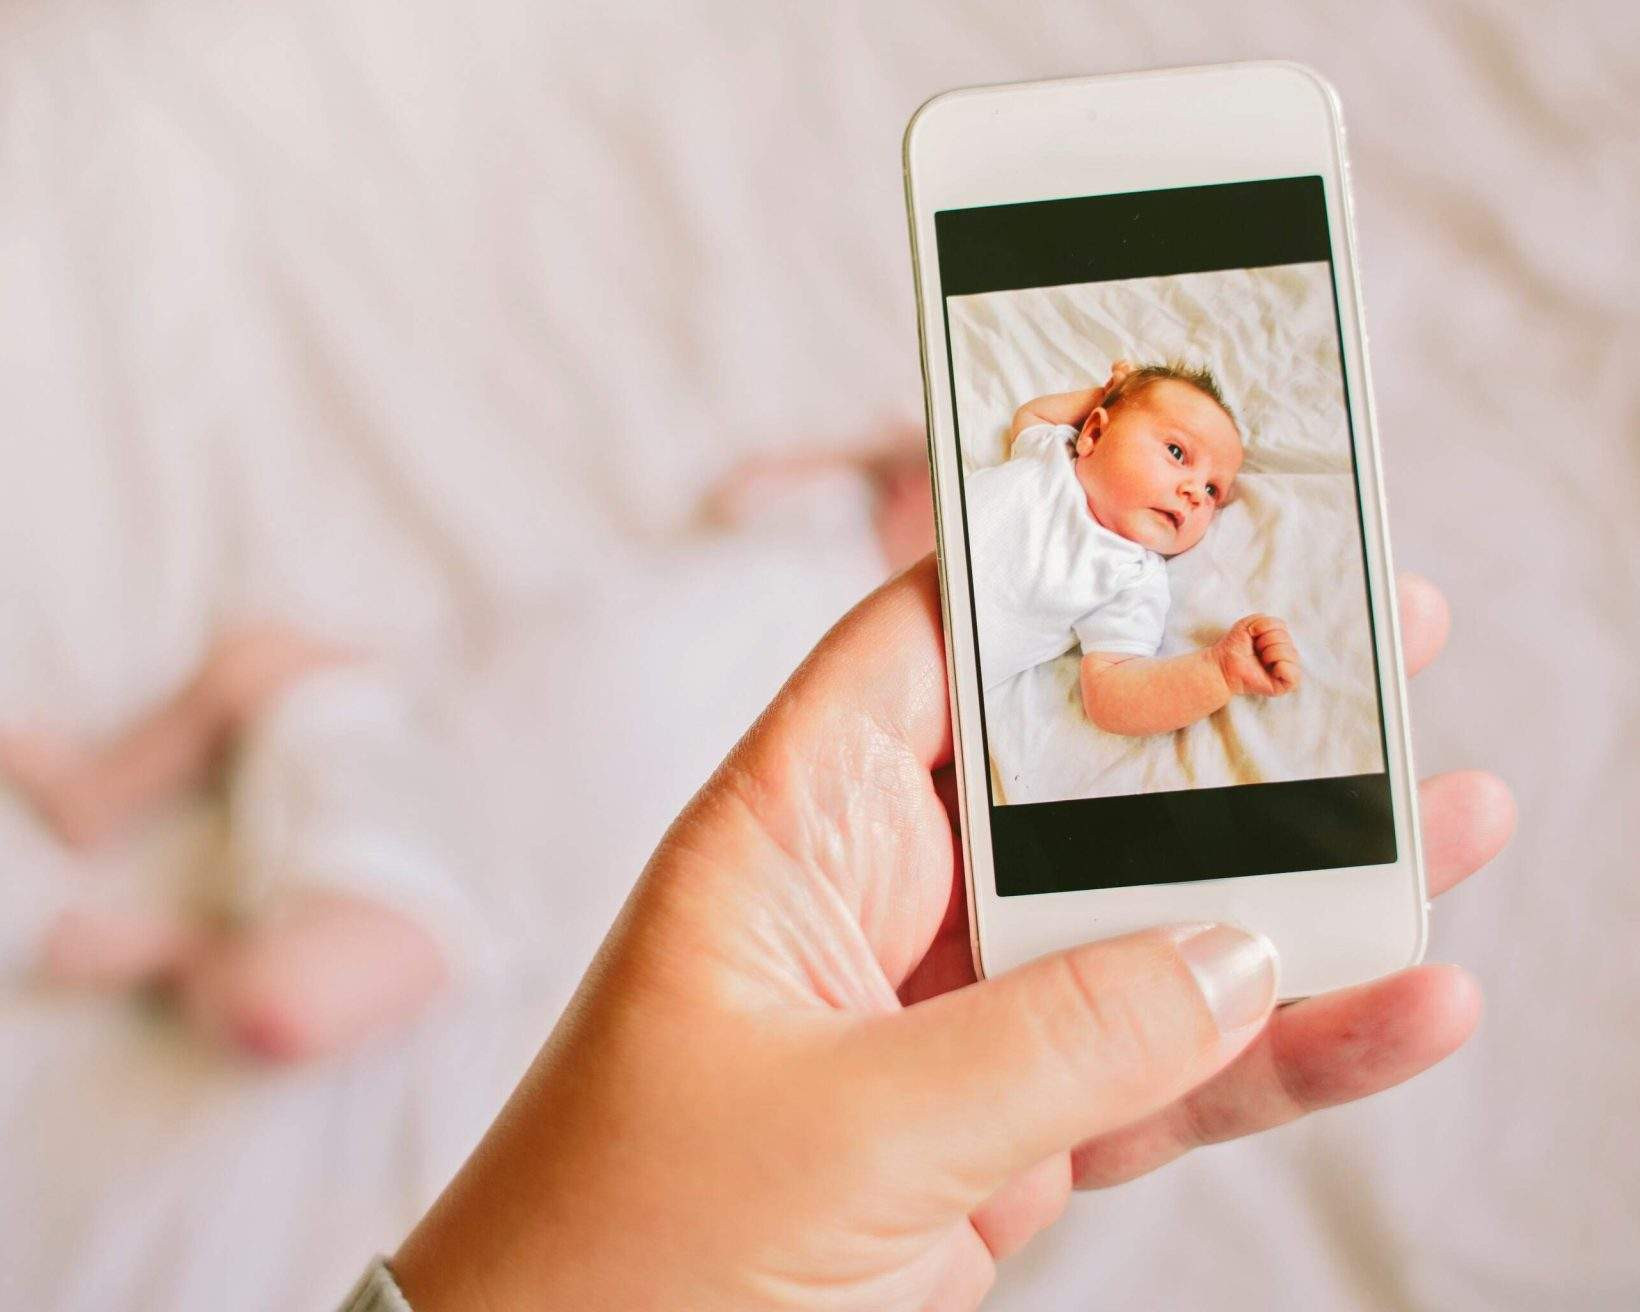
4.5. How to Take Passport Photos for Infants and Children
Taking passport photos of infants and children can be challenging, but with patience and the right techniques, you can achieve compliant results.
- Timing: Choose a time when your child is well-rested and content.
- Assistance: Have someone assist you in keeping your child still and focused.
- Background: Lay your baby on a plain white or off-white sheet.
- Lighting: Use natural light or soft, even artificial light.
- Expression: Capture a photo with your child’s eyes open. The U.S. Department of State accepts photos of infants with their eyes not entirely open.
- No Support: Ensure no one is holding or supporting the child in the photo.
- Distraction: Use toys or sounds to distract your child and keep their attention.
- Multiple Shots: Take multiple photos to increase your chances of capturing a compliant shot.
 Mother taking a photograph on a smartphone of her newborn baby daughter
5. Troubleshooting Common Issues
Even with careful preparation, you may encounter issues:
5.1. Dealing with Shadows and Glare
Shadows and glare are common problems. Here’s how to deal with them:
- Shadows: Adjust your lighting to eliminate shadows. Use additional light sources or change your position.
- Glare: Remove eyeglasses to prevent glare. Adjust your position to avoid reflections.
5.2. Correcting Color and Lighting Problems
Color and lighting issues can be corrected using photo editing software:
- Color Correction: Adjust the white balance to correct color casts.
- Brightness and Contrast: Adjust brightness and contrast to improve the overall appearance.
- Exposure: Adjust the exposure to brighten or darken the photo.
5.3. Ensuring Proper Size and Resolution
Ensure your photo meets the required size and resolution:
- Size: Crop the photo to 2×2 inches (51×51 mm).
- Resolution: Maintain a high resolution (at least 300 dpi) for printing.
5.4. What to Do If Your Photo Is Rejected
If your photo is rejected, don’t panic. Review the rejection reasons and correct the issues. Take a new photo, ensuring you meet all the requirements.
6. The Future of Passport Photography
Passport photography is evolving with technology. Advancements in smartphone cameras, AI, and online tools are making it easier than ever to take compliant photos at home. According to research from the Santa Fe University of Art and Design’s Photography Department, in July 2025, AI-powered passport photo apps will be able to automatically verify compliance with official guidelines, reducing the risk of rejection. Embrace these advancements to simplify the process and ensure a smooth passport application experience.
6.1. How Technology Is Changing the Game
Technology is revolutionizing passport photography:
- AI-Powered Apps: AI-powered apps can automatically detect and correct common issues, such as shadows and glare.
- Advanced Camera Technology: Smartphone cameras are constantly improving, offering higher resolution and better image quality.
- Online Verification Tools: Online tools can verify compliance with official guidelines.
6.2. Trends to Watch in Passport Photography
Stay informed about these trends:
- Biometric Integration: Integration of biometric data for enhanced security.
- Digital Submissions: Increased acceptance of digital passport photos.
- Automated Compliance Checks: AI-powered tools for automated compliance checks.
7. dfphoto.net: Your Resource for Perfect Passport Photos
For additional guidance and inspiration, visit dfphoto.net. Our website offers a wealth of resources, including detailed tutorials, expert tips, and a vibrant community of photographers. Whether you’re a beginner or a seasoned pro, dfphoto.net is your go-to resource for mastering passport photography and beyond.
7.1. Explore Our Guides and Tutorials
dfphoto.net offers a range of guides and tutorials on passport photography:
- Step-by-Step Tutorials: Learn how to take passport photos with your phone.
- Expert Tips: Get tips from professional photographers.
- Troubleshooting Guides: Find solutions to common issues.
7.2. Join Our Community of Photographers
Connect with other photographers, share your work, and get feedback:
- Forums: Participate in discussions and ask questions.
- Galleries: Showcase your photos and get inspired by others.
- Workshops: Attend workshops and learn new skills.
Address: 1600 St Michael’s Dr, Santa Fe, NM 87505, United States. Phone: +1 (505) 471-6001. Website: dfphoto.net.
8. Real-World Examples of Phone-Taken Passport Photos
Seeing is believing. Here are examples of passport photos taken with phones, demonstrating the quality achievable with the right techniques:
8.1. Case Studies of Successful Applications
- Case Study 1: Sarah, a busy mom, used her iPhone to take passport photos of her two children. By following the guidelines and using a passport photo app, she successfully submitted the photos and received her children’s passports without any issues.
- Case Study 2: John, a frequent traveler, used his Android phone to take his own passport photo. He used natural light, a plain white wall, and an online tool to verify compliance. His passport application was approved, saving him time and money.
- Case Study 3: Emily, a college student, used her smartphone and a tripod to take her passport photo. She carefully edited the photo to meet the size and resolution requirements. Her passport application was accepted, allowing her to study abroad.
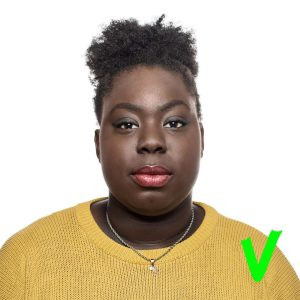 People passport photo correct gettyimages 936316310 universal within usage period 100265
8.2. Tips Learned from These Examples
- Attention to Detail: Pay close attention to the official guidelines.
- Proper Lighting: Use natural light or soft, even artificial light.
- Online Tools: Use online tools to verify compliance.
- Patience: Take multiple shots and edit carefully.
9. The Legal Aspects of Taking Your Own Passport Photo
Be aware of the legal aspects of taking your own passport photo. Ensure you comply with all regulations to avoid legal issues. According to legal experts at the American Immigration Lawyers Association, misrepresenting your identity in a passport photo can lead to severe penalties. Honesty and accuracy are paramount.
9.1. Understanding Copyright and Privacy
- Copyright: Ensure you have the right to use any images or software involved in taking your passport photo.
- Privacy: Protect your personal information and images. Use secure apps and websites.
9.2. Avoiding Fraudulent Activities
- Accuracy: Do not alter your appearance in the photo.
- Authenticity: Ensure the photo is genuine and has not been manipulated.
- Compliance: Comply with all official guidelines.
10. Frequently Asked Questions (FAQ)
Here are some frequently asked questions about taking passport photos on your phone:
10.1. Can I wear makeup in my passport photo?
Yes, you can wear makeup, but it should be natural-looking and not alter your appearance significantly.
10.2. Can I wear jewelry in my passport photo?
Small, modest jewelry is acceptable, but avoid anything that obscures your face or causes glare.
10.3. Can I smile in my passport photo?
No, you must maintain a neutral expression with your mouth closed.
10.4. Can I wear glasses in my passport photo?
No, you must remove eyeglasses for your passport photo.
10.5. Can I take a selfie for my passport photo?
No, selfies are not allowed. Use a tripod or have someone take the photo for you.
10.6. What if I don’t have a white wall at home?
Use a white sheet or poster board as a background.
10.7. How do I ensure my photo is the correct size?
Use a passport photo app or online tool to crop and resize your photo to 2×2 inches.
10.8. What if my photo is too dark or too light?
Adjust the brightness and contrast using photo editing software.
10.9. How do I print my passport photo at home?
Use a high-quality color printer and photo paper. Ensure the photo is printed at the correct size.
10.10. What if my baby won’t open their eyes?
The U.S. Department of State accepts photos of infants with their eyes not entirely open.
Conclusion
Taking passport photos on your phone is a convenient and cost-effective option. By following the official guidelines, mastering lighting and posing techniques, and utilizing the resources available at dfphoto.net, you can capture professional-quality photos that meet all requirements. Don’t let the complexities of passport photography intimidate you. Embrace the convenience of modern technology and take control of your passport application process today.
Ready to enhance your photography skills and ensure your passport photos are perfect? Visit dfphoto.net now to explore our comprehensive guides, stunning photo galleries, and connect with a vibrant community of photography enthusiasts. Unlock your creative potential and embark on a journey of visual discovery with dfphoto.net.