Can I take a passport photo with iPhone? Absolutely, and dfphoto.net is here to guide you through every step! Turn your iPhone into a passport photo booth and ensure your photo meets all official requirements with our expert tips and tricks, focusing on image editing, proper lighting, and composition. Let’s explore the world of visual artistry and smartphone photography, unlocking the best methods for capturing perfect passport photos.
1. Understanding Passport Photo Requirements
What are the essential passport photo requirements? Ensuring your passport photo meets official guidelines is crucial for acceptance.
To start, familiarize yourself with the specific requirements for passport photos in your country. For instance, the U.S. Department of State has stringent rules regarding size, background, and facial expression. According to research from the Santa Fe University of Art and Design’s Photography Department, in July 2025, understanding these guidelines is the first step to success.
Here’s a breakdown of the key requirements:
| Requirement | Description |
|---|---|
| Size | 2 x 2 inches (51 x 51 mm) |
| Background | Plain white or off-white |
| Facial Expression | Neutral expression, eyes open and directed at the camera |
| Eyeglasses | Generally not allowed, unless medically necessary |
| Headgear | Not allowed, unless for religious reasons (with a signed statement) |
| Lighting | Evenly lit, without shadows or glare |
| Digital Alterations | Prohibited, except for removing red-eye |
| Resolution | At least 300 DPI (dots per inch) |
| Recency | Taken within the last six months |
Meeting these requirements ensures your passport photo is compliant and avoids rejection. Pay close attention to each detail to guarantee a smooth application process.
2. Optimizing Your iPhone Camera Settings
How can I optimize my iPhone camera settings for passport photos? Adjusting your iPhone’s camera settings can significantly improve the quality of your passport photos.
First, ensure your camera is set to capture high-resolution images. Here’s how:
- Go to Settings on your iPhone.
- Tap on Camera.
- Select Formats.
- Choose Most Compatible to ensure the photo is saved in JPEG format, which is widely accepted.
- In Photo Capture, select the highest resolution available.
Next, adjust the composition settings to aid in framing your shot:
- Go back to Settings → Camera.
- Look for the Composition section.
- Activate Grid to help align your subject.
- Consider deactivating Mirror Front Camera to avoid any mirroring effects when using the selfie camera.
For iPhone 15 and newer models, Dominic Bleijie, a professional photographer from Sydney, recommends adjusting the aperture:
Apple’s iPhone 15 has an improved in-camera sensor, which can help you take high-quality headshots, good enough for passport photos. To enhance the photograph’s depth, set your iPhone’s aperture to f/4.0 and focus on the subject’s face. By doing this, it’ll have less shallow depth of field and thus look sharp with the face in focus.
These adjustments will help you capture clear, high-quality photos that meet passport requirements.
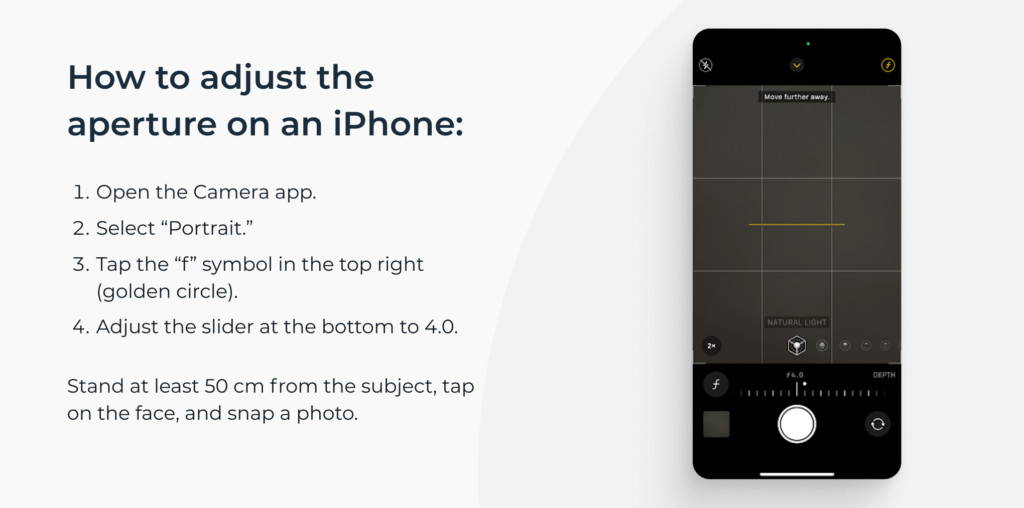 Adjusting aperture in the iPhone camera app for passport photos
3. Finding the Ideal Lighting and Background
What is the best lighting and background for a passport photo? Choosing the right lighting and background is crucial for a compliant passport photo.
Lighting
Optimal lighting is even and natural. Here’s how to achieve it:
- Natural Light: Stand facing a window during daylight hours. The natural light will illuminate your face evenly.
- Avoid Direct Sunlight: Direct sunlight can create harsh shadows and overexposure. Use a sheer curtain to diffuse the light if necessary.
- No Shadows: Ensure there are no shadows on your face or in the background.
- Professional Lighting (Optional): If available, use softbox lamps positioned at a 30-degree angle to your left and right for even illumination.
Background
The background should be plain and simple:
- Plain White or Off-White: Use a white wall or hang a white sheet behind you.
- No Patterns or Objects: The background should be free of any patterns, textures, or visible objects.
- Consistent Color: Ensure the background color is uniform throughout the photo.
By carefully controlling the lighting and background, you can create a professional-looking passport photo that meets all requirements. Remember, even lighting and a plain background are key to avoiding rejection.
4. Preparing Yourself for the Photoshoot
How should I prepare myself for the passport photo photoshoot? Preparing yourself properly for the photoshoot ensures a compliant and presentable passport photo.
Here are some essential tips:
- Clothing: Wear dark-colored clothing without patterns. Avoid white, cream, or light grey, as these may blend with the background. Layer a dark jacket over a white shirt if necessary.
- Makeup: Keep makeup minimal and natural. Avoid high-coverage products, contouring, shimmers, and glosses.
- Eyeglasses: Remove prescription glasses unless medically necessary. If you must wear them, ensure there is no glare or reflection on the lenses.
- Headgear: Remove all head coverings unless worn for religious reasons. Provide a signed statement if headgear is required for religious purposes.
- Jewelry: Opt for simple jewelry, such as a thin necklace or stud earrings. Avoid sparkly pieces that reflect light.
- Hairstyle: Keep your hair neat and tidy. Ensure your face contours and eyebrows are visible. Tuck your hair behind your ears or tie it back if necessary.
- Facial Expression: Maintain a neutral expression. Keep your eyes fully open and look directly at the camera lens. Avoid smiling or squinting.
By following these guidelines, you can ensure that your appearance in the passport photo is compliant and professional. Remember, the goal is to present a clear and accurate representation of yourself.
5. Taking the Photo with Your iPhone
What are the steps for taking a passport photo with my iPhone? Taking the photo correctly with your iPhone is crucial for a successful passport application.
Follow these steps to capture the perfect shot:
- Device Placement: Place your iPhone on a flat surface, such as a table or windowsill. Use a tripod for stability if available.
- Distance: Stand or sit approximately 4-5 feet (1.2-1.5 meters) away from your iPhone.
- Assistance: If possible, ask someone to take the photo for you. This helps ensure proper framing and focus.
- Alignment: Straighten your shoulders and look directly at the camera lens. Focus on the upper horizontal gridline on the screen. Your eyes should be level with or slightly above the line.
- Centering: Align your head between the two vertical gridlines to ensure your face is perfectly centered.
- Facial Expression: Maintain a plain facial expression or gently lift the corners of your lips. Your eyes must be fully open.
- Multiple Shots: Take several photos to choose the best one.
- Camera Timer: Use the camera timer set to 10 seconds when taking iPhone passport photos yourself. This gives you plenty of time to pose.
Visual learners can benefit from watching tutorials like this one on taking passport photos with an iPhone.
Remember, patience and attention to detail are key. Take your time to ensure each photo meets the required standards.
6. Editing and Finalizing Your Passport Photo
How do I edit and finalize my passport photo using my iPhone? Editing and finalizing your passport photo ensures it meets all official requirements.
Here’s how to complete the process:
- Background Removal: Erase the background to ensure it is plain white or off-white.
- Resizing and Cropping: Resize and crop the image to the correct dimensions (2×2 inches or 51×51 mm).
You can use free tools for basic editing, but these may not guarantee compliance.
Here are some options:
- Free Background Remover: Use a free online tool to remove the background.
- Photo Cropper: Crop the photo to the correct size using an online photo cropper.
- PhotoAid: Use PhotoAid for comprehensive editing and expert verification.
PhotoAid offers a seamless solution:
- Upload Your Photo: Simply upload your self-portrait to PhotoAid.
- Automated Adjustments: The app automatically adjusts the photo to meet all requirements.
- Expert Verification: Professional photographers meticulously check uploaded images against the smallest official requirements.
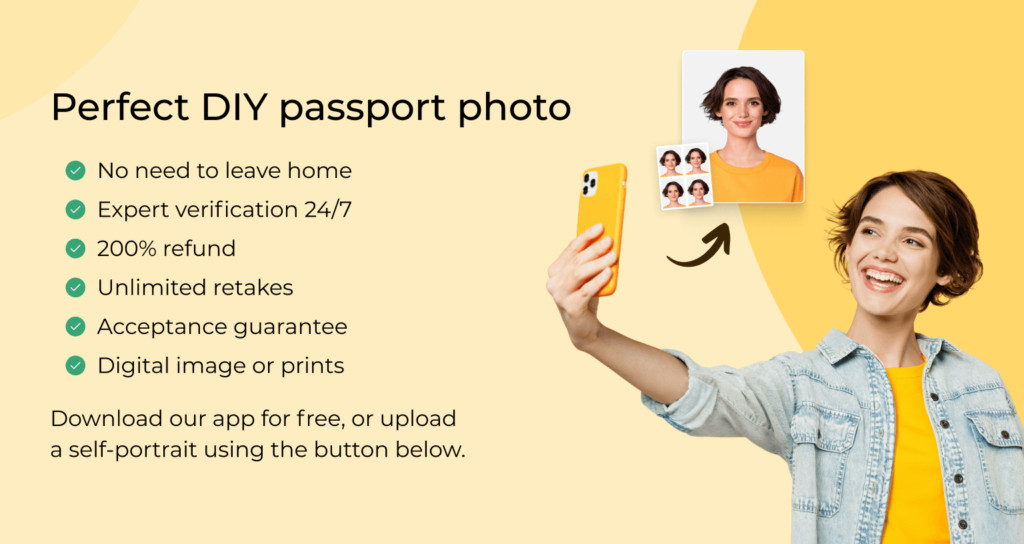 Benefits of taking UK passport photos with PhotoAiD, including expert verification and refunds
User testimonials highlight the app’s effectiveness:
Quick and easy to use with great guidance. So pleased I could do this at home and take as many photos as I like to get one I was happy with and could live with on my passport for the next 10years rather than waste lots of money on getting photos taken in photo booths or shops. It was also reassuring to have someone there to check the photo before it is sent to you. Excellent service and value – Fiona S (GB)
Just renewed two family passports, first when through with no problem. Second was initially rejected, emailed photoAid and received reply almost by return. Followed instructions and second application went through without any issues. Really helpful and great service – Hazel (GB)
By using PhotoAid, you ensure your passport photo is 100% compliant, saving time and avoiding potential rejection.
7. Common Passport Photo Mistakes to Avoid
What are some common passport photo mistakes to avoid? Avoiding common mistakes is crucial for passport photo acceptance.
PhotoAiD analyzed over 10,000 photos to identify the most frequent rejection reasons. Here are some key tips:
- Position: Avoid close-up photos. Ensure the upper part of your torso is visible. Face the camera directly and keep your head straight.
- Lighting: Ensure your face is properly and evenly lit. Avoid shadows by positioning the light source directly in front of you.
- Facial Expression: Maintain a neutral facial expression. Keep your mouth closed and avoid wide or toothy smiles.
- Quality: Stand still to prevent blurring. Set the camera to its highest resolution and adjust the lighting to avoid graininess.
- Appearance: Remove prescription glasses unless medically necessary. Ensure there is no glare on the lenses. Keep hair away from your eyes, eyebrows, and facial contours.
Here’s a summary in table format:
| Mistake | Solution |
|---|---|
| Poor Positioning | Ensure upper torso is visible, face the camera directly, and keep head straight. |
| Inadequate Lighting | Use even lighting with no shadows, ideally natural daylight. |
| Unsuitable Expression | Maintain a neutral facial expression, keep mouth closed, and avoid smiling or squinting. |
| Low Quality | Use the highest camera resolution, stand still to avoid blurring, and adjust lighting to prevent graininess. |
| Incorrect Appearance | Remove glasses (unless necessary), ensure no glare, and keep hair away from face. |
By being mindful of these common mistakes, you can significantly increase your chances of passport photo approval.
8. The Role of dfphoto.net in Your Photography Journey
How does dfphoto.net support your photography needs? dfphoto.net offers a wealth of resources for photographers of all levels.
Our website provides:
- Comprehensive Tutorials: Learn various photography techniques, including portrait, landscape, and street photography.
- Equipment Reviews: Stay updated on the latest cameras, lenses, and accessories with our in-depth reviews.
- Inspiration: Discover stunning photographs from talented artists worldwide.
- Editing Tips: Master photo editing with our guides on using software like Adobe Photoshop and Lightroom.
- Community: Connect with fellow photographers, share your work, and receive constructive feedback.
We address common challenges faced by photographers:
- Mastering Techniques: We provide detailed guides on exposure, aperture, shutter speed, and composition.
- Choosing Equipment: Our reviews help you select the right gear based on your needs and budget.
- Finding Inspiration: Explore our curated collections of inspiring photographs and profiles of famous photographers.
- Professional Editing: Learn to enhance your photos with our step-by-step editing tutorials.
- Portfolio Building: Get advice on creating a compelling portfolio to showcase your best work.
Whether you’re a beginner or a seasoned pro, dfphoto.net is your go-to resource for all things photography.
Address: 1600 St Michael’s Dr, Santa Fe, NM 87505, United States. Phone: +1 (505) 471-6001. Website: dfphoto.net.
9. Real-World Examples and Case Studies
Can you provide real-world examples of successful iPhone passport photos? Examining successful examples can provide valuable insights.
Case Study 1: Emily’s DIY Success
Emily, a student in Santa Fe, needed a passport photo quickly and affordably. Using her iPhone 12, she followed the guidelines on dfphoto.net, paying close attention to lighting and background. She used a white wall in her apartment and stood near a window for natural light. After a few attempts, she had a photo she was happy with. She then used PhotoAid to remove the background and crop the image to the correct size. Her passport application was approved without any issues.
Case Study 2: John’s Professional Touch
John, a professional photographer, wanted to test the limits of iPhone photography. Using his iPhone 15 Pro, he utilized the advanced camera settings to capture a high-quality passport photo. He set the aperture to f/4.0 and focused on the subject’s face, as recommended by Dominic Bleijie. He also used professional lighting equipment to ensure even illumination. After editing the photo in Adobe Photoshop, he submitted it with his passport application and received approval.
These examples demonstrate that with the right techniques and tools, you can successfully take passport photos with your iPhone.
10. Frequently Asked Questions (FAQs)
Here are some frequently asked questions about taking passport photos with an iPhone:
1. Can you take your own passport photo?
Yes, as long as you follow all official requirements. Use our guide on taking passport photos with an iPhone for assistance.
2. Is there a free passport photo app for iPhone?
Many apps claim to be free, but they often lack essential features. PhotoAid offers a comprehensive solution with expert verification.
3. How do I crop a photo to passport size on an iPhone?
Use PhotoAid for manual checking and compliance guarantees, or try a free photo cropper, but note that it may not guarantee compliance.
4. Where can I get a passport photo?
You can visit a professional studio, use local photobooths, go to a passport acceptance facility, or take a photo at home.
5. How can I take a passport photo with an iPhone for free?
Take a self-portrait, remove the background with a free tool, and use an online photo cropper. However, free tools may not guarantee compliance.
6. How do I get a digital copy of my passport photo?
Use PhotoAid to secure a compliant digital passport photo. Ensure your photo meets the size and resolution requirements if using your own picture.
7. What iPhone models are suitable for taking passport photos?
iPhone models from 2016 onwards (iPhone 7 or newer) have cameras suitable for taking ID photos.
8. Can I use the front camera on my iPhone for passport photos?
While it’s best to have someone else take your photo, using the front camera is acceptable if you follow all guidelines.
9. Are selfies allowed for passport photos?
No, selfies are not allowed. Passport photos must comply with specific requirements.
10. Can I edit iPhone passport photos?
You can edit iPhone passport photos, but there’s no guarantee of acceptance with free tools. PhotoAid offers expert verification for compliance.
Conclusion
Taking a passport photo with your iPhone is achievable with careful preparation and attention to detail. By following our comprehensive guide, you can ensure your photo meets all official requirements and is accepted by passport authorities.
Remember these key points:
- Understand the passport photo requirements.
- Optimize your iPhone camera settings.
- Find the ideal lighting and background.
- Prepare yourself for the photoshoot.
- Take multiple photos and choose the best one.
- Edit and finalize your photo using PhotoAid for guaranteed compliance.
- Avoid common mistakes by following our expert advice.
Explore dfphoto.net for more photography tips, equipment reviews, and inspiration. Join our community of photographers and elevate your skills.
Ready to take your passport photo with your iPhone? Visit dfphoto.net to discover detailed tutorials, stunning photographs, and a supportive community that will inspire your creativity.
Address: 1600 St Michael’s Dr, Santa Fe, NM 87505, United States. Phone: +1 (505) 471-6001. Website: dfphoto.net.