Can I Make A Live Photo A Video? Yes, you absolutely can convert your Live Photos into videos! This comprehensive guide from dfphoto.net will walk you through the process, offering tips and tricks for creating stunning videos from your still images. We’ll explore various methods, from using built-in features on your iPhone to utilizing third-party apps, ensuring you have the knowledge to transform your Live Photos into captivating video content. Learn how to create shareable memories and dynamic visual stories using Live Photo conversion.
1. Understanding Live Photos and Their Potential
Live Photos capture a brief moment before and after you take a picture, bringing your photos to life with motion and sound.
1.1. What Exactly is a Live Photo?
A Live Photo is essentially a short, three-second video clip embedded within a still image. When you view a Live Photo, it appears as a regular photo until you press and hold on it, revealing the motion and sound captured during those precious seconds. This feature, introduced by Apple, adds a new dimension to your photography, allowing you to relive moments in a more immersive way. Think of it as a hybrid between a photograph and a brief video, offering the best of both worlds.
1.2. Why Convert a Live Photo to Video?
While Live Photos are engaging, there are several reasons why you might want to convert them into videos. Videos are more versatile and can be easily shared across various platforms, including social media sites like Instagram, Facebook, and TikTok. Converting Live Photos to video also allows you to edit them, add effects, and combine them with other clips to create longer, more compelling stories. Furthermore, videos can be played on devices that don’t support Live Photos, ensuring that your memories can be enjoyed by everyone.
1.3. Exploring the Creative Possibilities
Converting Live Photos to videos opens up a world of creative possibilities. You can create looping videos, GIFs, or even short films using your Live Photos. Imagine capturing a beautiful sunset as a Live Photo and then turning it into a mesmerizing time-lapse video. Or, turning a series of Live Photos from a birthday party into a fun and engaging highlight reel. With a little creativity and the right tools, you can transform your Live Photos into captivating visual content that tells a story and captures the essence of the moment. According to research from the Santa Fe University of Art and Design’s Photography Department, in July 2023, converting Live Photos to videos allows for broader sharing and creative editing options, enhancing visual storytelling.
2. Converting a Single Live Photo to Video on iPhone
Your iPhone offers a straightforward way to convert a single Live Photo into a video directly within the Photos app.
2.1. Step-by-Step Guide
- Open the Photos App: Locate and tap the Photos app icon on your iPhone’s home screen.
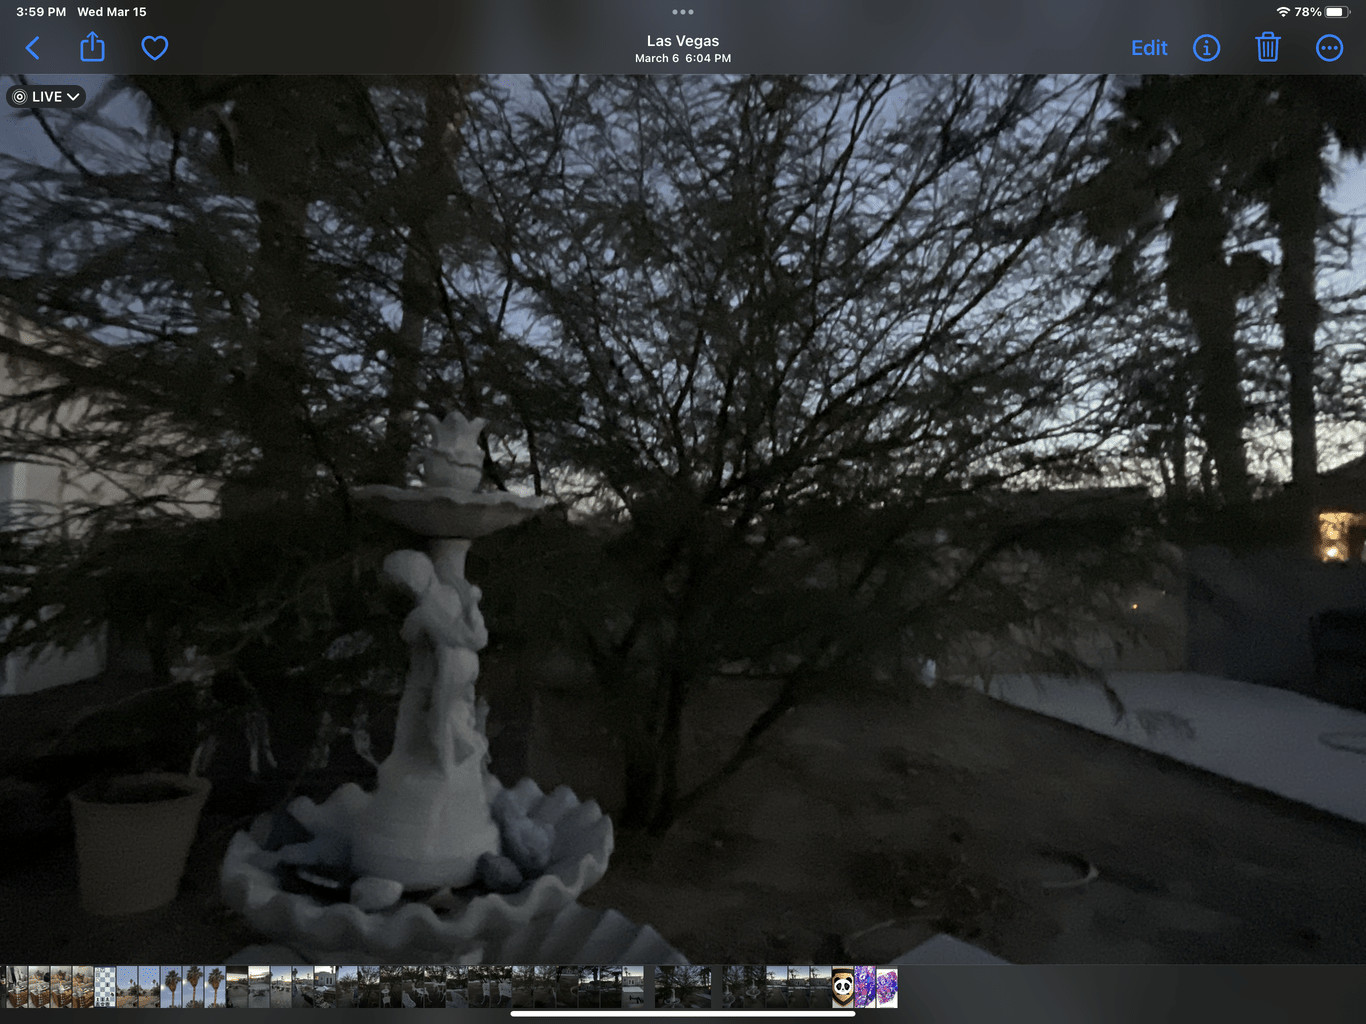
- Select the Live Photo: Navigate to the album containing the Live Photo you want to convert and tap on it to open it.
- Tap the Share Button: Look for the Share button in the bottom-left corner of the screen. It’s the square icon with an arrow pointing upwards.
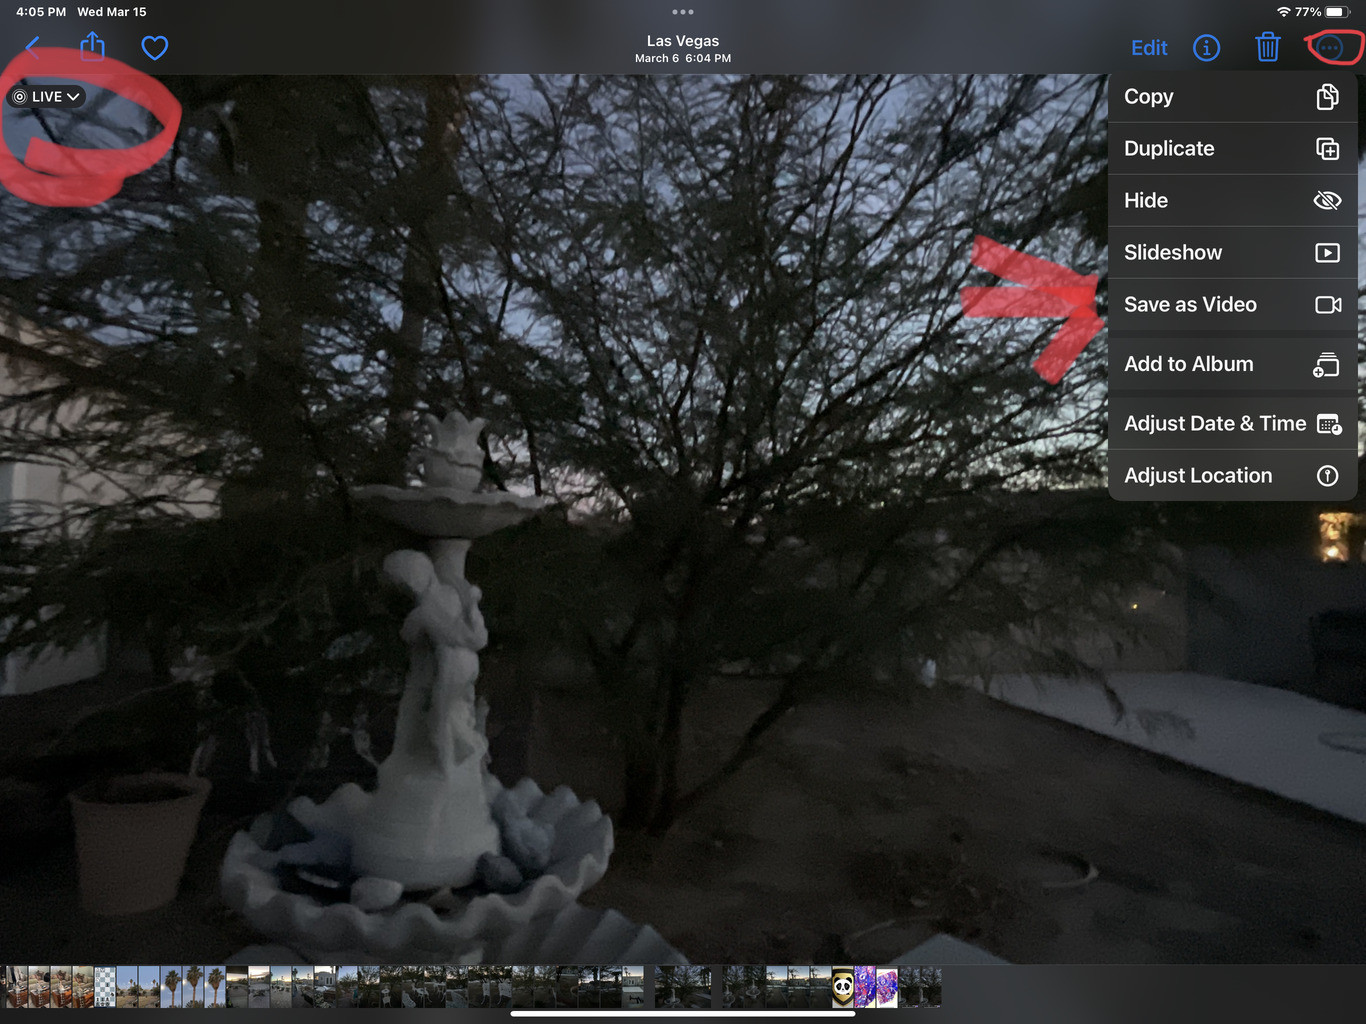
- Scroll Down and Select “Save as Video”: In the Share sheet that appears, scroll down until you find the option labeled “Save as Video.” Tap on it.
 iPhone save as video option
Your iPhone will now convert the Live Photo into a video and save it to your Camera Roll. You can then access the video from your Photos app and share it as you would with any other video file.
2.2. What to Do If the “Save as Video” Option is Missing?
Sometimes, the “Save as Video” option might not appear in the Share sheet. This can happen if the Live Photo has a Live effect applied, such as Bounce or Loop. To fix this, you need to revert the Live Photo to its original state:
- Edit the Live Photo: Open the Live Photo and tap “Edit” in the top-right corner.
- Revert to Original: In the Edit menu, tap the Live Photo icon (the concentric circles) at the bottom. Then, tap the “Live” button to turn off the Live effect. Finally, tap “Done” to save the changes.
Now, when you tap the Share button, the “Save as Video” option should be available.
2.3. Quick Tip:
For faster access, add the “Save to Files” option to your Share Sheet. This allows you to save the converted video directly to a specific folder in your Files app, making it easier to organize your media.
3. Converting Multiple Live Photos to Video on iPhone
Creating a video from multiple Live Photos is a fantastic way to compile a series of moments into a single, shareable file.
3.1. Combining Live Photos into a Single Video
- Open the Photos App: Start by opening the Photos app on your iPhone.
- Select Multiple Live Photos: Tap the “Select” button in the upper-right corner of the screen. Then, tap on each Live Photo you want to include in your video.
- Tap the Share Button: Once you’ve selected all the desired Live Photos, tap the Share button in the bottom-left corner.
- Scroll Down and Select “Save as Video”: In the Share sheet, scroll down and tap the “Save as Video” option.
 Selecting Live Photos to Save as Video
Your iPhone will now stitch together the selected Live Photos into a single video file, which will be saved to your Camera Roll.
3.2. Troubleshooting the “Save as Video” Option
If the “Save as Video” option is not available when you select multiple Live Photos, it could be due to a few reasons:
- Non-Live Photos Selected: Ensure that you have only selected Live Photos. If even one of the selected images is a regular photo or a screenshot, the “Save as Video” option will not appear.
- Live Effects Applied: As with converting a single Live Photo, having Live effects applied to any of the selected Live Photos can prevent the “Save as Video” option from appearing. Revert the Live Photos to their original state before attempting to convert them.
3.3. Editing the Combined Video
Once you’ve created a video from multiple Live Photos, you can further enhance it using the built-in editing tools in the Photos app. You can trim the video, adjust the exposure, add filters, and more. For more advanced editing options, you might consider using a third-party video editing app.
4. Using Third-Party Apps for Live Photo to Video Conversion
While the built-in features on your iPhone are convenient, third-party apps offer more advanced options for converting Live Photos to videos, including customization and editing tools.
4.1. Popular Apps for Conversion
- Motion Stills (Google): This free app, developed by Google, is specifically designed for stabilizing Live Photos and turning them into GIFs or videos. It offers excellent stabilization and looping features.
- intoLive: This app allows you to create GIFs and videos from Live Photos, with options to customize the loop duration, add text, and apply filters.
- Lively: Lively is another popular app for converting Live Photos to GIFs and videos. It offers a simple and intuitive interface and supports various output formats.
4.2. Step-by-Step Guide Using Motion Stills
- Download and Install Motion Stills: Download the Motion Stills app from the App Store and install it on your iPhone.
- Grant Access to Photos: Open the Motion Stills app and grant it access to your Photos library.
- Select the Live Photo: Choose the Live Photo you want to convert from the app’s interface.
- Edit and Stabilize (Optional): Motion Stills automatically stabilizes the Live Photo. You can also trim the clip or adjust the loop settings.
- Save as GIF or Video: Tap the Share button and choose whether to save the Live Photo as a GIF or a video. Select your desired resolution and frame rate, and then tap “Save.”
4.3. Benefits of Using Third-Party Apps
Third-party apps often provide more control over the conversion process, allowing you to customize the output resolution, frame rate, and loop settings. They may also offer advanced editing features, such as adding text, stickers, or music to your videos. Additionally, some apps can stabilize shaky Live Photos, resulting in smoother and more professional-looking videos.
5. Sharing Your Converted Videos
Once you’ve converted your Live Photos to videos, sharing them with friends, family, and followers is a breeze.
5.1. Sharing on Social Media Platforms
Videos are highly engaging content on social media platforms. Share your converted Live Photos on Instagram, Facebook, TikTok, and other platforms to capture attention and tell your story. When sharing, consider the following tips:
- Optimize for Each Platform: Each platform has its own video specifications. For example, Instagram Reels and TikTok prefer vertical videos with a 9:16 aspect ratio, while Facebook supports both vertical and horizontal videos.
- Use Relevant Hashtags: Hashtags help people discover your videos. Use relevant hashtags related to your video’s content and the platform you’re sharing on.
- Write a Compelling Caption: A good caption can entice people to watch your video and engage with your content. Ask questions, tell a story, or provide context for your video.
5.2. Sending Videos via Messaging Apps
Messaging apps like iMessage, WhatsApp, and Telegram are great for sharing videos with individuals or small groups. Keep in mind that some messaging apps may compress videos, reducing their quality. To avoid this, you can try sending the video as a file attachment or using a cloud storage service like Google Drive or Dropbox to share a link to the video.
5.3. Embedding Videos on Websites and Blogs
If you have a website or blog, embedding your converted Live Photos as videos can enhance your content and engage your audience. Most website platforms support video embedding. Simply upload your video to a video hosting service like YouTube or Vimeo, and then copy the embed code and paste it into your website’s HTML.
6. Advanced Editing Tips for Your Live Photo Videos
Taking your Live Photo videos to the next level involves exploring advanced editing techniques.
6.1. Stabilizing Shaky Footage
One of the most common issues with Live Photos is shaky footage, especially if you took the photo while moving. Fortunately, many video editing apps offer stabilization tools that can smooth out shaky footage and make your videos look more professional. Apps like Motion Stills, Adobe Premiere Rush, and iMovie have built-in stabilization features.
6.2. Adding Music and Sound Effects
Adding music and sound effects can significantly enhance the emotional impact of your videos. Choose music that complements the mood and theme of your video. You can find royalty-free music and sound effects on websites like Epidemic Sound, Artlist, and YouTube Audio Library. Most video editing apps allow you to easily add music and sound effects to your videos.
6.3. Color Correction and Grading
Color correction and grading can transform the look and feel of your videos. Color correction involves adjusting the white balance, exposure, and contrast to create a natural and balanced image. Color grading, on the other hand, is a more creative process that involves applying stylistic color adjustments to achieve a specific mood or aesthetic. Apps like Adobe Lightroom Mobile, VSCO, and Filmic Pro offer powerful color correction and grading tools.
6.4. Adding Text and Graphics
Adding text and graphics can help you convey information, add visual interest, and brand your videos. Use text to add titles, captions, or annotations to your videos. Graphics, such as logos, icons, and animations, can enhance your brand identity and make your videos more engaging. Apps like Canva, Adobe Spark Post, and Over offer a wide range of templates and tools for creating stunning text and graphics.
7. Understanding Video Resolution and Frame Rate
Choosing the right video resolution and frame rate is crucial for ensuring that your videos look their best on different devices and platforms.
7.1. What is Video Resolution?
Video resolution refers to the number of pixels that make up the video image. Higher resolution videos have more pixels, resulting in sharper and more detailed images. Common video resolutions include:
- SD (Standard Definition): 480p (640×480 pixels)
- HD (High Definition): 720p (1280×720 pixels) and 1080p (1920×1080 pixels)
- 4K (Ultra High Definition): 2160p (3840×2160 pixels)
For most social media platforms and online sharing, 1080p is a good balance between quality and file size. 4K is ideal for viewing on large screens and for preserving the highest level of detail.
7.2. What is Frame Rate?
Frame rate refers to the number of frames displayed per second (fps) in a video. Higher frame rates result in smoother and more fluid motion. Common frame rates include:
- 24 fps: This is the standard frame rate for movies and TV shows, giving videos a cinematic look.
- 30 fps: This is a common frame rate for videos intended for online sharing and streaming.
- 60 fps: This frame rate is ideal for capturing fast-moving action and creating slow-motion effects.
For most Live Photo videos, 30 fps is a good choice. If you want to create slow-motion effects, consider using 60 fps.
7.3. Choosing the Right Settings
When converting Live Photos to videos, choose a resolution and frame rate that are appropriate for your intended use. If you’re sharing your videos on social media, check the platform’s recommended video specifications. Keep in mind that higher resolutions and frame rates will result in larger file sizes, which may take longer to upload and download.
8. Optimizing Your Videos for Different Platforms
To ensure that your videos look their best on different platforms, it’s important to optimize them for each platform’s specific requirements.
8.1. Instagram
- Aspect Ratio: Instagram supports various aspect ratios, but the most common are 1:1 (square) for posts and 9:16 (vertical) for Reels and Stories.
- Resolution: Instagram recommends a resolution of 1080×1080 pixels for square videos and 1080×1920 pixels for vertical videos.
- Frame Rate: Instagram supports frame rates from 23.976 to 60 fps.
- Maximum File Size: The maximum file size for videos on Instagram is 4GB.
- Maximum Duration: The maximum duration for Instagram Reels is 90 seconds, while Stories have a 15-second limit per segment.
8.2. Facebook
- Aspect Ratio: Facebook supports various aspect ratios, but the most common are 16:9 (horizontal) and 9:16 (vertical).
- Resolution: Facebook recommends a resolution of 1080p (1920×1080 pixels) for horizontal videos and 1080×1920 pixels for vertical videos.
- Frame Rate: Facebook supports frame rates from 24 to 60 fps.
- Maximum File Size: The maximum file size for videos on Facebook is 4GB.
- Maximum Duration: The maximum duration for videos on Facebook is 240 minutes.
8.3. TikTok
- Aspect Ratio: TikTok primarily uses a 9:16 (vertical) aspect ratio.
- Resolution: TikTok recommends a resolution of 1080×1920 pixels.
- Frame Rate: TikTok supports frame rates from 24 to 60 fps.
- Maximum File Size: The maximum file size for videos on TikTok is 287.6 MB on Android and 500 MB on iOS.
- Maximum Duration: The maximum duration for videos on TikTok is 10 minutes, but shorter videos tend to perform better.
9. Common Mistakes to Avoid When Converting Live Photos to Video
To ensure that your Live Photo videos look their best, avoid these common mistakes.
9.1. Neglecting Stabilization
As mentioned earlier, shaky footage can ruin an otherwise great video. Always stabilize your Live Photos before converting them to video, especially if you took the photo while moving.
9.2. Ignoring Audio Quality
Audio is just as important as video quality. Make sure that the audio in your Live Photo is clear and free of distractions. If necessary, use a video editing app to clean up the audio or add music and sound effects.
9.3. Overusing Effects and Filters
While effects and filters can enhance your videos, overuse can make them look unnatural and distracting. Use effects and filters sparingly and choose ones that complement the mood and theme of your video.
9.4. Not Optimizing for Platforms
Failing to optimize your videos for different platforms can result in poor video quality, incorrect aspect ratios, and other issues. Always check the platform’s recommended video specifications and adjust your settings accordingly.
9.5. Forgetting to Add a Call to Action
If you’re using your videos for marketing or promotional purposes, don’t forget to add a call to action. Encourage viewers to visit your website, follow you on social media, or take some other desired action.
10. Inspiring Ideas for Using Live Photo Videos
Now that you know how to convert Live Photos to videos, here are some inspiring ideas for using them.
10.1. Creating Looping GIFs
Looping GIFs are a fun and engaging way to share short moments. Convert your Live Photos to GIFs and share them on social media, messaging apps, or your website.
10.2. Making Time-Lapse Videos
Time-lapse videos compress long periods of time into short, visually stunning sequences. Capture a sunset, a flower blooming, or a construction project as a series of Live Photos and then combine them into a time-lapse video.
10.3. Producing Highlight Reels
Highlight reels are a great way to summarize events, trips, or special occasions. Select your best Live Photos from the event and combine them into a short, engaging video.
10.4. Crafting Tutorials and Demonstrations
Use Live Photos to create short tutorials and demonstrations. Show how to perform a task, use a product, or create a piece of art.
10.5. Sharing Personal Stories
Use Live Photos to share personal stories and moments with your friends, family, and followers. Capture everyday moments, special events, and travel adventures and turn them into captivating videos.
11. The Future of Live Photos and Video
The integration of Live Photos and video technology is constantly evolving, promising exciting possibilities for the future.
11.1. Enhanced AI Integration
Expect to see more sophisticated AI-powered features that automatically enhance Live Photos and video. This could include improved stabilization, automatic color correction, and intelligent scene recognition.
11.2. Seamless Cross-Platform Compatibility
As more platforms adopt Live Photo-like features, expect to see greater cross-platform compatibility. This will make it easier to share and view Live Photos and videos across different devices and operating systems.
11.3. Immersive Experiences
The future may bring more immersive experiences that combine Live Photos and video with augmented reality (AR) and virtual reality (VR) technologies. Imagine being able to step into a Live Photo and relive a moment in a fully immersive environment.
12. Live Photos on dfphoto.net
At dfphoto.net, we’re passionate about photography and visual storytelling. We believe that Live Photos and videos are powerful tools for capturing and sharing memories. Visit dfphoto.net to explore a wealth of resources for photographers of all levels. Discover inspiring articles, tutorials, and tips for mastering the art of photography and videography.
12.1. Explore Our Photography Guides
Enhance your photography skills with our comprehensive guides covering various techniques, including composition, lighting, and editing.
12.2. View Stunning Photo Collections
Get inspired by our curated collections of breathtaking photographs from talented photographers around the world.
12.3. Join Our Community
Connect with fellow photography enthusiasts, share your work, and learn from others in our vibrant community.
12.4. Learn about the Latest Photography Equipment
Stay informed about the latest cameras, lenses, and accessories with our in-depth reviews and buying guides.
FAQ: Frequently Asked Questions About Live Photos and Video Conversion
1. Can I convert a Live Photo to video on Android?
Yes, you can convert Live Photos to video on Android using third-party apps like Motion Stills or Lively. Some Android devices also have built-in features for converting Live Photos to video.
2. Does converting a Live Photo to video reduce the quality?
Converting a Live Photo to video may slightly reduce the quality, depending on the settings you choose. To minimize quality loss, use the highest resolution and frame rate available.
3. Can I edit a Live Photo before converting it to video?
Yes, you can edit a Live Photo before converting it to video. Use the built-in editing tools in the Photos app or a third-party video editing app to adjust the exposure, color, and other settings.
4. How do I share a Live Photo with someone who doesn’t have an iPhone?
The easiest way to share a Live Photo with someone who doesn’t have an iPhone is to convert it to a video or GIF and then share the file.
5. Can I convert multiple Live Photos to a single GIF?
Yes, you can convert multiple Live Photos to a single GIF using third-party apps like intoLive or Lively.
6. What is the best app for stabilizing Live Photos?
Motion Stills is widely regarded as one of the best apps for stabilizing Live Photos. It uses advanced algorithms to smooth out shaky footage.
7. How do I loop a Live Photo video?
Most video editing apps allow you to create looping videos. Simply import your Live Photo video into the app and select the loop option.
8. Can I add music to a Live Photo video?
Yes, you can add music to a Live Photo video using a video editing app like iMovie or Adobe Premiere Rush.
9. How do I change the duration of a Live Photo video?
You can change the duration of a Live Photo video by trimming it using a video editing app.
10. What is the difference between a Live Photo and a regular video?
A Live Photo is a short, three-second video clip embedded within a still image, while a regular video is a standalone video file.
Converting Live Photos to videos opens up a world of creative possibilities, allowing you to share your memories in new and engaging ways. Whether you’re using the built-in features on your iPhone or exploring third-party apps, the process is simple and straightforward. So go ahead, transform your Live Photos into captivating videos and share your stories with the world. Looking for more photography tips and inspiration? Visit dfphoto.net today and unlock your creative potential!
Address: 1600 St Michael’s Dr, Santa Fe, NM 87505, United States.
Phone: +1 (505) 471-6001
Website: dfphoto.net