A Photo Of A Classroom can be improved with the right techniques and approach, as discovered by dfphoto.net. This guide will provide valuable insights for amateur and professional photographers, educators, and anyone interested in capturing the essence of a learning environment. You’ll discover how to make your shots stand out with optimal composition, lighting, and storytelling through photographs.
1. What Makes A Photo Of A Classroom Compelling?
A compelling photo of a classroom captures the environment and tells a story. It’s not just about snapping a picture; it’s about conveying the atmosphere, energy, and learning spirit within those four walls.
- Capturing Authentic Moments: The best classroom photos show real, unscripted moments. Students engaged in learning, teachers interacting with their class, or even a quiet moment of reflection can make a powerful image.
- Highlighting the Learning Environment: The classroom itself is a character in your photo. Showcasing colorful displays, student artwork, and the layout of the room can add depth and context.
- Telling a Story: Every photo should tell a story. Whether it’s a story of collaboration, discovery, or growth, aim to capture images that resonate emotionally with viewers.
2. What Are The Essential Photography Techniques For Photographing Classrooms?
Mastering a few essential photography techniques can dramatically improve your classroom photos. Understanding composition, lighting, and focus will help you create visually appealing and impactful images.
- Composition: Use the rule of thirds to create balanced and engaging shots. Place key elements off-center to draw the viewer’s eye through the photo.
- Lighting: Natural light is your best friend. Position yourself to take advantage of window light, and avoid harsh shadows. If natural light is limited, consider using reflectors or soft, diffused artificial light.
- Focus: Sharp focus on the subject is crucial. Use a shallow depth of field to isolate your subject and blur distracting backgrounds, or a deep depth of field to keep the entire scene in focus.
3. How Can I Optimize Lighting When Taking A Photo Of A Classroom?
Optimizing lighting is crucial for capturing a great photo of a classroom. Correct lighting enhances the mood, reduces shadows, and brings out the best in your subjects and environment.
- Maximize Natural Light: Natural light is soft and flattering, making it ideal for classroom photography. Open blinds and curtains to let as much light in as possible.
- Avoid Harsh Shadows: Direct sunlight can create harsh shadows. Diffuse the light by using sheer curtains or shooting on a cloudy day.
- Use Reflectors: Reflectors bounce light back into the scene, filling in shadows and creating a more balanced exposure. A simple white board can work wonders.
- Artificial Lighting: If natural light is insufficient, use softbox or diffused LED panels. Position them to mimic natural light and avoid creating unnatural shadows.
- Color Temperature: Pay attention to color temperature. Adjust your camera settings to match the light source (e.g., daylight, fluorescent) to avoid color casts.
4. What Equipment Is Best Suited For Taking A Photo Of A Classroom?
Choosing the right equipment is essential for capturing high-quality photos of classrooms. The right camera, lens, and accessories can make a significant difference in your results.
| Equipment | Description | Benefits |
|---|---|---|
| Camera | DSLR or Mirrorless camera with good low-light performance. | Offers manual control, interchangeable lenses, and better image quality than smartphones. |
| Lens | Wide-angle lens (e.g., 24-70mm) for capturing the entire classroom, or a prime lens (e.g., 35mm or 50mm) for portraits. | Wide-angle lenses allow you to capture more of the scene, while prime lenses offer excellent image quality and shallow depth of field. |
| Tripod | Sturdy tripod for stable shots in low light. | Prevents camera shake, especially useful when using slower shutter speeds. |
| External Flash | Speedlight with bounce and swivel capabilities. | Provides additional light when natural light is insufficient, and can be bounced off ceilings or walls for a softer effect. |
| Reflectors | Portable reflectors to bounce light and fill in shadows. | Helps to balance the lighting and reduce harsh shadows, creating a more even exposure. |
| Editing Software | Adobe Lightroom or similar software. | Allows you to adjust exposure, color, and other settings to enhance your photos. |
| Cleaning Kit | Lens cloth and cleaning solution. | Keeps your lens clean and free of smudges, ensuring sharp and clear images. |
5. How Do I Capture Candid Moments In A Photo Of A Classroom?
Capturing candid moments in a photo of a classroom requires a blend of patience, observation, and the ability to blend into the background. These unscripted moments often reveal the true essence of the classroom environment.
- Blend In: Move around the classroom unobtrusively. Avoid making sudden movements or loud noises that might distract the students and teachers.
- Be Patient: Wait for genuine interactions and expressions to unfold. Sometimes the best moments happen when people are least aware of the camera.
- Use a Fast Lens: A lens with a wide aperture (e.g., f/1.8 or f/2.8) allows you to shoot in low light without a flash, preserving the natural ambiance.
- Continuous Shooting Mode: Use your camera’s continuous shooting mode to capture a series of shots in quick succession. This increases your chances of capturing the perfect moment.
- Focus on Emotions: Look for emotions like joy, curiosity, and concentration. These moments are more likely to create compelling and engaging photos.
- Respect Privacy: Be mindful of privacy concerns. Obtain permission from the school and parents before photographing students.
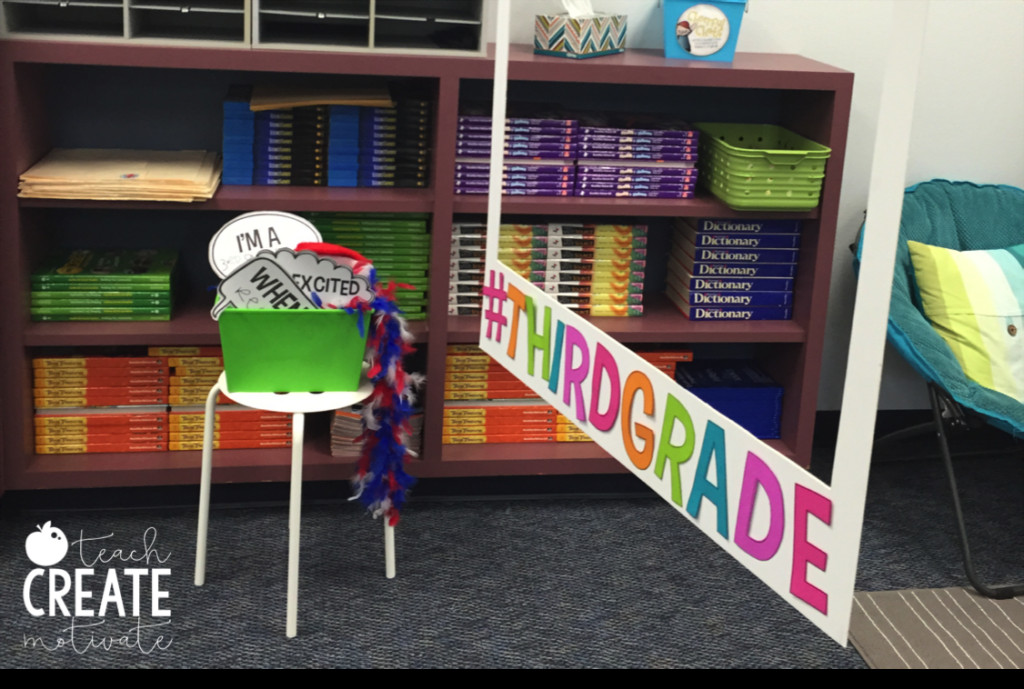 Classroom Photography Props
6. What Are Some Ethical Considerations When Taking Photos In A Classroom?
Ethical considerations are paramount when taking photos in a classroom. Protecting the privacy and well-being of students and staff is essential.
- Obtain Consent: Always obtain written consent from the school administration, teachers, and parents or guardians before photographing students.
- Respect Privacy: Avoid capturing images that could be embarrassing or compromising to students.
- Be Transparent: Clearly communicate the purpose of the photos and how they will be used.
- Follow School Policies: Adhere to the school’s policies regarding photography and media.
- Protect Identities: If photos are to be published, consider blurring faces or using pseudonyms to protect the identities of the students.
- Avoid Exploitation: Ensure that the photos are not used in a way that exploits or endangers the students.
- Be Mindful of Cultural Sensitivities: Be aware of cultural or religious sensitivities that might affect how students are photographed.
7. How Can I Use Composition Techniques In A Photo Of A Classroom?
Effective use of composition techniques can transform a simple snapshot of a classroom into a visually engaging photograph. Composition guides the viewer’s eye and creates a sense of balance and harmony.
- Rule of Thirds: Divide the frame into nine equal parts using two horizontal and two vertical lines. Place key elements along these lines or at their intersections to create a balanced composition.
- Leading Lines: Use lines (e.g., desks, hallways, bookshelves) to draw the viewer’s eye into the scene.
- Framing: Use elements within the classroom (e.g., doorways, windows, arches) to frame the subject and add depth to the photo.
- Symmetry: Capture symmetrical arrangements of desks, chairs, or other classroom elements to create a sense of order and balance.
- Patterns: Look for repeating patterns (e.g., rows of desks, colorful artwork) to add visual interest to the photo.
- Negative Space: Use empty space around the subject to create a sense of calm and focus.
- Viewpoint: Experiment with different viewpoints (e.g., high angle, low angle) to create unique and dynamic compositions.
8. What Post-Processing Techniques Enhance A Photo Of A Classroom?
Post-processing techniques can significantly enhance a photo of a classroom, correcting imperfections and bringing out the best in the image.
- Exposure Correction: Adjust the overall brightness of the photo to ensure it is well-exposed.
- White Balance: Correct any color casts by adjusting the white balance to make the colors appear natural.
- Contrast Adjustment: Increase contrast to add depth and dimension to the photo.
- Highlight and Shadow Recovery: Recover details in overexposed highlights and underexposed shadows.
- Noise Reduction: Reduce noise (graininess) in photos taken in low light.
- Sharpening: Sharpen the image to enhance details and make it appear crisper.
- Cropping: Crop the photo to improve composition and remove distracting elements.
- Color Grading: Adjust the colors to create a specific mood or style.
- Lens Correction: Correct lens distortion and chromatic aberration (color fringing).
- Retouching: Remove blemishes or distractions from the photo.
9. How Do I Take Photos Of Classrooms While Minimizing Distractions?
Minimizing distractions is essential for capturing clear and focused photos of classrooms. A cluttered environment can detract from the subject and make the photo less impactful.
- Declutter the Scene: Before taking photos, tidy up the classroom by removing unnecessary items and organizing desks and chairs.
- Choose the Right Angle: Select an angle that minimizes distracting elements in the background.
- Use a Shallow Depth of Field: Blur the background by using a wide aperture to isolate the subject.
- Shoot During Quiet Times: Take photos when students are engaged in focused activities or during breaks.
- Avoid Flash: Use natural light or soft, diffused artificial light to avoid distracting flashes.
- Be Unobtrusive: Move around the classroom quietly and avoid making sudden movements.
- Use Props Strategically: Add props that enhance the photo without cluttering the scene.
- Post-Processing: Use post-processing techniques to remove or minimize distractions.
10. How Can I Capture The Diversity Of Students In A Photo Of A Classroom?
Capturing the diversity of students in a photo of a classroom is essential for representing the reality of modern education. These photos should reflect the variety of backgrounds, abilities, and experiences within the classroom.
- Show a Range of Activities: Capture students engaged in different activities that highlight their diverse talents and interests.
- Focus on Interactions: Photograph students interacting with each other in collaborative projects, showcasing teamwork and inclusion.
- Highlight Individual Achievements: Capture moments of individual success and recognition to celebrate each student’s unique contributions.
- Include Students with Disabilities: Ensure that students with disabilities are included and represented in a positive and respectful manner.
- Show Cultural Diversity: Highlight cultural diversity by capturing students participating in cultural events or sharing their heritage.
- Use Inclusive Language: When describing the photos, use inclusive language that respects and celebrates diversity.
- Get Parental Consent: Ensure that you have parental consent for all students who appear in the photos.
- Be Authentic: Capture genuine moments that reflect the real diversity of the classroom, avoiding stereotypes or tokenism.
 Classroom Mounting Board
11. How Can I Create A Classroom Photo Booth?
Creating a classroom photo booth is a fun and engaging way to capture memorable moments throughout the school year. It provides a creative outlet for students and adds a personal touch to classroom events.
- Choose a Location: Select a well-lit area in the classroom with a neutral background.
- Select a Backdrop: Use a large sheet of colorful paper, fabric, or a whiteboard as a backdrop.
- Create a Frame: Use a large piece of cardboard or foam board to create a frame around the backdrop.
- Add Props: Gather a variety of props such as hats, glasses, signs, and costumes to encourage creativity.
- Incorporate Themes: Change the theme of the photo booth to match different holidays, seasons, or classroom topics.
- Set Up Lighting: Use natural light or soft, diffused artificial light to illuminate the photo booth.
- Provide Instructions: Post clear instructions on how to use the photo booth.
- Encourage Participation: Encourage students to use the photo booth during free time or special events.
- Share the Photos: Share the photos with students and parents through a class website or social media page (with appropriate permissions).
Example Steps for Making a Photo Booth
- Gather Materials: You’ll need a mounting board, bright colored cardstock, ruler, pencil, and Exacto knife.
- Create a Rectangle: Use your pencil and ruler to draw a rectangle on your board. The rectangle should be about 6-7 inches from the bottom, leaving 1.5 inches on the sides and top to mimic a polaroid-type photo.
- Cut Out the Rectangle: Use the Exacto knife to carefully cut out the rectangle you just drew.
- Add a Saying: Use bright colored cardstock to cut out letters for the bottom.
- Hang It Up: Use ceiling hangers to attach the photo booth to the ceiling.
12. How Can I Use Color Effectively In A Photo Of A Classroom?
Effective use of color can significantly enhance a photo of a classroom, adding vibrancy, creating mood, and drawing attention to key elements.
- Complementary Colors: Use complementary colors (e.g., blue and orange, red and green) to create contrast and visual interest.
- Analogous Colors: Use analogous colors (colors that are next to each other on the color wheel) to create a harmonious and balanced composition.
- Monochromatic Colors: Use different shades and tints of a single color to create a cohesive and unified look.
- Color Psychology: Use colors that evoke specific emotions (e.g., blue for calmness, yellow for energy) to create the desired mood.
- Color Balance: Ensure that the colors in the photo are balanced and harmonious, avoiding overly saturated or dull colors.
- Color Accents: Use small pops of color to draw attention to key elements in the photo.
- Color Temperature: Adjust the color temperature to create a warm or cool tone, depending on the desired effect.
- Post-Processing: Use post-processing techniques to adjust the colors and create a specific style.
13. What Are Some Common Mistakes To Avoid When Taking A Photo Of A Classroom?
Avoiding common mistakes can help you capture better photos of classrooms. These errors can detract from the quality and impact of your images.
| Mistake | Solution |
|---|---|
| Poor Lighting | Use natural light or soft, diffused artificial light. |
| Cluttered Background | Declutter the scene and choose an angle that minimizes distractions. |
| Blurry Images | Use a tripod and ensure that the subject is in focus. |
| Bad Composition | Use the rule of thirds and other composition techniques to create balanced and engaging shots. |
| Lack of Permission | Always obtain consent from the school, teachers, and parents before taking photos. |
| Disrespectful Photography | Avoid capturing images that could be embarrassing or compromising to students. |
| Overuse of Flash | Use natural light or bounce flash to avoid harsh shadows and red-eye. |
| Ignoring Ethical Concerns | Be mindful of privacy and cultural sensitivities, and follow school policies. |
| Poor Post-Processing | Use post-processing techniques to enhance the photo without making it look unnatural. |
| Neglecting Diversity | Capture the diversity of students in a respectful and inclusive manner. |
| Forgetting the Story | Focus on capturing authentic moments that tell a story about the classroom environment. |
14. How Can I Capture Action Shots In A Photo Of A Classroom?
Capturing action shots in a photo of a classroom requires quick reflexes, the right camera settings, and an eye for dynamic moments.
- Use a Fast Shutter Speed: Set your camera to a fast shutter speed (e.g., 1/250th of a second or faster) to freeze motion.
- Continuous Shooting Mode: Use your camera’s continuous shooting mode to capture a series of shots in quick succession.
- Autofocus Tracking: Use your camera’s autofocus tracking mode to keep the subject in focus as they move.
- Anticipate the Action: Watch the students and anticipate when they are about to engage in an activity.
- Get Close to the Action: Move closer to the subject to capture more detail and create a sense of immediacy.
- Use a Wide Aperture: Use a wide aperture (e.g., f/2.8 or f/4) to blur the background and isolate the subject.
- Pan with the Subject: Follow the subject with your camera as they move, keeping them in the center of the frame.
- Edit Selectively: Choose the best shots from the series and edit them to enhance the action.
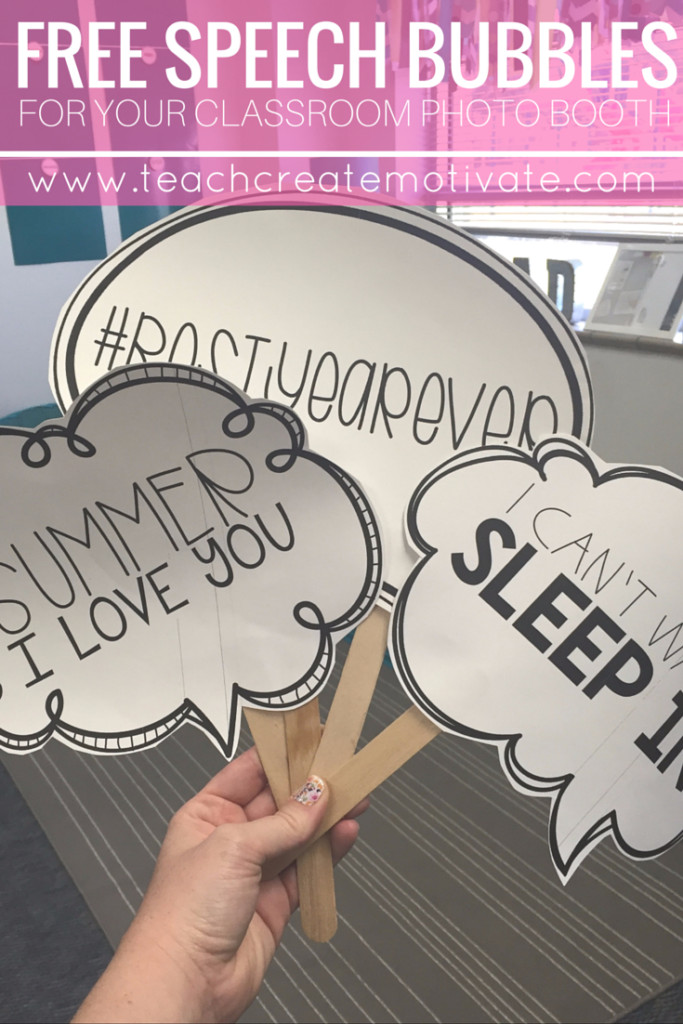 Free Speech Bubble Signs
15. What Are Some Creative Ideas For Classroom Photography Projects?
Creative classroom photography projects can engage students, enhance their learning, and showcase their talents.
- A Day in the Life: Students document a typical day in the classroom through photos.
- Classroom Portraits: Students take portraits of their classmates and teachers.
- Themed Photo Booth: Create a photo booth with different themes throughout the year.
- Nature Walk: Students capture photos of nature during a class field trip.
- Still Life: Students create and photograph still life arrangements using classroom objects.
- Abstract Photography: Students experiment with abstract photography techniques using classroom materials.
- Photojournalism: Students document a school event or project through photos and captions.
- Before and After: Students photograph a classroom project before and after completion.
- Perspective Challenge: Students capture photos of the same subject from different perspectives.
- Color Challenge: Students focus on capturing photos that feature a specific color.
16. How Can I Use A Photo Of A Classroom To Promote My School?
Using photos of a classroom to promote your school can attract prospective students, engage current families, and showcase the unique aspects of your educational environment.
- Showcase Learning: Capture photos of students engaged in active learning, demonstrating the school’s commitment to education.
- Highlight the Environment: Feature photos of the school’s facilities, classrooms, and outdoor spaces to showcase the learning environment.
- Capture Events: Document school events, performances, and activities to highlight the vibrant community.
- Feature Teachers: Showcase teachers interacting with students, demonstrating their expertise and dedication.
- Highlight Diversity: Capture the diversity of the student body and staff, reflecting the school’s commitment to inclusion.
- Use Testimonials: Include photos alongside testimonials from students, parents, and alumni.
- Share on Social Media: Share photos on social media platforms to reach a wider audience.
- Update Website: Use high-quality photos on the school’s website to attract prospective families.
- Create Brochures: Include photos in brochures and other marketing materials to showcase the school’s strengths.
- Display in the School: Display photos in the school’s hallways and common areas to create a welcoming atmosphere.
17. How Do I Take A Photo Of A Classroom That Includes Students With Special Needs?
Taking a photo of a classroom that includes students with special needs requires sensitivity, respect, and a commitment to inclusion.
- Obtain Consent: Always obtain consent from the school, teachers, and parents or guardians before photographing students with special needs.
- Focus on Abilities: Capture photos that highlight the students’ abilities and achievements, rather than their disabilities.
- Show Inclusion: Photograph students with special needs participating in classroom activities alongside their peers.
- Be Respectful: Avoid capturing images that could be embarrassing or stigmatizing to students with special needs.
- Use Inclusive Language: When describing the photos, use inclusive language that respects the students’ individuality and avoids stereotypes.
- Highlight Support: Capture photos that showcase the support and resources available to students with special needs.
- Be Authentic: Capture genuine moments that reflect the real experiences of students with special needs in the classroom.
- Collaborate with Teachers: Work closely with teachers to ensure that the photos are taken in a way that is respectful and appropriate for each student.
18. What Are The Best Angles For Taking A Photo Of A Classroom?
The best angles for taking a photo of a classroom can vary depending on the subject and the message you want to convey.
- Eye Level: Shooting at eye level creates a sense of connection and intimacy with the subject.
- High Angle: Shooting from a high angle can provide a broader view of the classroom and create a sense of order.
- Low Angle: Shooting from a low angle can make the subject appear larger and more imposing.
- Overhead Angle: Shooting from directly overhead can create a unique and abstract perspective.
- Diagonal Angle: Shooting from a diagonal angle can add dynamism and energy to the photo.
- Framing Angle: Using elements within the classroom (e.g., doorways, windows) to frame the subject can add depth and context.
- Close-Up Angle: Getting close to the subject can capture details and emotions that might be missed from a distance.
- Wide Angle: Using a wide-angle lens can capture more of the scene and create a sense of spaciousness.
- Point-of-View Angle: Shooting from the subject’s point of view can create a sense of immersion and empathy.
19. How Can I Get Parents To Allow Me To Photograph Their Children In The Classroom?
Gaining parents’ permission to photograph their children in the classroom requires clear communication, transparency, and respect for their concerns.
- Send a Letter: Send a letter to parents explaining the purpose of the photos, how they will be used, and who will have access to them.
- Provide Consent Forms: Include a consent form that allows parents to indicate whether they give permission for their child to be photographed.
- Address Concerns: Address any concerns that parents may have about privacy, safety, or the use of their child’s image.
- Be Transparent: Be transparent about how the photos will be used and who will have access to them.
- Offer Options: Offer parents the option to have their child’s face blurred or to exclude them from photos altogether.
- Follow School Policies: Adhere to the school’s policies regarding photography and media.
- Be Respectful: Be respectful of parents’ decisions and avoid pressuring them to give permission.
- Provide Examples: Provide examples of the types of photos that will be taken and how they will be used.
- Offer Access: Offer parents access to the photos so they can see how their child is being represented.
- Communicate Regularly: Communicate regularly with parents about the project and provide updates on its progress.
20. How Can I Improve My Skills In Classroom Photography?
Improving your skills in classroom photography requires practice, experimentation, and a commitment to learning.
- Take a Class: Enroll in a photography class or workshop to learn new techniques and get feedback from instructors.
- Practice Regularly: Practice taking photos of classrooms regularly to develop your skills and gain experience.
- Experiment with Settings: Experiment with different camera settings (e.g., aperture, shutter speed, ISO) to see how they affect the photo.
- Study Other Photographers: Study the work of other photographers who specialize in classroom photography to learn from their techniques and styles.
- Get Feedback: Get feedback on your photos from other photographers, teachers, and parents.
- Read Books and Articles: Read books and articles about photography to learn new tips and techniques.
- Join a Photography Club: Join a photography club to connect with other photographers and share your work.
- Attend Workshops: Attend photography workshops to learn new skills and network with other photographers.
- Use Online Resources: Use online resources such as tutorials, forums, and blogs to learn about photography.
- Be Patient: Be patient with yourself and don’t get discouraged if your photos aren’t perfect right away.
 Mounting Board Ready to Cut
FAQ Section
1. What is the ideal camera setting for classroom photography?
The ideal camera setting for classroom photography is to use a wide aperture (f/2.8 to f/4) for shallow depth of field, a fast shutter speed (1/200s or faster) to freeze motion, and an ISO as low as possible to minimize noise while maintaining proper exposure.
2. How can I handle low lighting conditions in a classroom?
To handle low lighting conditions in a classroom, use a wide aperture lens, increase the ISO setting (while being mindful of noise), use a tripod for stability, and consider using external lighting such as a speedlight with bounce capabilities.
3. What are the best lenses for capturing classrooms?
The best lenses for capturing classrooms include wide-angle lenses (16-35mm or 24-70mm) for capturing the entire room, and prime lenses (35mm or 50mm) for portraits and detailed shots.
4. How do I ensure the students’ privacy is protected when taking photos?
To ensure the students’ privacy is protected, always obtain written consent from the school administration, teachers, and parents or guardians before photographing students, and adhere to the school’s policies regarding photography and media.
5. What composition techniques work best for classroom photography?
Composition techniques that work best for classroom photography include the rule of thirds, leading lines, framing, symmetry, and the use of negative space to create balanced and visually engaging shots.
6. How do I capture candid moments without disrupting the class?
To capture candid moments without disrupting the class, blend into the background, be patient, use a fast lens, shoot in continuous mode, and focus on emotions while respecting privacy.
7. Can I use my smartphone for classroom photography?
Yes, you can use your smartphone for classroom photography, especially if it has a good camera and manual settings. However, a dedicated camera with better low-light performance and lens options will generally yield better results.
8. What post-processing steps are essential for classroom photos?
Essential post-processing steps for classroom photos include exposure correction, white balance adjustment, contrast enhancement, highlight and shadow recovery, noise reduction, sharpening, and cropping to improve composition.
9. How do I avoid capturing distracting elements in my classroom photos?
To avoid capturing distracting elements, declutter the scene, choose the right angle, use a shallow depth of field, shoot during quiet times, and use post-processing to minimize distractions.
10. What are some creative project ideas for classroom photography?
Creative project ideas for classroom photography include a “Day in the Life” series, student portraits, themed photo booths, nature walks, still life arrangements, abstract photography, and photojournalism projects.
By following these tips and techniques, you can capture stunning photos of classrooms that tell a story, engage viewers, and promote your school or educational environment. Remember to visit dfphoto.net for more resources and inspiration to enhance your photography skills.
Ready to transform your classroom photography? Visit dfphoto.net today to explore detailed tutorials, view stunning photo collections, and connect with a vibrant community of photographers. Discover new techniques, get inspired, and take your skills to the next level. Don’t wait—start your journey to exceptional classroom photography now! Address: 1600 St Michael’s Dr, Santa Fe, NM 87505, United States. Phone: +1 (505) 471-6001.