Accessing your cherished memories stored in iCloud on your Windows PC is a seamless process. This guide provides a step-by-step walkthrough on how to view photos in iCloud on your PC, covering setup, downloading, and uploading images.
Setting Up iCloud Photos on Your Windows Computer
Before viewing your photos, ensure iCloud is configured correctly on your devices. You should have already set up iCloud on your iPhone, iPad, or Mac, enabled iCloud Photos, and signed in with your Apple ID.
- Install iCloud for Windows: Download and install iCloud for Windows from the official Apple website.
- Sign In: Launch the application and sign in using your Apple ID credentials.
- Enable iCloud Photos: Locate the “Photos” option and click the accompanying arrow to reveal further settings. Select the checkbox to turn on iCloud Photos.
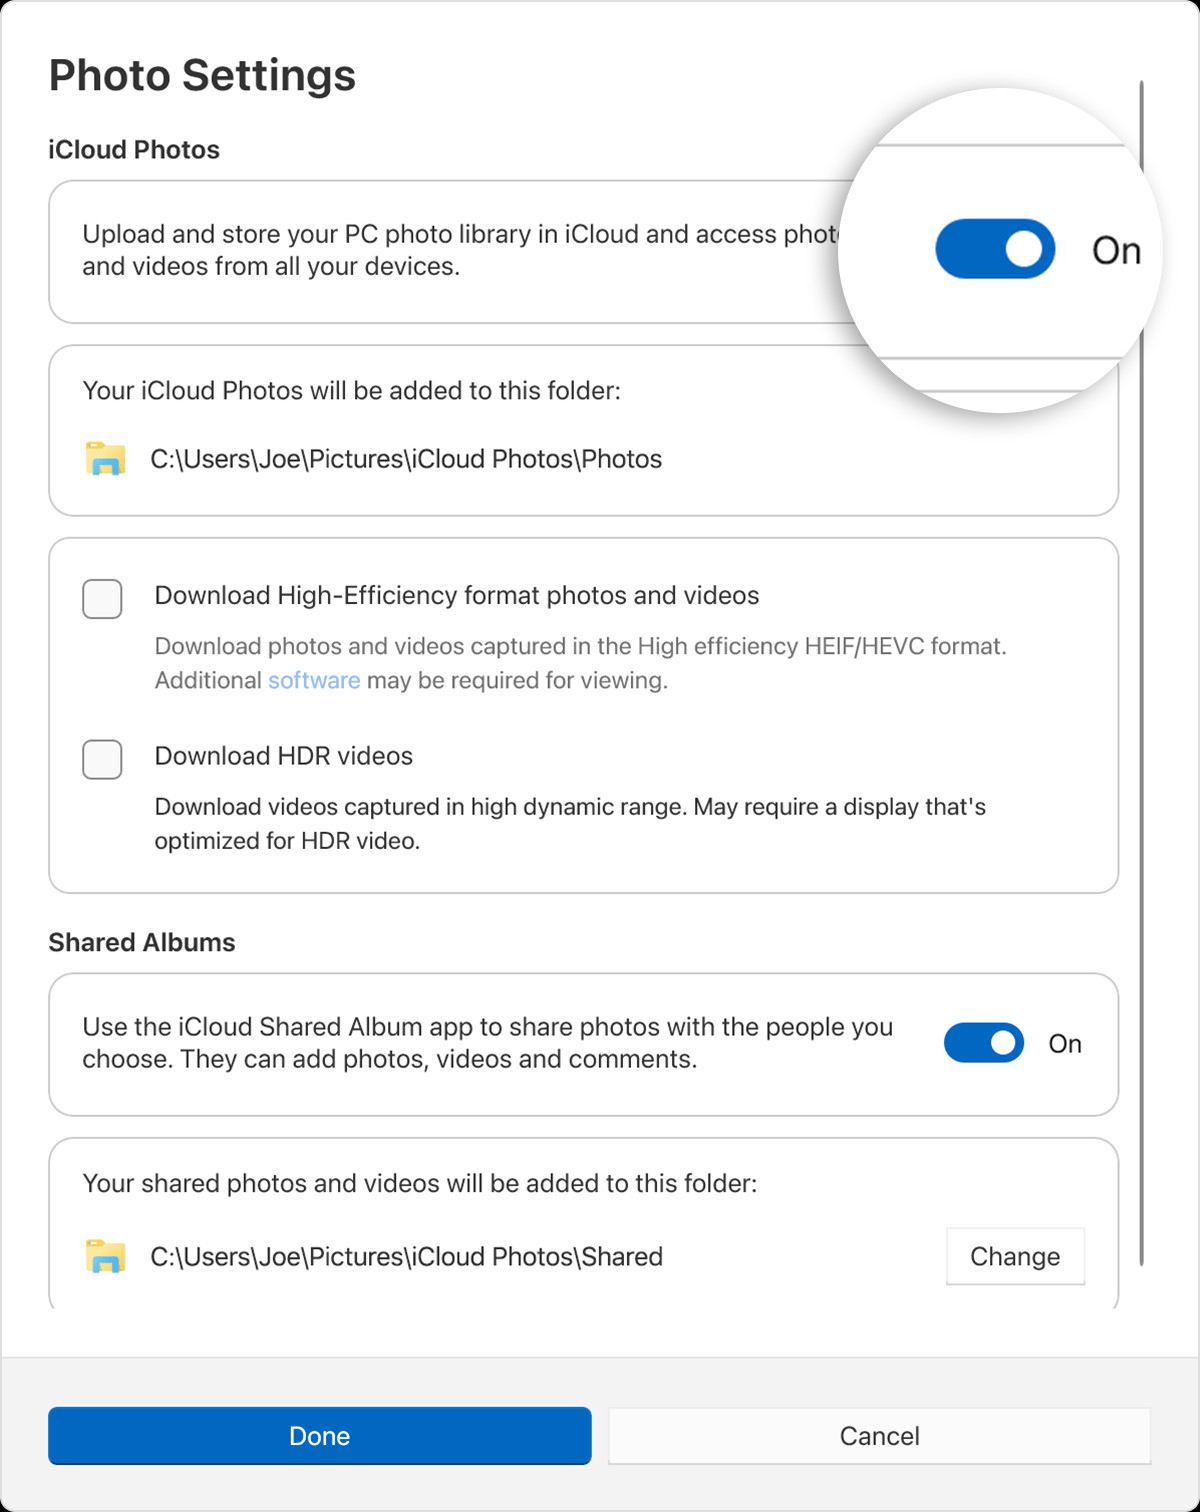 iCloud Photos settings in iCloud for Windows.
 - Optimize Downloads (Optional): In iCloud for Windows 14.2 or later, customize your download preferences by clicking “Advanced.” Choose between “Download High-Efficiency format photos and videos” for optimized storage or “Download HDR videos” for higher quality.
- Activate Shared Albums: To access shared albums, enable the “Shared Albums” option. Note that changing the default location for Shared Albums is limited to folders within your C: drive; external drives are not supported.
- Confirm Settings: Click “Done” to save your preferences.
Locating Your iCloud Photos on Your PC
Once iCloud Photos is set up, your pictures and videos are stored in a dedicated folder: C:\Users\[user name]\Pictures\iCloud Photos\Photos.
Accessing iCloud Photos in Windows 11
- Open Microsoft Photos: Launch the built-in Microsoft Photos application.
- Navigate to iCloud Photos: Select “iCloud Photos” from the left-hand navigation pane.
Accessing iCloud Photos in Windows 10 (and later)
- Open File Explorer: Launch File Explorer.
- Navigate to iCloud Photos: Click “iCloud Photos” in the Navigation pane.
Downloading Photos and Videos from iCloud
Newly added photos and videos automatically appear on your PC. To download a specific file, double-click its thumbnail. For offline access, follow these instructions:
- Open File Explorer: Access File Explorer.
- Locate iCloud Photos: Navigate to the “iCloud Photos” folder in the Navigation pane.
- Select Desired Files: Choose the photos and videos you want to download.
- Keep Files Locally: Right-click on the selected files and choose “Always keep on this device.” This ensures the selected files are always available offline.
Any changes made to photos or videos on other devices or iCloud.com will automatically update on your PC.
Uploading Photos and Videos to iCloud from Your PC
Adding your local photos and videos to iCloud is straightforward:
- Open File Explorer: Launch two File Explorer windows. In the first window, navigate to the “iCloud Photos” folder.
- Locate Local Files: In the second window, browse to the folder containing the photos and videos you wish to upload.
- Drag and Drop: Select the desired files and drag them into the “iCloud Photos” folder in the first window. This will upload them to iCloud.
Uploaded content can be viewed on iCloud.com and across all your Apple devices. Deleting a photo or video in File Explorer or Microsoft Photos will also remove it from iCloud Photos.